Best File Format for YouTube Upload with Settings Guide
Learn the best file format and optimal resolution, bitrate, and audio settings for YouTube uploads, plus export tips for top viewing quality.
Best File Format for YouTube Upload with Settings Guide
Choosing the best file format for YouTube upload is key to ensuring your videos look sharp, stream smoothly, and reach viewers without technical hiccups. Using the right format and export settings will improve compatibility, reduce upload times, and provide an optimal viewing experience across devices. This comprehensive guide explains YouTube’s recommended formats, compares MP4, MOV, and AVI, and shares export tips from leading video editors.

Whether you’re starting out or refining a pro workflow, the advice here will help you make informed decisions about file format, resolution, bitrate, and audio settings so your content appears top‑tier once it’s live.
---
Understanding YouTube’s Recommended File Formats and Codecs
YouTube officially recommends these settings:
- Container: MP4
- Video codec: H.264
- Audio codec: AAC‑LC
- Bitrate: Varies by resolution and frame rate
Why MP4 with H.264?
MP4 balances high-quality visuals with smaller file sizes, making uploads faster and reducing buffering. The H.264 codec is optimized for online streaming, widely supported, and delivers consistent quality across different devices.
---
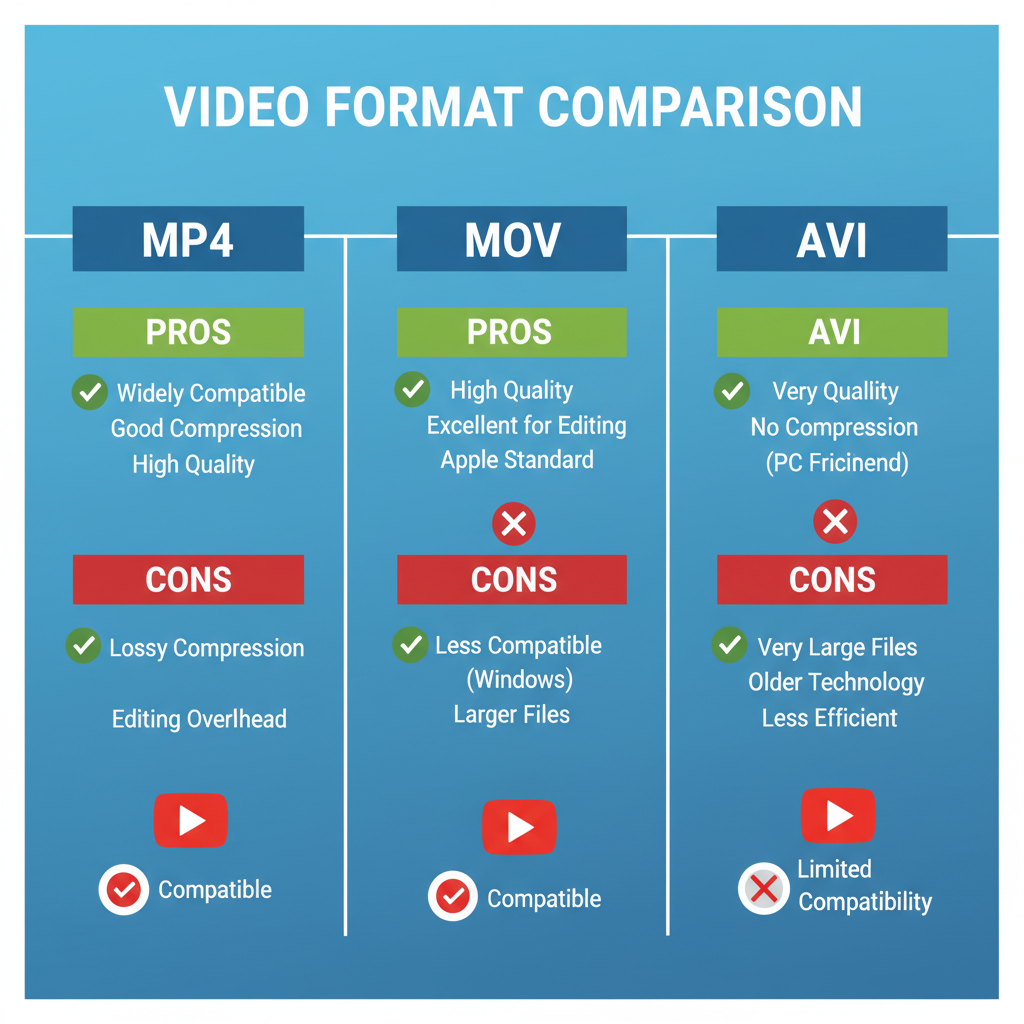
MP4 vs MOV vs AVI: Pros, Cons, and Compatibility
Each format offers unique benefits and drawbacks, especially when it comes to editing and distribution.
| Format | Pros | Cons | Best Use Case |
|---|---|---|---|
| MP4 (H.264) | High compatibility, excellent quality, efficient compression | Less flexible for intensive re‑editing | Direct upload to YouTube and social platforms |
| MOV | Superior quality, supports advanced editing (Apple-friendly) | Larger file sizes, slightly less cross‑platform friendly | Editing workflows on Mac; export final upload as MP4 |
| AVI | Potentially uncompressed, preserving full fidelity | Very large files, poor online compatibility | Archiving raw footage; not ideal for streaming/upload |
Verdict:
MP4 is the preferred upload format. MOV works well during production but should be transcoded to MP4 for YouTube. AVI is unsuitable for direct upload due to size and streaming limitations.
---
Ideal Video Resolution, Aspect Ratio, and Frame Rate for YouTube
To achieve the best playback quality:
- Resolution:
- Full HD: 1920×1080
- High-end: 3840×2160 (4K UHD) or higher for flagship content
- Aspect Ratio: 16:9 standard; 9:16 for vertical formats like Shorts
- Frame Rate: Maintain the camera’s native frame rate (24, 25, 30, 48, 50, or 60 fps)
- Progressive Scan: Always use progressive (non‑interlaced) video
---
Recommended Audio Settings and Codecs for Best Sound Quality
Crystal-clear audio is as important as resolution for viewer retention:
- Codec: AAC-LC
- Sample Rate: 48 kHz
- Bitrate: 128 kbps+ for stereo; 384 kbps for surround
- Channels: Stereo or surround, based on project needs
Following these settings ensures professional audio quality while avoiding excessive file sizes.
---
Compression Tips to Balance Quality and Upload Speed
Smart compression optimizes your workflow:
- Use variable bitrate (VBR) with 2-pass encoding.
- Target bitrates:
- ~8 Mbps for 1080p @ 30 fps
- ~12 Mbps for 1080p @ 60 fps
- ~35–45 Mbps for 4K @ 60 fps
- Avoid over‑compression that causes artifacts.
- With slower internet, opt for excellent 1080p over low‑bitrate 4K.
---
How to Export Videos in MP4 H.264 from Popular Editors
Correct export settings in your editing software avert format issues.
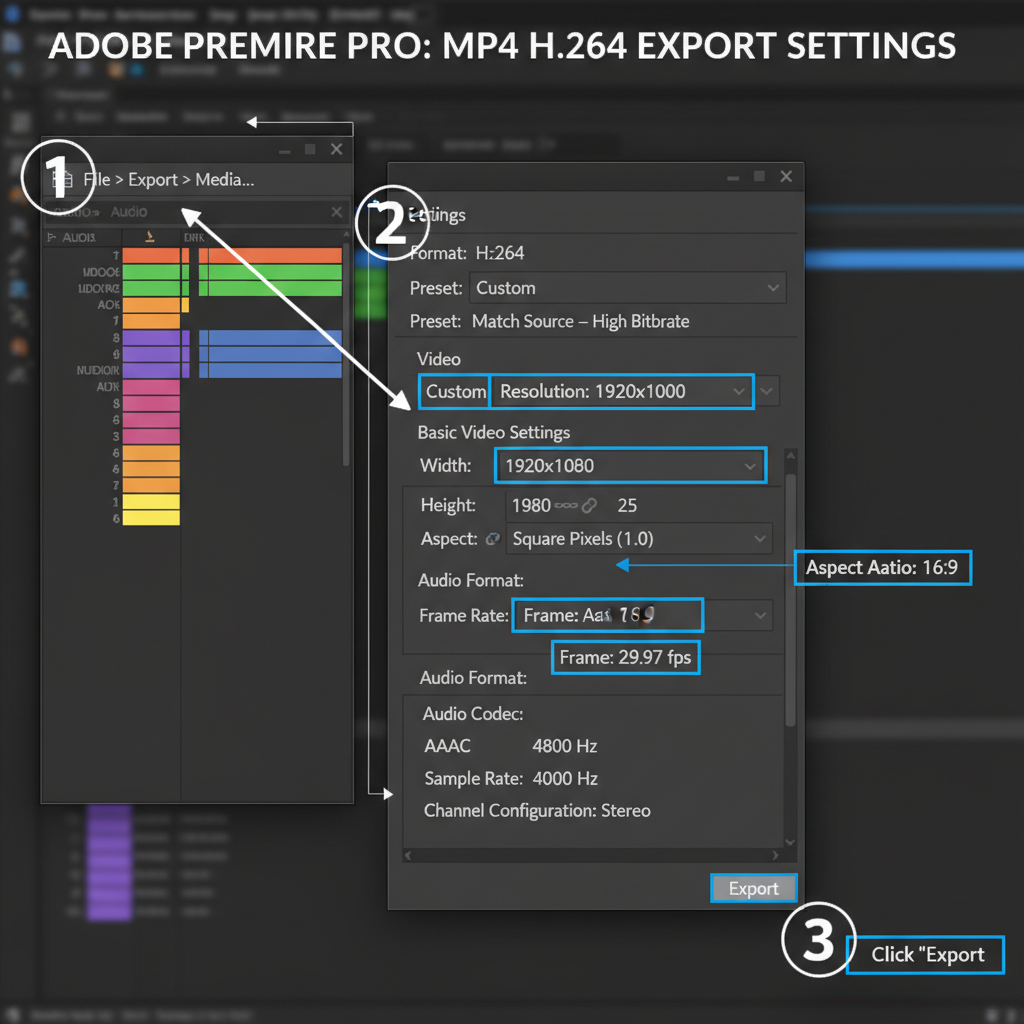
Adobe Premiere Pro
- Select File > Export > Media.
- Format: `H.264`.
- Preset: `YouTube 1080p HD` or `YouTube 2160p 4K`.
- Enable Render at Maximum Depth and Maximum Render Quality.
- Export.
  H.264
  YouTube 2160p 4K
  true
  true
Final Cut Pro
- Go to File > Share > Master File.
- Format = `Computer`, Codec = `H.264 Better Quality`.
- Set resolution to project specs.
- Save.
DaVinci Resolve
- Open the Deliver page.
- Choose `Custom` or a `YouTube` preset.
- Format: `MP4`, Codec: `H.264`.
- Set resolution.
- Add to queue and render.
---
Troubleshooting Common Upload Issues Caused by Incorrect Formats
Avoid these typical pitfalls:
| Issue | Cause | Solution |
|---|---|---|
| Slow processing | Unsupported codec/container | Export as MP4 with H.264 video and AAC audio |
| No audio | Wrong audio codec | Re‑export using AAC-LC |
| Pixelation/artifacts | Low bitrate or poor compression | Increase bitrate; use 2-pass VBR |
| Excessive file size | Uncompressed or high bitrate export | Use MP4 with optimized bitrate |
---
Optimizing Metadata and Thumbnails Alongside the Right File Format
Technical excellence must be paired with discoverability:
- Title: Natural keyword integration.
- Description: Detailed context, timestamps, relevant links.
- Tags: Specific keywords for niche targeting.
- Thumbnail: Crisp (1280×720), visually compelling.
- Captions: Accurate subtitles for accessibility and SEO.
Pro Tip: The correct file format plus optimized metadata and thumbnails make your content more searchable and clickable.
---
Summary and Next Steps
For the best file format for YouTube upload, use MP4 with H.264 video and AAC-LC audio. Follow YouTube’s bitrate, resolution, and frame rate recommendations, apply professional audio settings, and export correctly from your editor. Then, optimize metadata and thumbnails to boost visibility.
By aligning technical settings with SEO-friendly publishing practices, you’ll improve your audience’s viewing experience and your video’s performance. Start applying these steps to your next upload to see measurable gains in quality and engagement.