Best File Type for Instagram Images and Videos
Learn the best file types, codecs, and resolution settings to keep Instagram images and videos sharp while minimizing compression artifacts.
Best File Type for Instagram Images and Videos
If you want your Instagram posts to look sharp, vibrant, and professional, you need to know the best file type for Instagram and how to prepare your media before uploading. Instagram’s algorithm compresses images and videos to ensure fast loading, but if you understand these limitations, choose optimal formats, and follow best practices, your content can stand out without losing quality. This guide covers Instagram’s compression rules, the top recommended formats for images and videos, resolution tips, and expert export settings to help you maintain maximum visual appeal.
Understanding Instagram’s Compression and Format Limitations
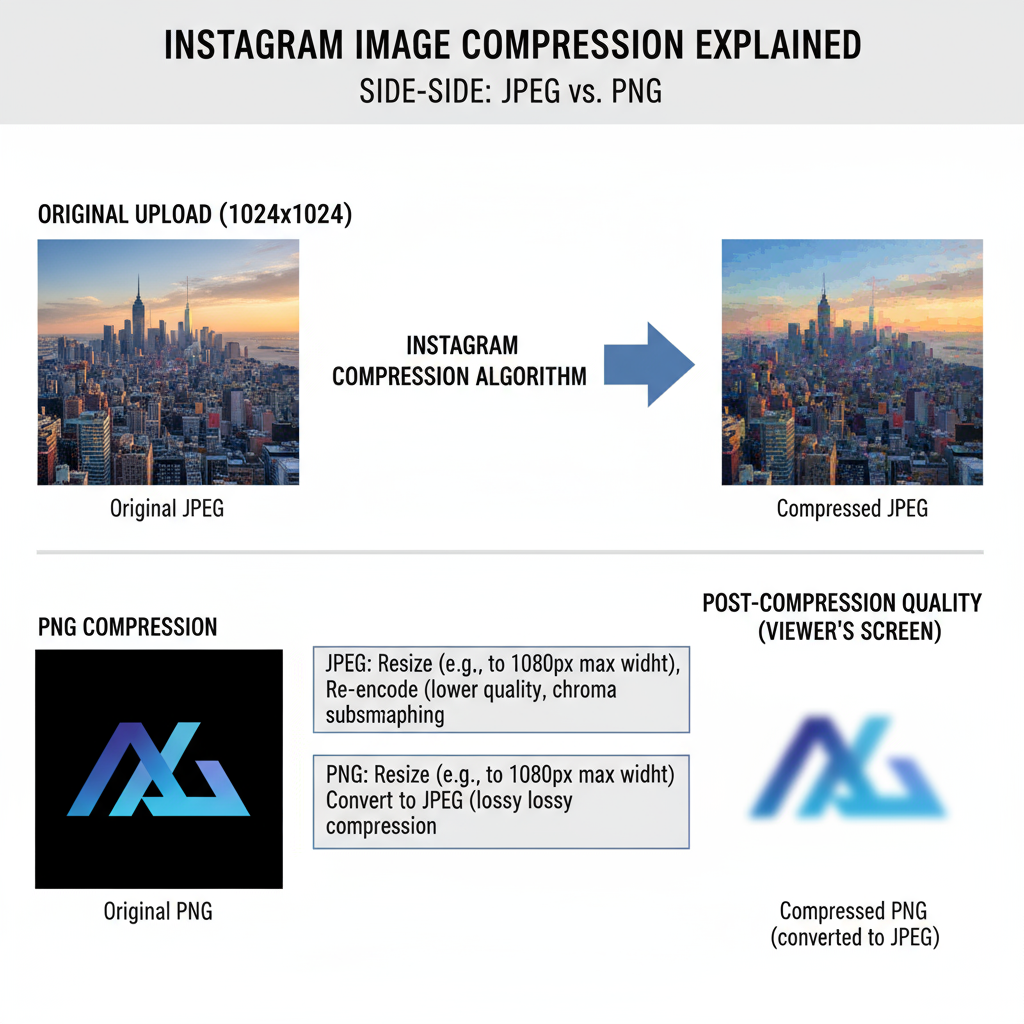
Instagram applies heavy compression to all uploaded media to balance quality with fast delivery for millions of users worldwide. That means even perfect high-resolution files will be altered to fit platform specs:
- Resizes images to standard widths.
- Re-encodes videos to meet internal bitrate and codec thresholds.
- Strips metadata such as EXIF details.
This compression can cause visible artifacts like blurriness, color banding, or pixelation, especially if you upload in the wrong file type or resolution.

To minimize degradation, note these platform limits:
- Images: Feed posts are up to 1080 pixels wide, with height varying by aspect ratio.
- Videos: Feed videos can be up to 60 seconds, Reels up to 90 seconds, IGTV 15 minutes from mobile (60 minutes from desktop).
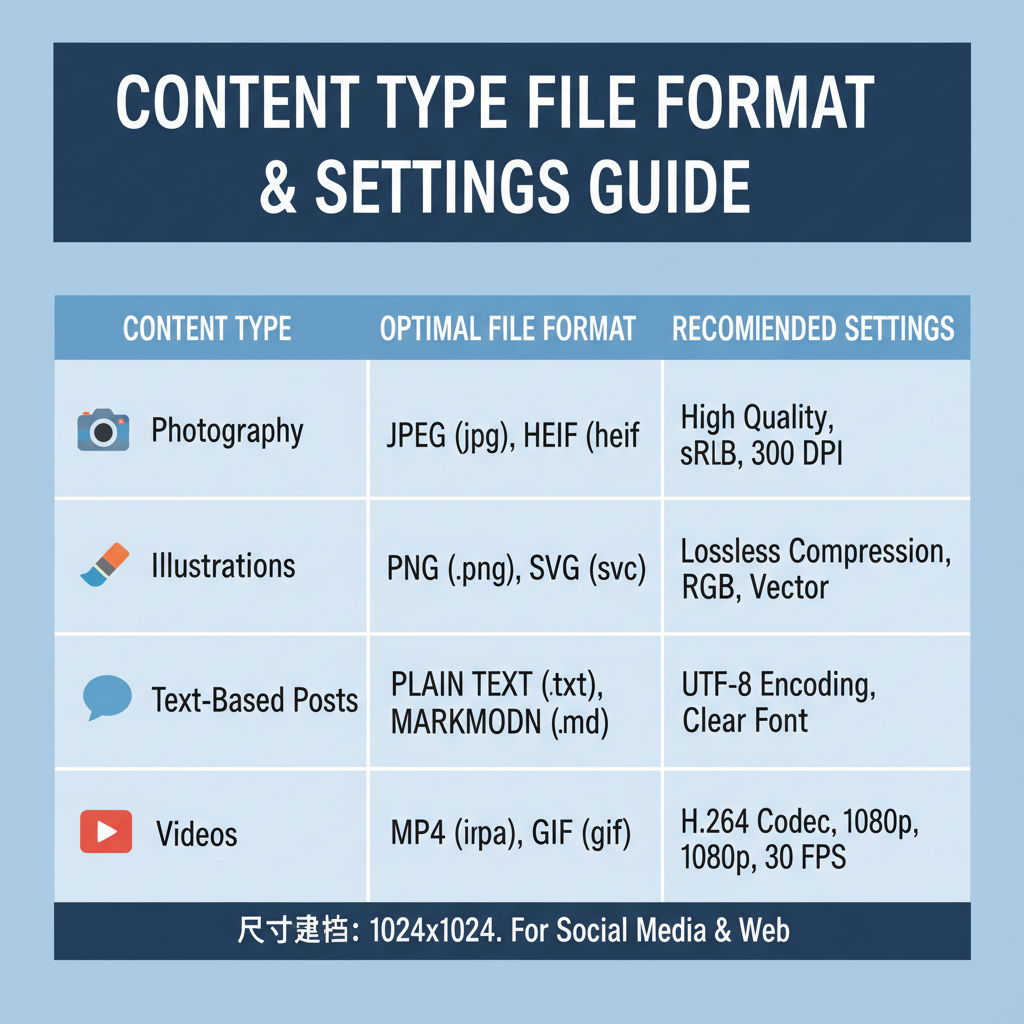
Recommended Image Formats for Different Content Types
Selecting the appropriate image format hinges on your post type and visual elements.
JPEG for Photography and Color-rich Scenes
JPEG works well for photos with complex colors, gradients, and textures. Its lossy compression maintains good visual fidelity while keeping file sizes small.
Advantages:
- Compact file size for quick uploads.
- Balanced quality-to-compression ratio.
Use Cases:
- Portraits
- Landscapes
- Event photography
PNG for Graphics and Text
PNG’s lossless compression keeps sharp edges intact, making it ideal for designs with text, logos, or flat colors.
Advantages:
- No quality loss during compression.
- Supports transparency.
- Sharp rendering of shapes and type.
Use Cases:
- Quote posts
- Logos and icons
- Infographics or mockups
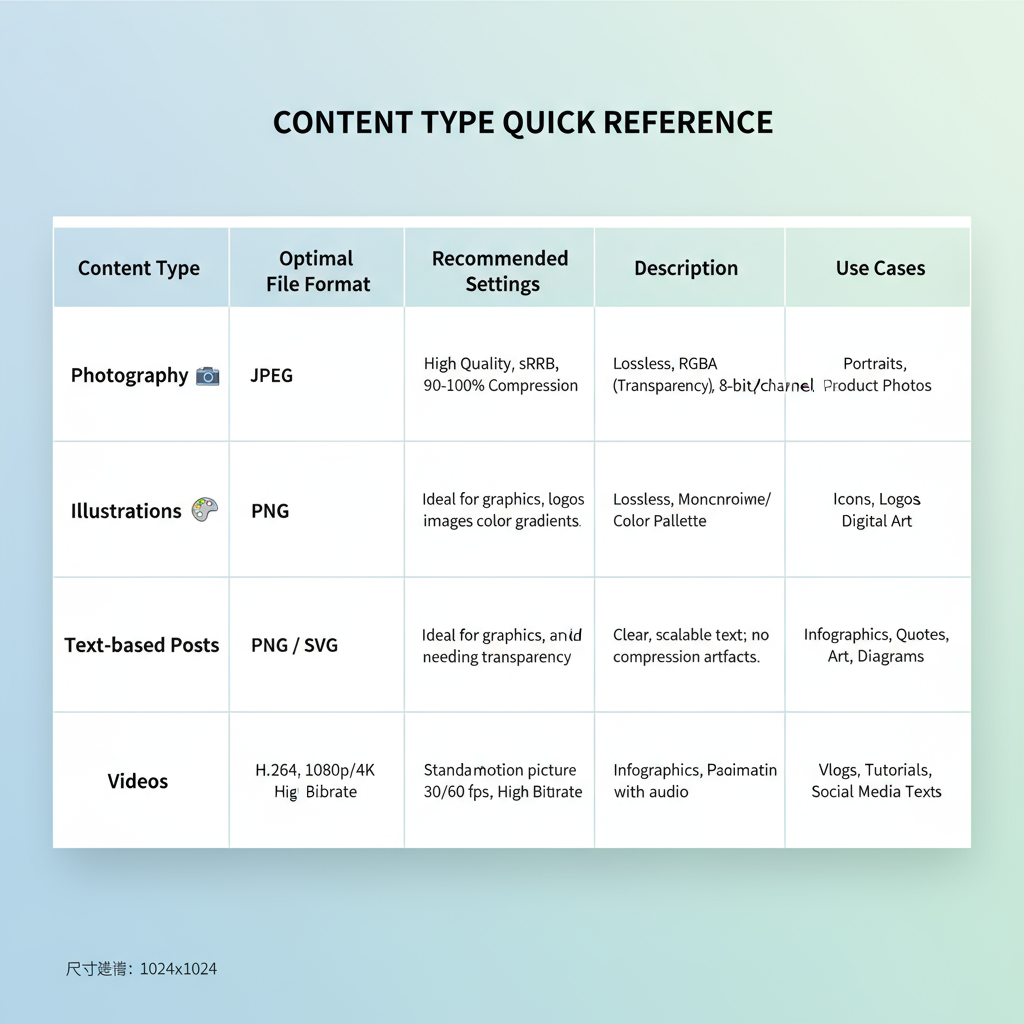
Quick Format Guide
| Content Type | Recommended Format | Compression | Transparency Support |
|---|---|---|---|
| Photography | JPEG | Lossy | No |
| Graphics/Text | PNG | Lossless | Yes |
| Mixed Media | JPEG (for photos) / PNG (for overlays) | Hybrid | Depends on layer |
Ideal Video File Type and Codec for Instagram Uploads
For videos, Instagram recommends MP4 format with the H.264 codec — a reliable choice that maintains quality while keeping sizes manageable.
Key MP4 Specs:
- Codec: H.264
- Audio: AAC
- Bitrate: ~3,500 kbps for feed; higher for Reels or IGTV
- Frame Rate: 30 or 60 fps (avoid variable fps for stable playback)
MOV files are also accepted, but Instagram tends to re-encode them more heavily, which can lower quality.
Optimal Aspect Ratios and Resolution Settings
Aspect ratio guides how your content fills the viewer’s screen and influences engagement:
- Square (1:1): 1080×1080 px — traditional feed style.
- Portrait (4:5): 1080×1350 px — more vertical real estate.
- Landscape (1.91:1): 1080×566 px — cinematic shot framing.
- Stories/Reels (9:16): 1080×1920 px — full-screen vertical.
Export at Instagram’s maximum supported resolution without oversizing, as larger inputs trigger heavier compression.
How File Size Impacts Quality and Loading Speed
File size matters for both upload speed and Instagram’s compression intensity.
Large files:
- Slower upload speed.
- Higher compression aggression.
- Potential motion blur or pixelation.
Small files:
- Faster uploads.
- Less visible compression.
- Risk of starting with lower quality.
Aim for JPEGs under 2 MB and videos under 50 MB for feed posts to balance speed and quality.
Tips for Exporting Files from Photoshop, Lightroom, Premiere Pro
Optimizing export settings in your preferred software keeps Instagram-ready quality intact.
Photoshop
- Use Save for Web (Legacy) or Export As.
- JPEG quality set between 80–85%.
- Embed sRGB profile.
Lightroom
- Format: JPEG.
- Quality: 80–100, based on need.
- Resize to 1080 px width.
- Sharpen for screen output.
Premiere Pro
- Format: H.264.
- Preset: Match Source – High Bitrate.
- Match resolution to aspect ratio.
- Audio: AAC, stereo, 128–192 kbps.
Maintaining Quality when Transferring Files from Mobile or Desktop
Poor transfer methods degrade files before upload.
Avoid:
- Messaging apps (WhatsApp, Messenger) that compress media.
- Email attachments that resize.
- Cloud sync services with default compression on.
Use:
- AirDrop or USB transfers.
- Saving exports directly from editing software to your mobile device.
- Compression-free sharing via Dropbox or WeTransfer.
Common Mistakes That Cause Blurry or Distorted Uploads
Watch for these pitfalls:
- Uploading screenshots instead of exports.
- Overusing filters that add noise.
- Upsizing small images.
- Using incorrect color profiles (stick to sRGB).
- Variable frame rates in videos.
Advanced Tricks for Crisp Carousel Posts and Reels
Carousel Posts
- Keep resolution consistent across slides.
- Match color grading for smooth transitions.
Reels
- Export at high bitrate for motion-heavy clips.
- Keep captions within safe zones.
- Render animations at 1080×1920 px.
Pro Tip: Use a tiled PSD layout to manage crop consistency for multi-image posts.
Final Checklist Before Posting for Maximum Quality
Before you hit “Share”:
- Verify resolution matches aspect ratio.
- Apply correct file type (JPEG, PNG, MP4/H.264).
- Ensure sRGB color profile is embedded.
- Keep sizes within platform limits.
- Avoid unnecessary compression in transfer.
- Preview in-app to catch cropping or distortion.
- Check video frame rate and audio quality.
---
By mastering Instagram’s compression rules, choosing the best file type for Instagram, and optimizing your workflow, you can create posts that consistently impress. Whether building a carousel, sharing cinematic footage, or posting a vertical Story, apply these techniques to maintain visual crispness and engage your audience. Ready to show your work in the best possible light? Optimize your next upload and take your feed to the next level today.