Create and Manage Facebook Friend Groups Effectively
Learn how to create, organize, and manage Facebook friend groups to control privacy, target content, and keep your social connections efficient.
Introduction to Facebook Friend Groups
Facebook friend groups — often referred to as custom friend lists — are an essential tool for users who want more control and personalization over their social connections. By creating targeted groups of contacts, you can ensure that posts, photos, and updates reach the right audience, giving you better privacy, content relevance, and efficiency. In this guide, we’ll explore the benefits of group Facebook friends, walk through the steps to set them up, and share best practices to keep them organized over time.
---
Understanding Facebook Friend Groups and Their Benefits
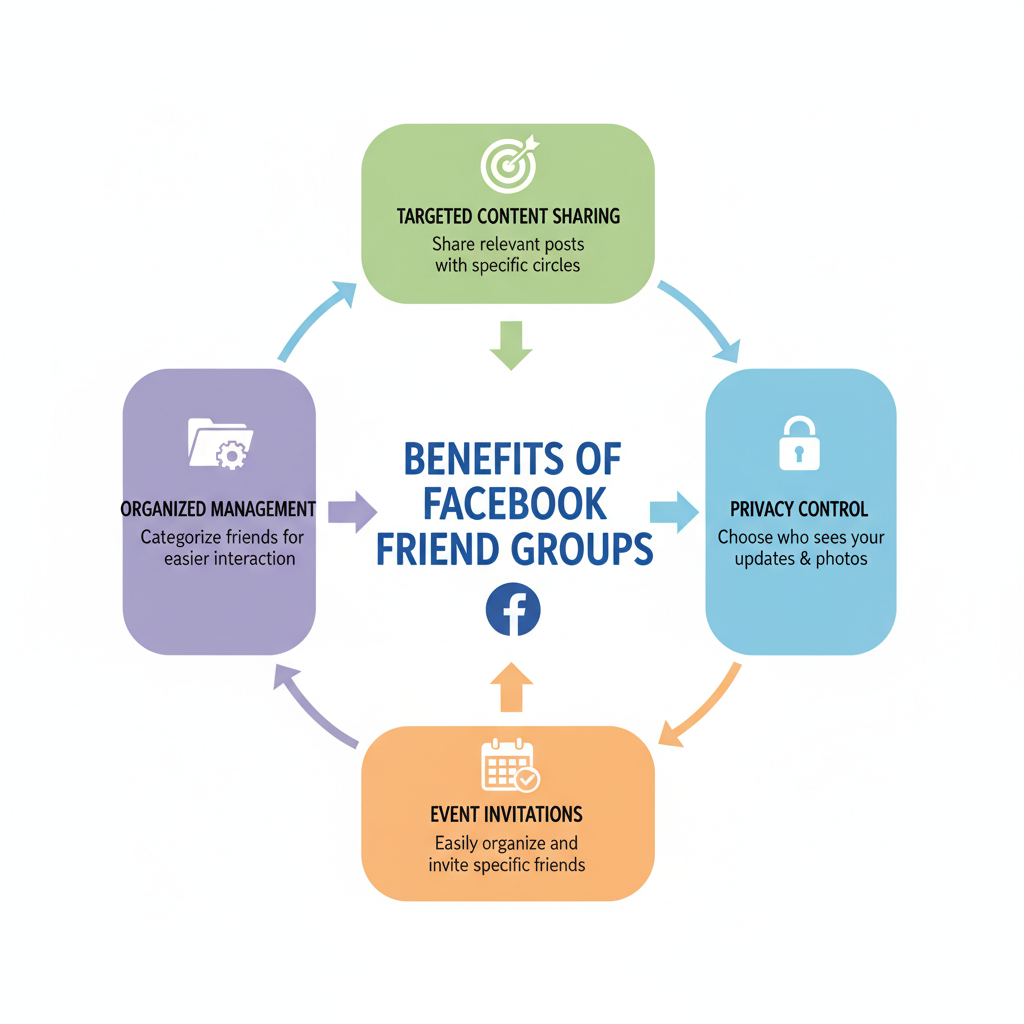
Facebook friend groups are a powerful way to organize your contacts on the platform. Instead of letting your entire friend network see all your posts, you can segment friends into categories and control who sees specific content.
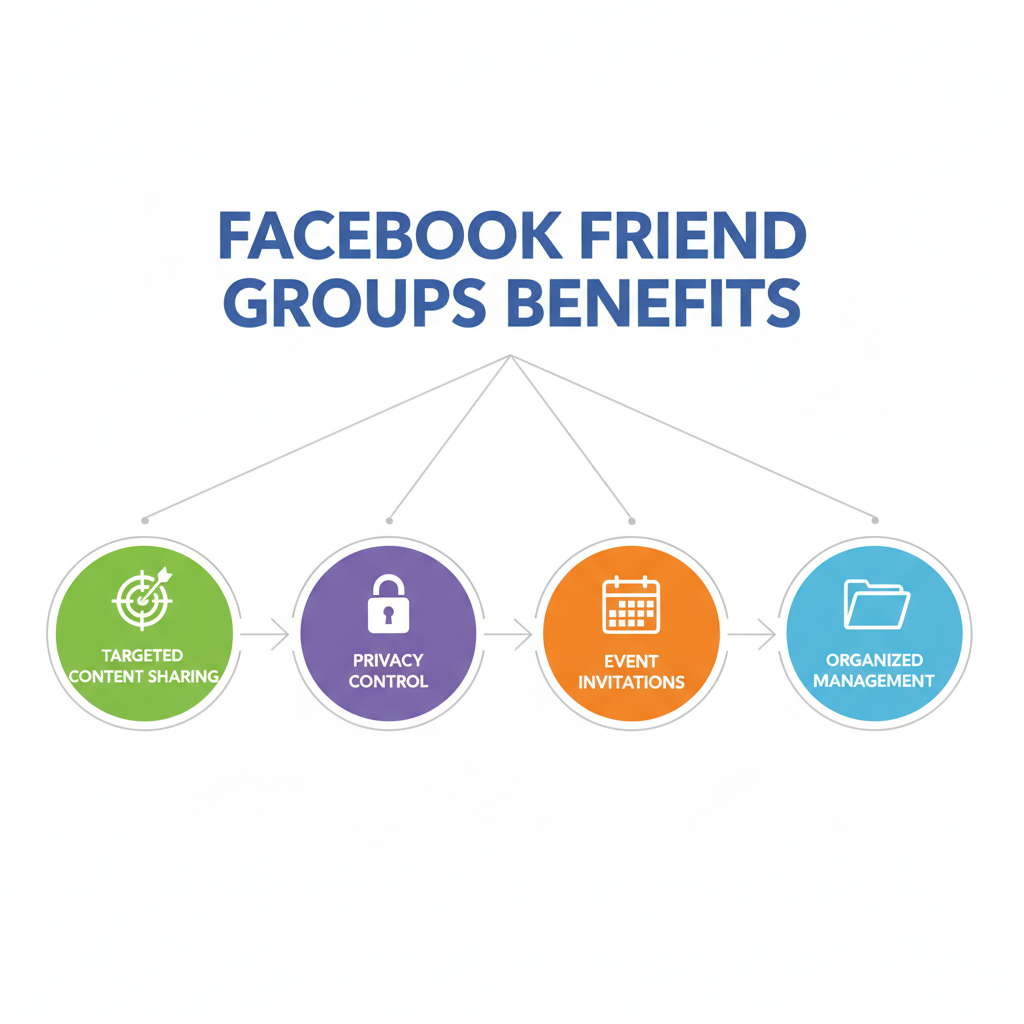
Benefits of using group Facebook friends include:
- Privacy control – Share updates with only selected people.
- Relevance – Target posts towards certain interests or communities.
- Efficiency – Quickly find friends in a particular category.
- Event planning – Send invitations to a relevant audience only.

These friend groups are especially useful for people who use Facebook for both professional and personal purposes, as they help keep boundaries clear.
---
Navigating to the Friends Section in Facebook
Before creating a group, you need to locate the Friends section in your account.
Desktop:
- Log into your Facebook account.
- Click your profile icon in the top bar or go to your profile page.
- In the left-hand menu, look for "Friends" and click it.
Mobile App:
- Tap the menu (☰) in the bottom right corner.
- Select "Friends" from the menu list.
- You may need to scroll down to find it.
From here, you can view your existing lists and begin creating new ones.
---
Step-by-Step Guide to Creating a New Friend List or Group
Creating a custom friend list for group Facebook friends is straightforward:
- Go to the Friends Section (as described above).
- Find "Custom Lists" – On desktop, you may see an option like "Create List" or "Custom Friend Lists" on the left column.
- Click "Create List" – A pop-up will appear.
- Name Your List – Choose a descriptive name such as Family, Work Colleagues, or Soccer Team.
- Add Initial Friends – Begin typing names; select them from the drop-down suggestions.
- Save – Your new group is now active.
Repeat this process to make multiple lists tailored to different purposes.
---
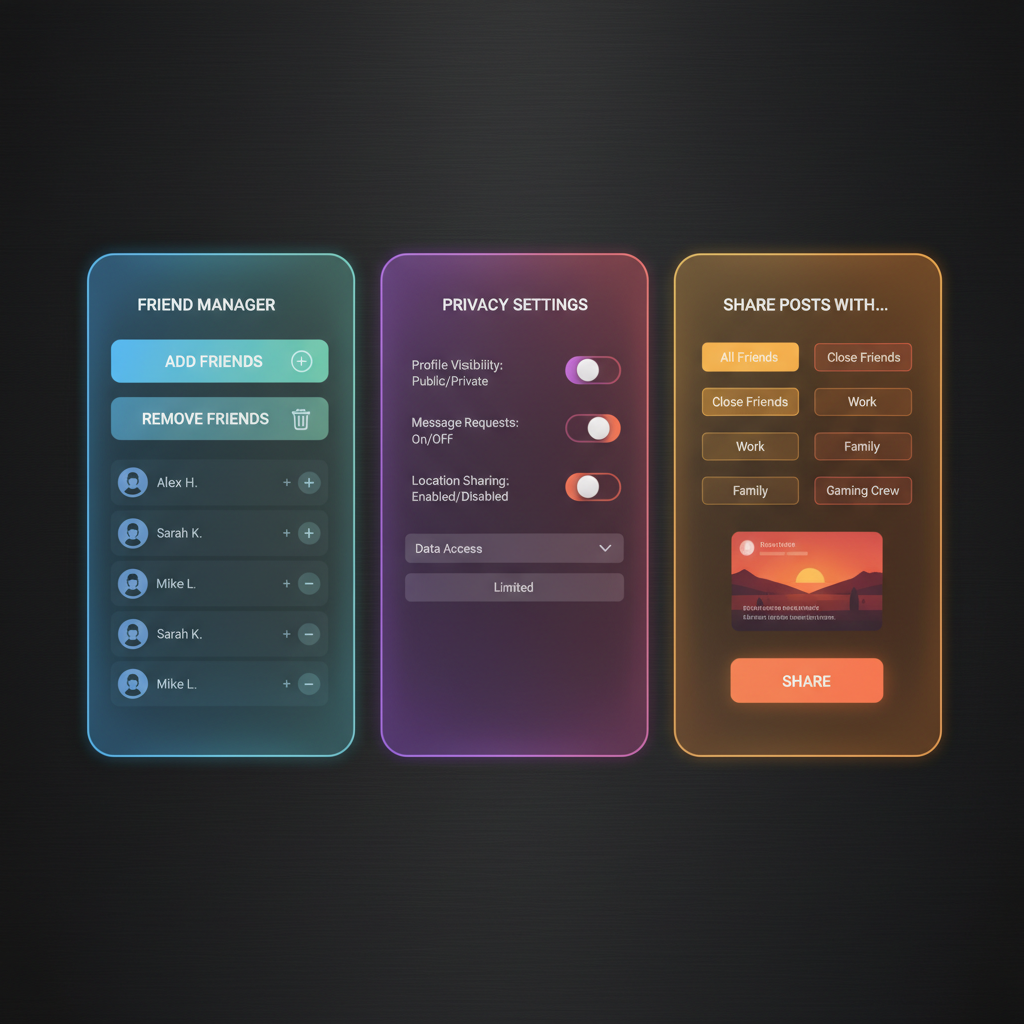
Adding and Removing Friends from Your Custom Group
Once you've created a group, updating its membership is simple.
To add friends:
- Go to your list.
- Click "Manage List" or "Edit List."
- Type their names into the add field and confirm.
To remove friends:
- Access the same "Edit List" page.
- Hover over their profile image in the list and click "Remove."
Keeping your groups up to date ensures that your posts always reach the intended people.
---
Adjusting Privacy Settings for Friend Group Interactions
Privacy settings allow you to tailor what each group sees.
When you make a post:
- Click the audience selector (often labeled "Friends," "Public," or "Only Me").
- Select "More" > "Custom" > choose the relevant group list.
For sensitive content, you can also exclude certain lists:
- Under "Custom," choose "Don't share with" and select specific groups.
This gives you granular control over your online presence.
---
Posting and Sharing Content with Specific Friend Groups
Targeted posting is one of the biggest advantages of group Facebook friends.
Example scenarios:
- Share family vacation photos with Family only.
- Post professional updates to Colleagues without spamming casual friends.
- Share niche hobby content with a Photography Club list.
On mobile, tap "Audience" before posting, then select your desired group.
Segmentation keeps your timeline relevant to each segment of your audience.
---
Using Friend Groups for Event Invitations and Targeted Updates
Friend groups are perfect for inviting people to events. When creating an event:
- Go to Events on Facebook.
- Click Create New Event.
- Fill out the details.
- Use the "Invite" function to select an entire friend group.
This eliminates the need to select people one-by-one and ensures the invite is relevant.
You can also post important updates specifically to certain groups — an efficient method for clubs, projects, and community initiatives.
---
Managing and Updating Your Groups Over Time
Like real-life relationships, your Facebook connections evolve. Periodic review of your groups ensures relevancy.
Maintenance tips:
- Remove people who are no longer part of that circle.
- Merge or rename groups as interests change.
- Add newcomers promptly after meeting them.
| Task | Frequency | Purpose |
|---|---|---|
| Review membership | Quarterly | Ensure relevance |
| Rename lists | As needed | Reflect current interests |
| Merge lists | Occasionally | Simplify management |
---
Tips for Organizing Friends by Interests, Location, or Relationship Type
Here are ways to structure your friend groups for maximum usefulness:
- Interests: Music lovers, book readers, sports teammates.
- Location: Local friends, overseas contacts, city-specific lists.
- Relationship type: Family, co-workers, school friends.
Well-organized lists make content sharing more personal and meaningful. You can get creative — for example, make a list called "Travel Buddies" for people you might invite on future trips.
---
Common Mistakes to Avoid When Grouping Friends on Facebook
Grouping friends can backfire if done carelessly. Avoid these pitfalls:
- Over-categorization – Too many small lists can be hard to manage.
- Forgetfulness – Not updating groups means outdated audiences.
- Confusing names – Use clear, descriptive titles to avoid posting to the wrong list.
- Ignoring privacy – Always check audience settings before you post.
By steering clear of these mistakes, you’ll keep your friend groups functional and beneficial.
---
Conclusion and Next Steps
Organizing your Facebook contacts through custom friend groups offers improved privacy, targeted communication, and a smoother social media experience. By understanding how to navigate the Friends section, create lists, update memberships, adjust privacy, and strategically post, you turn Facebook into a more personalized platform.
Whether for personal circles, professional updates, or community events, a well-managed set of group Facebook friends empowers you to connect more meaningfully. Set aside time to review your lists regularly, rename when necessary, and prune outdated contacts. Start creating and curating your friend groups today to enjoy a cleaner, more relevant feed and stronger online relationships.