Fix Instagram Couldn't Load Search Results Error
Learn the common causes and step-by-step fixes for the Instagram "Couldn't Load Search Results" error to restore smooth search functionality.
Fix Instagram “Couldn't Load Search Results” Error
Experiencing the Instagram couldn't load search results error can be frustrating, especially when you urgently need to find profiles, hashtags, or trending content. This problem is more common than you might think and can be caused by network issues, outdated apps, corrupted cache, or even Instagram’s own servers being down. In this complete guide, you’ll learn the top causes, step-by-step fixes, and best practices to prevent the error from happening again—so you can restore smooth Instagram search functionality.

---
Understanding the Causes of the Error
Before jumping into fixes, it’s important to understand what triggers the Instagram couldn't load search results error. Typical causes include:
- Network Problems: Weak or unstable Wi-Fi or mobile data signals can halt search queries.
- Cache & Storage Issues: Corrupted temporary files stored by Instagram may slow or block search operations.
- Server Outages: Instagram’s own servers may be down for maintenance.
- App Bugs & Outdated Versions: Using an older Instagram version can create compatibility issues affecting the search API.
- VPN or Proxy Interference: Altered connection routes can trigger search load failures.
---
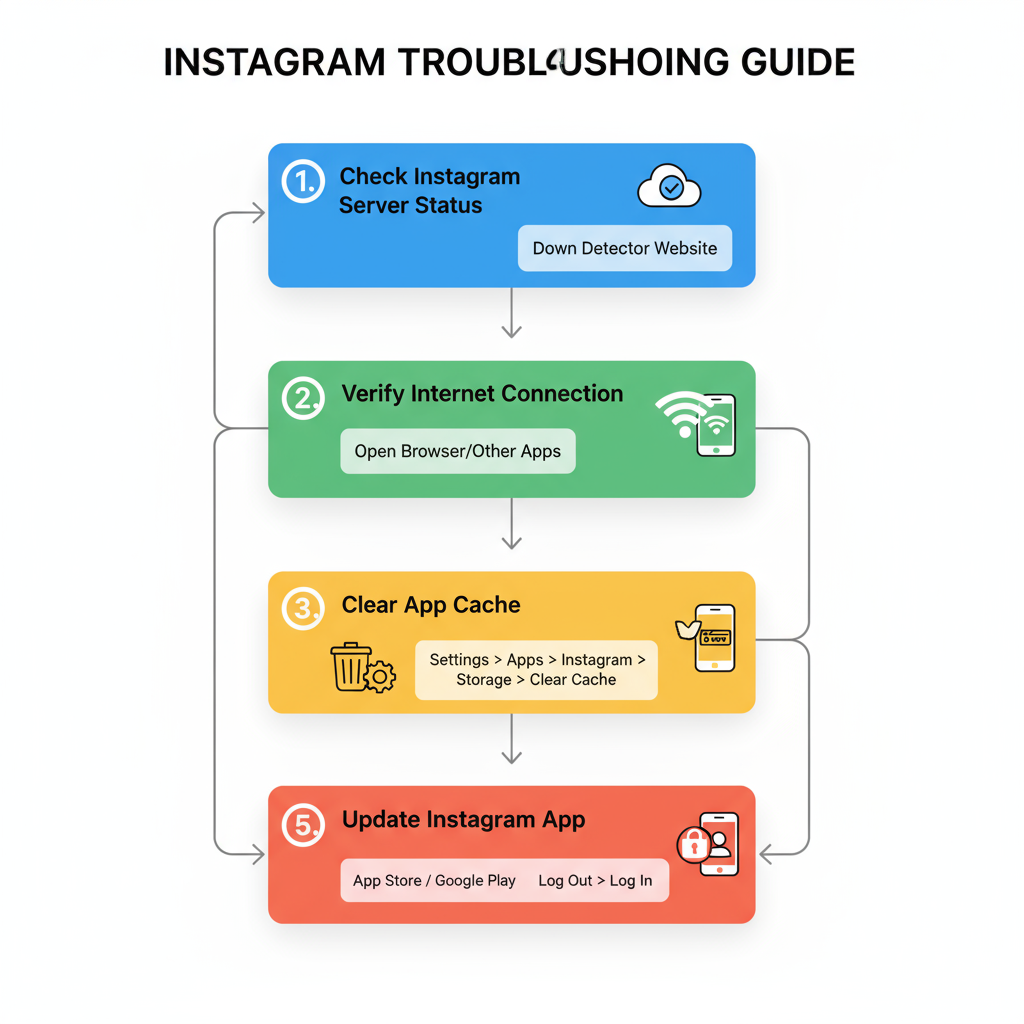
Step 1: Check Instagram Server Status
Sometimes, the problem is on Instagram’s side and no local fix will work until their service is restored.
Ways to check:
- Visit DownDetector for real-time outage reports.
- Search Twitter for “Instagram down” to see if others are reporting issues.
- Check Instagram’s official social accounts for announcements.
If widespread reports appear, it’s most likely a server outage.
---
Step 2: Troubleshoot Your Internet Connection
Poor internet can cause search failures on Instagram.
Quick network tips:
- Switch Between Wi-Fi and Mobile Data — One may be more stable than the other.
- Toggle Airplane Mode — Turn it on for 30 seconds, then off to reset.
- Restart Your Router — If on Wi-Fi, a reboot often fixes connection lags.
---
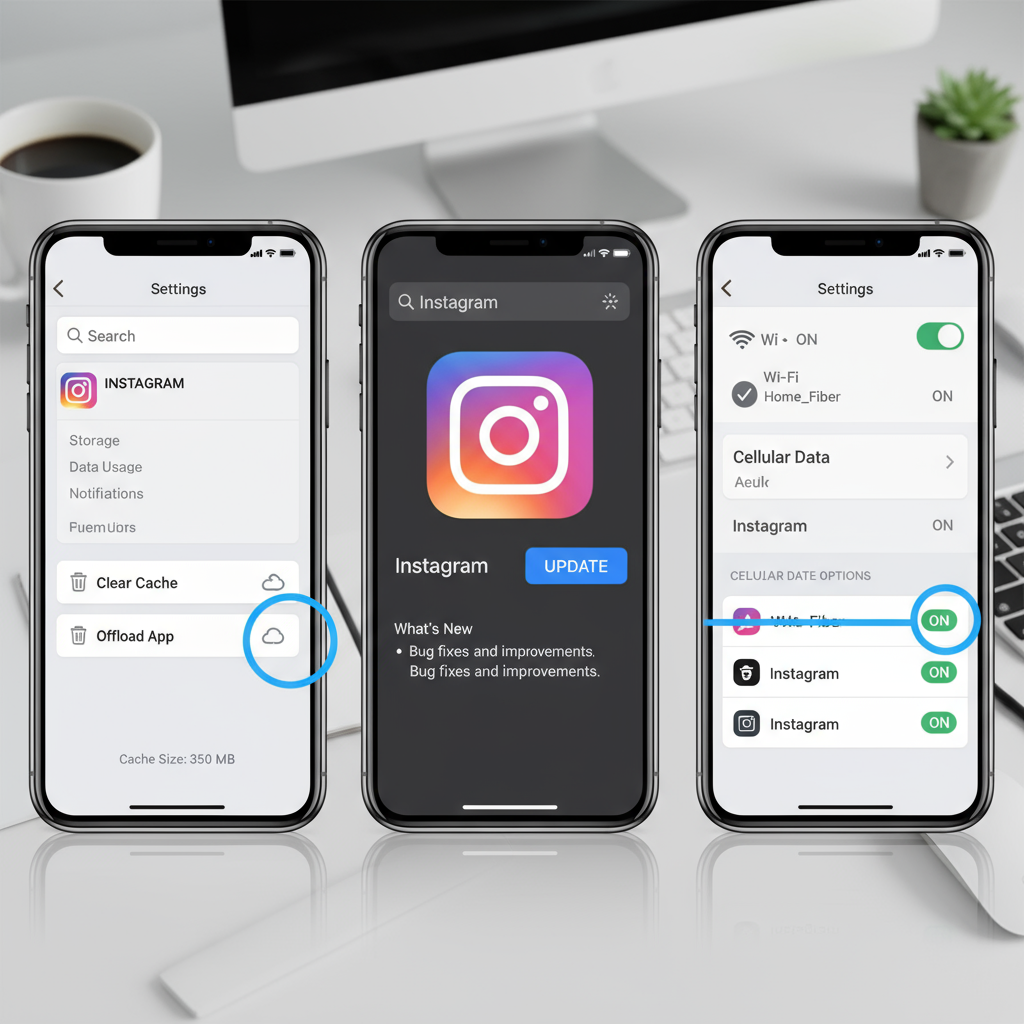
Step 3: Clear Instagram App Cache or Offload Data
Instagram’s cache helps speed up loading but may become corrupted.
On Android:
Settings > Apps > Instagram > Storage > Clear CacheOn iOS:
Settings > General > iPhone Storage > Instagram > Offload AppOffloading removes data files but keeps settings intact, refreshing the app’s storage.
---
Step 4: Update Instagram to the Latest Version
Updates fix bugs and improve compatibility.
- Android: Open Google Play Store → Search Instagram → Tap Update.
- iOS: Open App Store → Search Instagram → Tap Update.
Always run the newest version for optimal performance.
---
Step 5: Log Out and Log Back In
Expired or invalid session tokens can disrupt features.
- Go to Profile → Settings → Log Out.
- Close the app completely.
- Login again using your correct credentials.
This refreshes data linked to your account.
---
Step 6: Disable VPN or Proxy Services
VPNs or proxies can cause unusual routing issues with Instagram.
- Turn off any active VPN or proxy.
- Connect via your ISP directly.
If search works after disabling, adjust VPN settings or switch regions.
---
Step 7: Adjust App Permissions
Instagram requires basic permissions to function properly.
Check:
- Data Usage — Allow background data usage (Android: Settings > Apps > Instagram > Data Usage).
- Battery Optimization — Remove Instagram from aggressive battery saving lists.
- Background App Refresh — Enable via Settings > General > Background App Refresh on iOS.
Without these, real-time search updates may fail.
---
Step 8: Reinstall Instagram
If all else fails, a fresh installation can solve deeper issues.
- Uninstall Instagram.
- Restart your device.
- Install again from your official app store.
This wipes all cached and potentially corrupted data.
---
Step 9: Contact Instagram Support
When nothing works, get help directly:
- Use Settings > Help > Report a Problem in the app.
- Clearly describe the issue and all troubleshooting steps taken.
- Include screenshots of the error if possible.
---
Preventative Habits to Avoid Future Search Errors
After fixing the Instagram couldn't load search results problem, reduce the likelihood of recurrence with these tips:
1. Keep Your App Updated
Install new releases promptly to minimize bugs.
2. Clear Cache Regularly
On Android, clear cache every few weeks; on iOS, offload periodically.
3. Maintain a Stable Network
Prefer strong Wi-Fi or mobile data connections for searches.
4. Avoid Unnecessary VPN Use
Only use VPNs when necessary for security.
5. Monitor Server Status
Bookmark outage sites to confirm global issues quickly.
---
Quick Troubleshooting Reference Table
| Issue | Possible Cause | Solution |
|---|---|---|
| Search results not loading | Poor network / server down | Switch network or check server status |
| App crashes during search | Corrupted cache | Clear cache or reinstall app |
| No results for known hashtags | VPN/proxy interference | Disable VPN and retry |
| Login issues after error | Session token expired | Log out/in to refresh session |
---
Summary
The Instagram couldn't load search results error is usually fixable with the right steps—ranging from checking server status to clearing your cache, updating the app, or reinstalling completely. Often, it’s a temporary glitch, but proactive habits like keeping your app updated and maintaining a strong internet connection can help avoid it in the future.
If your Instagram search isn’t working now, start with the simplest solutions listed and work through to the more advanced ones; you’ll likely restore full search functionality quickly.
Ready to fix your Instagram search? Follow these steps now and enjoy hassle‑free browsing!