Resize a Photo for Facebook Cover Without Losing Quality
Learn how to resize a photo for a Facebook cover without losing clarity, using safe zone placement, online tools, and professional editing techniques.

Resize a Photo for Facebook Cover Without Losing Quality
Creating a crisp, perfectly sized Facebook cover photo is essential for making a strong first impression on visitors to your profile or page. In this guide, you’ll learn exactly how to resize a photo for Facebook cover without sacrificing image clarity, along with tips for maintaining quality, preventing cropping issues, and optimizing file size for fast loading.
---
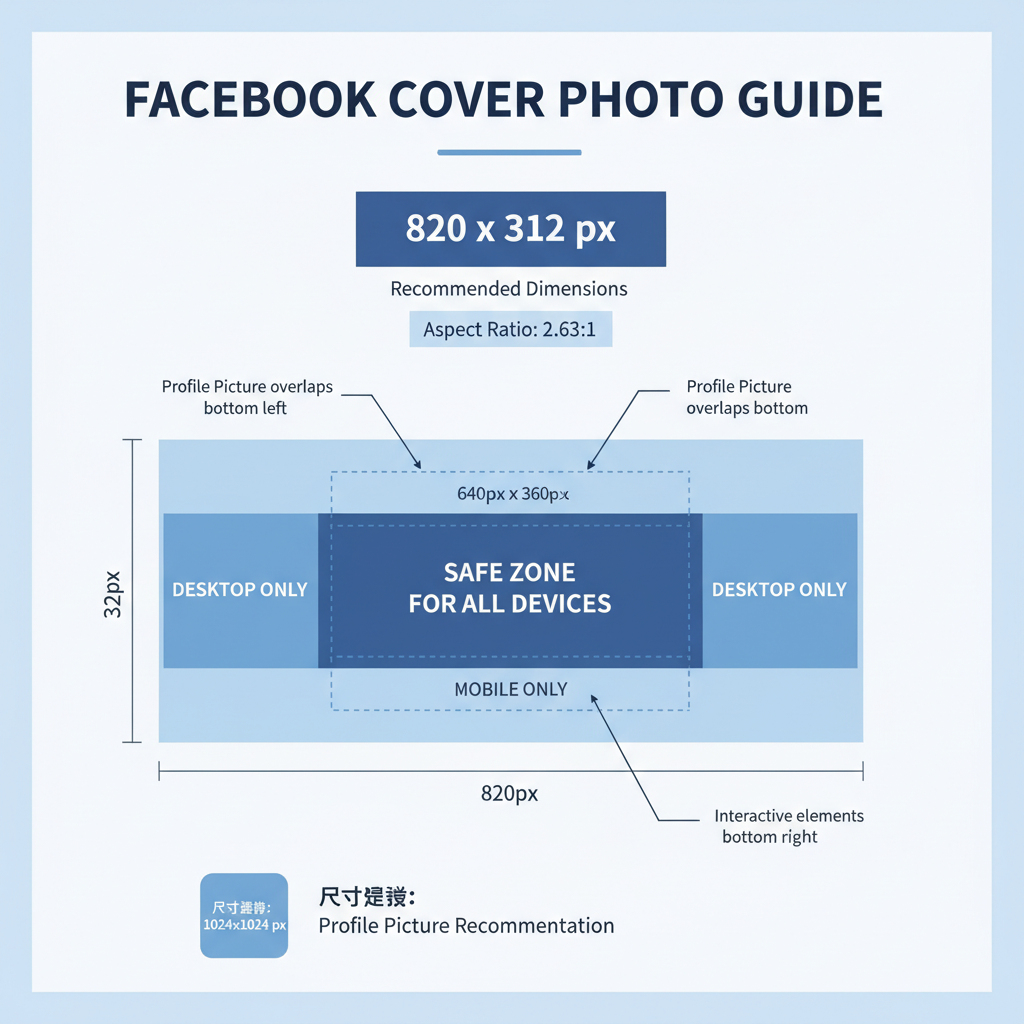
Understanding Facebook Cover Photo Dimensions and Aspect Ratio
Facebook cover photos have specific requirements:
- Desktop view: 820 × 312 pixels
- Mobile view: 640 × 360 pixels
The challenge is that Facebook crops and scales your image differently depending on the device, meaning parts of your design may be visible only on mobile or desktop.
Optimal approach:
Create a single image of 820 × 360 pixels with important elements placed within a center-safe area so they appear on both desktop and mobile.
---
Choosing the Right Image and Safe Cropping Area
Before resizing, select an image that can be cropped without losing key details.
Quick tips:
- Use high-resolution images (at least 1600 × 600 pixels before resizing)
- Avoid placing text or logos too close to edges
- Keep the focal point centered
Safe Zone Concept: The central 640 × 312-pixel area is visible on both desktop and mobile. Place critical design elements here for consistent visibility across devices.
---
Using Online Resizing Tools for Quick Adjustments
If you need a rapid solution, online tools offer preset dimensions and easy interfaces:
| Tool | Best For | Free Version? | Easy for Beginners? |
|---|---|---|---|
| Canva | Templates + graphics | Yes | Yes |
| Fotor | Quick resizing + basic edits | Yes | Yes |
| Adobe Express | Professional branding layouts | Yes | Moderate |
These tools usually provide a “Facebook Cover” template. Upload your image, fit it into the frame, and export without dealing with manual pixel dimensions.
---
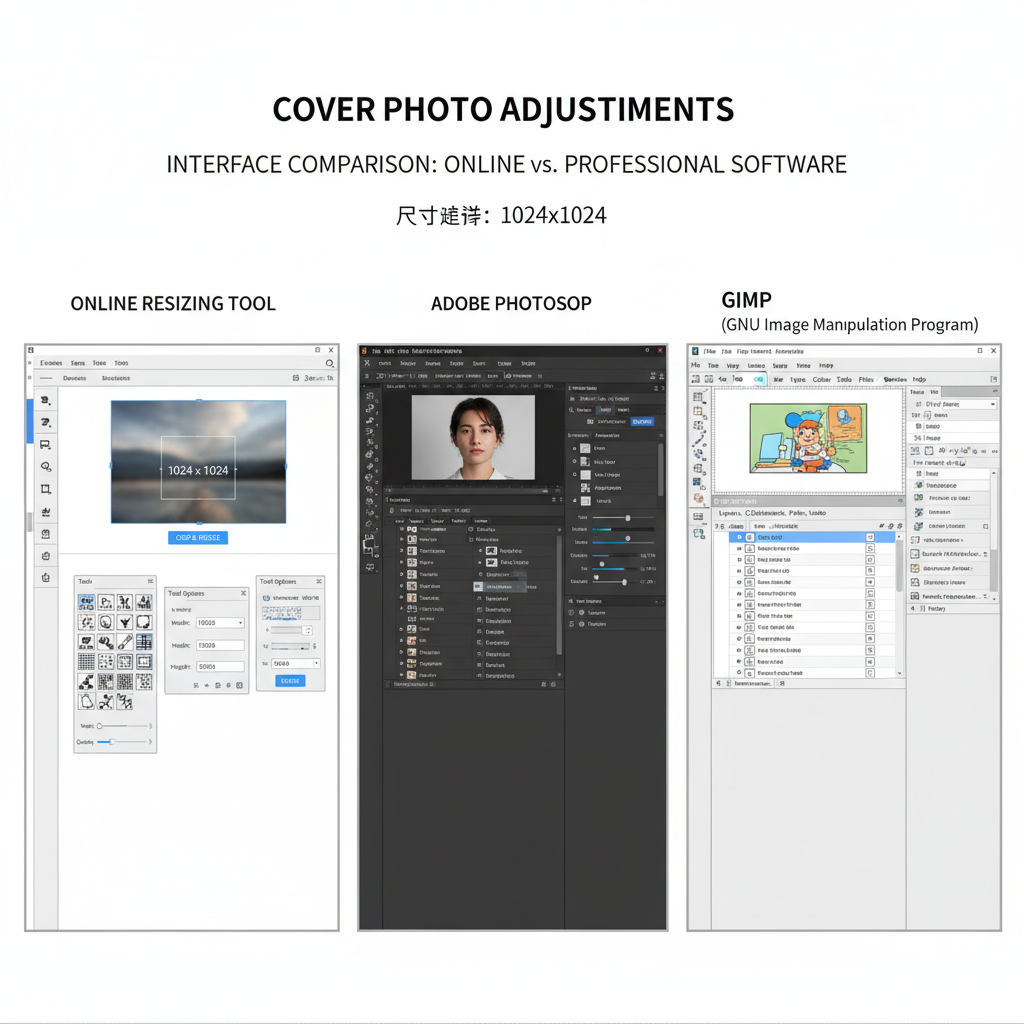
Resizing with Photo Editing Software for Precision
For maximum control over cropping, resolution, and quality, use professional software:
Photoshop
- Go to File → New and set dimensions to 820 × 360 px
- Import your image into the document
- Use Edit → Free Transform to scale proportionally (hold `Shift`)
GIMP (Free & Open Source)
- Open image → Image → Scale Image
- Input width and height values
- Set interpolation to “Cubic” for smoother scaling
Example: Photoshop Resize
Image Size: 820 x 360 px
Resolution: 72 DPI (web standard)
File format: JPEG, quality 80–90%
Professional tools let you avoid Facebook’s automatic compression and preserve crisp edges.
---
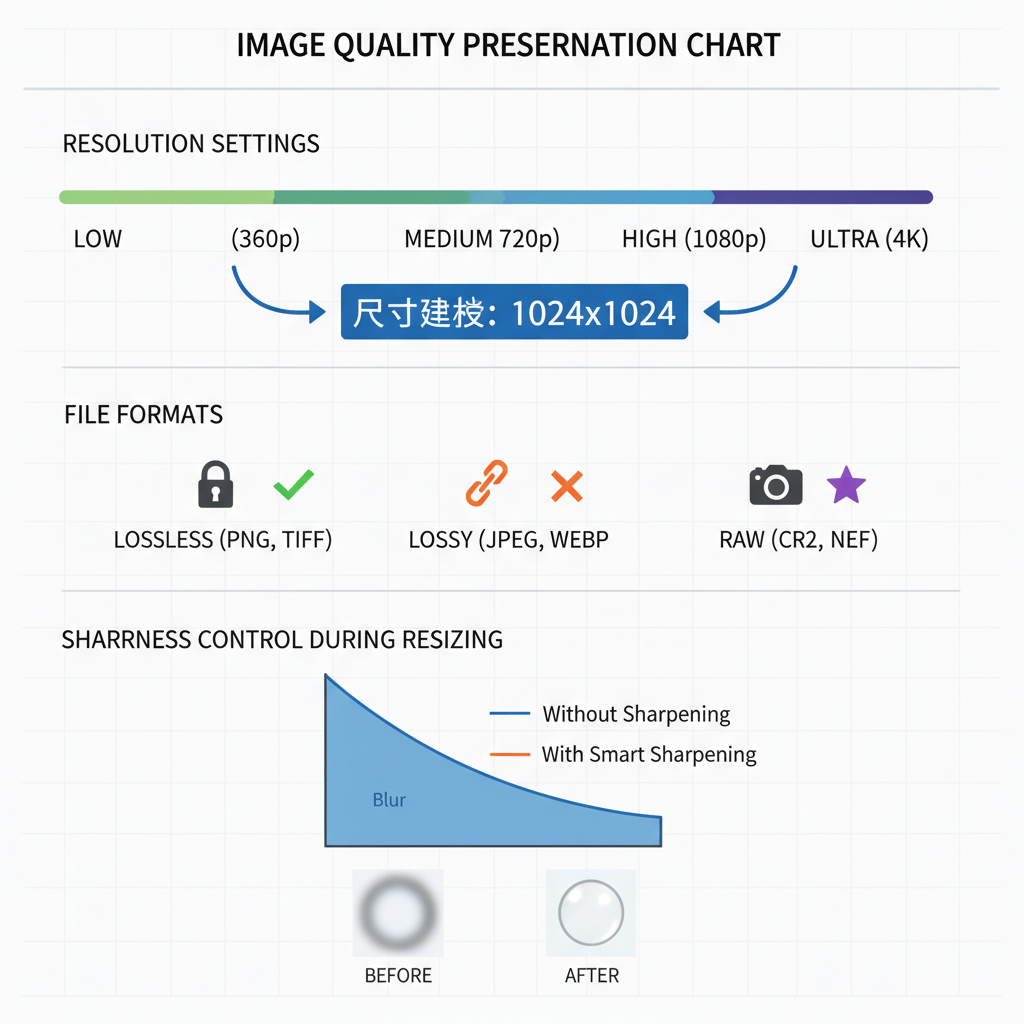
Maintaining Image Quality While Changing Size
To ensure your resized cover remains sharp:
- Export at high quality (JPEG 80–90% or PNG for text/graphics)
- Always resize from an original high-resolution source
- Use proper interpolation: Bicubic (Photoshop) or Cubic (GIMP)
Avoid enlarging undersized images — it introduces pixelation. Scale down from a large source instead.
---
Preventing Stretching, Distortion, or Pixelation
Stretching occurs when you force mismatched aspect ratios.
Avoid this by:
- Locking aspect ratio during resize
- Cropping first, then resizing
- Respecting the safe zone for key elements
Pixelation happens when enlarging low-resolution images. If your original is smaller than 820 × 360 px, it’s best to choose a different photo or use vector art assets.
---
Testing Cover Preview on Desktop and Mobile
Always preview your uploaded cover on both formats:
- Upload to a test page or use Facebook’s live preview
- Check for cropping on desktop (top/bottom)
- Check mobile for left/right cuts
This step ensures you won’t lose essential text or logos when displayed across devices.
---
Optimizing File Format and Size for Fast Loading
Large files slow your page load and impact user experience.
Format recommendations:
- JPEG: Best for photos (smaller file size)
- PNG: Best for graphics or text elements
Aim for under 100 KB. Facebook will compress your image, so starting small helps maintain fidelity.
---
Tips for Placing Key Elements in the Safe Zone
Visualize your cover in three regions:
- Central zone: Always visible; ideal for logos, titles, and focal imagery
- Left/Right edges: Mainly desktop-only components
- Top/Bottom edges: Decor only; may be cropped on certain devices
Strategic placement ensures your message reaches every viewer.
---
Final Checklist Before Uploading
- Image sized at 820 × 360 px
- Important elements in central safe zone
- JPEG or PNG format chosen appropriately
- JPEG quality set to 80–90%
- Previewed on desktop and mobile
- No pixelation, stretching, or distortion
- Branding clear and readable
---
Summary
Resizing a photo for your Facebook cover without losing quality comes down to correct dimensions, safe zone awareness, and using the right tools for your skill level. From quick online editors like Canva to precision software like Photoshop, the process is simple once you know the rules.
Apply these guidelines now to refresh your Facebook profile or page header, ensure it looks stunning on all devices, and make a lasting impression. Start resizing your Facebook cover photo today and build a more professional online presence.


