Step-by-Step Guide to Publish a Page on Facebook
Learn how to create, optimize, and publish a professional Facebook Page with visuals, key details, and posts to boost your brand’s online presence.

Step-by-Step Guide to Publish a Page on Facebook
Publishing a Facebook Page can be a game‑changer for your business, brand, or project. If you’ve been wondering "How do I publish a page on Facebook?", this comprehensive guide will walk you through the process — from understanding the difference between Pages and Profiles to optimizing content and promoting your new online presence. Follow these steps to ensure your Page looks professional, reaches the right audience, and delivers results.

---
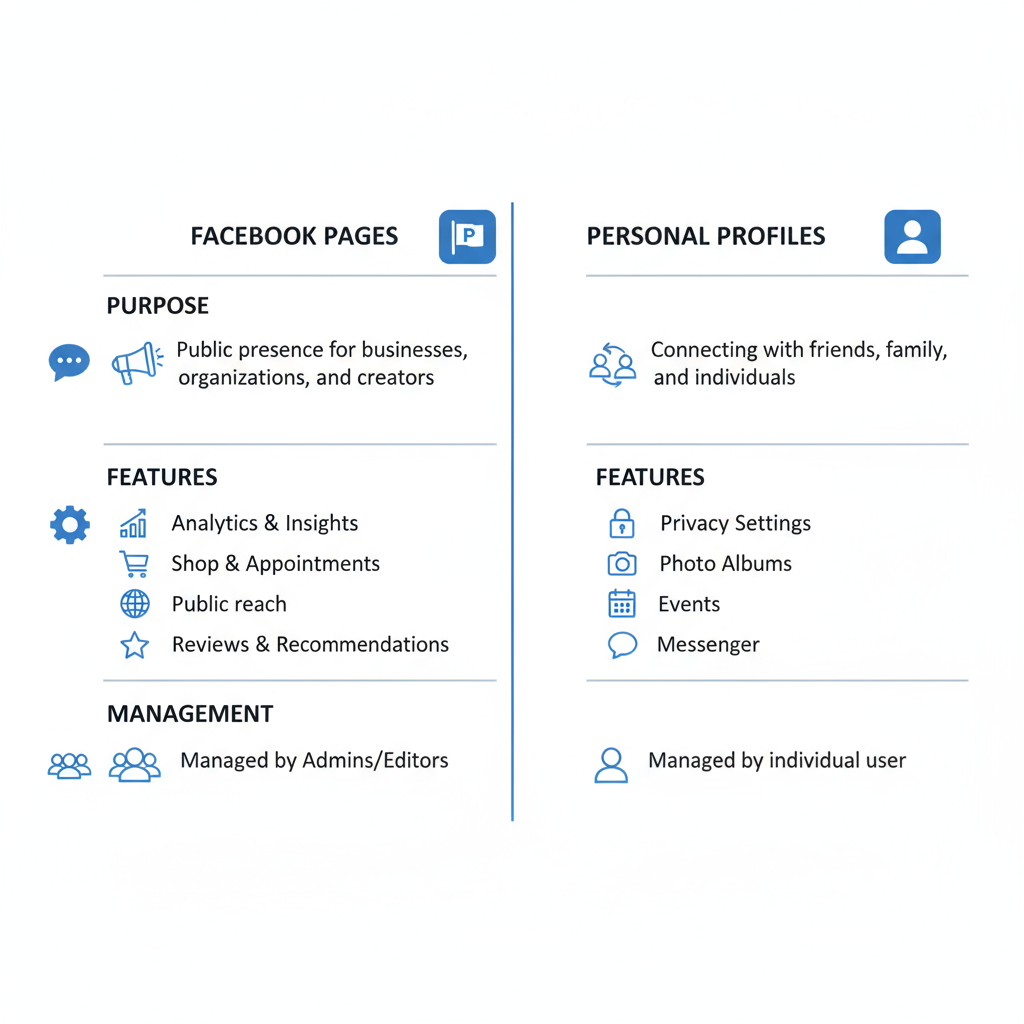
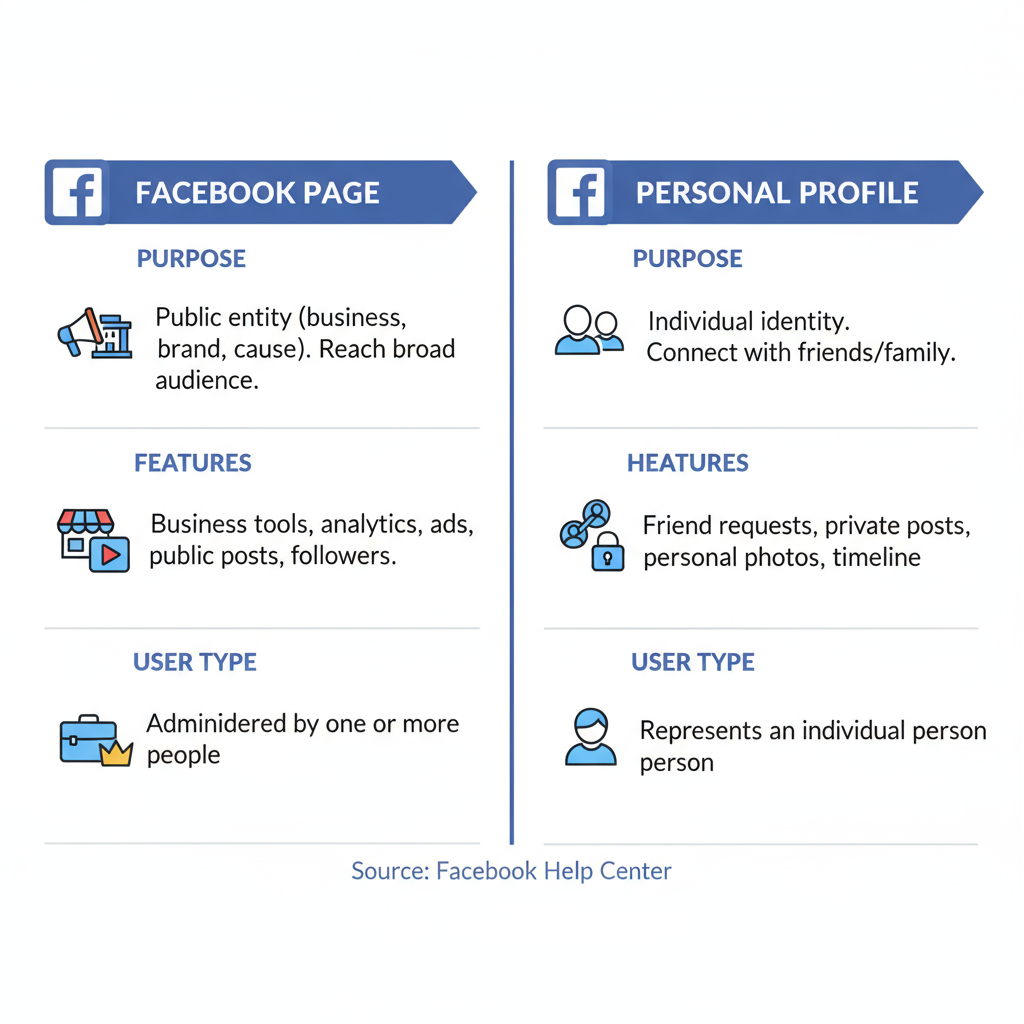
Understanding Facebook Pages vs. Profiles
Before you begin, it’s crucial to distinguish between a Facebook Profile (personal account) and a Facebook Page (public representation).
A Facebook Profile is for personal use, letting you:
- Connect with friends.
- Share personal updates.
- Follow other Pages.
A Facebook Page:
- Is always public.
- Can represent a business, brand, community, public figure, event, or cause.
- Provides tools like analytics (Insights), ad campaigns, and role assignments for team management.
Benefits of Facebook Pages include:
- Professional branding.
- Advertising capabilities.
- Detailed audience metrics.
- Unlimited follower capacity.
---
Sign In and Navigate to the "Pages" Section
To start creating your Page:
- Sign into Facebook using your login credentials.
- On desktop, use the left-hand sidebar; on mobile, open the menu tab and tap Pages.
- Click Create New Page.
> Tip: Save time by going directly to facebook.com/pages.
---
Create Your Page: Select the Right Type
Clicking Create New Page prompts you to select a category that defines your Page. Options include:
- Business or Brand
- Community or Public Figure
- Entertainment
- Cause or Nonprofit
Choose carefully: The category influences your Page’s discoverability and available features. You can update it later if necessary.
---
Add Key Page Details: Name, Category, Description
Fill in these essential fields:
- Page Name: Typically your business or brand name.
- Category: Begin typing; select from Facebook’s suggestions.
- Description: A concise, keyword-rich summary (up to 255 characters) explaining your Page’s purpose.
> SEO Tip: Use relevant keywords here to improve Facebook and search engine visibility.
---
Upload Profile Picture and Cover Photo
Strong visuals enhance your Page’s appeal.
Profile Picture:
- Appears next to posts and in search.
- Recommended: 170×170 pixels (desktop) or 128×128 pixels (mobile).
Cover Photo:
- Large banner at the top.
- Recommended: 820×312 pixels (desktop) or 640×360 pixels (mobile).
> Pro Tip: Choose clear, high-resolution images aligned with your branding; ensure they display well on all devices.
---
Complete Page Information: Username, Contact Details, Hours
In the About section, add:
- Username (Custom URL): e.g., facebook.com/YourBrandName.
- Contact Info: Email and phone number.
- Website: Link to your main site.
- Location: Physical address, if applicable.
- Hours: For storefronts or service availability.
Accurate information builds trust and improves customer interaction.
---
Prepare Content Before Publishing
Avoid launching an empty Page. Create 3–5 posts beforehand:
- Welcome/introduction post.
- High-quality product/service visuals.
- Relevant news or tips.
Consistency: Match your tone, style, and brand values across posts.
---
Preview Your Page Before Going Live
Take advantage of Facebook’s preview feature to:
- Check grammar, punctuation, and spelling.
- Review images for clarity and proper alignment.
- Test all buttons and links.
> Tip: View on both desktop and mobile, and solicit feedback from a colleague or friend.
---
Publish Your Facebook Page
When everything is ready:
- Click Publish Page at the top.
- Confirm your decision.
Your Page is now public and ready for engagement.
---
Promote Your Published Page
Once live, use multiple channels to drive traffic:
- Invite personal contacts to like the Page.
- Share the Page link via your personal profile, website, email footer.
- Cross-promote on other social platforms.
- Participate in relevant Facebook Groups (authentically).
- Launch targeted Facebook Ads.
---
Maintain and Optimize Your Facebook Page
Ongoing activity is essential for success. Use the following schedule:
| Action | Frequency | Benefit |
|---|---|---|
| Post Content | 3–5 times/week | Boosts audience engagement and reach |
| Respond to Messages | Within 24 hours | Strengthens trust and responsiveness rating |
| Review Insights | Weekly | Data‑driven strategy adjustments |
Monitor Facebook Insights to learn:
- Top-performing content.
- Optimal posting times.
- Audience demographics.
---
Common Pitfalls to Avoid
Stay clear of these mistakes:
- Launching without content — makes a poor first impression.
- Using low-quality visuals — undermines professionalism.
- Leaving info incomplete — discourages potential followers.
- Posting sporadically — reduces algorithmic visibility.
- Ignoring engagement — alienates existing followers.
---
Summary and Next Steps
Publishing a Facebook Page is straightforward, but making it thrive requires strategy. By understanding the type of Page you need, adding complete information, uploading professional images, creating strong initial content, and maintaining consistent interaction, you can maximize reach and impact. Now that you know how to publish a page on Facebook, take action today — set up your Page, share it widely, and start connecting with your audience.