How to Cross Post on Facebook Step by Step
Learn how to cross-post videos on Facebook step by step, link multiple Pages, and optimize posts for consistent brand voice and greater reach.
How to Cross Post on Facebook Step by Step
In the fast-paced world of digital marketing, cross-posting on Facebook is an invaluable strategy for maximizing content reach. This feature lets brands, publishers, and content creators post the same native video to multiple Pages without re-uploading, ensuring consistency while saving time. In this guide, you’ll learn exactly how to set it up, execute it for recorded and live videos, analyze results, and apply best practices for consistent brand messaging.
Whether you manage multiple regional Pages, collaborate with partners, or handle client accounts, mastering cross-posting can streamline your workflow and boost engagement quickly and efficiently.

---
What Is Cross-Posting and Why It Matters
Cross-posting on Facebook means publishing the same video or live stream to more than one Page without creating duplicate uploads. Each Page gets its own native version of the post, with separate engagement data. That means:
- Videos are stored natively on Facebook for each Page.
- Likes, Comments, and Shares are tracked separately.
- Posts appear as native uploads — no "shared from" label.
For marketers, this means broader reach, authentic presentation, and saved bandwidth.
---
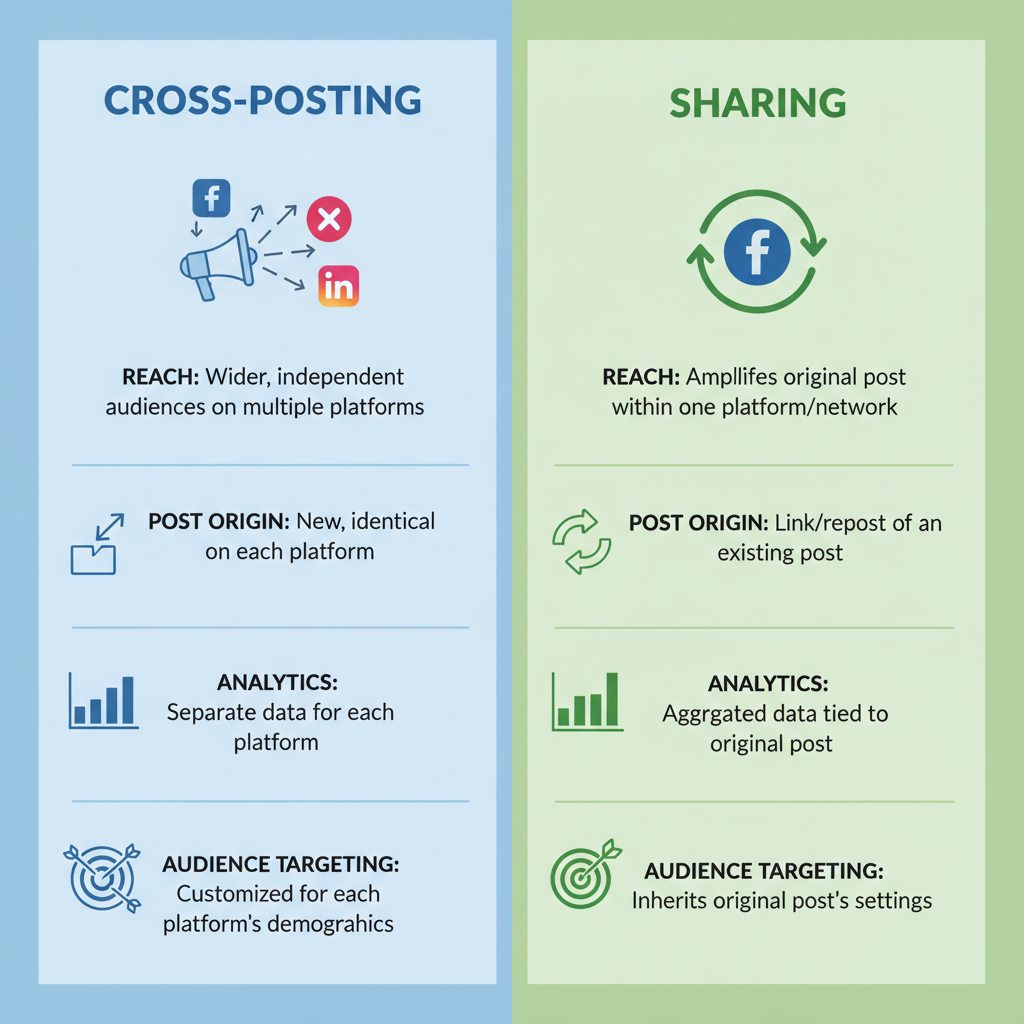
Cross-Posting vs Sharing: Key Differences
Many mistakenly think sharing is the same as cross-posting. Here’s how they differ:
| Feature | Cross-Posting | Sharing |
|---|---|---|
| Content Type | Native video (uploaded once, posted natively to other Pages) | Link to an existing post |
| Engagement Tracking | Separate metrics per Page | Engagement tracked on original post only |
| Brand Consistency | Appears native to each Page | Shows as shared from another Page |
| Eligibility | Requires Page admin/editor permissions and link setup | Anyone can share publicly visible content |
Pro Tip: Cross-posting feels more authentic to audiences, which can improve watch time and engagement.
---
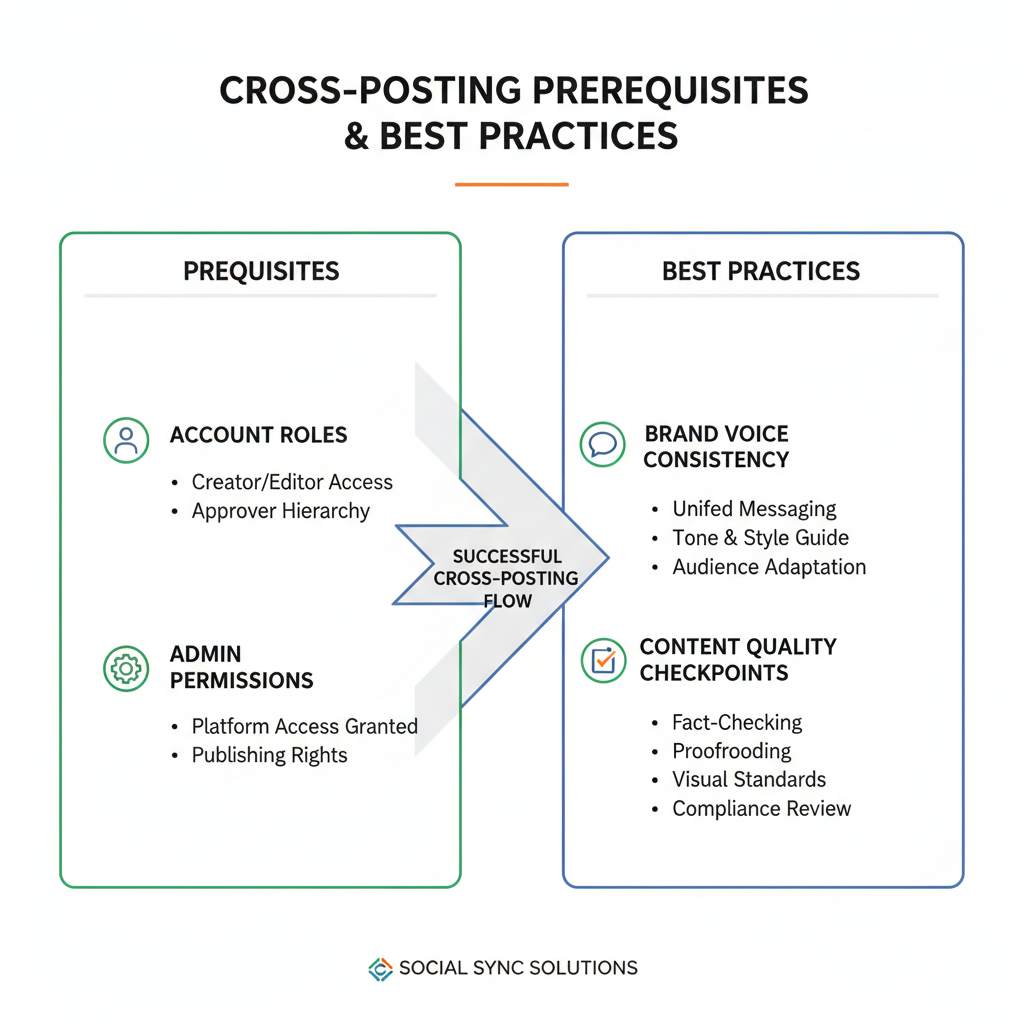
Prerequisites for Cross-Posting
Before setting up cross-posting on Facebook, ensure that:
- Correct Page Roles are assigned — you must be an Admin or Editor on both Pages.
- Mutual Permission is agreed upon for cross-posting between Pages.
- Content Type is an eligible video (recorded or live), not images or text posts.
- Rights and Compliance are met — no monetization or copyright conflicts.
---
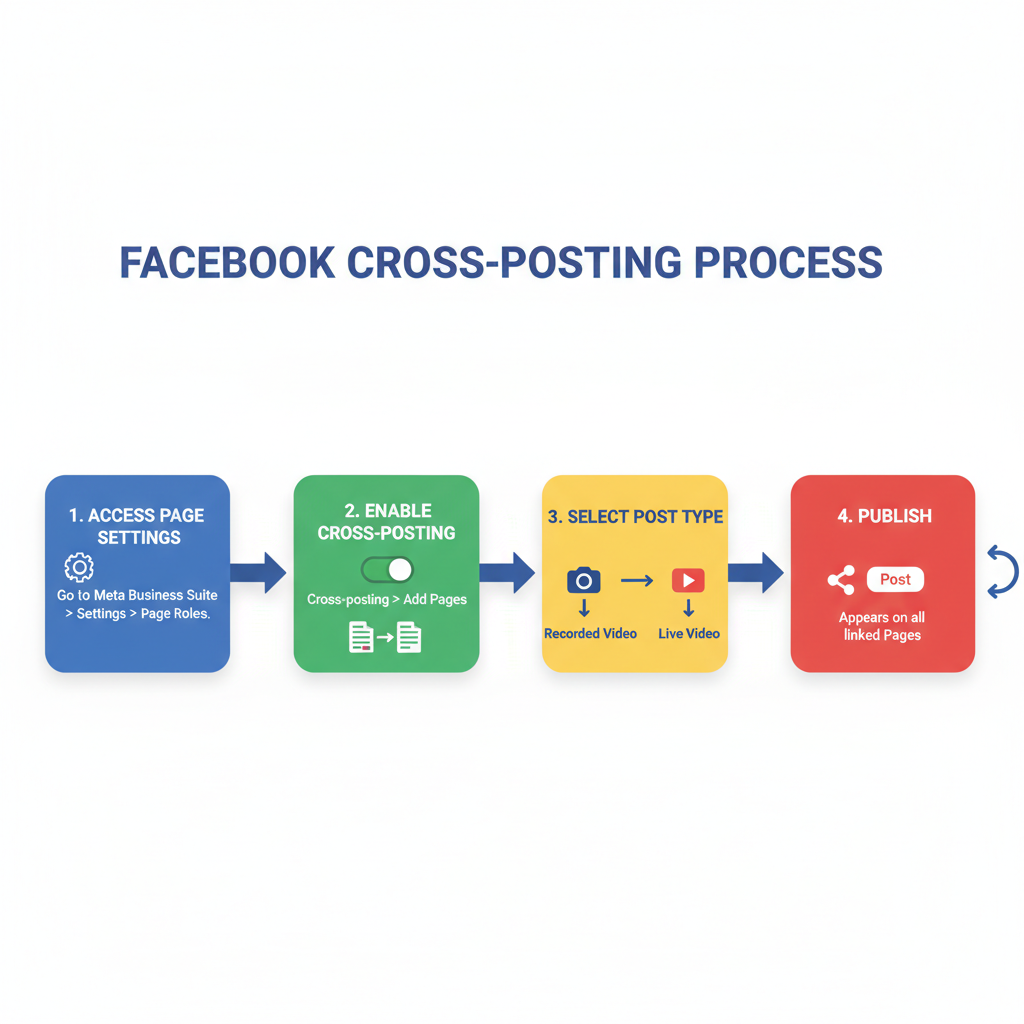
Enabling Cross-Posting Between Pages
To link Pages for cross-posting:
- Go to the Settings on your Facebook Page (desktop view).
- Select Crossposting from the left menu.
- Search and select the Page you want to link.
- Set permissions:
- Allow cross-posting without approval, or
- Require approval for each cross-post.
- Click Save and repeat for the other Page.
Once linked both ways, you can start cross-posting.
---
How to Cross-Post a Recorded Video
With cross-posting enabled:
- Open Publishing Tools on your Page.
- Navigate to Videos > Video Library.
- Select a video you’ve uploaded.
- Click Edit, then go to the Crosspost tab.
- Choose linked Pages for cross-posting.
- Optionally tailor titles, descriptions, and captions per Page.
- Publish immediately or schedule.
Note: Facebook references the original file, so you won’t use extra storage.
---
How to Cross-Post a Live Video
To cross-post live videos:
- In Live Producer, select the Crossposting tab while setting up your live.
- Add Pages that can cross-post your stream.
- Decide on automatic vs manual posting for partner Pages.
- Begin your live video.
- If allowed, it will appear natively in linked Page feeds in real time.
Pro Tip: Always test with an unlisted live before going public.
---
Best Practices for Maintaining Brand Voice
Consistency across Pages is key:
- Localize Captions to match each audience’s preferences.
- Use region-specific hashtags where relevant.
- Keep branding elements — colors, logos, style — uniform across cross-posts.
---
Editing Cross-Posted Content Post-Publish
Remember:
- Only the original uploading Page can change the video file.
- Cross-posting Pages can edit captions, thumbnails (if permitted), and tags.
- Updating the original video changes visuals across all cross-posts, but not captions.
---
Analyzing Cross-Post Performance with Insights
Each Page tracks its own video performance:
- Views and Minutes Watched
- Engagement (likes, comments, shares)
- Reach and Audience Demographics
Example comparison:
| Page | Video Views | Engagement Rate | Top Audience |
|---|---|---|---|
| Main Brand Page | 12,000 | 5.2% | Women 25-34 |
| Regional Page | 8,500 | 7.1% | Men 18-24 |
Use these metrics to refine content targeting.
---
Troubleshooting Common Issues
Solutions to common cross-posting errors:
- Permissions Error: Double-check Settings > Crossposting permissions on both Pages.
- Unsupported Format: Ensure video format meets Facebook specs.
- Privacy Setting: Videos must be Public to cross-post.
- Missing Live Post: Confirm Pages are selected before going live and run tests first.
---
Automating and Scheduling Cross-Posts
For efficiency:
- Use Meta Business Suite to schedule content across Pages.
- Third-party tools like Hootsuite can help, though manual steps may be required.
- Maintain a content calendar to balance frequency and avoid audience fatigue.
---
Summary & Actionable Checklist
Cross-posting on Facebook is a direct way to extend reach, engage audiences across regions, and save upload time — all without sacrificing authenticity.
Quick Checklist:
- Confirm admin/editor permissions.
- Enable two-way cross-posting in Settings.
- Choose auto or manual approval.
- Upload once, cross-post widely.
- Customize captions per audience.
- Track results via Facebook Insights.
- Test before major campaigns.
When someone asks “how do you cross post on Facebook?”, you’ll be ready with the exact steps and strategies. Start applying these best practices today to make your Facebook marketing more efficient and impactful.


