How to Post on Facebook Timeline Step-by-Step
Learn step-by-step how to post on your Facebook timeline, choose the right audience, add media, tag friends, and boost engagement while protecting privacy.

How to Post on Facebook Timeline Step-by-Step
Learning how to post on Facebook timeline is essential for anyone who wants to share updates, photos, or videos effectively with friends, followers, or the public. In this step-by-step guide, you’ll learn exactly how to create a post, choose the right settings, and optimize your content for maximum engagement — all while keeping your privacy under control.
---
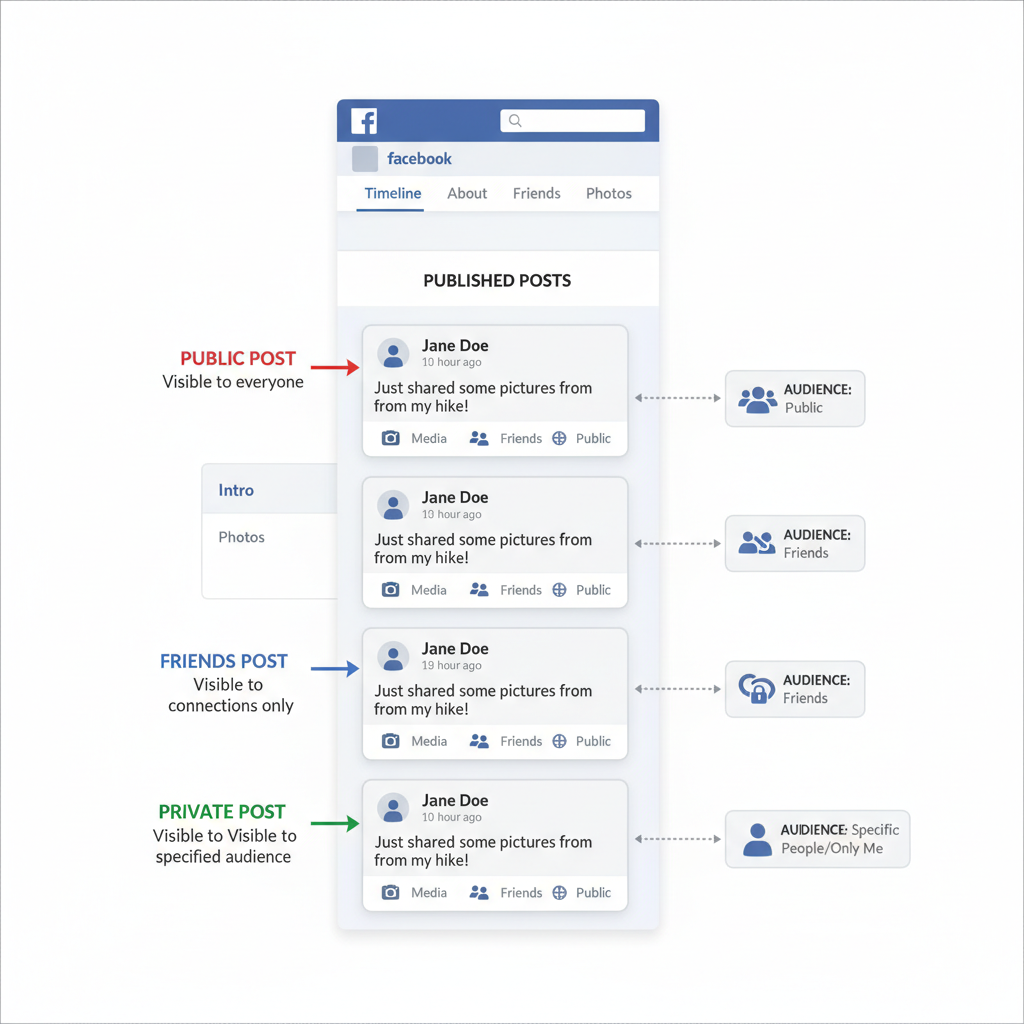
Understanding the Facebook Timeline and Visibility Settings
Your Facebook timeline is your personal feed displaying posts you’ve made, posts you’re tagged in, and other activities you’ve decided to share. Visibility settings determine who can view your posts:
- Public – Anyone on or off Facebook can see your post.
- Friends – Only your Facebook friends will see it.
- Specific friends – Limit viewership to selected friends.
- Only me – Completely private to you.
Adjusting these settings before posting ensures your content reaches only the audience you want.

---
Logging Into Your Facebook Account
Before you can post, you’ll need to log in:
- Desktop: Visit facebook.com, then enter your email/phone and password.
- Mobile App: Open the app, tap Log In, and provide your credentials.
Always use the official site or app to protect your account.
---
Locating the “What’s on your mind?” Post Box
At the top of your timeline or news feed, you’ll see the “What’s on your mind?” box. This is where you initiate your post — whether you plan to share text, photos, videos, or external links.
---
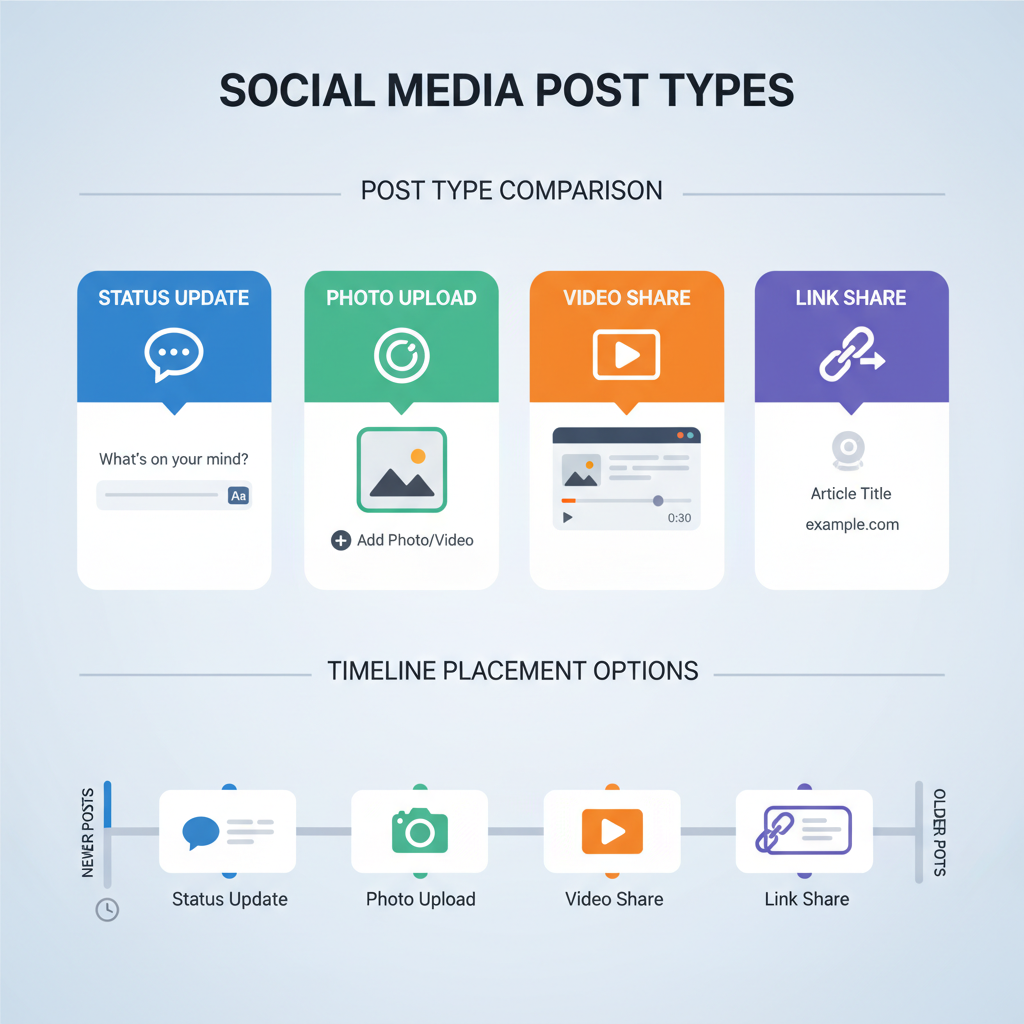
Choosing Your Post Type
Facebook lets you share a variety of post formats:
- Text – Write messages or updates.
- Photo/Video – Upload and share visual content.
- Link – Direct your audience to a site.
- Check-In – Share your current location.
- Feeling/Activity – Express your emotions or activities.
Mixing these formats keeps your timeline engaging.
---
Adding Text: Writing a Status Message or Story
In the text input area:
- Be clear and concise — maintain reader interest.
- Use a relatable tone for personal updates; professional tone for business.
- Add a relevant call-to-action (CTA) where appropriate.
---
Attaching Media: Upload Photos or Videos
Visuals attract more engagement:
- Click/tap Photo/Video.
- Select files from your computer or phone.
- Preview your media before posting.
For best results, use sharp, high-resolution images or videos.
---
Tagging Friends to Increase Visibility
Tag friends to extend your post’s reach:
- Select Tag Friends before posting.
- Enter your friend’s name and select from the suggestions.
This shares your post with their networks too.
---
Adding a Location to Your Post
To geotag:
- Click Check In or tap the location icon.
- Search or choose from suggested places.
Location-tagged posts often create stronger local engagement.
---
Setting the Audience for Your Post
Control who sees what you share:
- Click the audience selector (default is Friends).
- Choose Public, Friends, Specific friends, or Only me.
- Confirm your selection before posting.
You can change the audience later in post settings.
---
Using Emojis and Formatting for Visual Appeal
Emojis can make posts livelier:
- Use relevant emojis for emphasis or emotion.
- Keep them minimal in professional content.
Although Facebook doesn’t support advanced text formatting, you can use Unicode or third-party formatting tools.
---
Reviewing Content Before Posting
Check everything to avoid mistakes:
- Grammar and spelling — errors affect credibility.
- Media quality — blurry media reduces engagement.
- Correct tags — ensure you tag the right people.
---
Publishing Your Post
When satisfied:
- Click or tap Post.
- Your content will immediately appear on your timeline and in your audience’s feed.
---
Editing or Deleting a Post
Manage your posts easily:
- Edit: Click the three-dot menu, choose Edit Post, adjust, then save.
- Delete: From the same menu, choose Move to trash. Content stays in trash for 30 days before deletion.
---
Understanding Post Interactions
Posts can receive several types of engagement:
| Interaction Type | Description |
|---|---|
| Likes | Standard approval reaction. |
| Reactions | Emotional response types (Love, Haha, Wow, Sad, Angry). |
| Comments | Written responses or feedback from viewers. |
| Shares | When someone republishes your post on their timeline. |
Track engagement metrics to see which content resonates with your audience.
---
Privacy Tips: Controlling Timeline Content
Manage what appears and who interacts:
- Timeline Review — Approve tags before they appear on your profile.
- Activity Log — Monitor all actions linked to your account.
- Blocking — Restrict unwanted users.
Fine-tune your Privacy Settings for more control.
---
Best Practices for Posting
Boost performance and visibility with these tips:
- Post at optimal times — mornings or early evenings often work best.
- Respond to comments quickly to build engagement.
- Use high-quality visuals for greater shareability.
- Stay consistent in your posting schedule.
- Experiment with formats like live video, stories, and carousels.
---
Summary and Next Steps
By following this comprehensive process, you can confidently share updates, images, and videos on your Facebook timeline while fine-tuning your privacy and audience reach. You now know exactly how to post on Facebook timeline in ways that build engagement, maintain privacy, and present you professionally or personally.
Start applying these steps with your next update — and watch your Facebook interactions grow!