How I Fully Automated My Manual Daily Reports

# Automating the Company’s Daily Report
## A Detailed Breakdown of My Process, Challenges & Solutions
Previously, we discussed applying **automation thinking** to repetitive tasks.
I used the example of **automating our company's daily report**.
Today, I’ll walk you through:
- **Exactly how I implemented it**
- **The problems and challenges I faced**
- **How each was resolved**
---
## 📌 Background
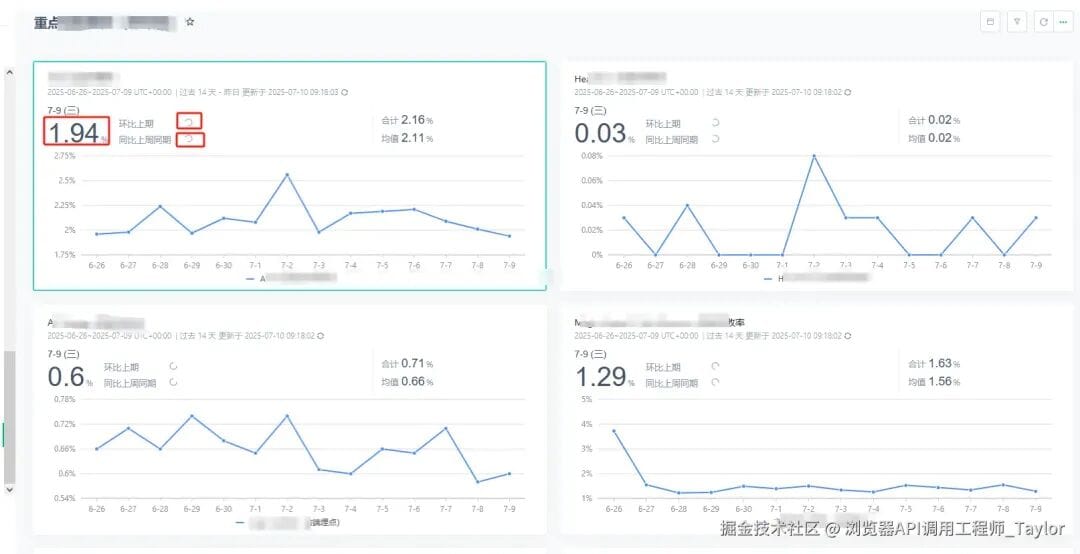
Our company uses a **third-party system** with a custom data dashboard.
Every day, a **daily report** must be sent to a group chat.
### Past Manual Process
Team members took turns weekly:
1. Copy data from the dashboard into Excel.
2. Convert Excel into an image.
3. Send the image to the chat.
When it was my turn:
- Left screen: Dashboard.
- Right screen: Excel.
- Copy each percentage (`3.4%`, `-10%`) **manually** and cross-check.
- **Time consumed:** 7–10 minutes **per day**.
- **Feels:** Tedious, error-prone, boring.
> **Thought:** *"Can’t this repetitive task be automated?"*
I asked in our group chat:

Result: **Read but no response**.
> **Decision:** *"I’ll solve this myself!"*
---
## 🚀 First Exploration
Opening the system, I noted:
- Custom dashboard configured in the backend.
- Each item has **3 data points** needed.
- Total: 30–40 manual copy-paste actions.
**Problems:**
- Time-wasting.
- Easily prone to copy-paste errors.
- Monotonous routine.
**First Goal:**
Automate data-copying via script.
---
## 🧩 Workflow Mapping
First, map manual steps → automation steps.
### 1️⃣ Original Manual Flow
- Log in to system.
- Open dashboard.
- Copy each value to Excel.
- Convert Excel to image.
- Send image to group.
### 2️⃣ Automated Tasks
1. Reverse-engineer login encryption → **automate login & get token**.
2. **Scrape** required data via API.
3. Format into table → **render image via Canvas**.
4. Upload image to OSS → **send via DingTalk API**.
---
## 🛠 Step-by-Step Implementation
Initially, I aimed to start with **automated login** (Step 1).
But login API encryption was **complex** — quick bypass not possible.
💡 **Solution:** Temporarily **manually copy login credential**, build end-to-end pipeline, then revisit login automation later.
---
### **Step 1: Data Retrieval via API Scraping**
#### 1.1 Inspect Data Loading Process
- If **server-rendered** → scrape HTML.
- Else → scrape asynchronous API responses.
In my case:
- Data loaded via **queued API calls**.
- Page render time **unpredictable** → HTML scraping unstable.
- ✅ Chose **direct API scraping**.
---
#### Keyword Search in API Responses
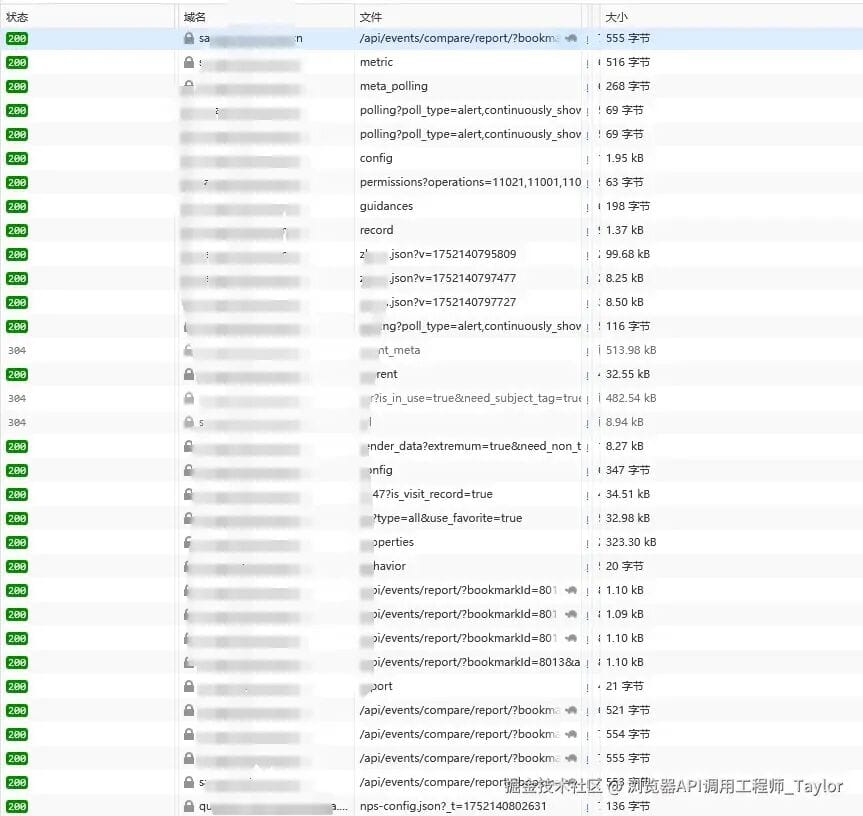
**Method:**
1. Open DevTools Network tab.
2. Search for keywords matching dashboard titles.
3. Locate API with list data.
Example:
- Found panel list API:

- Needed detailed MoM / YoY → Found item detail API.
---
#### **Code – Fetch Panel List**async function queryReportList(dashboard) {
const { id: dashboard_id, common_event_filter } = dashboard;
const data = await fetch(
`https://xxx/api/v2/sa/dashboards/${dashboard_id}?is_visit_record=true`,
{
credentials: "include",
headers: { "User-Agent": "...", Cookie: Cookie },
method: "GET"
}
).then(res => res.json());
const result = [];
for (const item of data.items.slice(0, 13)) {
if (item.bookmark) {
const data = JSON.parse(item.bookmark.data);
const res = await queryReportByTool({
bookmarkid: item.bookmark.id,
measures: data.measures,
dashboard_id,
common_event_filter
});
result.push({ ...res, name: item.bookmark.name });
}
}
return result;
}
---

#### **Code – Fetch Item Detail**
async function queryReportByTool(params) {
const requestId = Date.now() + ":803371";
const body = {
measures: params.measures,
unit: "day",
from_date: dayjs().subtract(14, "day").format("YYYY-MM-DD"),
to_date: getYesterDay(),
detail_and_rollup: true
};
try {
const data = await fetch(
`https://xxxx/api/events/compare/report/?bookmarkId=${params.bookmarkid}&async=true&timeout=10&request_id=${requestId}`,
{
credentials: "include",
headers: { "User-Agent": "...", Cookie },
body: JSON.stringify(body),
method: "POST"
}
).then(res => res.json());
if (!data || !data.isDone) return await queryReportByTool(params);
else return data;
} catch {
return await queryReportByTool(params);
}
}
---

### **Step 2: Generate Image**

Use **node-canvas**:
const Canvas = require('canvas');
// render table & data as image
Implementation detail depends on your design.

---

### **Step 3: Upload & Send**

**Upload to Tencent Cloud OSS:**
const filePath = `/custom/999/${dashboard.worksheetName}-${dayjs().format('YYYYMMDD')}.jpeg`
const uploadRes = await tencentCos.upload(imageBuffer, filePath, true)
**Send via DingTalk Webhook:**async function sendDingTalkMessage(text) {
const token = 'YOUR_BOT_TOKEN';
const result = await fetch(
`https://oapi.dingtalk.com/robot/send?access_token=${token}`, {
method: 'post',
headers: { 'Content-Type': 'application/json' },
body: JSON.stringify({
msgtype: "markdown",
markdown: { title: "Monitoring Daily Report", text },
at: { isAtAll: true }
})
}
).then(res => res.json());
if (result.errcode === 0) console.log('Sent successfully');
}
---

### **Step 4: Reverse-Engineer Login Encryption**

The login API uses:
- **RSA + AES hybrid encryption**
- RSA encrypts AES key
- AES encrypts JSON login data

#### Why Hybrid?
RSA is limited by key size (e.g., 2048-bit → ~245 bytes max).
Large data must be encrypted with AES; AES key itself is secured via RSA.

---

#### Code – Encrypt Login Data
var b = require("crypto-js");
var jsencrypt = require("nodejs-jsencrypt/bin/jsencrypt").default;
function encryptLogin(body, public) {
const W = new jsencrypt();
W.setPublicKey(public);
const q = b.enc.Utf8.parse(Math.floor(Math.random() * 1e6) + Date.now()).toString();
const re = W.encrypt(q),
ie = b.lib.WordArray.random(128 / 8),
fe = b.lib.WordArray.random(128 / 8),
ue = b.PBKDF2(q, ie, { keySize: 128 / 32, iterations: 100 }),
ye = b.AES.encrypt(JSON.stringify(body), ue, { iv: fe, mode: b.mode.CBC, padding: b.pad.Pkcs7 });
const Ee = parseInt(Date.now() / 1000).toString();
const bt = `${Ee}_${Ee}_/api/v2/auth/login?is_global=true_${ye}_14skjh`;
return {
headers: {
"aes-salt": ie.toString(),
"aes-iv": fe.toString(),
"aes-passphrase": re,
"X-Request-Timestamp": Ee,
"X-Request-Sign": b.MD5(bt).toString(),
"X-Request-Id": Ee
},
body: ye.toString()
};
}
---

#### Code – Login API Call
async function login(public, loginData) {
const encryptOptions = encryptLogin(loginData, public);
return await fetch("LOGIN_URL", {
method: "POST",
headers: { ...encryptOptions.headers },
credentials: "include",
body: encryptOptions.body
}).then(res => {
Cookie = res.headers.get('set-cookie');
return res.json();
});
}
---
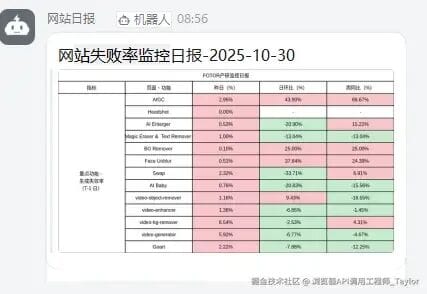
## ✅ Final Deployment
- **Combine all steps**.
- Deploy script to server.
- Schedule via **cron job**.
- Daily report → automated & sent.
---
## 📊 Result
---
## 💡 Lessons Learned
1. **Finish first, then refine**: Use manual Cookie → full pipeline → return to login automation.
2. **Obfuscation ≠ Impossible**: Breakpoints + keyword/API path search to locate logic.
3. **RSA + AES Common**: RSA for keys, AES for bulk data.
4. **Persistence Wins**: Day 1 frustration → Day 2 success after iteration.
---
Although described smoothly here, the real process involved:
- Dead ends in obfuscated code.
- Multiple failed approaches.
- Wrong package versions.
- Header miss-matches.
---
## 📢 Share Your Work
If you publish automation tutorials or reverse-engineering insights, consider **multi-platform AI content publishing** tools like [AiToEarn官网](https://aitoearn.ai/):
- AI-based content generation.
- Publish to **Douyin, Kwai, WeChat, Bilibili, Xiaohongshu, Facebook, Instagram, LinkedIn, Threads, YouTube, Pinterest, X/Twitter**.
- Unified analytics and monetization.
---
**Enjoyed this deep dive?**
Follow for more technical breakdowns and reverse engineering case studies!