How to Add a Link in an Instagram Story: Step-by-Step Guide, Best Practices, and Troubleshooting
Learn how to add a link in Instagram Stories with the Link sticker. Step-by-step setup, CTA and placement tips, UTM tracking, and fixes for common issues.

A well-executed Link sticker can turn passive Story views into measurable traffic and conversions. This formatted guide lays out the current Instagram workflow, practical design and analytics tips, and solutions to common pitfalls so you can add links with confidence. Use it as a checklist for solo creators and as a playbook for teams managing approvals, scheduling, and deep links.
How to Add a Link in an Instagram Story: Step-by-Step Guide, Best Practices, and Troubleshooting
Instagram retired the old “Swipe Up” and replaced it with the Link sticker, making it easier—and more flexible—to drive traffic from Stories. If you’re searching for how to add a link in an Instagram Story, this guide walks you through the current workflow, design and analytics tips, common pitfalls, and advanced team processes.
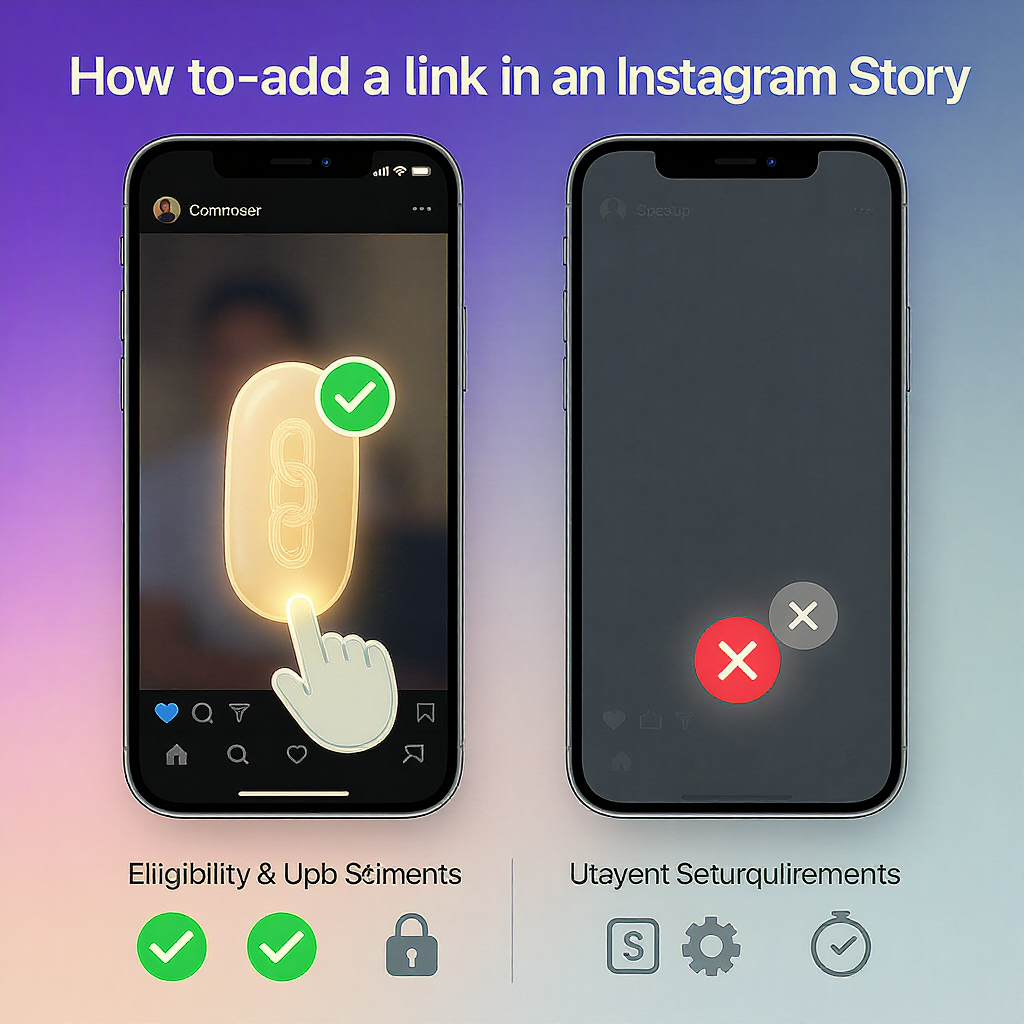
Quick Overview: Link Sticker vs. Swipe Up, Who Can Add Links, and Requirements
- Link Sticker replaced Swipe Up. You now add links via a sticker that you can move, resize, and style—plus add a custom label (CTA).
- Availability: The Link sticker is broadly available to most Instagram account types (Personal, Creator, Business). Some new or restricted accounts may not see it yet.
- Basic requirements:
- Update to the latest Instagram app (iOS/Android).
- Follow Instagram’s Community Guidelines and Terms; violating accounts may lose access.
- Link to safe, allowed domains using HTTPS. Some domains are blocked for security or policy reasons.
Here’s a quick comparison:
| Feature | Link Sticker (Current) | Swipe Up (Deprecated) |
|---|---|---|
| Availability | Broadly available to most account types | Previously limited (e.g., 10k+ followers or verified) |
| Customization | Custom label text, color styles, free placement | Fixed “Swipe Up” UI with limited styling |
| Interactivity | Coexists with other stickers (polls, questions, etc.) | Reduced on-frame flexibility |
| Analytics | Story Insights include link taps | Link actions in Insights but less on-frame flexibility |
Step-by-Step on iOS and Android
The flow is nearly identical on both platforms.
1) Create a Story
- Open Instagram, tap the plus (+) and select Story, or swipe right from the Home feed.
- Capture a photo/video, or upload from your camera roll.
2) Open the Sticker Tray
- Tap the sticker icon (smiley face square) at the top toolbar.
3) Select the Link Sticker
- Tap “Link.”
- Paste your URL into the URL field.
- Optional: Tap “Customize sticker text” to replace the raw URL with a clear call-to-action (e.g., “Shop the drop” or “Read the guide”).
- Tap “Done.”
4) Customize Look and Placement
- Tap the sticker to cycle through color styles for contrast.
- Drag to position the sticker; pinch to resize or rotate.
- Avoid covering UI elements (see placement tips below).
5) Publish
- Add captions, music, or other stickers as needed.
- Tap “Your story,” “Close Friends,” or send as a DM.
Pro tip: After posting, add it to Highlights to make the link persist beyond 24 hours (details below).
Smart Setup Tips: Clean URLs, UTMs, CTA Labels, and Placement
- Use clean, human-readable URLs when possible.
- Track performance with UTM parameters so you can measure traffic and conversions by campaign, medium, and content. Keep them short and consistent.
Example UTM build:
https://example.com/product?utm_source=instagram&utm_medium=story&utm_campaign=summer_launch&utm_content=frame1_linksticker- Write a clear CTA in the sticker label:
- “Get 20% off today”
- “Reserve your seat”
- “Download the checklist”
- Place the sticker:
- Away from the top (username) and bottom (reply bar/send) UI.
- Not too close to screen edges; leave some padding.
- Where your subject doesn’t obscure it.
- Ensure high contrast:
- If your background is bright, choose a dark sticker style (and vice versa).
- Consider adding a semi-transparent shape behind the sticker for legibility.

Design for Conversions: Nudge Viewers to Tap
- Point with intent:
- Use arrows, animated GIF stickers, or motion graphics pointing to the Link sticker.
- Start with a teaser frame; show the sticker in a subsequent frame to build anticipation.
- Write compelling on-screen copy:
- Lead with the value: “Save $10 today,” “See the full recipe,” “Watch the full demo.”
- Keep text large and readable; use sentence case for clarity.
- Pair with interactive stickers to boost engagement:
- Polls and quizzes can increase dwell time, often lifting link taps.
- Countdown stickers for drops or events create urgency.
- Questions sticker followed by a frame answering those questions with the link.
- Keep audio intentional:
- A short VO explaining “Tap the link sticker to…” often increases clarity.
- Add captions for accessibility and sound-off viewers.
Make Links Last: Highlights, Multi-Frame Flows, and Link-in-Bio Hubs
- Add to Highlights:
- After posting, open the Story > Highlight > create or add to an existing Highlight.
- Organize by theme (Shop, Events, Tutorials) for evergreen access.
- Build multi-frame narratives:
- Frame 1: Problem/teaser.
- Frame 2: Value/benefits.
- Frame 3: Social proof (review, stat).
- Frame 4: Clear CTA + Link sticker (repeat the CTA in text and sticker label).
- When you need multiple destinations:
- Direct people to a link-in-bio hub that organizes multiple links.
- Mention it directly: “Need the full list? See link in bio.”
- Consider using a Story sequence where each frame promotes a different link over time.
Measure Performance: Insights, UTMs, A/B Tests, and Organic vs. Paid
Track both in-app behavior and off-platform outcomes.
- Instagram Story Insights:
- Reach, Impressions
- Link taps (sometimes labeled “Link clicks”)
- Forwards, Backs, Exits, Replies
- Analytics with UTMs:
- Sessions, bounce rate/engagement rate, conversions, revenue per session.
- A/B testing:
- CTA text (“Shop now” vs “See the collection”)
- Sticker color and placement
- Time of day and day of week
- Compare organic vs. paid reach:
- Boost a high-performing Story or run a Story ad with the same creative to benchmark.
Key metrics overview:
| Metric | Where to Find | What It Tells You |
|---|---|---|
| Link taps | Instagram Story Insights | How many people tried to visit your URL from the Story |
| Reach / Impressions | Instagram Story Insights | Size of audience and frequency (impressions ≥ reach) |
| Exits / Forwards / Backs | Instagram Story Insights | Viewer retention and content pacing cues |
| Sessions, Conversions | Web Analytics (via UTMs) | Traffic and outcomes on your site/app |
| Cost per result | Ads Manager (if promoting) | Efficiency of paid distribution vs. organic |
Troubleshooting: Missing Link Sticker, Restrictions, Blocked Domains, and Limitations
- Link sticker missing?
- Update the app to the latest version.
- Log out/in; try clearing cache or reinstalling.
- Switch to a Professional account (Creator or Business) if applicable—while not strictly required, some features roll out faster there.
- Check account status: Repeated policy violations or very new accounts may have limited features.
- Regional rollouts or temporary bugs can cause delays.
- Links not opening or errors:
- Use HTTPS and a valid, publicly accessible URL.
- Test the link on iOS and Android; some app deep links behave differently per OS.
- Avoid excessive redirects or interstitials that the in-app browser might block.
- If you rely on shorteners, use reputable services; some are flagged by Meta.
- Blocked or disallowed domains:
- Meta may block certain domains (e.g., malware, policy-violating categories).
- If a domain is blocked, use a compliant landing page or alternate subdomain.
- Verify link health with Meta’s Sharing Debugger (for Facebook) as a quick sanity check.
- Key limitations to know:
- One Link sticker per Story frame.
- Stories expire after 24 hours (unless saved to Highlights).
- You can’t edit the link after posting—delete and repost if needed.
- Some advanced link schemes (custom URI, certain app links) may not open reliably in the in-app browser without proper configuration.
Brand and Compliance Essentials
- Disclosures:
- Use clear, unavoidable disclosures for sponsored or affiliate content (e.g., “Ad,” “#ad,” “Paid partnership”).
- When required, use Instagram’s Branded Content tools (“Paid partnership with…”).
- Policy alignment:
- Follow Instagram’s Community Guidelines and advertising policies.
- Avoid deceptive practices (misleading labels, bait-and-switch).
- Respect privacy laws when collecting data (consent for tracking where required).
- Accessibility:
- Add captions for spoken content.
- Use adequate color contrast and readable font sizes.
- Avoid flashing content that could cause discomfort.
Advanced and Team Workflows: Scheduling, Approvals, Deep Links, and Regional URLs
- Scheduling:
- Professional accounts may schedule Stories via Meta Business Suite where available.
- Keep a content calendar that maps key dates, CTAs, and UTM structures.
- If your account doesn’t have native scheduling, use reminders and drafts.
- Approvals and collaboration:
- Use shared calendars and naming conventions for Story assets and UTMs.
- Implement an approval checklist (legal, brand, accessibility, link QA).
- Maintain a “link library” doc noting destination, purpose, UTMs, and expiration dates.
- Deep links and app links:
- Implement iOS Universal Links and Android App Links so your URLs open the app when installed and fall back to web when not.
- Test deep link behavior inside Instagram’s in-app browser; include web fallbacks and avoid requiring custom URI schemes only.
- Region-specific URLs:
- Route traffic to localized pages (e.g., /us/, /de/) or auto-detect locale.
- Use country- or language-specific UTM tags for clean reporting.
- Consider time zone and local holidays when scheduling Stories.
Example Assets: CTAs and UTM Consistency
CTA label ideas:
"Shop the drop"
"Get 20% off"
"Watch the full demo"
"Reserve your seat"
"Read the full guide"
UTM template:
utm_source=instagram&utm_medium=story&utm_campaign={campaign_name}&utm_content={frame_role_or_variant}Consistent naming helps you A/B test and learn over time.
Quick Checklist: Before You Post
- URL works on mobile, loads fast, and uses HTTPS.
- UTM parameters added and verified.
- Sticker label is clear, benefit-driven, and short.
- Sticker placement avoids UI edges and has good contrast.
- Supporting visuals (arrows, captions, polls) guide attention.
- Compliance check (disclosures, policies, accessibility).
- Post plan: Will you save to Highlights? What’s the follow-up Story frame?
Final Thoughts
If you’re wondering how to add a link in an Instagram Story today, the Link sticker is your go-to: it’s flexible, trackable, and conversion-friendly. Combine clean URLs and strong CTAs with thoughtful design, interactive elements, and robust measurement. Save your best performers to Highlights, and level up with scheduling, approvals, and deep links. With these steps and best practices, you’ll turn Story views into meaningful clicks and conversions.
Summary
- Add links via the Link sticker, then optimize with clear labels, smart placement, and strong contrast.
- Measure results using Story Insights and UTMs, and troubleshoot missing features or blocked domains as needed.
- Extend value with Highlights, multi-frame narratives, and advanced workflows like scheduling, approvals, and deep linking.