How to Add a Photo to IG Story Step-by-Step Guide
Learn step-by-step how to add a photo to your Instagram Story, customize it with text, stickers, and interactive elements to boost engagement.

How to Add a Photo to IG Story: Step-by-Step Guide
Instagram Stories are one of the platform’s most engaging features, enabling users to share photos, videos, and interactive moments that vanish after 24 hours. Learning how to add a photo to IG story is essential whether you want to connect with friends, build a personal brand, or boost your online visibility. This guide provides a clear, step-by-step approach along with expert tips to help your Stories stand out.
---
Understanding Instagram Stories and Their Benefits
Instagram Stories appear at the top of the feed and offer followers quick, immersive updates. They:
- Boost engagement by encouraging immediate interaction.
- Drive traffic through swipe-up links or link stickers (for eligible accounts).
- Increase visibility through Explore and shared location tags.
- Show personality with behind-the-scenes and casual content.
For influencers and brands, Stories provide a dynamic channel to share ephemeral but impactful content, enhancing connections and fostering a loyal audience.
---
Step 1: Update the IG App
Before you create a Story, make sure your Instagram app is up to date. New features arrive via updates, and older versions may lack essential tools.
To update:
- iOS: Open App Store → Search “Instagram” → Tap Update.
- Android: Open Google Play Store → Search “Instagram” → Tap Update.
Having the latest version ensures access to the newest filters, stickers, and interactive options.
---
Step 2: Open Instagram and Access the Stories Camera
You can access the Stories interface two ways:
- Swipe right from your main feed.
- Tap the “+” icon at the top left, then select Story.
This step brings up the camera view, ready to capture or upload media.
---
Step 3: Choose Between Taking a New Photo or Uploading from Camera Roll
Inside the Stories camera:
- Take a new photo: Tap the shutter button at the bottom.
- Upload from camera roll: Swipe up or tap the gallery icon to browse saved images.
This choice allows you to post spontaneous shots or carefully prepared visuals.
---
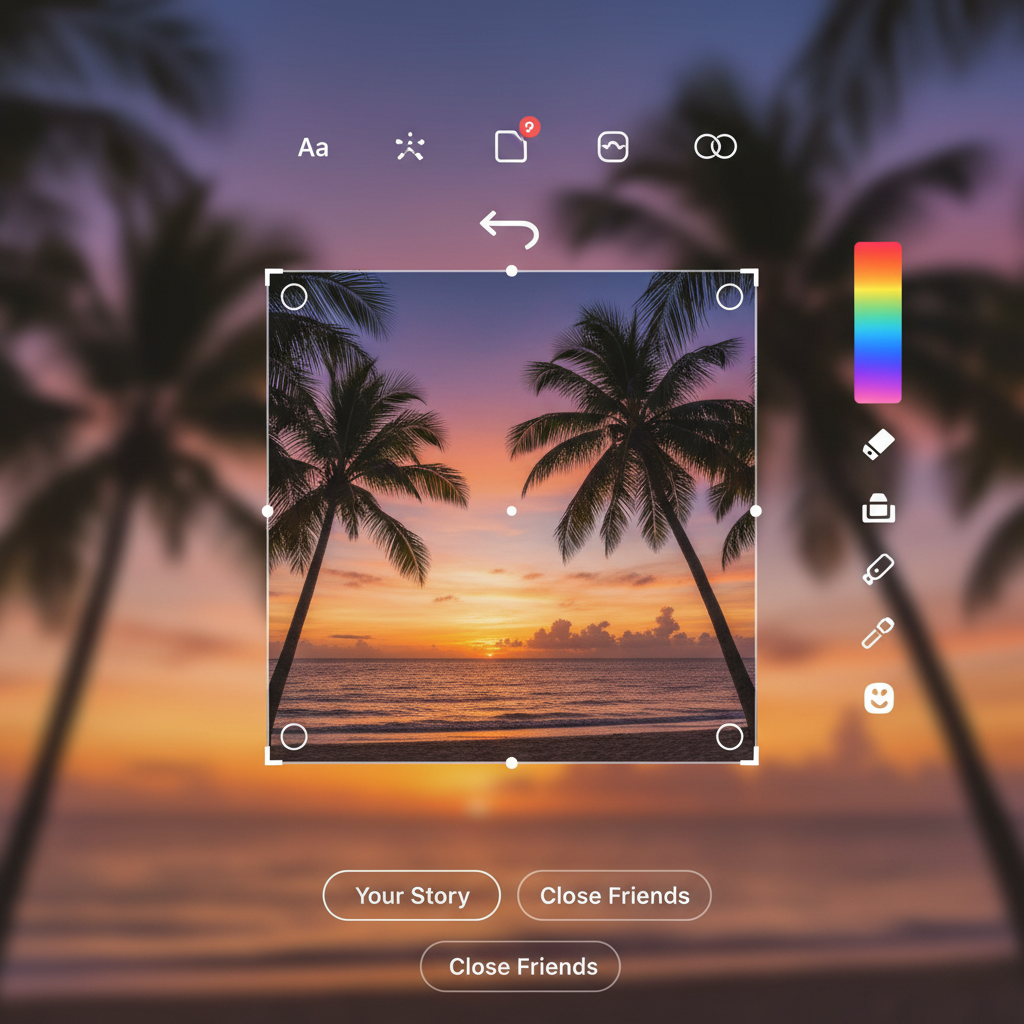
Step 4: Select a Photo and Adjust Size, Position, and Rotation
After selecting your photo:
- Resize: Pinch in/out with two fingers.
- Reposition: Drag the image to adjust framing.
- Rotate: Twist two fingers to change orientation.
Aim to keep key elements clear of UI overlays like usernames and icons.
---
Step 5: Customize with Text, Stickers, and Filters
Personalizing your Story adds flair:
- Tap Aa for text captions, calls-to-action, or quotes.
- Tap the smiley sticker icon for emojis, GIFs, polls, and themed graphics.
- Swipe left or right for creative filters and color shifts.

Creative enhancements can make your photo more expressive and memorable.
---
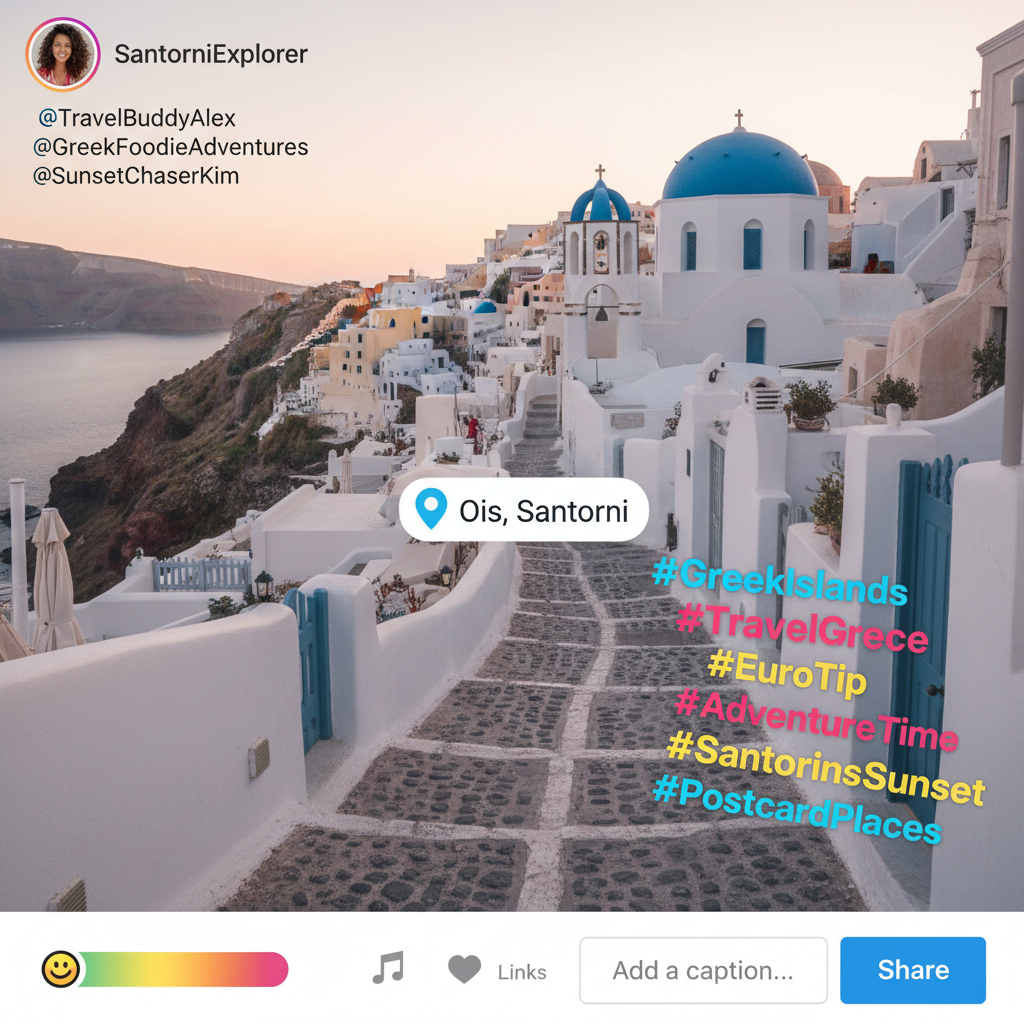
Step 6: Tag People, Add Location, and Use Hashtags
These elements help expand reach:
- Tag people: Stickers → “@Mention” → enter username.
- Location tag: Adds your Story to location-based feeds.
- Hashtags: Increases discoverability in Explore.
Effective tagging makes your Story more visible beyond your followers.
---
Step 7: Apply Interactive Elements Like Polls, Questions, or Music
Engage followers with interactive tools:
- Polls: Invite opinions with a simple choice.
- Questions: Encourage audience Q&A.
- Music: Add a soundtrack by searching for a song title.
Interactivity keeps people returning to your content and fosters direct engagement.
---
Step 8: Preview and Confirm Your Story Before Publishing
When ready:
- Tap Your Story (bottom-left) to share with all followers.
- Or choose Send To for a custom audience.
- Preview design, spelling, and layout before posting.
Once published, your Story is visible for 24 hours unless added to Highlights.
---
Step 9: Save Your Story to Highlights
Highlights preserve your Stories permanently on your profile:
- View your Story before it expires.
- Tap Highlight → create or add to an existing highlight.
Curating Highlights lets followers revisit key content anytime.
---
Troubleshooting Common Issues
Here are common challenges when learning how to add a photo to IG story and their solutions:
| Issue | Possible Cause | Solution |
|---|---|---|
| Upload errors | Poor internet connection | Switch to Wi-Fi or strong mobile signal |
| Blurry quality | Photos compressed during upload | Enable “High-Quality Uploads” in settings |
| Missing stickers/filters | Outdated Instagram app | Update to latest version |
| No location tagging option | Location permissions disabled | Allow IG access to device location |
---
Tips for Keeping Stories Consistent and Engaging
To maintain consistent performance:
- Stick to a theme: Consistent colors and design reinforce branding.
- Post regularly: Keeps your account active and visible.
- Mix formats: Use photos, videos, boomerangs, and text slides.
- Tell a narrative: Create mini story arcs across multiple slides.
- Respond promptly: Engage with reactions and direct messages from viewers.
---
Summary & Next Steps
By mastering how to add a photo to IG story and using Instagram’s customization and interactive features, you can create engaging content that strengthens your digital presence. Regular posting, creative styling, and strategic tagging will help your Stories capture attention and drive follower interaction.
Ready to level up your Instagram game? Follow these steps today, experiment with your creative voice, and watch your engagement grow.