How to Add a Video to My Story on Instagram, Facebook, Snapc
Learn how to add and optimize videos for Instagram, Facebook, and Snapchat stories with editing, tagging, and interactive features to boost engagement.
How to Add a Video to My Story for Maximum Engagement
In the era of fast-scrolling social media, knowing how to add a video to my story can be a game-changer for anyone aiming to boost audience engagement. Stories — on Instagram, Facebook, or Snapchat — are short-lived but highly addictive snippets of content that keep followers coming back for more. Videos enhance these stories by delivering movement, emotion, and interactivity that static images simply can’t match. This guide walks you step-by-step through adding videos to stories and optimizing them for maximum impact.

Short videos let you connect in real time, add personality to your brand, and turn everyday moments into compelling narratives.
---
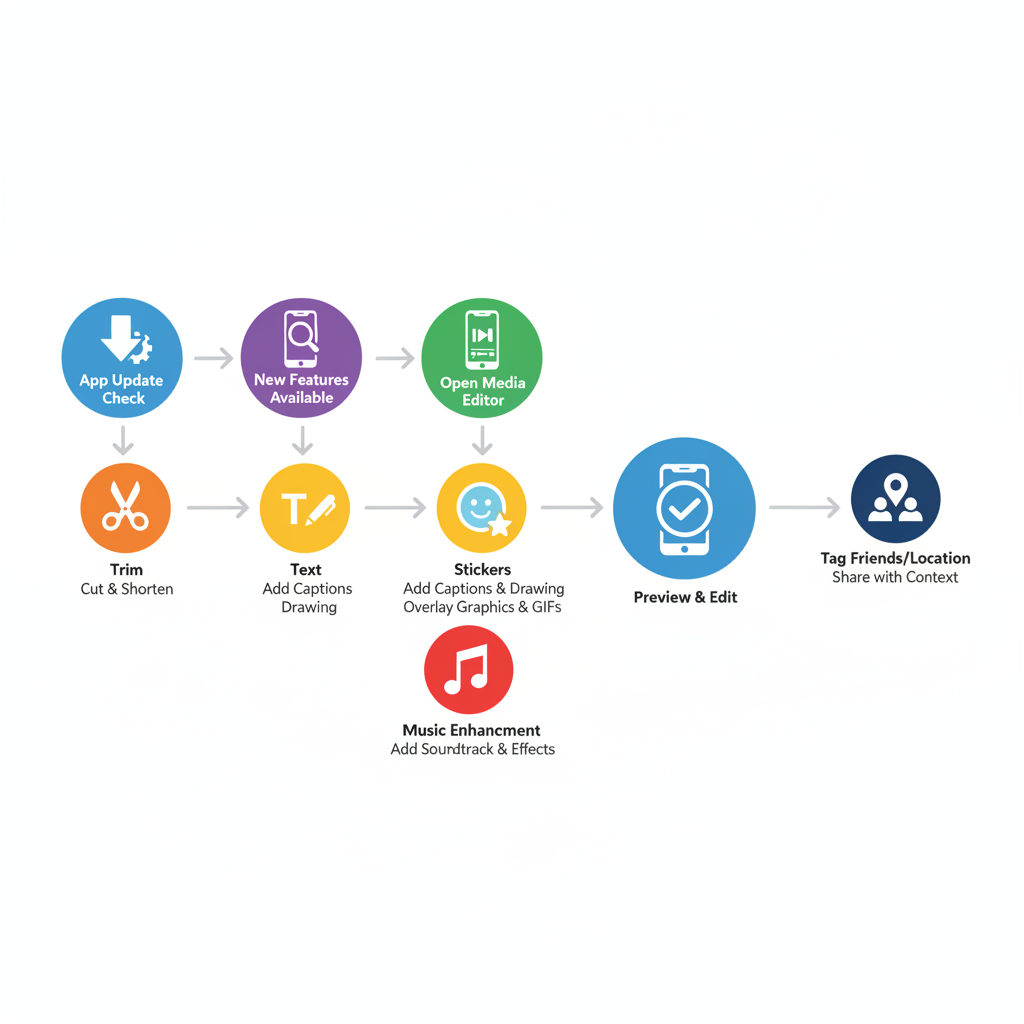
Step 1: Check for App Updates
Before uploading a video, ensure your social media app is updated to the latest version. Updates often bring new story features such as music tracks, AR filters, and enhanced editing tools.
- iOS: Open the App Store, go to the app’s page, and tap “Update” if available.
- Android: Visit Google Play Store, open the app listing, and select “Update.”
Staying current minimizes compatibility issues and unlocks new creative options.
---
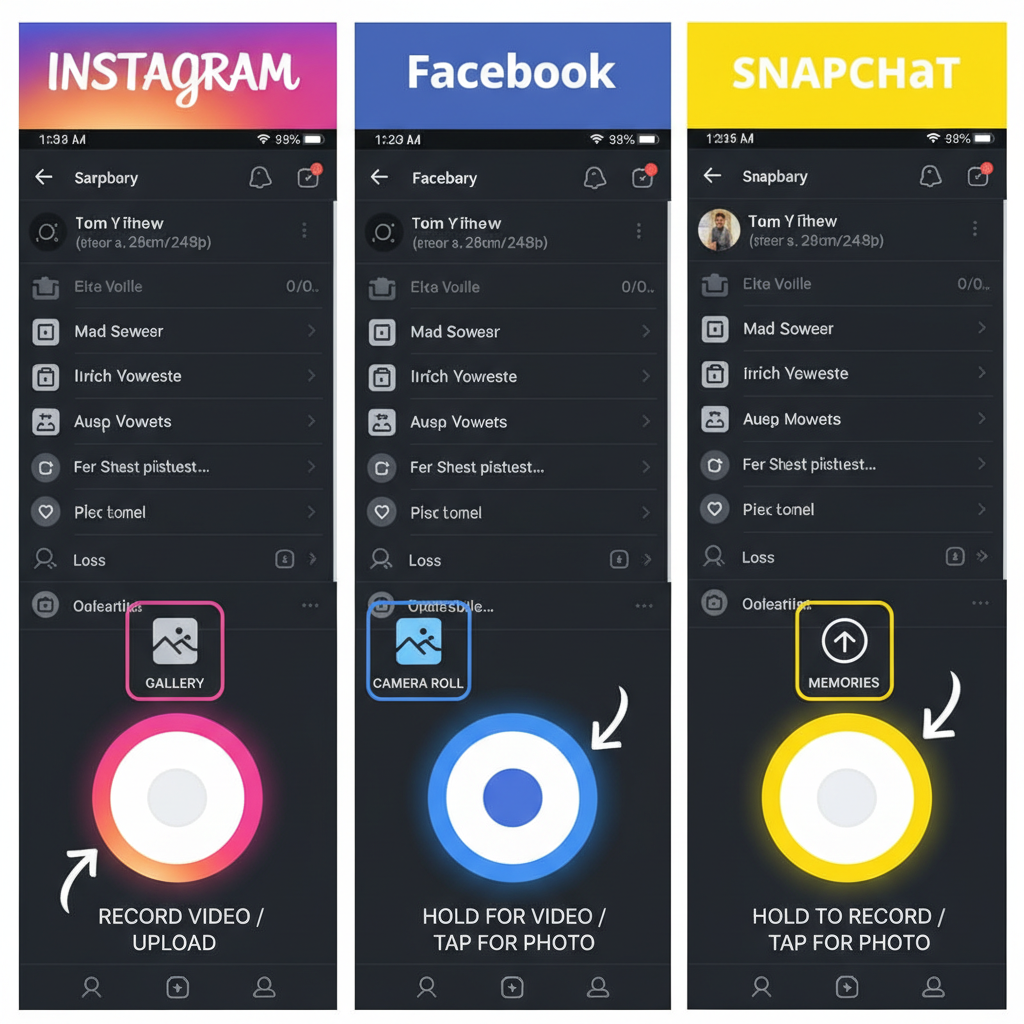
Step 2: Navigate to the Story Creation Screen
Open Instagram, Facebook, or Snapchat and head to the story creation screen:
- Instagram: Swipe right from the feed or tap “+” on your profile image.
- Facebook: Use the “Create Story” option at the top of your feed.
- Snapchat: Tap the circular camera icon.
From here, you can record content directly or upload from your gallery.
---
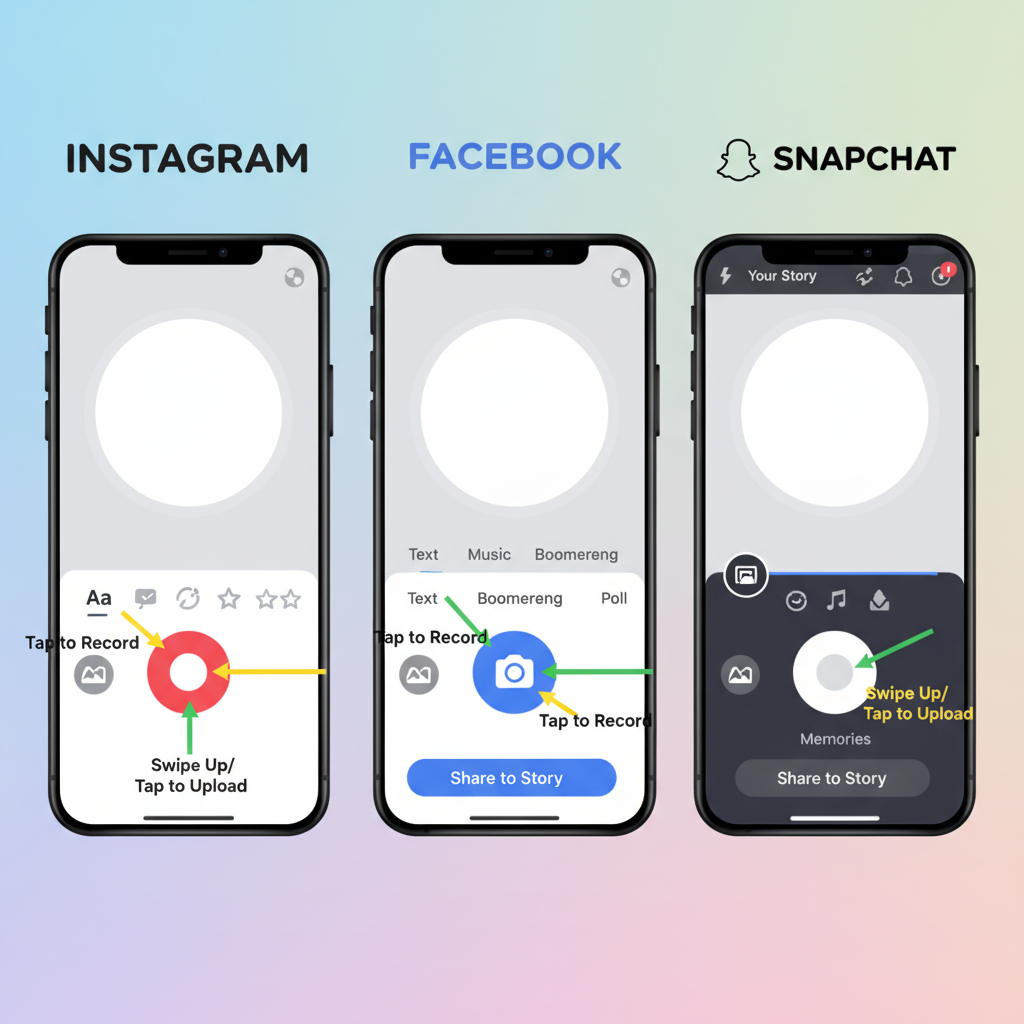
Step 3: Record a Video Within the App
Use the platform’s built-in camera for seamless story uploads:
- Hold the capture button to record continuously.
- Release to stop recording.
- Add live filters or AR effects while filming.
In-app recording ensures correct formatting and instant access to editing features.
---
Step 4: Upload a Pre-Recorded Video
For previously shot footage:
- Tap the gallery/upload icon in the story interface.
- Pick your video clip and adjust length or size as prompted.
Ideal for polished edits, promotional material, or curated highlights with consistent branding.
---
Step 5: Enhance Your Video with Trim, Text, Stickers, and Music
You can make your video story pop by using built-in editing tools:
- Trim: Remove unnecessary parts.
- Text: Add captions, quotes, or promotional copy.
- Stickers: Decorate with emojis, GIFs, or themed frames.
- Music: Select tracks from the platform’s library.
These enhancements help craft a more engaging visual experience.
---
Step 6: Keep Video Within Each Platform’s Limits
Different apps have specific time constraints for story videos:
| Platform | Max Story Video Length | Notes |
|---|---|---|
| 15 seconds per story segment | Longer videos auto-split into clips | |
| 20 seconds | Duration may vary by version | |
| Snapchat | 60 seconds (split into six 10s snaps) | Automatic segmentation |
Knowing limits helps you tailor content for clarity and viewer retention.
---
Step 7: Tag Friends or Add Location
Increase reach organically using:
- Tags: Mention users to encourage re-shares.
- Location: Geotag for local discoverability.
These elements make your story more findable and relatable.
---
Step 8: Add Interactive Features for Engagement
Interactive tools convert viewers into participants:
- Polls for quick voting.
- Question boxes for collecting feedback.
- Quizzes for entertainment and learning.
The more interactive, the more memorable your story becomes.
---
Step 9: Proof Your Story Before Posting
Always preview your video:
- Check visuals, filters, and text placement.
- Ensure audio matches the video.
- Confirm that stickers don’t hide key parts.
A quick review prevents avoidable errors.
---
Step 10: Set Your Privacy and Audience
Control who sees your story using:
- Public for maximum reach.
- Friends/Followers only for selective sharing.
- Custom lists for targeted audiences.
Adjust these via the platform’s privacy settings to match your goals.
---
Step 11: Post and Monitor Engagement
After posting, track how your content performs:
- Total views.
- Replies or direct messages.
- Tap-through rates for multi-part stories.
Insights guide future video strategy.
---
Step 12: Elevate Content with Third-Party Editing Apps
Professional editing apps like InShot, CapCut, or Adobe Premiere Rush allow:
- Custom transitions.
- Color correction.
- Advanced text animations.
- Aspect ratio adjustments.
Such tools enable higher production quality and distinctive branding.
---
Step 13: Troubleshoot Common Problems
Upload Errors
Fix: Switch to reliable Wi-Fi or check your mobile data connection.
Unsupported Formats
Fix: Export videos in MP4 or other compatible formats.
Audio-Video Sync Issues
Fix: Align tracks during editing and preview thoroughly before upload.
---
Conclusion: Consistency Builds Impact
Mastering how to add a video to my story lets you share dynamic, audience-focused content that stands out. By staying updated, optimizing length, and using interactive tools, you not only entertain but also foster community. Commit to regular posting and creative experimentation, and your stories will become a powerful driver of engagement and growth.
Ready to captivate your followers? Start adding videos to your stories today and watch your social presence flourish.