How to Add or Update Your Email on Instagram
Learn how to add or update your email on Instagram for security, recovery, and communication, including mobile, desktop, and business account steps.

How to Add or Update Your Email on Instagram for Better Security and Communication
Adding a valid email to Instagram is essential for account security, recovery, and professional communication. Whether you’re a casual user or running a business account, having the correct email linked ensures you can reset your password, receive security alerts, and let clients or followers reach you. This guide covers how to add email on Instagram, update it on mobile or desktop, enable a public contact option, fix common issues, and follow best practices for privacy.
---
Why Adding Your Email to Instagram Is Important
When it comes to keeping your Instagram account safe and functional, adding a valid email address is one of the most crucial steps. Your email acts as both a recovery option and a communication channel between you and Instagram.
Adding your email can:
- Boost Security: Helps with account recovery in case of forgotten passwords or hacking attempts.
- Enable Communication: Allows Instagram to send you security notifications, login alerts, and policy updates.
- Provide Business Access: For business or creator accounts, it enables potential clients, brands, or followers to reach you via a contact button.
If you skip or avoid setting up an email, you may face difficulty regaining access to your account if something goes wrong.
---
Private Email vs. Public Contact Option
Instagram uses email in two different contexts:
- Private Email (Account Recovery)
- This is the email linked privately to your account. Only you and Instagram can see it. It’s essential for:
- Resetting your password.
- Receiving security verification codes.
- Notifications about suspicious login attempts.
- Public Contact Option (Business/Creator Accounts)
- With a professional account, you can display a Contact button in your profile, letting followers directly email your business.
- This email will be visible to others, so use a dedicated business email.
---
How to Check if Your Email Is Already Linked
Before adding or changing your email, verify whether you already have one linked.
On Mobile App:
- Go to your profile.
- Tap Menu (☰) → Settings and Privacy.
- Select Account → Personal Information.
- Check the Email Address field.
On Desktop:
- Click your profile picture → Settings.
- Go to Edit Profile.
- Look for the Email field.
If the field is empty or outdated, follow the steps below to update it.
---
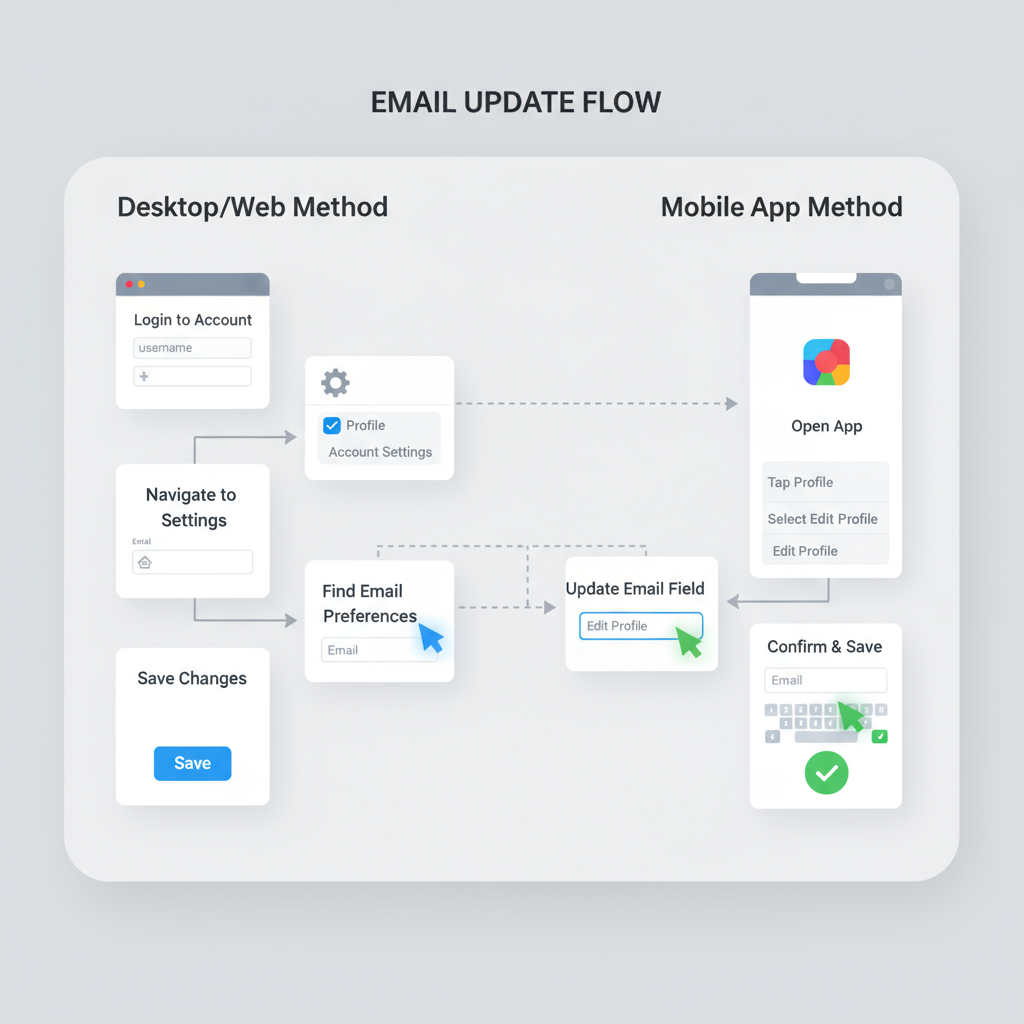
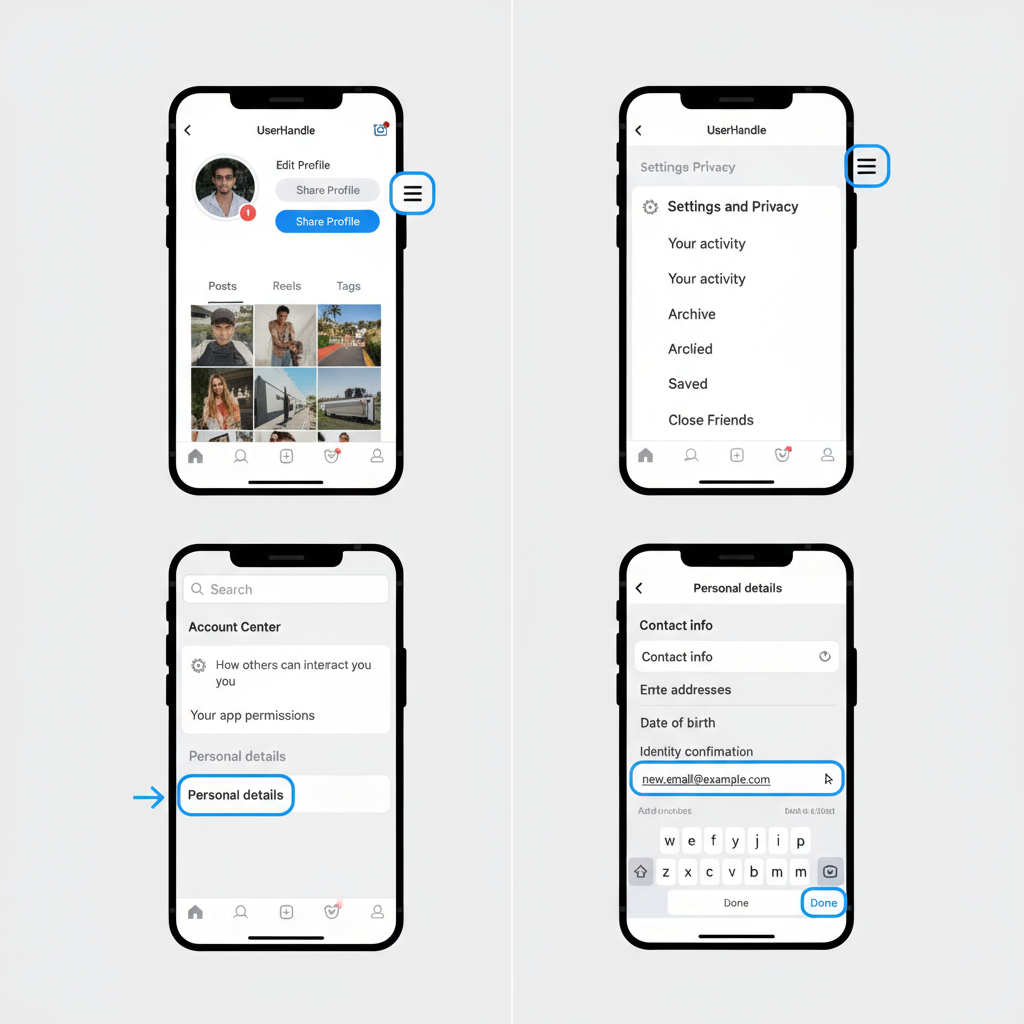
How to Add or Update Email via Instagram Mobile App
Adding your email on the mobile app is quick and straightforward.
Step-by-Step Instructions
- Open the Instagram App
- Ensure you’re logged in.
- Go to Your Profile
- Tap your profile icon in the bottom right.
- Access Settings
- Tap the menu (☰) in the top right → Settings and Privacy.
- Open Account Info
- Tap Account → Personal Information.
- Add/Update Your Email
- Enter your correct email address. If replacing, simply overwrite the current one.
- Save and Confirm
- Instagram will send a confirmation email to verify the change.
- Open your inbox and click the verification link.
---
How to Add or Update Email via Instagram Desktop/Web Version
The process on the web is similar to mobile.
- Log In to Instagram.com using your username and password.
- Open Profile Settings by clicking your avatar in the top right.
- Choose Settings → Edit Profile.
- Locate the Email field.
- Add or update your email, then click Submit.
- Watch for a confirmation email in your inbox and validate the change.
---
Enabling Email as a Public Contact Button (Business/Creator Accounts)
If you have a business or creator account, you can make your email visible as a Contact button.
To Enable on Mobile:
- Go to your profile.
- Tap Edit profile → Contact options.
- Add your Business Email Address.
- Toggle visibility so it appears publicly.
- Save changes.
This lets followers email you with one tap. Avoid using your personal email — create a dedicated professional address.
---
| Setting | Private Email | Public Contact Email |
|---|---|---|
| Visibility | Only you/Instagram | Visible to anyone visiting profile |
| Primary Purpose | Account recovery, security | Customer or follower communication |
| Best Practice | Use personal email, secured | Use dedicated business email |
---
Troubleshooting Common Instagram Email Issues
Sometimes adding or updating your email doesn’t go as planned. Here’s how to fix popular issues.
1. Not Receiving Confirmation Email
- Check Spam/Junk folders.
- Ensure email address is typed correctly.
- Wait a few minutes — sometimes delivery is delayed.
- Try resending from Instagram’s settings.
2. Email Already in Use
- You may have used it on another Instagram account.
- Log into the other account and change its email first.
- If you can’t access it, contact Instagram Support.
3. Verification Link Not Working
- Ensure you open the link from the same device as your login session.
- Request a new verification email if expired.
---
Email Security Tips for Instagram Users
Your email is a gateway to your Instagram — protect it wisely:
- Avoid Publicizing Personal Email: Keep your recovery email private; use a separate public email for business.
- Use a Strong, Unique Password: Avoid reusing passwords from other accounts.
- Enable Two-Factor Authentication (2FA): Adds another layer of protection if your password is compromised.
- Update Email Regularly: If you change email providers or get hacked, update Instagram immediately.
- Watch for Phishing Scams: Instagram will never ask for your password via email.
---
How to Remove or Change Email Later
Changing or removing your email is straightforward.
On Mobile App:
- Go to Settings and Privacy → Account → Personal Information.
- Tap the email field.
- Remove or update as needed.
- Save and verify changes.
On Web:
- Go to Edit Profile within Settings.
- Edit or clear the Email field.
- Submit and confirm.
Remember — having no email linked is risky. Always maintain a valid, accessible address.
---
Summary and Best Practices
Keeping your Instagram email updated ensures you:
- Have a secure way to recover your account.
- Can communicate with clients or followers (for business/creator accounts).
- Receive important security alerts instantly.
Best Practices:
- Always verify your email after updating it.
- Use separate emails for recovery and public contact.
- Implement 2FA for maximum security.
- Periodically review your personal information in Instagram settings.
By following these steps for updating Instagram email settings, you’ll stay connected, recoverable, and secure — ensuring your presence remains uninterrupted and professional.
Ready to secure your account? Update your email on Instagram now to protect your profile and keep communication flowing.