How to Add Photo in IG Story with Creative Edits
Learn how to add a photo to your Instagram Story and enhance it with creative edits, including text, stickers, filters, layouts, and music for impact.
How to Add Photo in IG Story with Creative Edits
Instagram Stories are one of the most engaging ways to share moments, promote ideas, and boost your personal or brand presence. Understanding how to add photo in IG story — and enhancing it with creative edits — can make your content far more attention-grabbing. This step-by-step guide will lead you through the process, from opening the app to saving your story in Highlights, ensuring every frame reflects your unique style.

---
Open Instagram App and Access the Story Camera
To begin, open the Instagram app on your phone. Once signed in:
- Tap your profile picture at the top left corner.
- Alternatively, swipe right from your feed to open the story camera instantly.
- You'll enter the Story creation interface, ready for capturing or adding content.
This quick access helps you document moments as they happen.
---
Choose Between Taking a New Photo or Selecting from Your Gallery
The story camera offers two main options:
- Take a new photo
- Tap the white circle button to snap an image using your front or rear camera.
- Select from gallery
- Swipe up or tap the gallery icon in the lower left to add a photo taken earlier.
Gallery selection is ideal for curated or pre-edited images.
---
Adjust Photo Size, Crop, or Zoom for the Best Fit
A well-fitted image enhances impact. Stories use Instagram’s vertical 9:16 aspect ratio:
- Pinch in/out to zoom.
- Drag to reposition.
- Use crop tools to remove distractions.
Paying attention to composition ensures the main subject stands out.
---
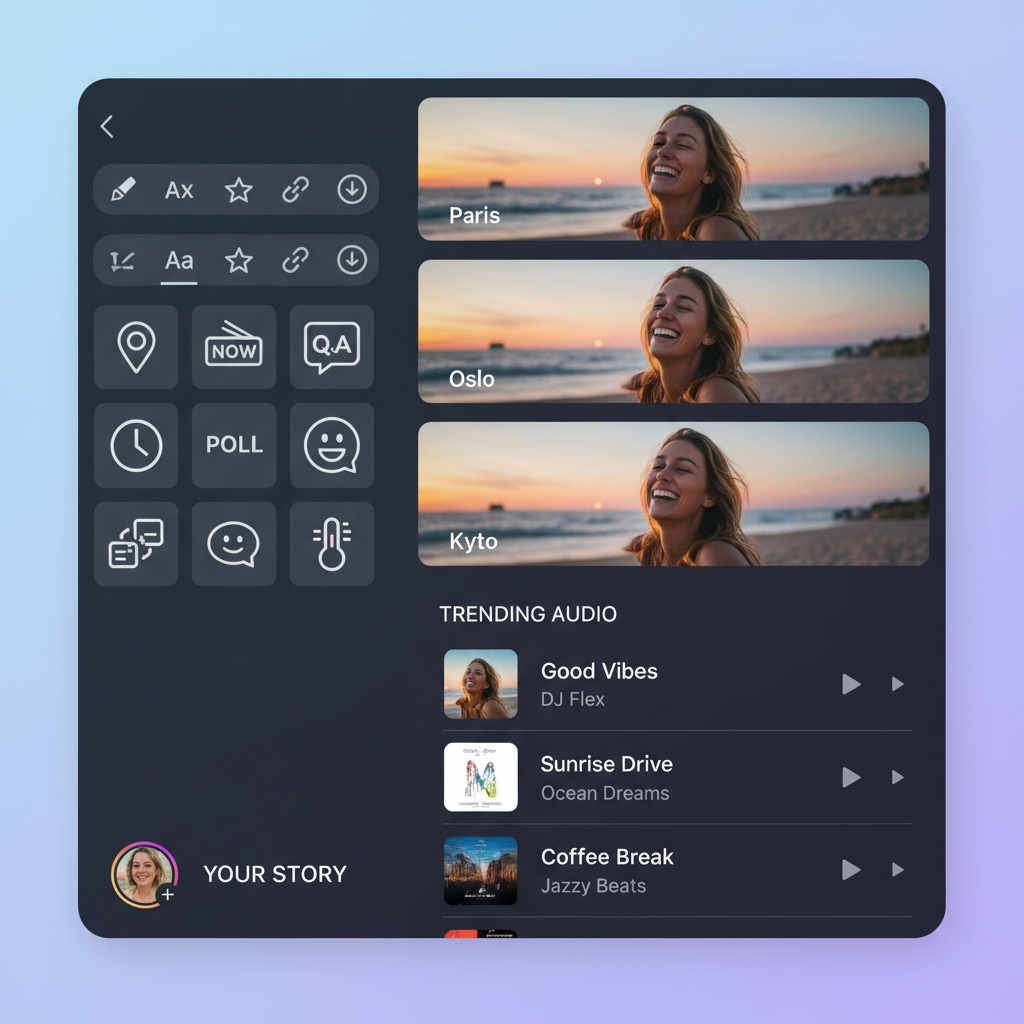
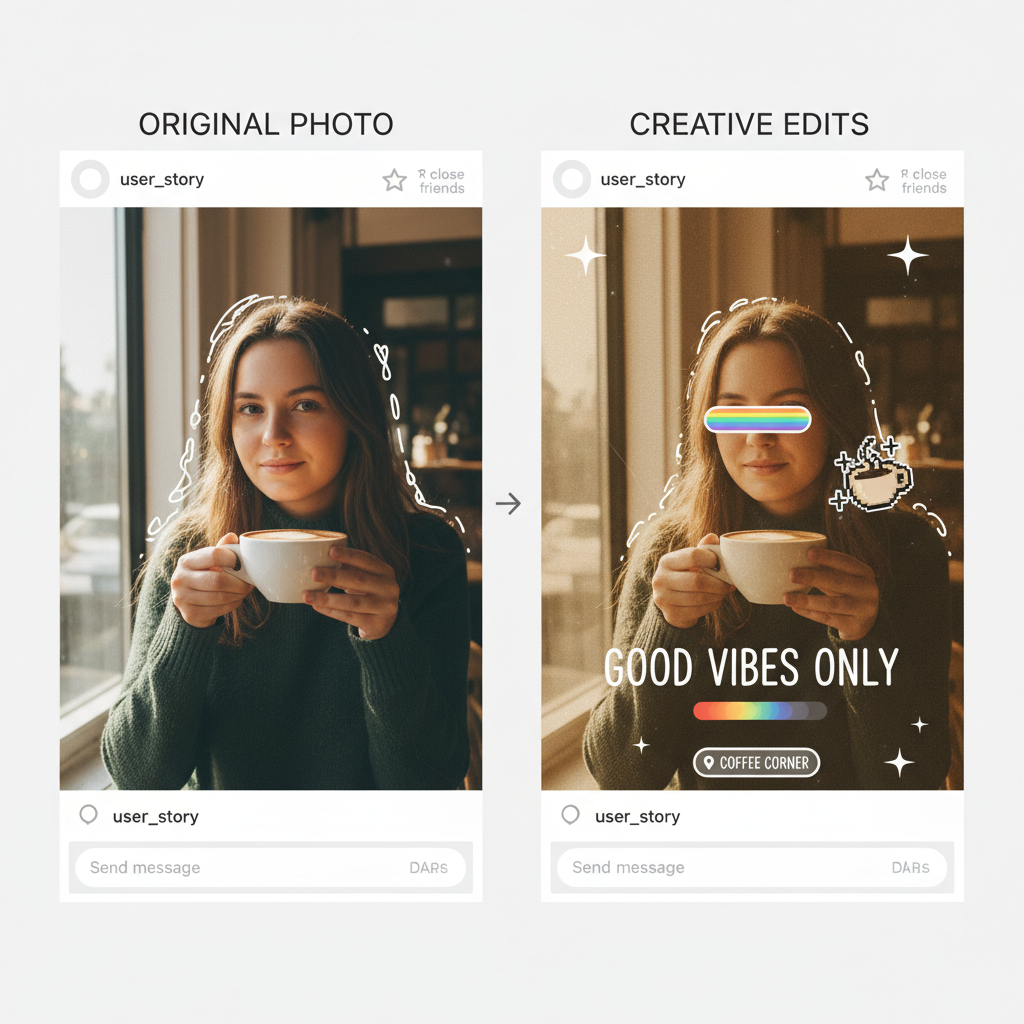
Add Text Overlays, Stickers, GIFs, and Emojis
Boost engagement with visual elements:
- Text overlays: Tap “Aa,” pick fonts and colors to add context or captions.
- Stickers: Access interactive or decorative stickers via the smiley icon.
- GIFs: Search and insert trending animations.
- Emojis: Add playful or expressive emojis to communicate emotion.
> Tip: Resize and rotate elements for balanced placement within the frame.
---
Apply Filters and Special Effects
Instagram’s filters and AR effects can be powerful:
- Swipe left/right on the preview to explore filters.
- Tap the face icon for augmented reality features such as sparkles or unique tones.
Applied purposefully, filters can enhance colors, evoke moods, and create consistent branding.
---
Tag Friends, Add Location, and Insert Hashtags
Extend reach and engage your network:
- Tag friends: Type `@username` or use the Mention sticker.
- Location sticker: Share where you were when taking the shot.
- Hashtags: Use the hashtag sticker to join broader conversations.
Pro Tip: Relevance boosts discoverability without clutter.
---
Add Music or Audio Clips
Audio can set the emotional tone for your Instagram Story photo:
- Select the music sticker.
- Search for desired tracks.
- Choose a 5–15 second segment.
- Adjust the lyrics or visual style display.
Matching audio to visuals enhances the immersive feel.
---
Use Multiple Photo Layouts
Create dynamic content with Layout mode:
- Tap the grid icon in story mode.
- Pick a template with 2–6 slots.
- Combine live captures and gallery images.
Layouts are great for thematic collages or side-by-side comparisons.

---
Preview and Refine Before Publishing
Before going live:
- Tap the preview arrow to check for errors.
- Adjust text, stickers, placement, and cropping.
- Ensure your visuals align with your intended narrative.
Spending a moment to refine increases professionalism.
---
Post to Your Followers or Close Friends List
When ready:
- Tap “Your Story” to share with all followers.
- Select “Close Friends” for a smaller audience.
Privacy tip: This option lets you limit who sees more personal updates.
---
Save Story to Highlights
Stories expire after 24 hours, but Highlights preserve them:
- Open your posted story.
- Tap “Highlight” and create a new category or add to existing.
Use Highlights for evergreen collections like Q&As or tutorials.
---
Troubleshoot Common IG Story Issues
Here’s a quick solutions chart for frequent problems:
| Issue | Possible Cause | Solution |
|---|---|---|
| Upload error | Weak internet connection | Switch to Wi-Fi or a stronger network and retry |
| Blurry images | Low resolution photo or compression | Use high-resolution images and avoid excess zoom |
| Music not available | Location restrictions | Try royalty-free tracks or check Instagram’s audio library |
| Missing stickers/tools | Outdated app version | Update to the latest Instagram version |
---
Final Thoughts and Next Steps
Mastering how to add photo in IG story with creative edits is more than just hitting “post.” With careful attention to layout, interactive elements, and personalization, you can produce stories that captivate and connect. Whether for personal or business use, each creative touch builds audience loyalty and boosts engagement.
Quick Recap Steps:
- Launch Instagram and open the story camera.
- Capture or select a photo.
- Adjust size, crop, and composition.
- Add text, stickers, GIFs, and emojis.
- Apply filters/effects.
- Tag friends, add location and hashtags.
- Include music for emotional impact.
- Explore multi-photo layouts.
- Preview for polish.
- Post to your audience.
- Save in Highlights for longevity.
- Troubleshoot issues when needed.
---
Want to keep creating standout content every day? Follow these tips and start experimenting with your next Story — your audience will notice the difference.