How to Add Reels to Your Instagram Story Step-by-Step
Learn how to share Instagram Reels to your Story with step-by-step instructions, customization ideas, and tips to boost reach and audience engagement.
How to Add Reels to Your Instagram Story Step-by-Step
Instagram is a powerful platform for sharing visual content, and two of its most engaging formats — Reels and Stories — can work together to significantly expand your audience. If you’ve been wondering how to add Reels to your Instagram Story, this comprehensive step-by-step guide will walk you through the process, from understanding the difference between these features to practical tips for customization, troubleshooting, and boosting engagement.

---
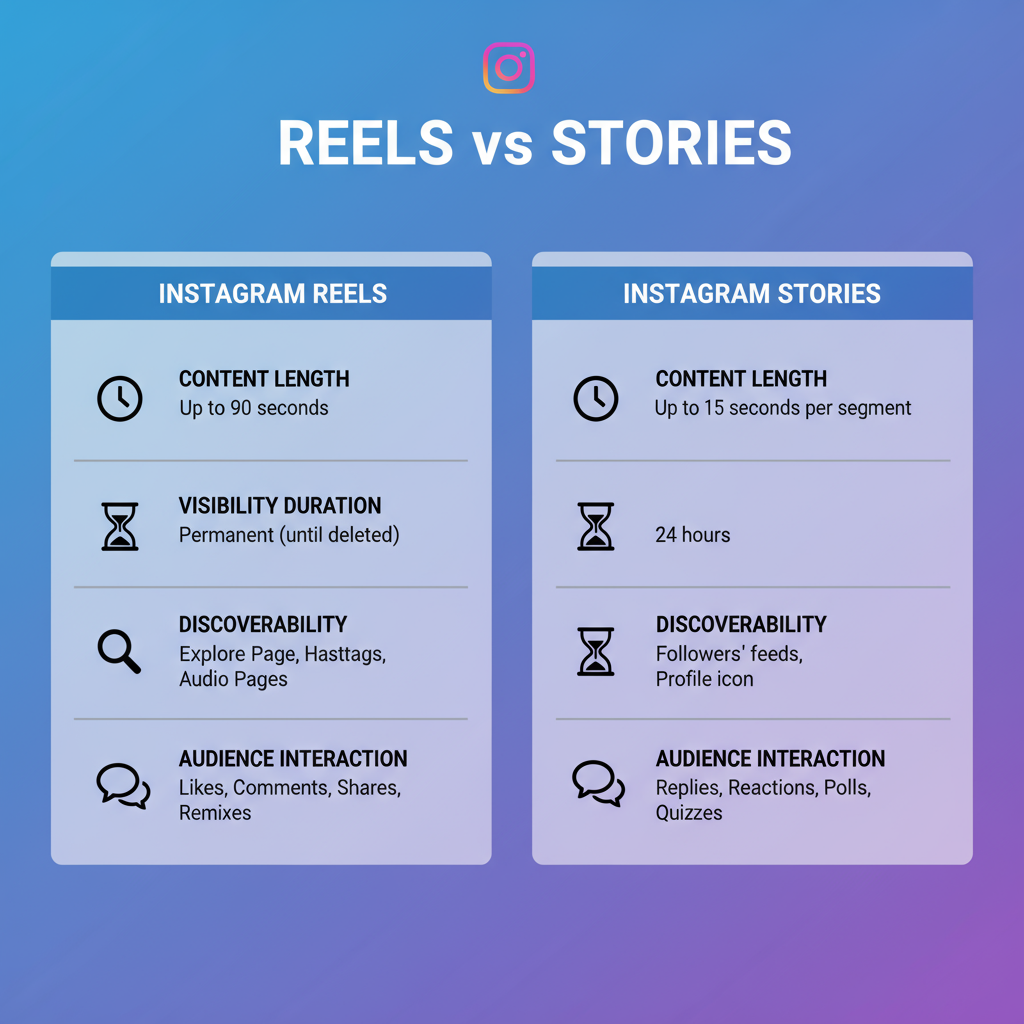
Understanding Instagram Reels and Stories
Before diving into the tutorial, it’s important to understand how Reels and Stories work and what makes them unique.
Instagram Reels
- Format: Short, vertical videos up to 90 seconds.
- Purpose: Discoverability — shown in Explore and to non-followers.
- Editing tools: Music, AR effects, multi-clip editing, speed controls.
Instagram Stories
- Format: Vertical images or videos up to 15 seconds per frame.
- Purpose: Timely, casual updates that vanish after 24 hours unless saved to Highlights.
- Editing tools: Stickers, GIFs, text, polls, filters.
Key Difference: Reels are designed for longevity and discovery; Stories are fleeting updates aimed at driving authentic, immediate engagement with your followers.
---
Why Sharing Reels to Stories Increases Reach and Engagement
Adding a Reel to your Story strategically blends the wide reach of Reels with the personal engagement of Stories.
- Boosts visibility: Reaches followers who may not browse your Reels tab.
- Cross-channel promotion: Drives viewers from Stories to your Reel for the full experience.
- Encourages interaction: Story stickers, polls, or questions incentivize responses.
- Matches varying attention spans: Stories are quick bites; Reels are deeper content.
---
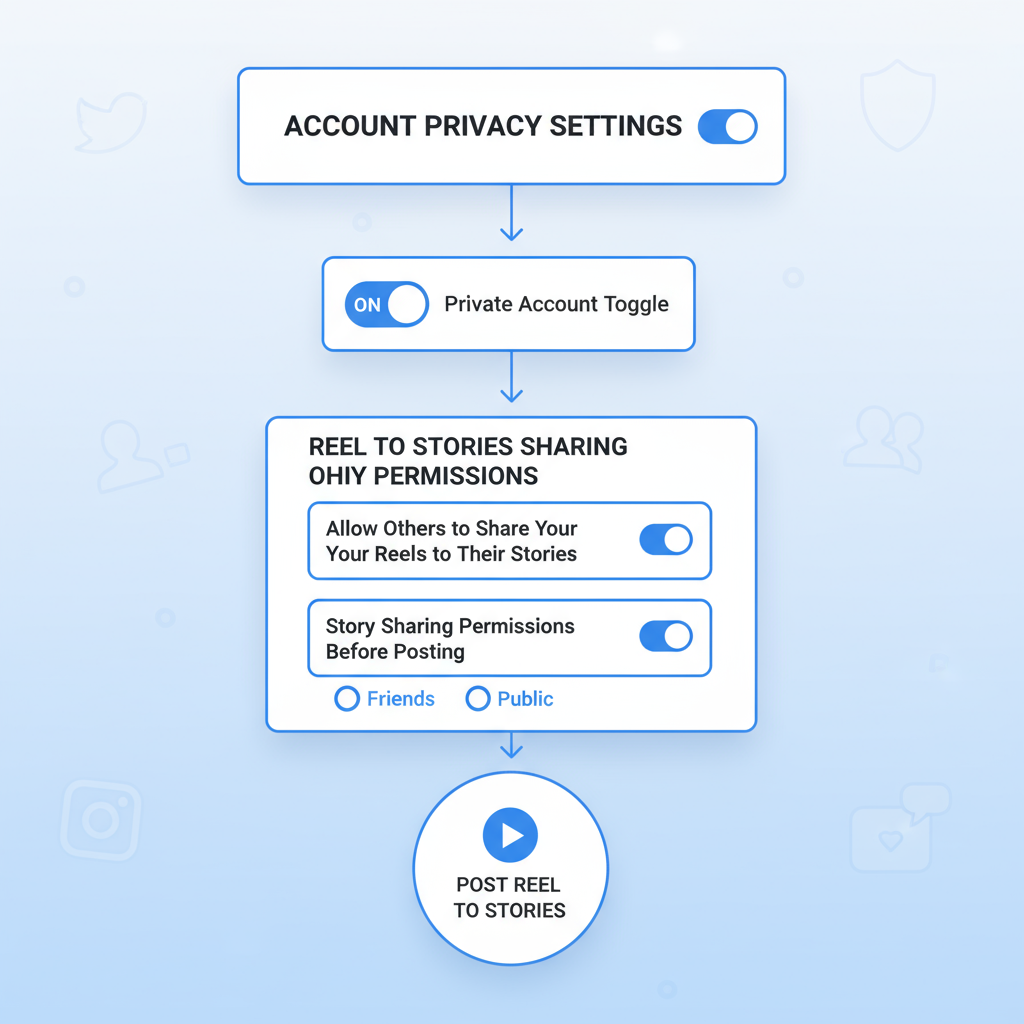
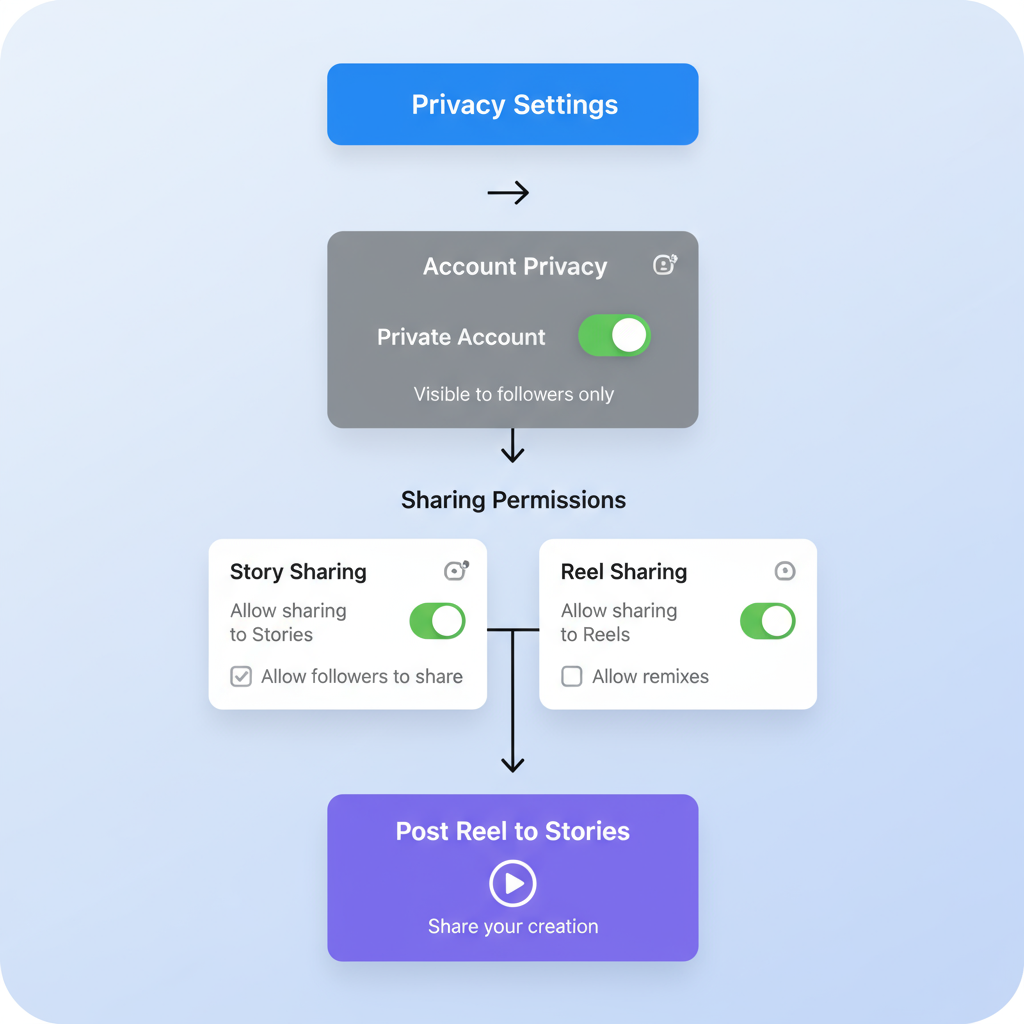
Check Privacy Settings Before Sharing
Not all Reels are shareable, and permissions depend on account privacy.
For Your Own Reels:
- Set your account to Public for maximum exposure.
- If private, only followers can see shared content.
For Someone Else’s Reels:
- The creator must have a public account and enable sharing in settings.
- Some disable “Allow Sharing to Stories” entirely.
To Check Sharing Permission:
- Open the Reel.
- Tap the paper airplane Share icon.
- If “Add Reel to Your Story” isn’t listed, sharing is turned off.
---
Method 1: Share Your Own Reel to Story (Step-by-Step)
Follow these steps to share your own Reel:
- Open Instagram and go to your profile.
- Tap the Reels tab (clapperboard icon).
- Choose the Reel you want to share.
- Tap the Share (paper airplane) icon.
- Select “Add Reel to Your Story”.
- Customize with stickers, filters, or text.
- Publish to Your Story or Close Friends.
> 💡 Pro Tip: A short, action-oriented call-to-action like “Tap to watch full Reel” improves click-through rates.
---
Method 2: Share Someone Else’s Reel to Story (Step-by-Step)
To share another creator’s Reel:
- Open and watch the Reel.
- Tap the Share icon.
- Tap "Add Reel to Your Story" (if option appears).
- Customise — add arrows or captions.
- Post it.
⚠️ Respect intellectual property — always tag and credit the original creator.
---
Customize Your Story When Sharing a Reel
Enhance engagement by adding interactive and eye-catching elements.
Options include:
- Stickers: Polls, quizzes, questions, location tags.
- Text overlays: Share your personal take or highlight key points.
- Drawing tools: Arrows, doodles, or underlines to guide viewers.
- Music & sound: You may swap or mute audio for effect.
---
Tips to Make Shared Reels More Engaging in Stories
- Add context: Explain why the Reel matters to your audience.
- Use a teaser: Hide part of the content with a sticker to spark curiosity.
- Relevant hashtags: Increase odds of appearing in Story searches.
- Engage directly: Ask your viewers a question about the content.
- Post at optimal times: Use Insights to find when your audience is most active.
---
Common Issues When Sharing Reels to Stories (and Fixes)
| Issue | Possible Cause | Fix |
|---|---|---|
| “Add Reel to Your Story” missing | Private account or sharing disabled | Check creator’s privacy settings |
| Audio missing | Copyright restrictions | Re-add music from Instagram’s audio library |
| Blurred video | Low quality upload or slow network | Use high-resolution video and stable connection |
| Story not posting | App glitch or outdated Instagram | Update or reinstall the app |
---
Best Practices for Maximizing Reel-to-Story Performance
- Hook early: Capture attention in the first 3 seconds.
- Direct traffic: Use captions like “Watch the full Reel ↗”.
- Mix formats: Balance shared Reels with original Story posts.
- Track Insights: Look at completion rates and taps forward/back.
- Experiment often: Try new sticker placements or CTAs.
---
Final Checklist for Sharing Reels Effectively
Go through this list before posting:
- ✅ Checked privacy permissions.
- ✅ Picked an engaging Reel.
- ✅ Added interactive or contextual elements.
- ✅ Included a clear CTA.
- ✅ Posted at peak user activity times.
- ✅ Measured performance after posting.
---
Summary & Next Steps
Sharing Instagram Reels to your Story is an effective way to increase visibility, drive engagement, and connect different audience segments. By understanding privacy settings, perfecting customization, and applying these best practices, you can make each Reel perform better while strengthening your overall Instagram strategy.
Ready to grow your Instagram reach? Start sharing your best Reels to Stories today — experiment, track results, and refine your approach for maximum impact.


