How to Build a Responsive, Customizable Sidebar with react-mui-sidebar

Building a Responsive Sidebar with `react-mui-sidebar`
In modern web development, a well-crafted sidebar can greatly improve user experience by offering easy navigation and quick access to key features.
`react-mui-sidebar` — built on top of Material-UI (MUI) — is a powerful React package that makes it simple to create responsive, customizable sidebars.
In this guide, you'll learn:
---
Table of Contents
- Prerequisites
- What is MUI?
- Features of react-mui-sidebar
- Why Choose react-mui-sidebar?
- Getting Started
- Step 1: Install the package
- Step 2: Import Components
- Step 3: Configure Routing
- Step 4: Initialize the Sidebar
- Step 5: Add a Logo
- Step 6: Create a Menu
- Step 7: Add Submenus
- Wrapping Up
---
Prerequisites
Before starting, make sure you have:
- Basic React knowledge — components, props, state, JSX
- Familiarity with React Router or Next.js App Router
- Understanding of MUI — theming, components, styling
- NPM or Yarn experience — package installation and dependency management
- Basic CSS/layout skills — flexbox, responsive widths
---
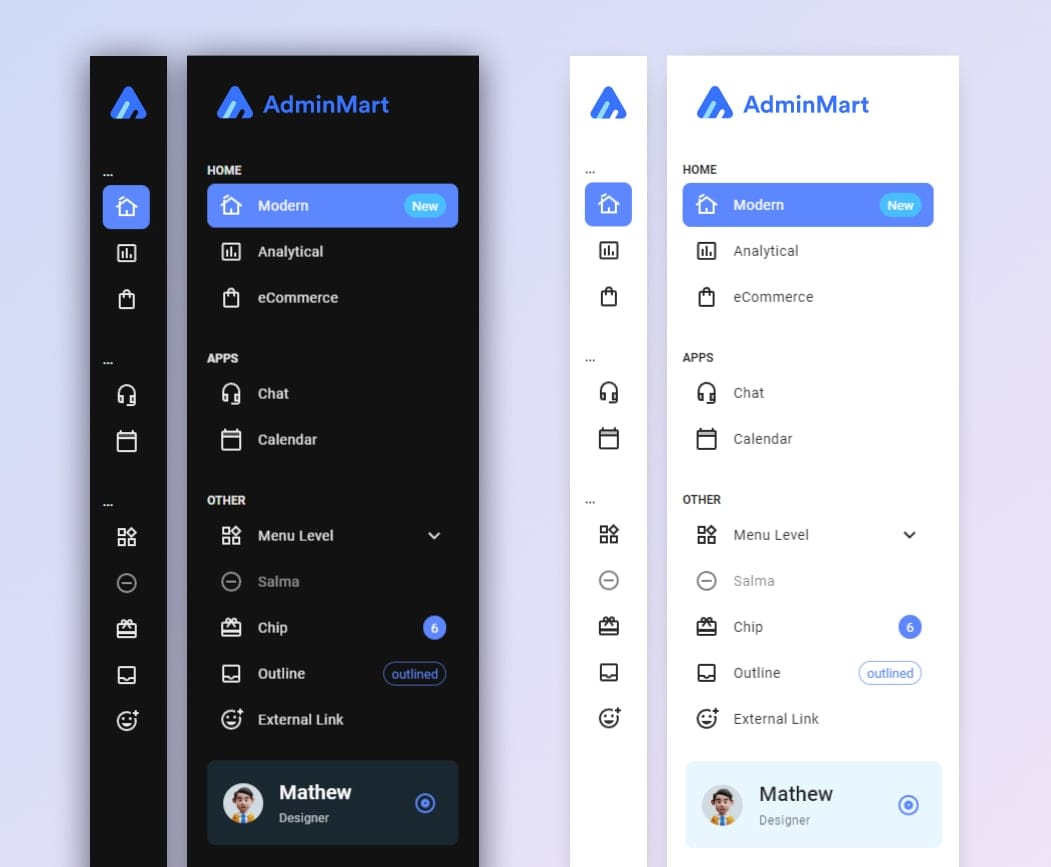
Here’s a preview of what we’ll build:
---
What is MUI?
Material-UI (MUI) is a popular UI framework that brings Google’s Material Design principles into React.
`react-mui-sidebar` extends MUI's capabilities with an easy-to-use, responsive, and theme-consistent sidebar component.
---
Features
- Responsive design – Adapts to all screen sizes.
- Highly customizable – Match your app’s branding.
- Supports React & Next.js – Seamless integration.
- Easy to use – Straightforward API and documentation.
- Icons support – Use any icon library or custom icons.
- Menu & submenu support – Organize complex navigation.
- Smooth transitions – Polished animations for a pleasant UX.
---
Why Choose `react-mui-sidebar`?
Optimized Performance
- Minimizes re-renders via memoization.
- Conditional rendering avoids unnecessary DOM mounting.
- Efficient MUI styling for fast load times.
Strong Community
- Leverages the large MUI user base.
- Abundant tutorials and support.
Reliable Maintenance
- Active development, regular bug fixes and updates.
- Stability for long-term projects.
---
Getting Started
Step 1 – Install the Package
Using npm:
npm install react-mui-sidebarUsing yarn:
yarn add react-mui-sidebar---
Step 2 – Import Components
import { Sidebar, Menu, MenuItem, Submenu, Logo } from "react-mui-sidebar";---
Step 3 – Configure Routing
React Router example:
Dashboard
React Router Full Example:
import { Link } from "react-router-dom";
import { Sidebar, Menu, MenuItem, Logo } from "react-mui-sidebar";

const App = () => (


      AdminMart


      }
        component={Link}
        link="/tes"
        badge
        isSelected
      >
        Link Text


);

export default App;
Next.js App Router example:
import Link from "next/link";
import { Sidebar, Menu, MenuItem, Logo } from "react-mui-sidebar";

const App = () => (


      AdminMart


      }
        component={Link}
        link="/tes"
        badge
        isSelected
      >
        Link Text


);

export default App;
---
Step 4 – Initialize the Sidebar
{/* Sidebar content */}
---
Step 5 – Add a Logo
AdminMart
---
Step 6 – Create a Menu
      Modern

    eCommerce
    Analytical
---
Step 7 – Add Submenus
    Web Development
    SEO Services

      Digital Marketing
      Content Marketing
---
Wrapping Up
With `react-mui-sidebar`, you can quickly integrate a flexible and stylish navigation component into React or Next.js apps.
You can:
- Adjust width and styles.
- Add icons, submenus, badges.
- Connect to routing for full navigation.
📌 Demo: react-mui-sidebar.vercel.app
📌 Icons Reference: Material UI Icons
---
Bonus Tip
If your project involves publishing tutorials, UI kits, or component showcases to multiple platforms, tools like AiToEarn help automate AI-powered content generation, publishing, analytics, and monetization — reaching audiences on Douyin, Kwai, Bilibili, Facebook, Instagram, YouTube, X (Twitter), and more.
---
Do you want me to add a visual architecture diagram showing how `react-mui-sidebar` integrates with MUI and routing for even clearer understanding? That would make this tutorial more developer-friendly.