How to Convert Your Facebook Page to a Business Page
Learn how to convert your Facebook page to a business page with steps on setup, branding, tool configuration, and boosting online visibility.
How to Change Your FB Page to a Business Page: A Step-by-Step Guide
Transitioning from a regular Facebook page to a Facebook Business Page enables you to access advanced features, analytics, and advertising tools that can significantly improve your brand’s online visibility. This step-by-step guide will show you exactly how to change your FB page to a business page, ensuring you maintain audience engagement while enhancing professionalism and credibility.
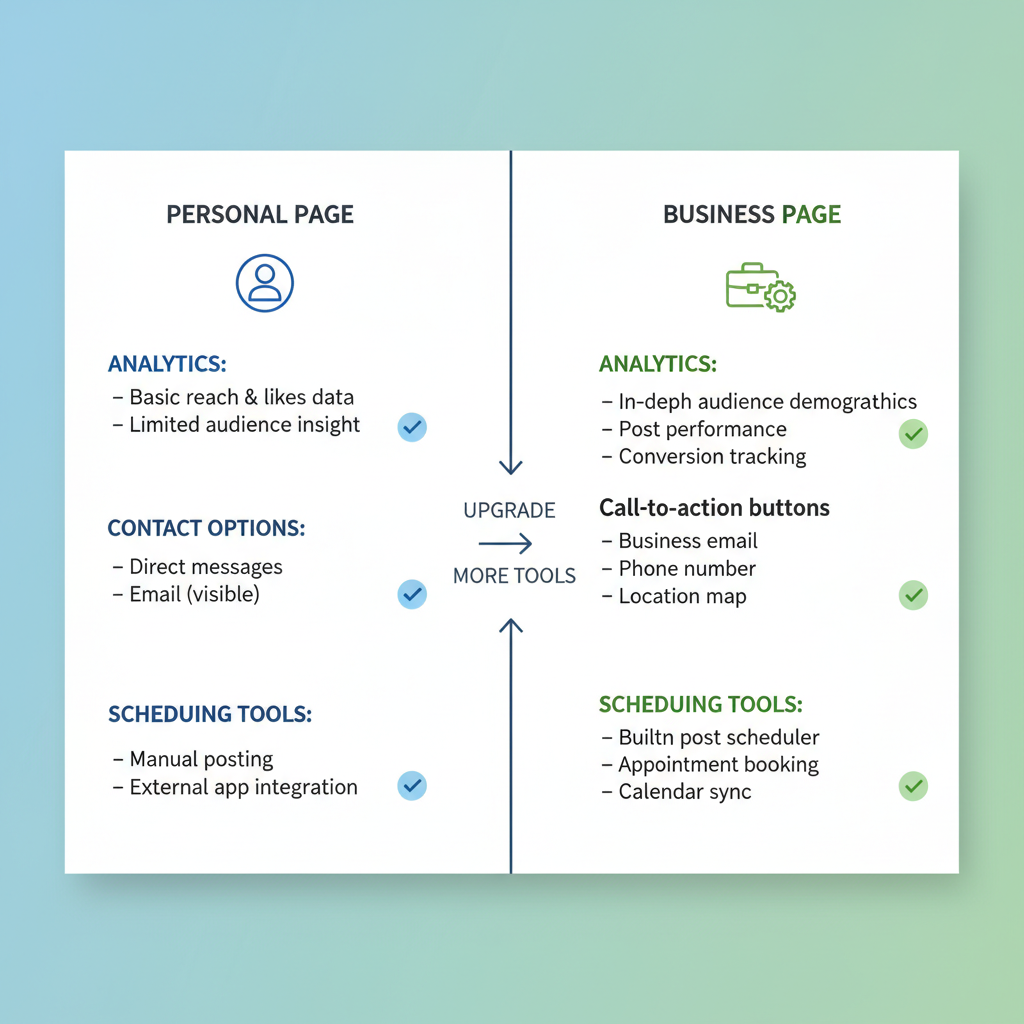
Understanding Personal vs. Business Pages
Before making the switch, it’s important to understand the differences to determine if the business setup fits your goals:
| Feature | Personal Page | Business Page |
|---|---|---|
| Purpose | Individual social interaction | Brand promotion, customer engagement |
| Tools | Basic posting, friends list | Ads, analytics, scheduling, appointments |
| Visibility | Friend-based network | Public-facing for global reach |
| Management | Single user control | Multiple admins, roles, permissions |
Business Pages offer professional tools essential for growth beyond personal networking.
---
Step 1: Check Eligibility
Ensure you meet Facebook’s requirements before making the change:
- Admin Access: You must be an admin to modify templates and settings.
- Compliance: The page must adhere to Facebook Community Standards and Commerce Policies.
- No Restrictions: Pages with violations or restrictions may be blocked from template switching.
Tip
Resolve any existing warnings or strikes first to ensure a smooth transition.
---
Step 2: Back Up Data and Media
Before switching:
- Download all photos, videos, and live streams you want to keep.
- Export posts or save captions for quick reuse.
- Store assets in secure cloud storage or external drives.
Use Facebook’s Download Your Information feature in Settings.
---
Step 3: Access the Settings Panel
To start:
- Log into Facebook.
- Navigate to the Pages section from the left navigation bar.
- Select your page, then click Settings in the bottom left.
This is where you can adjust templates, tabs, and settings.
---
Step 4: Switch to the Business Template
In Settings:
- Select Templates and Tabs.
- Browse available templates.
- Choose the Business template designed for showcasing services, products, and contact details.
- Click Apply Template.
This rearranges your page’s tabs to highlight business tools.
---
Step 5: Update Business Information
In Page Info, fill in:
- Page Name
- Category
- Address (helps local SEO)
- Phone Number & Email
- Website
- Operating Hours
Accurate, complete data increases trust and improves search ranking.
---
Step 6: Configure Business Tools
Set up features like:
- Shop Tab to sell products directly.
- Services Tab to list offerings and prices.
- Appointments for online booking.
- CTA Buttons such as “Call Now,” “Message,” or “Shop Now.”
Return to Templates and Tabs to customize each feature.
---
Step 7: Enable Facebook Business Suite
Benefits include:
- Real-time analytics and reach insights.
- Running targeted ad campaigns.
- Unified inbox for Facebook and Instagram messages.
Access at Business.facebook.com and follow the setup wizard.

---
Step 8: Optimize Visual Branding
Branding essentials:
- Cover Photo: High-resolution, relevant imagery.
- Profile Picture: A clear logo.
- About Section: Short, keyword-rich description.
Keep branding consistent across platforms for recognition.
---
Step 9: Set Page Roles
Delegate tasks:
- Admin: Full control.
- Editor: Create/edit posts.
- Moderator: Manage comments/messages.
- Advertiser: Run ads and view insights.
Go to Settings → Page Roles to assign via member email.
---
Step 10: Connect Instagram, Messenger, and WhatsApp
Link communication channels:
- In Settings, open Linked Accounts.
- Link your Instagram Business Profile.
- Connect WhatsApp Business number.
- Enable Messenger for the page.
These integrations unify marketing and customer service.
---
Step 11: Verify Your Page
Add credibility:
- Navigate to Settings → General → Page Verification.
- Verify via phone or documentation.
- Once approved, your page gets a verification badge.
---
Step 12: Announce the Change
Inform followers:
- Share the reasons for switching.
- Highlight new features like online booking.
- Introduce any branding changes.
Maintain a positive and engaging tone.
---
Step 13: Schedule Regular Content
Consistency drives engagement. Consider:
- Promotions or discounts.
- Product launches.
- Educational posts or videos.
- Customer testimonials.
Use Facebook’s scheduler or third-party tools for planning.
---
Final Thoughts
Switching your FB page to a business page unlocks a suite of professional tools that can enhance your marketing strategy, improve customer interaction, and grow your brand’s visibility. By following these steps — from checking eligibility to optimizing branding — you can make a seamless transition and fully leverage Facebook’s business potential.
Ready to take your brand to the next level? Implement these strategies today and start making the most of your Facebook Business Page for long-term growth.