How to View and Manage Scheduled Posts on Facebook
Learn how to view, filter, edit, reschedule, or delete scheduled posts on Facebook using Meta Business Suite on desktop or mobile apps.

Introduction to Facebook’s Scheduling Feature and Why It’s Useful
Facebook’s scheduling feature is an essential tool for individuals, businesses, and marketers who want to plan and publish content at the most strategic times. By learning how to check scheduled posts on Facebook, you can ensure that your planned updates go live exactly when intended, even if you’re not actively online.
With Facebook scheduling, you can:
- Maintain a consistent posting schedule even during busy periods.
- Reach your audience at peak engagement times.
- Craft high-quality, error-free posts without last-minute stress.
- Coordinate messaging across larger marketing campaigns.
Whether you’re a small business owner promoting weekly offers or a social media manager overseeing multiple pages, mastering scheduled post management is key to an effective social media calendar.
---
Accessing Scheduled Posts on Desktop via Meta Business Suite
If you manage a Facebook Page from a desktop, Meta Business Suite provides a central hub for Facebook and Instagram content planning, including a clear view of all upcoming scheduled posts.
Steps to View Scheduled Posts in Meta Business Suite
- Log in to Facebook on your desktop.
- Navigate to your Page.
- On the left menu, click Meta Business Suite.
- Select Content from the sidebar.
- Click the Scheduled tab to view all upcoming posts.
Additional Tips
- Hover over a post to quickly see its scheduled date and time.
- Use the preview panel to check captions, images, or videos without reopening the post editor.
---
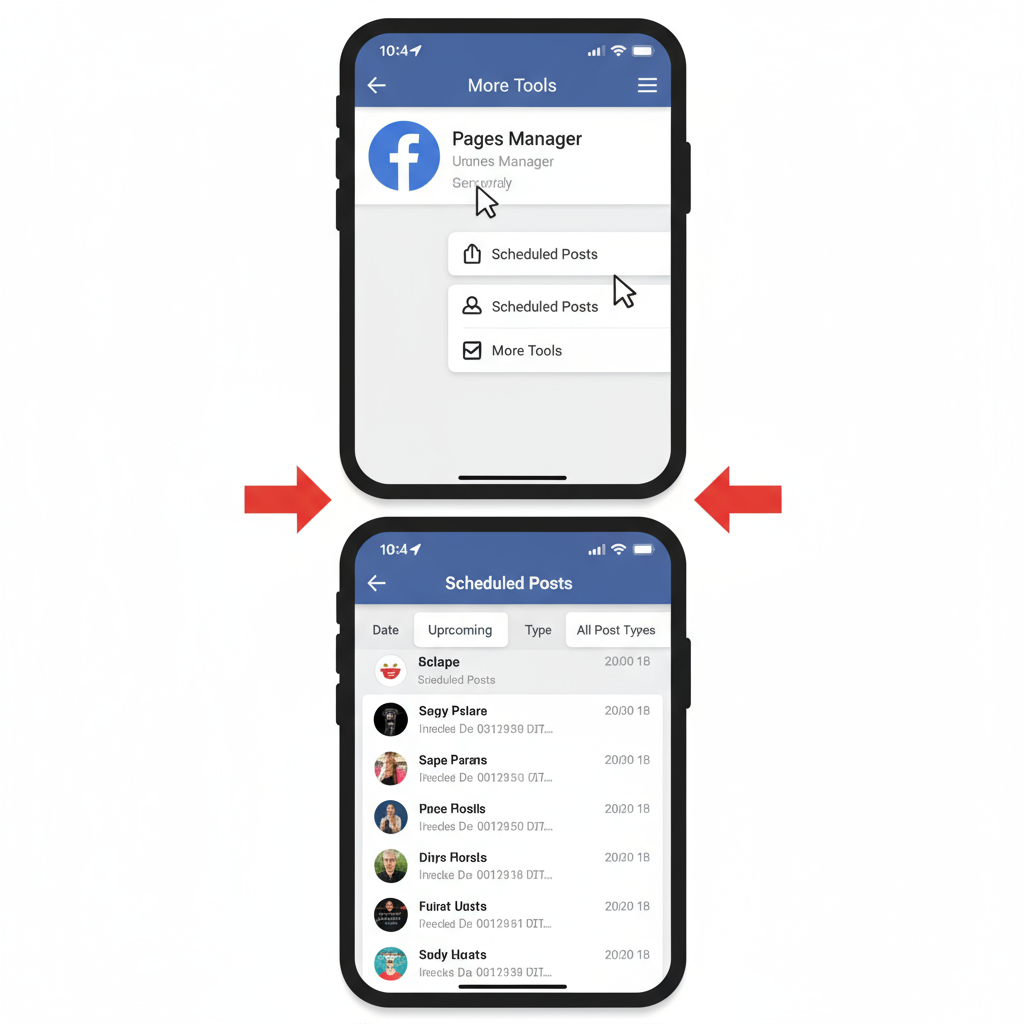
Accessing Scheduled Posts on Facebook Mobile App
When you’re on the go, Facebook’s mobile app and Pages Manager functionality offer convenient access to scheduled content.
Using the Facebook Pages Manager or Mobile Facebook App
- Open the Facebook app and go to your Page.
- Tap the More button (three dots icon) or menu.
- Locate Publishing Tools or Scheduled Posts.
- Tap to view your list of scheduled content.
Note:
- Certain mobile app versions will redirect you to the Meta Business Suite app for full scheduling features.
- Keep your app updated to access the latest tools and layout.
---
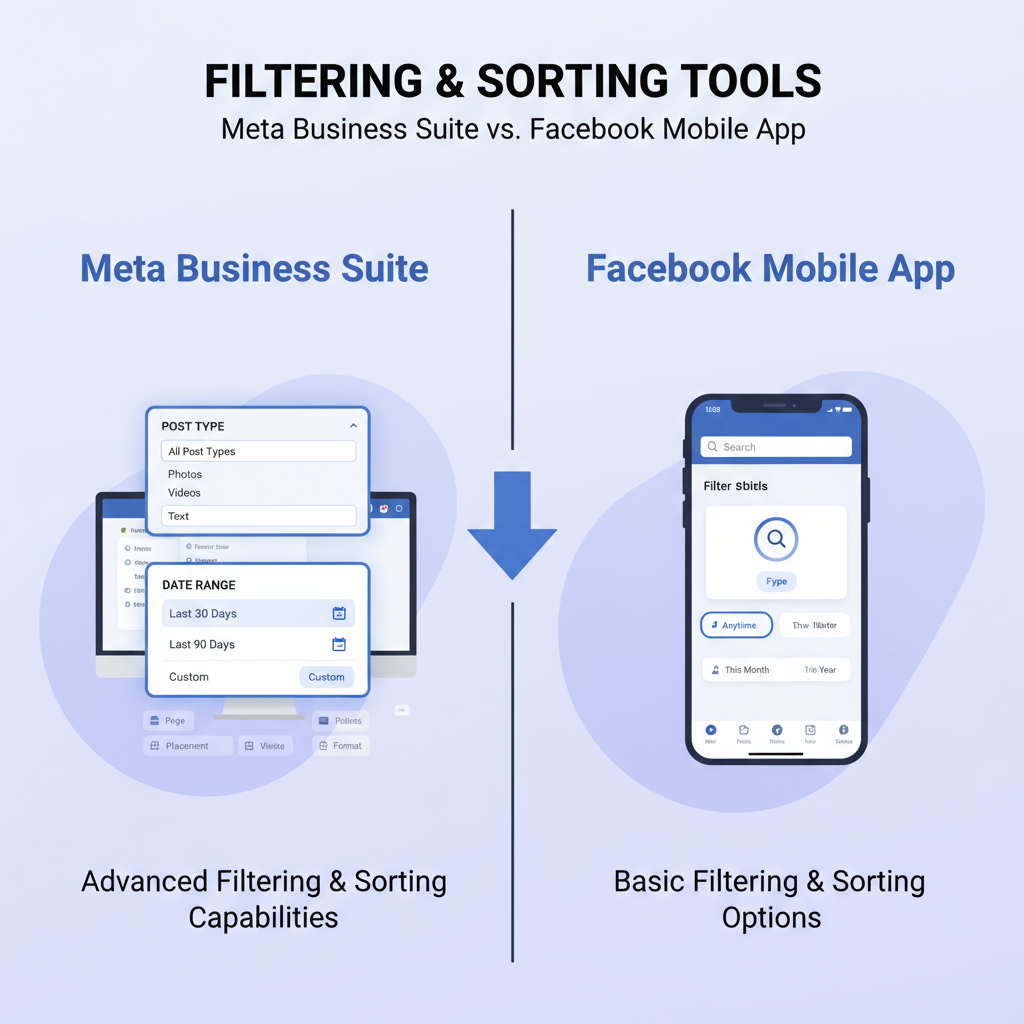
Filtering and Sorting Scheduled Posts by Date or Post Type
When managing a large volume of scheduled posts, filtering ensures you can quickly find and review content.
How to Filter in Meta Business Suite
- By Date: View posts within a specific time window.
- By Type: Filter posts by media type (photo, video, event, etc.).
- By Platform: See only Facebook or Instagram content if accounts are linked.
| Filter Option | Purpose |
|---|---|
| Date Range | Locate scheduled posts for a certain day or week. |
| Post Type | Focus on specific media like photos or videos. |
| Platform | Separate Facebook posts from Instagram posts. |
Filtering helps prevent errors, duplicates, and scheduling conflicts.
---
Editing or Rescheduling a Scheduled Post
Plans can change, and so can scheduled content. Knowing how to edit or reschedule helps keep your messaging relevant.
To Edit or Reschedule:
- Find the scheduled post.
- Click to open the editor.
- Update text, links, or media as needed.
- Adjust the scheduled date and time.
- Save all changes.
Pro Tip:
Changing content does not reset Facebook’s engagement predictions—your scheduled time is still key to reach.
---
Deleting a Scheduled Post Before It Goes Live
Occasionally, you’ll need to prevent a post from publishing altogether.
Steps to Delete:
- Locate the post in your scheduled list.
- Click the More Options button (ellipsis) or right-click.
- Select Delete.
- Confirm deletion.
Once removed, the post will not be visible in your published feed.
---
Common Issues and Troubleshooting Tips
Managing scheduled posts can sometimes present challenges, especially when first figuring out how to check scheduled posts on Facebook.
Scheduled Post Not Appearing
- Refresh your browser or app—updates may take a few minutes.
- Clear cache and cookies or app data.
- Ensure you are managing the correct Page, not your personal profile.
Timezone Settings
- Go to Page Settings > General > Time Zone.
- Adjust if incorrect, as time discrepancies can cause unexpected publication times.

---
Benefits of Reviewing Scheduled Posts Regularly
Regular review of your planned content ensures:
- Quality Control: Spot typos, broken links, or missing visuals.
- Brand Consistency: Align tone and voice across all posts.
- Avoid Duplicate Content: Prevent unnecessary repetition.
- Adapt to Trends: Respond to market or news changes promptly.
---
Best Practices for Organizing and Planning Your Facebook Content Calendar
A well-structured posting plan saves time and increases engagement.
Recommended Practices:
- Plan Monthly: Schedule content in monthly batches, but stay agile.
- Use Themes: Assign content categories or topics to specific days.
- Track Performance: Use Insights to refine future scheduling.
- Include Holidays: Schedule around special dates for boosted relevance.
- Batch Content Creation: Produce multiple posts in one session for efficiency.
Using tools like spreadsheets or Meta Business Suite’s planner can keep your workflow smooth and predictable.
---
Wrap-Up and Call to Action
Understanding how to check scheduled posts on Facebook helps you stay in full control of your publishing strategy. By mastering the desktop and mobile tools, using filters for efficiency, and applying edits, deletions, or troubleshooting fixes, you can maintain a consistent and impactful posting schedule.
Action Step:
Set aside 10 minutes this week to review your scheduled posts. Confirm that your scheduled times match peak engagement hours, verify content accuracy, and align posts with your marketing priorities.
Consistent scheduling isn’t just automation—it’s a powerful way to deliver timely, valuable experiences to your Facebook audience. Start refining your content calendar today!


