Create a Place on Facebook: Step-by-Step Instructions
Learn how to create and optimize a Facebook Place with accurate details, photos, and GPS settings to boost local visibility and engagement.
Create a Place on Facebook: Step-by-Step Instructions
Creating a Place on Facebook is one of the most effective ways to give your physical location — whether it’s a business, landmark, or event venue — a presence on social media. This step-by-step guide explains what a Facebook Place is, why it benefits your visibility, and how to set it up, manage it, and optimize it so more people can find and engage with you.
---
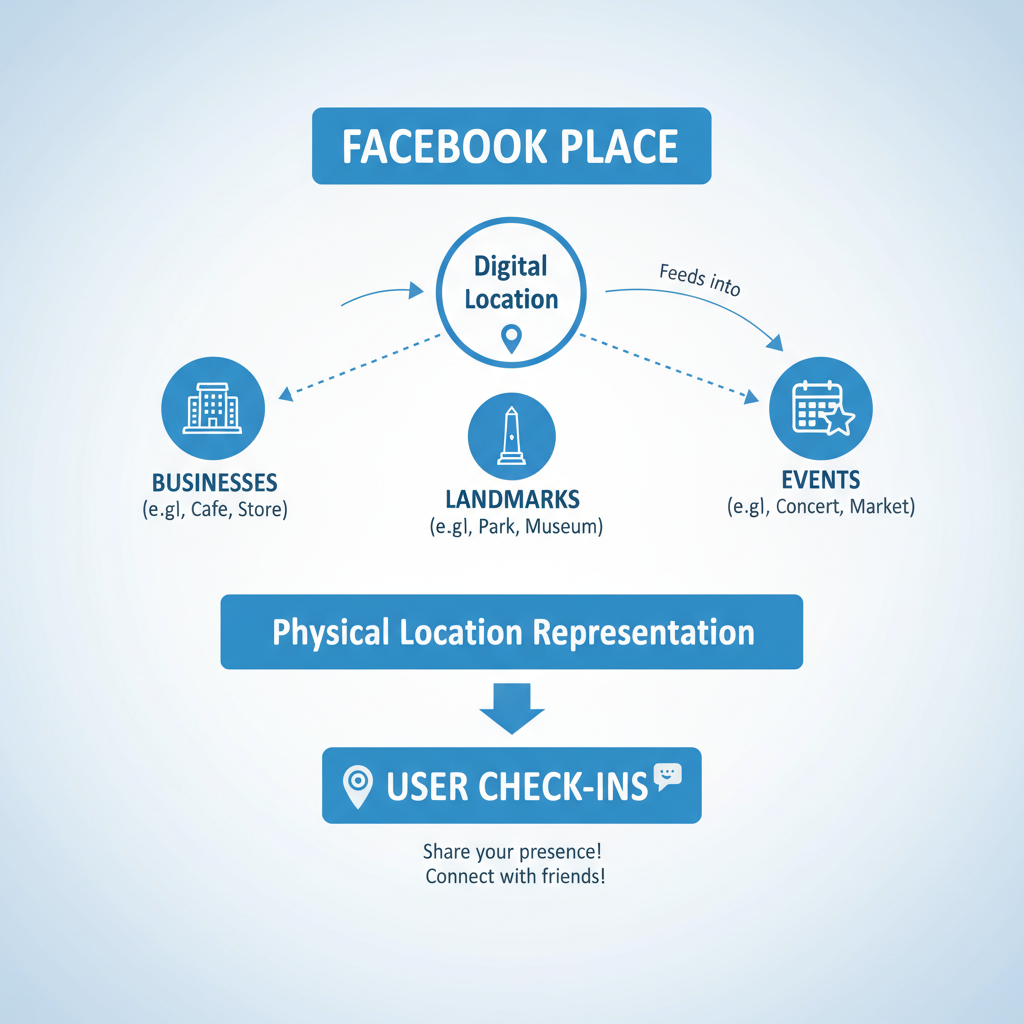
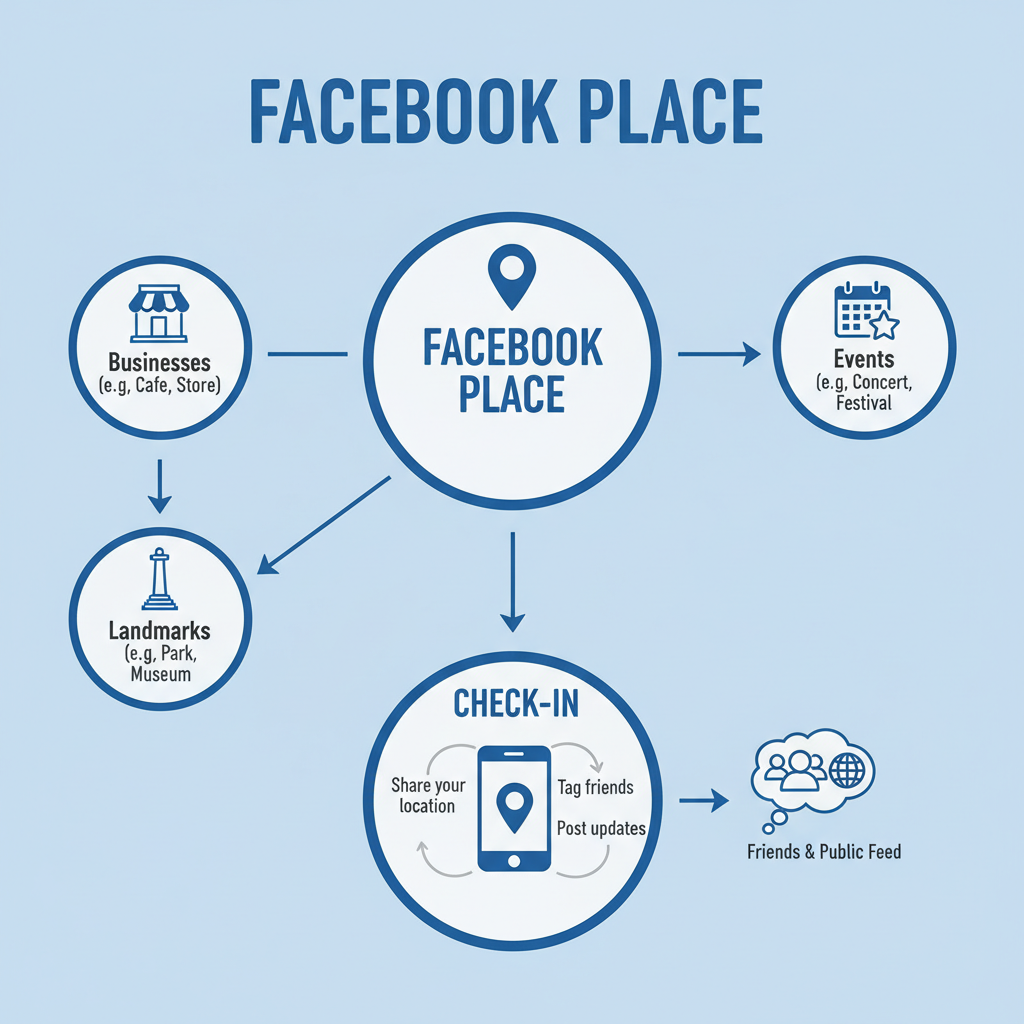
Understanding What a Facebook Place Is and Why It Matters
A Facebook Place is a geotagged location that people can check in to while using Facebook. It’s tied to a physical address and appears in search results, on maps, and on user timelines when check-ins occur.
Creating a Place can help you:
- Increase brand or location visibility.
- Encourage visitors to share experiences and photos.
- Provide accurate information like opening hours and directions.

If you operate a brick-and-mortar store, venue, or point of interest, a dedicated Facebook Place lets people connect more easily and amplify word-of-mouth via their networks.
---
Check If the Place Already Exists
Before setting up a new entry, check whether your location already has a Facebook Place listing. Having duplicates can confuse visitors, split engagement, and distort check-in data.
How to check:
- On Facebook, search your location name.
- Apply the “Places” filter in search results.
- Look for matches by address or nearby landmarks.
If there’s an existing listing with wrong details, request edits or claim it instead of adding a duplicate.
---
Prepare Required Details
Having the necessary information ready makes creating a Place quick and accurate. Gather:
- Place name — Official brand, business, or site name.
- Address — Full street, city, and zip/postal code.
- Category — Select from options like Restaurant, Park, Office, etc.
- Profile photo — Logo or relevant image.
| Detail | Example |
|---|---|
| Place Name | Sunset Coffee Roasters |
| Address | 123 Main Street, Springfield |
| Category | Café |
| Profile Photo | Logo or building front image |
---
Enable Location Services on Your Device
Location services are essential for Facebook to verify and pinpoint your Place accurately via GPS.
On iOS:
- Go to Settings > Privacy > Location Services
- Enable location services for Facebook
On Android:
- Go to Settings > Location
- Turn on location and grant Facebook permission
---
Use the Facebook "Check In" Feature
The most direct way to add a Place is by using Facebook’s mobile Check In feature.
- Open the Facebook app.
- Tap Check In (under “What’s on your mind?” in the composer).
- Facebook lists nearby locations based on GPS.
---
Add Your Place Name If Not Found
If your desired name doesn’t appear:
- Type it into the Check In search bar.
- Scroll down and select Add [Place Name].
- Fill in the Facebook Place creation form.
---
Enter Location Details Accurately
Precise details improve your Place’s search visibility and prevent visitor confusion.
- Full address: Include suite/unit numbers.
- City & Zip/Postcode: Exact spelling and format.
- Category: Choose a relevant, predefined option for discoverability.
Misentered information can make your Place hard to find or flagged for correction.
---
Add a Profile Photo or Image
Visual content builds trust and recognition. Suitable options include:
- Official logo
- Storefront or building photo
- Recognizable part of the location
Images help users confirm they have arrived at the correct spot when checking in.
---
Save and Confirm Your Place
After reviewing details:
- Tap Create or Save.
- Facebook will process the Place; it’s usually live within minutes.
- Search for it or check in yourself to confirm.
---
Edit and Manage Your Facebook Place
From time to time, update your Place for accuracy:
- Open the Place Page.
- Tap Edit Page Info.
- Adjust data such as opening hours, phone, or description.
- Save changes.
Consistently updated information improves user trust and search ranking.
---
Merge Duplicates
Duplicate Places can arise from variations in names or addresses. To merge:
- Open the duplicate Place.
- Select Suggest Edits or report to Facebook.
- Request a Merge to combine check-ins and likes.
---
Encourage Visitor Check-Ins
More check-ins lead to greater visibility via organic feeds and recommendations. Strategies include:
- Offering rewards for check-ins.
- Posting signage at your location.
- Reminding followers via social media posts.
---
Troubleshooting Common Issues
If problems occur:
Location not showing
- Confirm GPS is enabled and has a strong signal.
- Check if the address is in Facebook’s mapping system.
Name changes blocked
- Popular Places have restricted edits to prevent misuse.
- Submit official proof if necessary.
---
Follow Facebook Guidelines
To ensure your Place stays live and compliant:
- Avoid misleading or spammy naming conventions.
- Minimize all-caps text unless brand-specific.
- Only use genuine, physical address information.
Breaking rules can lead to Place removal.
---
Summary and Next Steps
By preparing accurate details, enabling location services, using the Check In feature correctly, and keeping your Place well-managed, you can successfully create a Place on Facebook that strengthens your visibility and engagement.
Ready to start? Implement these steps now, and watch your community grow through authentic connections and increased traffic to your page and location.