How Do I Create a Post on Facebook Step by Step Guide
Learn how to create a Facebook post step by step, from choosing the right format to adding media, tags, location, and optimizing engagement.
How Do I Create a Post on Facebook: Step-by-Step Guide
If you’ve ever wondered how do I create a post on Facebook that truly stands out, you’re not alone. Posting on Facebook effectively requires both technical know-how and creative strategy. Whether you’re sharing personal moments, highlighting your brand, or engaging a community, mastering each step — from selecting your post type to monitoring engagement — can dramatically boost your reach and impact.
This comprehensive guide breaks down the entire process in a beginner-friendly way, complete with actionable tips and best practices.

---
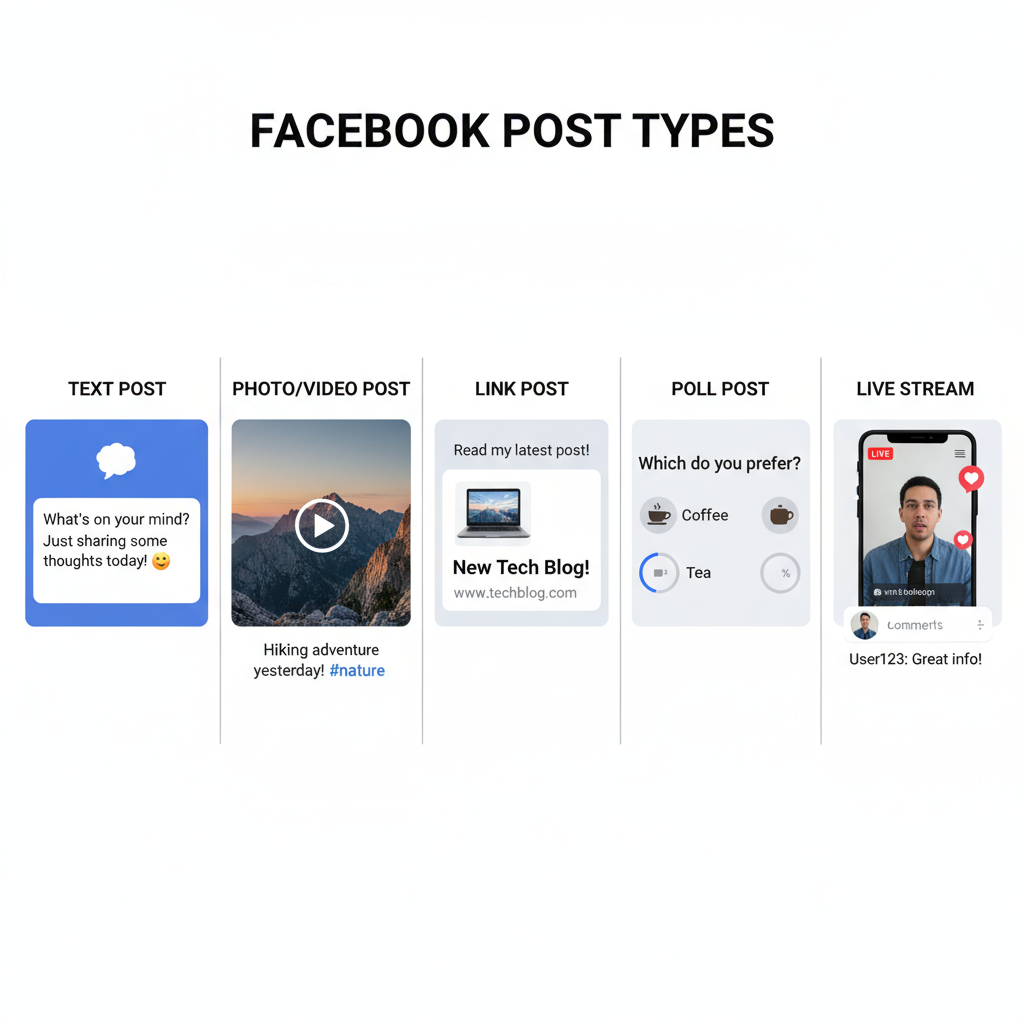
Understanding the Different Types of Facebook Posts
Before you hit that “Post” button, familiarize yourself with the range of content formats available on Facebook:
- Text-Only Posts – Short, quick updates perfect for announcements or questions.
- Image Posts – Visual content like photos or graphics to capture attention.
- Video Posts – Great for tutorials, storytelling, and driving engagement.
- Link Shares – Share external content and let Facebook generate a clickable preview.
- Polls – Encourage audience opinions and participation.
- Events – Announce gatherings, webinars, or launches with RSVP options.
| Post Type | Best For | Engagement Potential |
|---|---|---|
| Text | Quick updates, polls via comments | Medium |
| Image | Visual storytelling, promotions | High |
| Video | Tutorials, vlogs, ads | Very High |
| Link | Sharing articles, blogs | Medium |
| Poll | Feedback gathering | High |
---
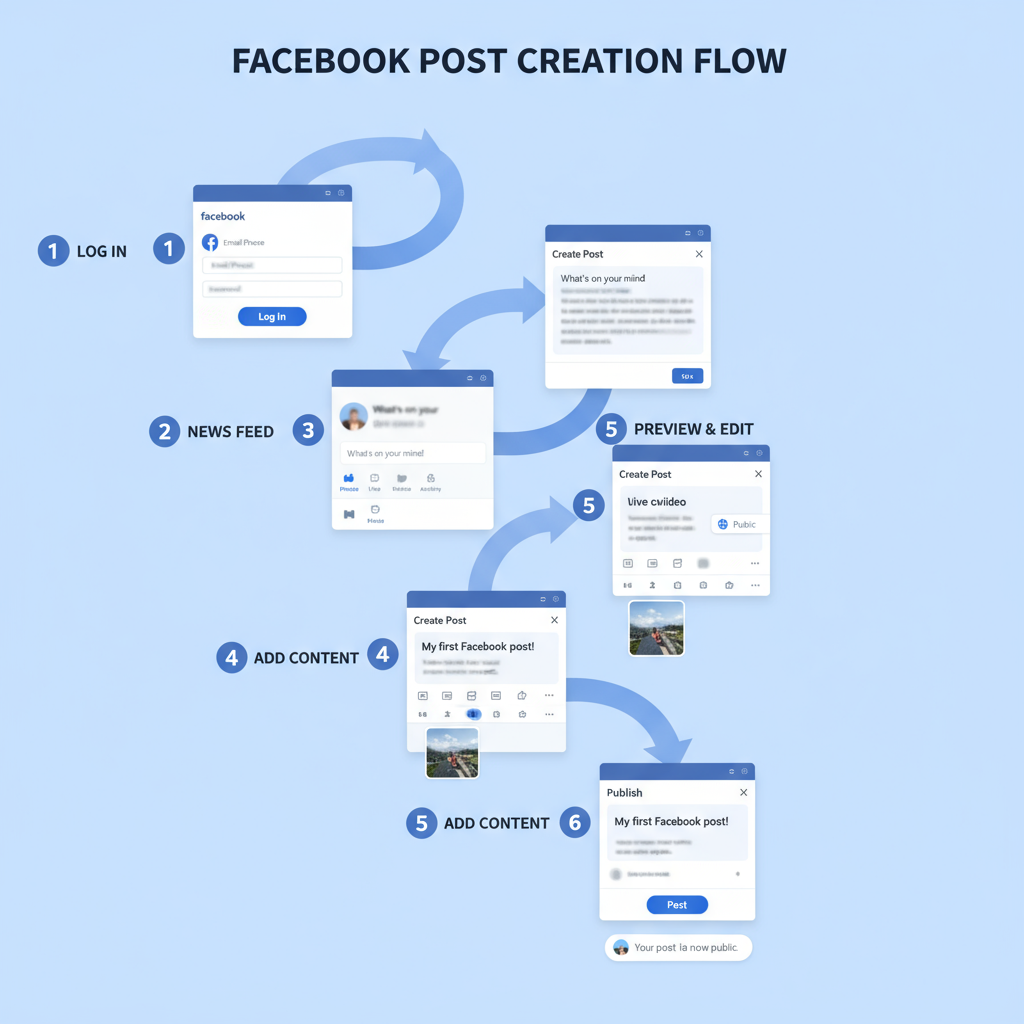
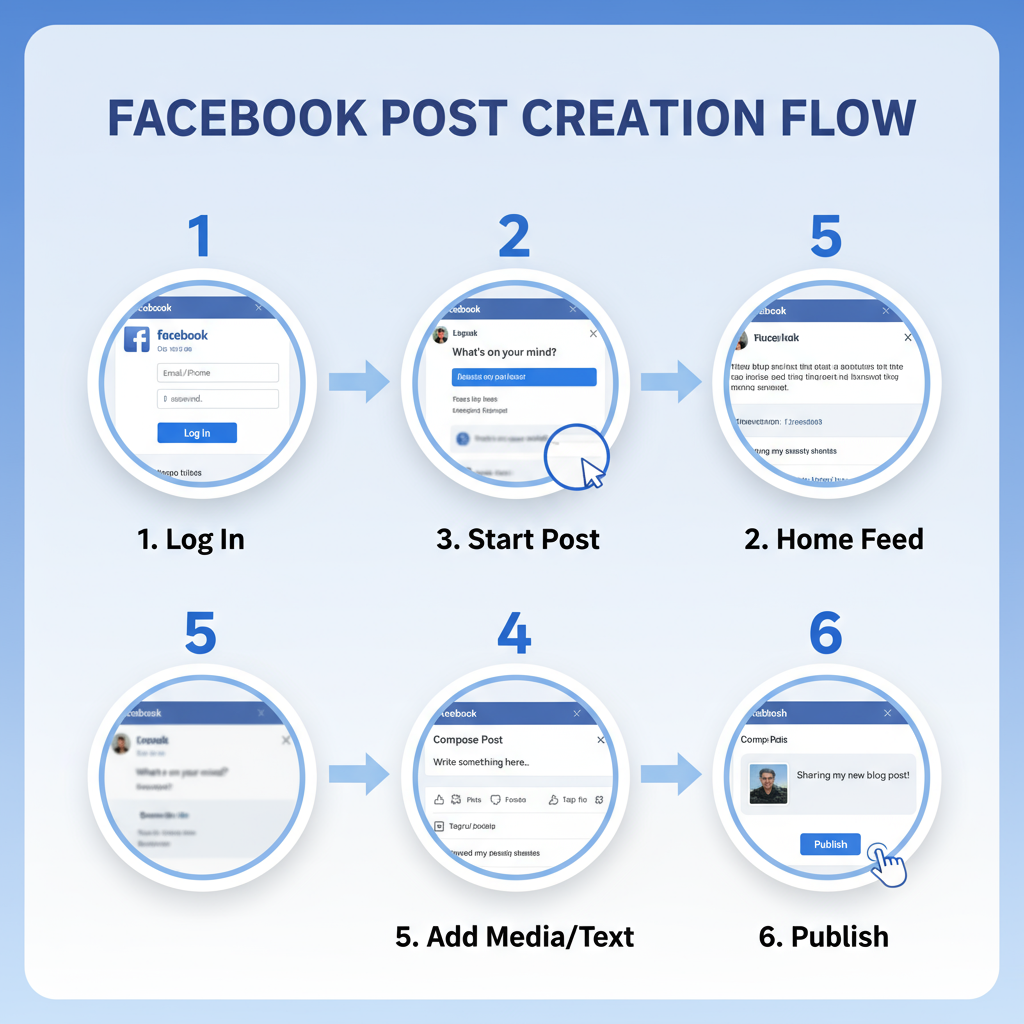
Step 1: Log in to Your Facebook Account
To begin creating your post:
- Desktop: Visit Facebook.com, enter your email or phone number and password, then click Log In.
- Mobile: Launch the Facebook app, enter your credentials, and tap Log In.
Tip: Enhance your account’s security with two-factor authentication.
---
Step 2: Go to Your News Feed or Profile Page
Once you’re logged in, decide where you want to post:
- Home (News Feed) – Broadly share with your entire network.
- Profile Page – Showcase personal updates on your own timeline.
- Managed Page – Ideal for brands, businesses, or community groups.
---
Step 3: Find the “What’s on your mind?” Composer Box
At the top of your News Feed (desktop) or just below your profile picture (mobile), you’ll see the composer box labelled “What’s on your mind, [Name]?”. Click or tap to start crafting your post.
---
Step 4: Select Your Post Type
From the composer box, choose:
- Text Update – Write your message and add expressive emojis.
- Photo/Video Upload – Attach files from your device.
- Link Share – Paste a URL to auto-generate a link preview.
- Event or Poll – Access via the "+" or “More” menu.
---
Step 5: Craft Engaging Text
Your opening sentence should grab attention immediately:
- Pose a thought-provoking question
- Reveal a surprising statistic
- Highlight a clear benefit
Example:
> "Ever wondered how to double your Facebook engagement in just one week? Here's how..."
---
Step 6: Add Media for Impact
When uploading:
- Use high-resolution images (minimum 1080px width)
- Share HD videos for crisp visuals
- Ensure relevance between media and caption
- Preview placement to confirm visual appeal
---
Step 7: Tag Friends or Pages
Increase exposure by tagging:
- Type `@` followed by the friend’s or page’s name
- Tags can notify others and encourage resharing
---
Step 8: Include a Location
Add a location when:
- Highlighting local activities
- Sharing travel updates
- Promoting location-based businesses
Location tagging can increase local search visibility.
---
Step 9: Adjust Privacy Settings
Set who can see your post:
- Public – Anyone on or off Facebook
- Friends – Only your Facebook friends
- Specific Friends – Select a group
- Only Me – Private to you
---
Step 10: Use Hashtags Wisely
Hashtags help topic discovery. On Facebook, opt for up to three relevant hashtags to keep captions clean.
Example:
`#TravelTips #ProductivityHacks`
---
Step 11: Preview Your Post
Before posting:
- Check grammar and readability
- Review media alignment and cropping
- Ensure link previews work as intended
---
Step 12: Publish or Schedule
- Post Now – Click Post to go live
- Schedule – From Pages, use Creator Studio to choose a future date
Scheduled posts encourage consistent audience engagement.
---
Step 13: Respond and Interact
Once live:
- Monitor likes, comments, and shares
- Reply promptly to foster community
- Recognize and thank users for their interactions
---
Step 14: Track Post Performance
For business pages or creators:
- Use Facebook Insights or Meta Business Suite
- Focus on metrics like reach, engagement, CTR, and video retention
| Metric | What It Measures |
|---|---|
| Reach | Number of unique users who saw your post |
| Engagement | Total interactions (likes, comments, shares, clicks) |
| Click-Through Rate (CTR) | Percentage of viewers who clicked your link |
| Video Retention | Average watch time for videos |
---
Step 15: Refine Your Strategy
Using your analytics:
- Repeat content types that resonate
- Test new posting times for better reach
- Continuously innovate captions, visuals, and hashtag use
---
Summary & Next Steps
Mastering how do I create a post on Facebook takes practice, but following this step-by-step process can help you create posts that earn attention and drive interaction. From content selection to analyzing results, every action builds towards stronger engagement and better audience relationships.
Start planning your next Facebook update today — and remember, consistency and responsiveness are your best tools for long-term success on the platform.