How to Find and Manage Scheduled Posts on LinkedIn (Profiles and Pages, Desktop and Mobile)
Learn exactly where to find and manage scheduled posts on LinkedIn for profiles and Pages, on desktop and mobile. Includes editing, rescheduling, roles.
How to Find and Manage Scheduled Posts on LinkedIn (Profiles and Pages, Desktop and Mobile)

If you’ve just scheduled content and now you’re wondering how to find scheduled posts on LinkedIn, the answer depends on whether you’re using a personal profile or a LinkedIn Page, and whether you’re on desktop or mobile. This guide covers all flows, plus editing, rescheduling, troubleshooting, and team best practices.
---
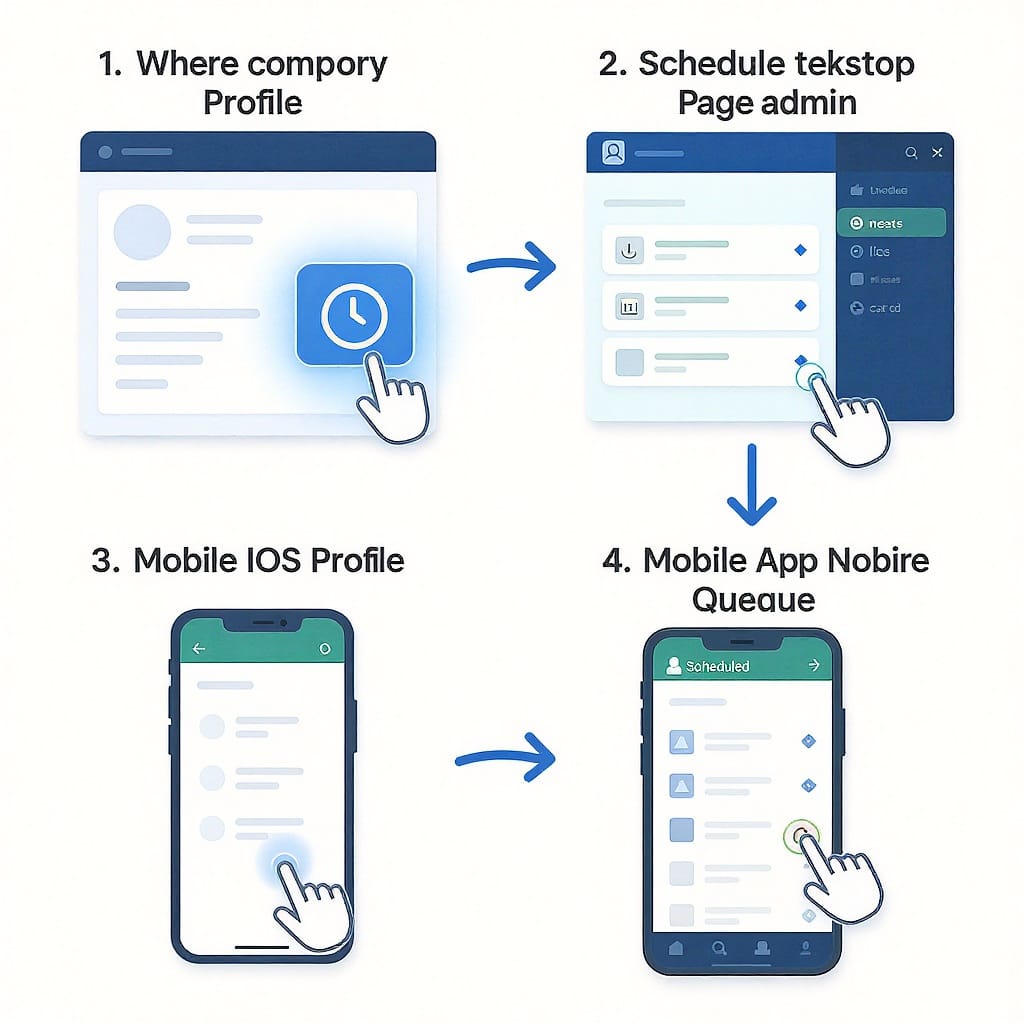
Quick answer: where to click (Profiles, Pages, Desktop, Mobile)
- Personal profile (desktop)
- From Home, click “Start a post.”
- In the post composer, click the clock icon next to the Post button.
- Click “View all scheduled posts.”
- LinkedIn Page (desktop)
- Go to Me (top nav) → Manage → select your Page to enter Admin view.
- Open the Posts/Content area.
- Click the Scheduled tab or filter for Scheduled.
- Mobile app (iOS/Android) for profiles
- Tap Post from your feed (or the +).
- Tap the clock icon in the composer.
- Tap “View scheduled.”
- Mobile app (iOS/Android) for Pages
- Switch to your Page (profile photo → switch/Manage Page or toggle “Post as”).
- Open the post composer as the Page.
- Tap the clock → “View scheduled.”
Tip: Scheduled posts created via third-party tools (e.g., Buffer, Hootsuite, Sprout Social) won’t appear in LinkedIn’s native scheduled list.
---
Step-by-step on desktop for personal profiles
- Open linkedin.com and log in.
- In your Home feed, click “Start a post.”
- In the composer window:
- Add your text, hashtags, mentions, and media.
- Click the clock icon near the Post button to schedule.
- Choose a date and time, then confirm.
- To see everything you’ve scheduled:
- Click the clock icon again.
- Click “View all scheduled posts.”
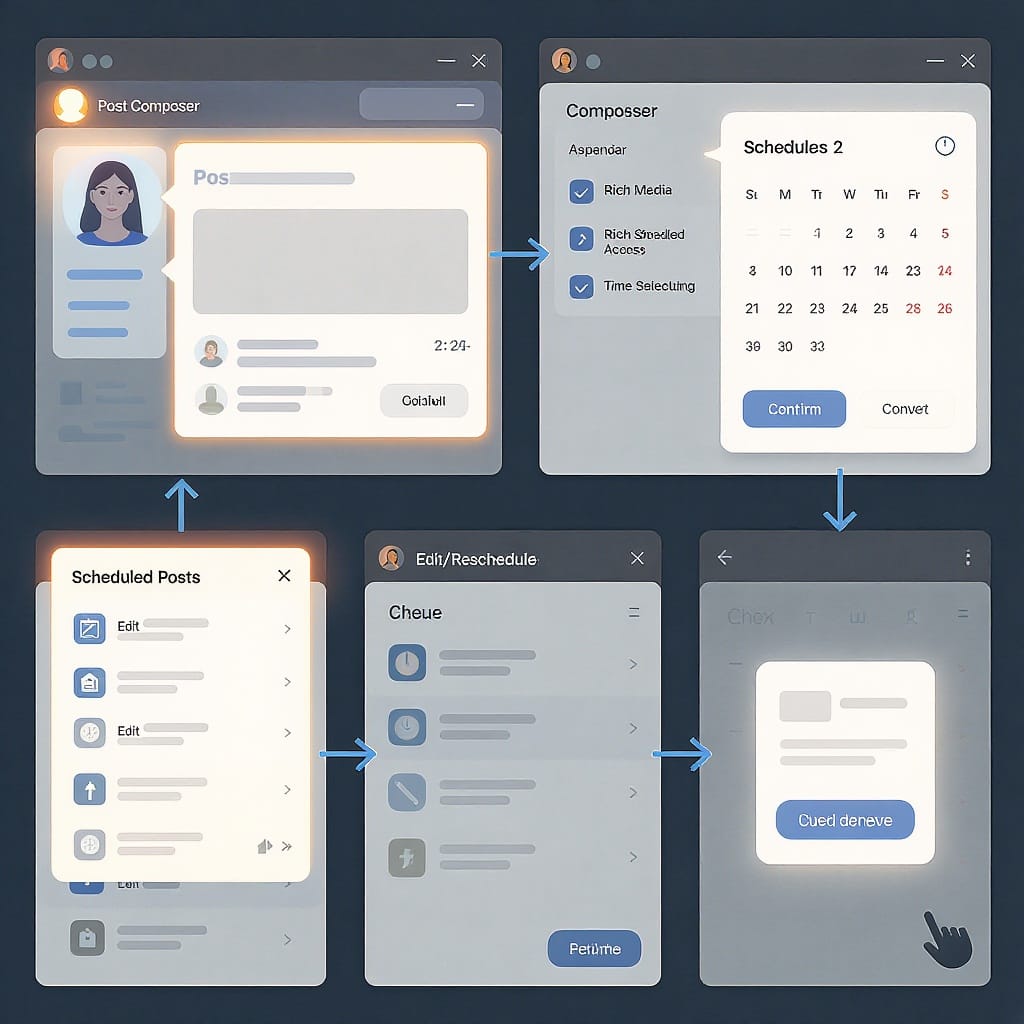
What the scheduled queue controls do:
- Edit/reschedule time: Adjust the publish date/time.
- Edit post content: Update copy and tags; note you may need to delete and recreate to change attached media (image/video/PDF).
- Publish now: Push the scheduled post immediately.
- Delete: Remove the post from the queue (it will not publish).
Notes and nuances:
- Mentions/hashtags: Edits typically preserve @mentions and #hashtags, but re-check that mentions still link correctly after changes.
- Media changes: If you must swap images/videos/documents after scheduling, deleting and recreating the post is most reliable.
- Time zone: The scheduled time follows the time zone shown in the scheduler. Verify before confirming, especially when traveling.
---
Step-by-step on desktop for LinkedIn Pages
- Enter Page admin view:
- Click Me (top navigation) → Manage → select your Page.
- Open the Posts/Content area:
- Look for tabs or filters: Published, Drafts, Scheduled.
- Click Scheduled to see all upcoming Page posts.
- Manage scheduled posts:
- Open a post for Edit, Reschedule, Publish now, or Delete.
- Confirm you have the right Page role (see permissions below).
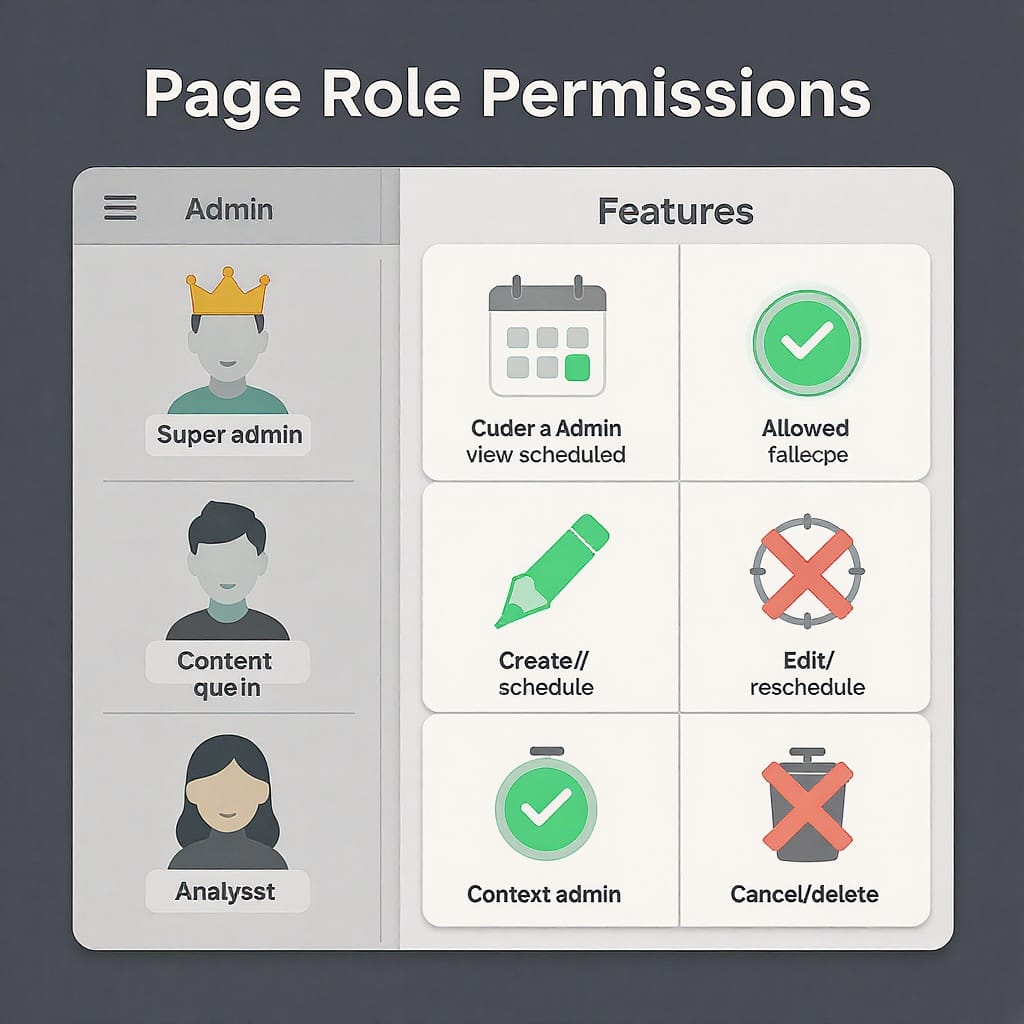
Page role permissions overview
| Page role | See Scheduled tab | Schedule posts | Edit/reschedule | Publish now | Delete scheduled |
|---|---|---|---|---|---|
| Super admin | Yes | Yes | Yes | Yes | Yes |
| Content admin | Yes | Yes | Yes | Yes | Yes |
| Curator | Usually No | No | No | No | No |
| Analyst/Viewer | No | No | No | No | No |
Tip: If you can’t access Scheduled, ask a Super admin to confirm your role.
---
Using the LinkedIn mobile app (iOS/Android)
Profiles
- Tap Post (or the +) from the feed.
- Compose your update; tap the clock icon to pick a schedule.
- To see scheduled posts, tap the clock again → “View scheduled.”
- You can edit time, edit text, publish now, or delete.
Pages
- Switch to manage your Page:
- Tap your profile photo or the account switcher.
- Select your Page (or toggle “Post as [Page]” in the composer).
- Open the composer as the Page.
- Tap the clock → “View scheduled” to see Page items.
- Manage as needed: edit/reschedule/publish now/delete.
Mobile tips
- Double-check you’re posting “as the Page” vs “as yourself.”
- Keep the app updated to ensure the schedule list and controls appear.
- On cellular data, allow a moment for the scheduled list to load.
---
Edit, reschedule, or delete: what’s possible
- Change publish time/date: Safe and supported for profiles and Pages.
- Edit text/hashtags/mentions: Allowed; verify mentions still resolve correctly.
- Change media (images/video/PDF): Often requires deleting and recreating the scheduled post to avoid broken attachments.
- Switch between profile and Page: Not supported; delete and recreate under the right identity.
- Publish now: Use when a timelier release is needed; confirm any campaign tracking (e.g., UTM links) is correct before doing so.
Time zone tips:
- Align the scheduler’s time zone with your audience.
- For distributed teams, add the time zone to the post title in your planning doc, e.g., “Launch post — 10:00 ET / 07:00 PT.”
- Watch for daylight saving time changes.
---
Can’t find your scheduled posts? Common causes and fixes
- You’re looking in the feed instead of the composer (profiles): Open the composer and tap/click the clock → “View scheduled.”
- Wrong identity: You’re posting as your profile, but the post was scheduled under a Page (or vice versa). Switch identities and check again.
- Insufficient Page role: You need Super admin or Content admin to view and manage the scheduled queue.
- Feature not rolled out / app outdated: Update the LinkedIn app; on desktop, try another browser or wait if your account is still rolling out features.
- Browser cache or extension conflicts: Hard refresh, clear cache, or try incognito/private mode.
- Scheduled via third-party: Posts scheduled in Buffer, Hootsuite, Sprout Social, Later, etc. won’t show in LinkedIn’s native list—check the tool’s queue/calendar.
---
Third‑party scheduler caveats
Where to find scheduled posts:
- Buffer: Open the channel’s Queue; switch between Upcoming and Calendar views.
- Hootsuite: Go to Planner; filter by profile and status (Scheduled).
- Sprout Social: Publishing → Calendar; filter for LinkedIn profiles/Pages and “Scheduled.”
Why they don’t appear in LinkedIn’s native list:
- LinkedIn treats third-party schedules as external; they publish via API at the designated time without populating the native “Scheduled” queue.
Approvals and edits:
- Most tools support approval workflows and audit trails natively.
- Editing content or assets should be done inside the tool; changing from the outside can break attachments or tracking.
- If you move a scheduled time in the third-party tool, it updates the API call—no need to touch LinkedIn’s composer.
Content quirks:
- Tags/mentions: Some tools don’t support tagging people or may only support Page mentions.
- PDFs/carousels: Document posts are supported by many tools, but editing after scheduling is limited—recreate if you must swap the file.
- Video: Pre-processing/thumbnail controls vary by tool; test before critical campaigns.
---
Best practices for scheduling on LinkedIn
- Post when your audience is online: Start with local business hours in their time zone; test morning (8–10 a.m.) and midday slots.
- Favor midweek for B2B: Tuesday–Thursday often yields stable engagement; validate with your analytics.
- Space posts: Avoid back-to-back drops; leave at least 4–6 hours between posts per identity to prevent cannibalizing reach.
- Align with campaigns and events: Schedule anchor posts around launches, webinars, and announcements; queue reminder and recap posts.
- Use analytics to refine: Review LinkedIn analytics or your third-party tool’s performance data weekly; iterate on time/day, format, and cadence.
- Mix formats: Alternate between text + image, document (carousel), and video to keep engagement fresh.
- Add tracking: Use UTM parameters consistently so scheduled posts feed your attribution model.
---
Team workflows for Pages
- Assign roles intentionally: Limit Super admin to a few owners; give Content admin to day-to-day publishers.
- Naming conventions: In your planning doc or draft title, include campaign, owner, and time zone, e.g., “[Q4-LAUNCH] Value prop #1 — Ann — 09:00 PT.”
- Central source of truth: Maintain a shared calendar (e.g., a spreadsheet or project board) mirroring the Scheduled queue with links to assets.
- Approvals: If using native LinkedIn only, run approvals in your project tool and lock final copy before scheduling. If using a scheduler, use its built-in approvals.
- Audit trail: Third-party tools provide logs; if working natively, add a simple “change log” column in your calendar with date, editor, and edits.
- Content hygiene: Store final media files in a shared drive with versioning; avoid re-uploading last-minute files that can cause mismatches.
- Weekly review: Have a standing review to triage the Scheduled tab, confirm timing vs. other channels, and fill gaps.
---
Final checklist
- Profile scheduled posts: Open composer → clock → View scheduled.
- Page scheduled posts: Admin view → Posts/Content → Scheduled tab.
- Mobile: Composer clock → View scheduled (ensure correct identity).
- Edits: Safe for copy/time; recreate if swapping media.
- Can’t find it? Verify role, identity, app version, cache, or third-party queue.
With these steps and guardrails, you’ll always know how to find scheduled posts on LinkedIn and keep your content pipeline running smoothly.
---
Summary
Finding and managing scheduled posts on LinkedIn varies by identity (profile vs. Page) and platform (desktop vs. mobile), but the composer’s clock icon and the Page Scheduled tab are your primary entry points. You can safely edit copy and timing, but swapping media often requires recreating the post, and third-party scheduled items won’t appear in LinkedIn’s native queue. Align roles, workflows, and timing best practices to keep your calendar organized and your campaigns on track.


