Step-by-Step Guide to Insert Photo in Instagram Story
Learn step-by-step how to insert, edit, and optimize photos in Instagram Stories, including creative tools, tagging, and quality enhancement tips.

Step-by-Step Guide to Insert Photo in Instagram Story
If you’re searching for how to insert photo in Instagram Story, you’ll find this comprehensive guide invaluable. Instagram Stories are a dynamic way to share moments, drive engagement, and expand your reach. Below, we walk you through each step—from opening the app to adding creative elements—so you can create polished, visually appealing Stories that captivate your audience.
---
1. Open the Instagram App and Access the Story Camera
Begin by launching the Instagram app on your smartphone. The default view will be your main feed.
To start creating your Story:
- Tap your profile picture at the upper left (“Your Story”).
- Or swipe right from anywhere in the feed.
Once inside the Story camera, you’re ready to capture or upload content.
---
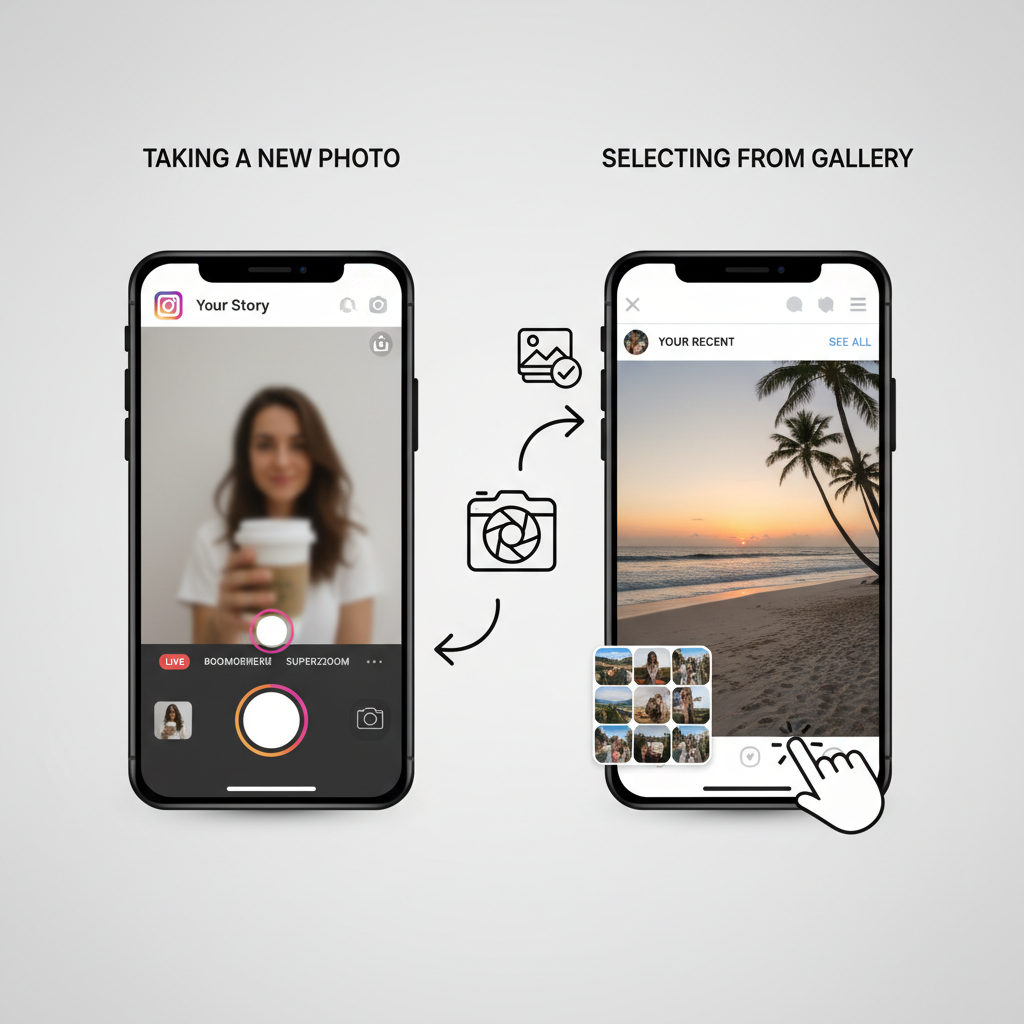
2. Choose Between Capturing a New Photo or Uploading from Your Gallery
Within the Story camera interface, choose one of two options:
- Capture a new photo: Tap the white shutter button centered at the bottom.
- Upload from gallery: Select an existing image stored on your device.

This versatility allows for both spontaneous posts and curated images.
---
3. Swipe Up or Tap Gallery Icon to Select Existing Photo
If uploading from your gallery:
- Swipe up to reveal your camera roll.
- Alternatively, tap the small square gallery icon in the lower left.
After selecting, Instagram will auto-scale the image to Story dimensions—adjustments can be made next.
---
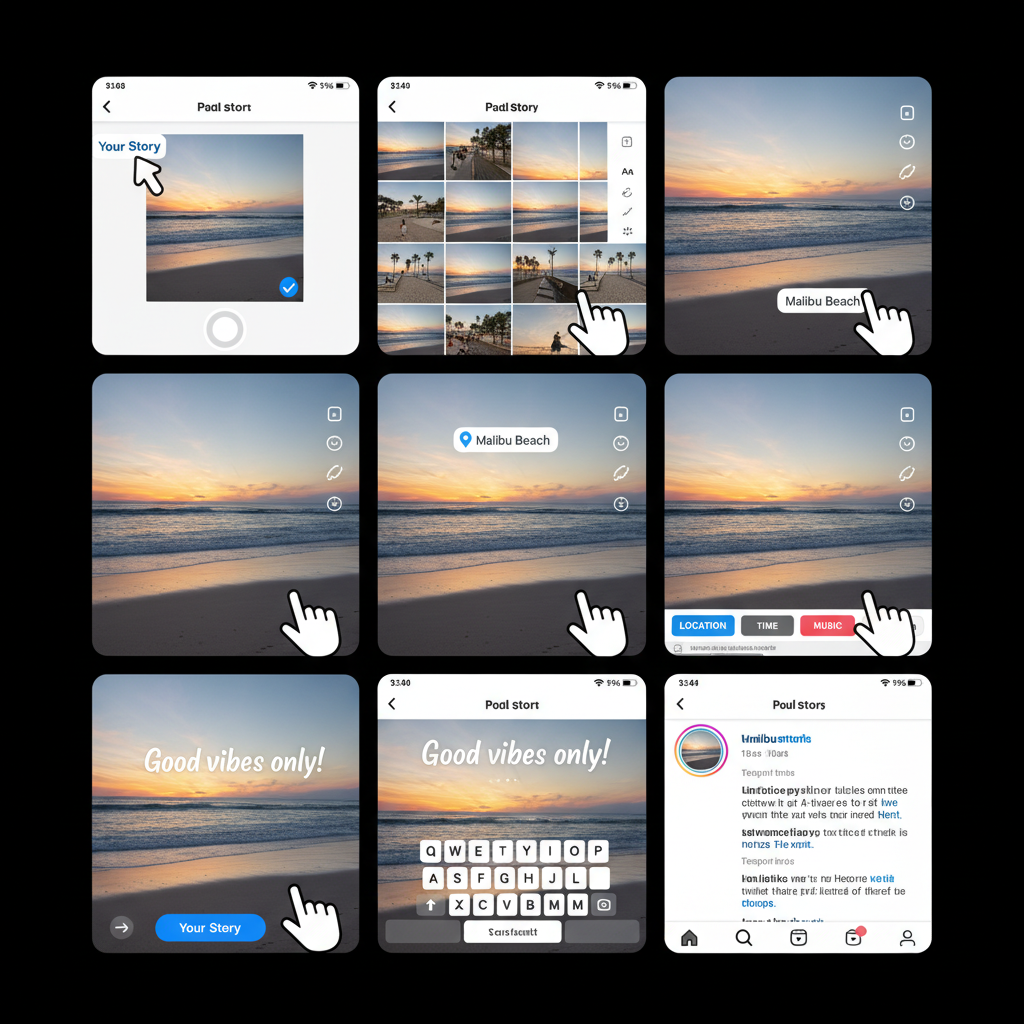
4. Adjust Photo Size, Position, and Orientation
Perfect your photo placement by:
- Pinching two fingers to zoom in or out.
- Dragging with one finger to reposition.
- Rotating with two fingers.
Well-balanced alignment enhances both aesthetics and impact.
---
5. Add Creative Elements: Stickers, GIFs, Text, and Drawing Tools
Make your Story interactive by incorporating:
- The sticker icon (square smiley face) for polls, music, and more.
- Fun GIFs from Instagram’s library.
- The Aa text tool for captions, quotes, or branding.
- The drawing tool for sketches or doodles.
Each feature encourages engagement while adding personality.
---
6. Use Filters and Effects to Elevate Your Photo’s Style
Instagram’s filters and AR effects can transform your image:
- Swipe left/right to apply color filters.
- Tap the sparkle icon to explore AR effects.
Layering filters and effects gives Stories a unique creative edge.
---
7. Tag Friends, Add Location, and Include Hashtags
Boost discoverability by:
- Tagging friends via @mention stickers.
- Specifying a location so locals can find your content.
- Adding relevant hashtags to appear in hashtag Stories.
These elements increase reach without extra cost.
---
8. Preview Your Story Before Publishing
Always double-check content before posting:
- Tap Preview (eye icon) or review your draft.
- Assess alignment, clarity, and detail accuracy.
- Verify stickers, text, and tags are correctly placed.
This quick step ensures professional-looking Stories.
---
9. Post the Story by Tapping “Your Story” or “Close Friends”
Select your audience carefully:
- Your Story shares with all followers.
- Close Friends targets a select group.
Choosing appropriately can maintain privacy and optimize impact.
---
10. Tips for Optimizing Photo Quality for Stories
Instagram Stories look best with proper preparation. Follow these guidelines:
| Tip | Details |
|---|---|
| Dimensions | Use 1080px by 1920px for crisp quality. |
| Aspect Ratio | Keep 9:16 to prevent cropping. |
| Lighting | Opt for natural light; avoid harsh shadows. |
| Compression | Limit excessive editing to maintain image sharpness. |
---
11. Common Mistakes to Avoid When Adding Photos to Stories
Steer clear of:
- Excessive text/stickers distracting from the main image.
- Ignoring aspect ratio, which distorts visuals.
- Overusing filters resulting in unnatural colors.
- Skipping preview, causing typos or misplacement.
Attention to these details keeps your content polished.
---
12. How to Save or Archive Your Posted Story for Later Use
Stories vanish after 24 hours, but Instagram provides options to keep them:
- Save to device: Tap the three dots on your Story, select “Save Photo/Video”.
- Add to Highlights: Permanently showcase selected Stories under themed categories.
- Use Archive: Automatically stores past Stories privately for access anytime.
Archiving allows repurposing and preserves memories.
---
Recap: Mastering How to Insert Photo in Instagram Story
Learning how to insert photo in Instagram Story empowers you to share content effectively:
- Open the Story camera quickly from your feed or profile.
- Choose between capturing new shots or uploading existing ones.
- Adjust and enhance with filters, stickers, and captions.
- Preview thoroughly to ensure quality.
- Apply optimization tips for crisp visuals.
Stories thrive on creativity and smart sharing—use these steps to make your photos captivating.
---
Final Thoughts and Call to Action
By mastering these techniques, you can seamlessly add photos to Instagram Stories and strengthen your social media presence. Try integrating different styles, keep quality high, and experiment with interactive elements. Start applying these tips today to transform your Stories into engaging, standout posts that connect with followers.