How to View Scheduled Posts on LinkedIn
Learn how to find, edit, and manage your scheduled posts on LinkedIn for both personal profiles and company pages, plus tools and troubleshooting tips.

How to View Scheduled Posts on LinkedIn
LinkedIn is a powerful platform for professionals and brands to share ideas, updates, and thought leadership. If you regularly schedule content, you may wonder how to view scheduled posts on LinkedIn to ensure your messaging is accurate and timely. This guide walks you through locating, reviewing, and managing scheduled posts for both personal profiles and company pages, with additional tips, troubleshooting advice, and best practices to maximize reach.

---
Logging into Your LinkedIn Account
Before you can check any scheduled posts, you must log in with the correct LinkedIn profile or company admin account:
Desktop
- Go to LinkedIn.com in your web browser.
- Enter your email/phone and password.
- Click Sign in.
Mobile
- Open the LinkedIn mobile app.
- Tap Sign in.
- Enter your credentials.
> Tip: Scheduled posts are linked to the account that created them, so ensure you’re using the right login.
---
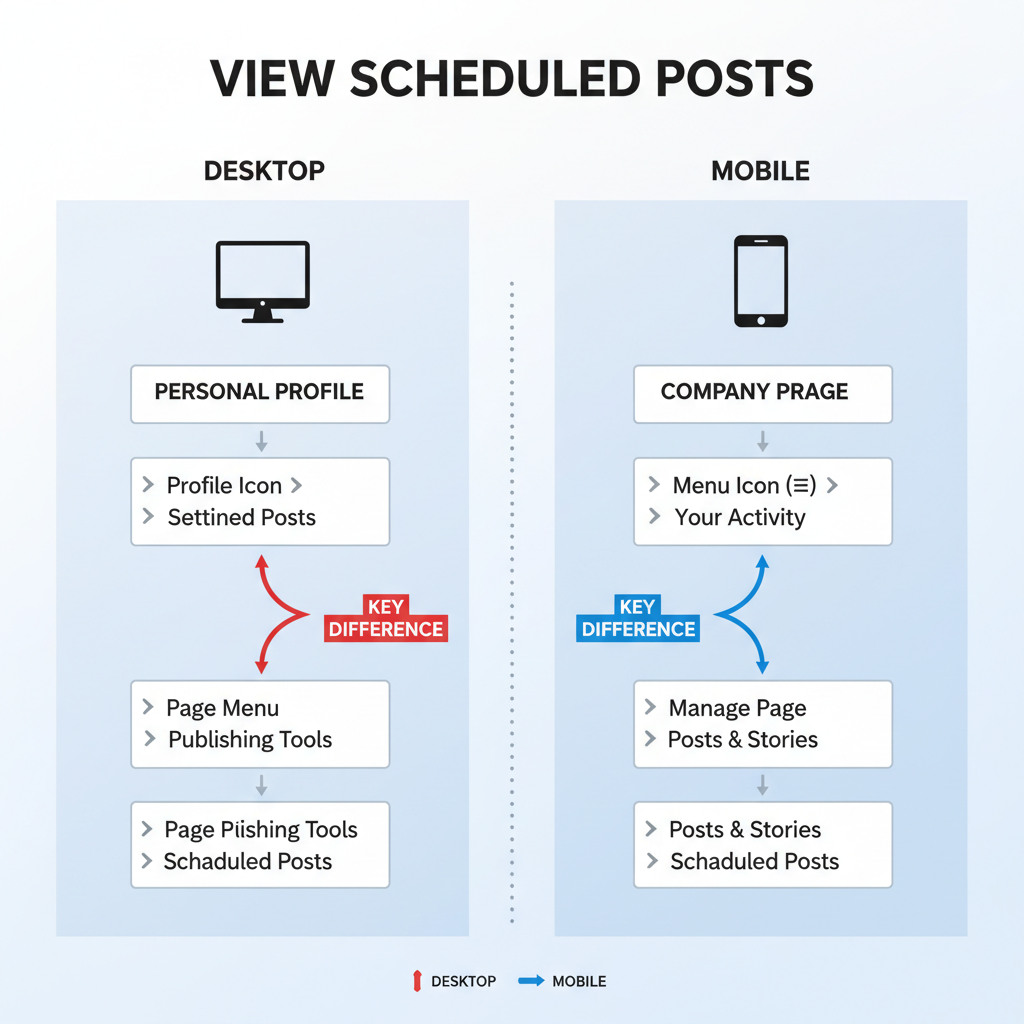
Navigating to the Relevant Section
Your starting point depends on the type of scheduled post:
- Personal profile posts: Begin in your Home feed.
- Company page posts: Go to your company page via the Me menu → Manage → select the desired page.
---
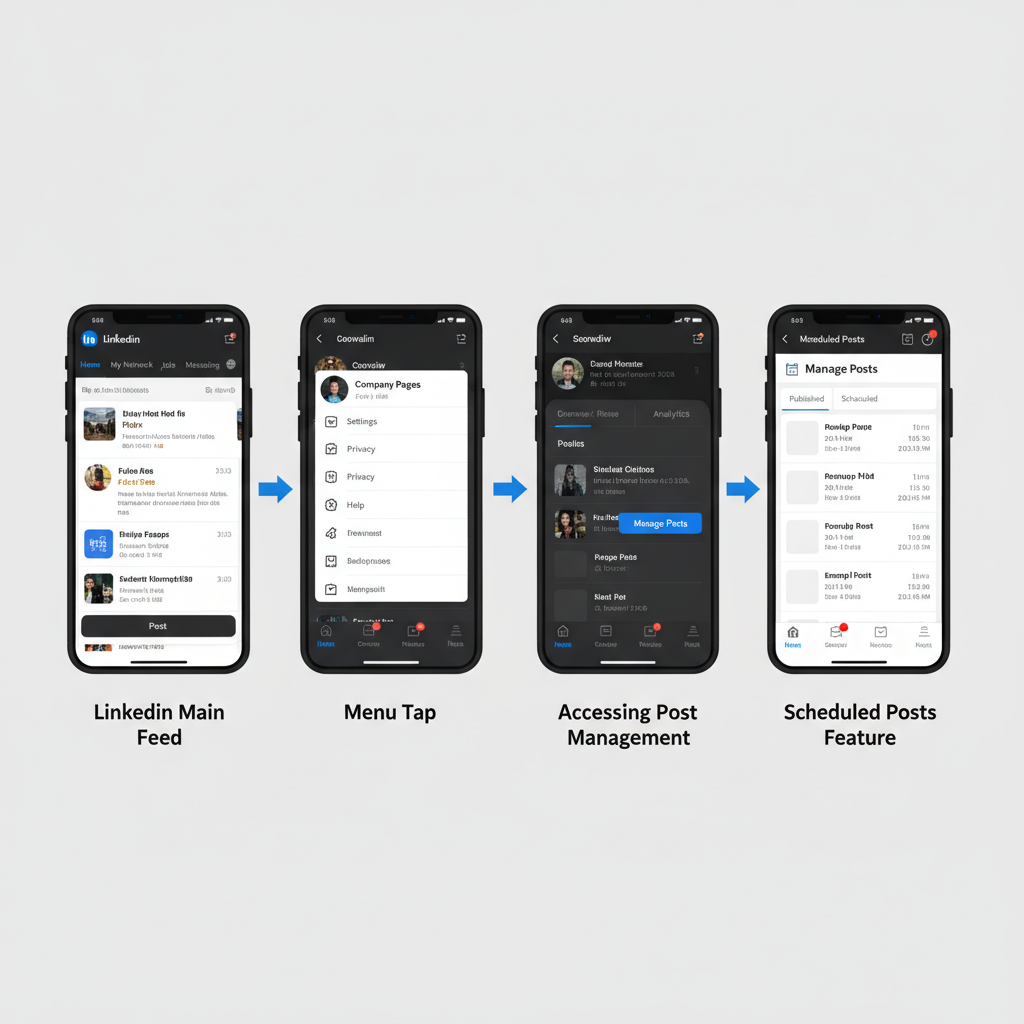
Finding the Scheduled Posts Feature
LinkedIn’s post composer has a built-in scheduling display.
For Personal Profiles
- In your Home feed, open the Post composer (“Start a post” box).
- Look for the clock icon or Scheduled link.
- Click View scheduled posts or Manage scheduled posts.
For Company Pages
- Switch to Admin view.
- Navigate to the Content tab.
- Select Scheduled posts from the menu.
---
Viewing, Editing, or Rescheduling LinkedIn Content
Within the scheduled posts interface:
- Preview to verify visuals and text.
- Edit to fix errors, then save.
- Reschedule by changing the date/time field.
- Cancel scheduling entirely if necessary.
You’ll typically see upcoming posts listed with their scheduled times and authors.
---
Organizing Scheduled Posts for Efficiency
Organized scheduling boosts productivity and consistency.
| Organization Method | Benefits |
|---|---|
| Categorization | Aligns content with your marketing campaigns |
| Labels | Simplifies tracking in content calendars |
| Date Priorities | Ensures posts coincide with peak engagement periods |
---
Benefits of Regularly Monitoring Scheduled Posts
Ongoing monitoring prevents issues and improves your strategy:
- Maintain quality control for visuals and copy.
- Achieve timely engagement by aligning with current events.
- Protect brand consistency across campaigns.
- Sync publication times with analytics insights.
---
How to Delete or Revise Content Before Publishing
Should you need to make significant changes:
- Open the scheduled post interface.
- Select the target post.
- Choose Delete or Cancel schedule and confirm.
- Alternatively, select Edit, update content, and save to keep the schedule.
> Note: Major edits, such as replacing images, may require re-uploading and re-scheduling.
---
Using Third-Party Tools to Manage LinkedIn Scheduled Posts
LinkedIn’s native feature is useful, but external platforms provide extra functions.
Examples:
- Buffer – queue management and analytics.
- Hootsuite – calendar view with drag-and-drop rescheduling.
- Sprout Social – campaign tagging and approval workflows.
Key advantages:
- Manage multiple networks from one dashboard.
- Enable team collaboration.
- Access AI-based best-time scheduling suggestions.
---
Troubleshooting Missing Scheduled Posts
If you cannot locate a scheduled post:
- Verify account permissions.
- Check if the post is saved as a draft instead of scheduled.
- Look for expired posts that have already gone live.
- Compare mobile vs. desktop—some views are desktop-only.
- Consider temporary LinkedIn bugs; try logging out/in.
---
Best Practices for Scheduling
To optimize your scheduled content:
- Post during peak audience hours.
- Use varied formats—text, images, video, articles.
- Monitor engagement metrics to refine scheduling.
- Stay current by adjusting for breaking news.
- Avoid excessive posting to prevent audience fatigue.
---
Summary and Next Steps
Knowing how to view scheduled posts on LinkedIn empowers you to maintain control over publishing and messaging. Use the native LinkedIn tools for quick checks, or enhance your workflow with third-party apps for deeper analytics and flexibility. Keep your queue organized, review content regularly, and adjust as needed to maintain relevance.
Start by logging into LinkedIn now, check your scheduled posts, and ensure your upcoming content aligns with your brand voice and goals—your audience will thank you.


