Step-by-Step Guide to Making a Private Facebook Group
Learn how to create a private Facebook group, set privacy and visibility options, manage membership approvals, and control posting permissions.

Step-by-Step Guide to Making a Private Facebook Group
Creating a private Facebook group is one of the best ways to establish a secure, dedicated environment for communication, networking, or shared interests. Whether you aim to nurture a professional network, support community causes, or keep family updates private, the right privacy settings ensure control over membership and conversations. In this guide, you’ll learn exactly how to make a private Facebook group, configure settings, and maintain engagement effectively.
---
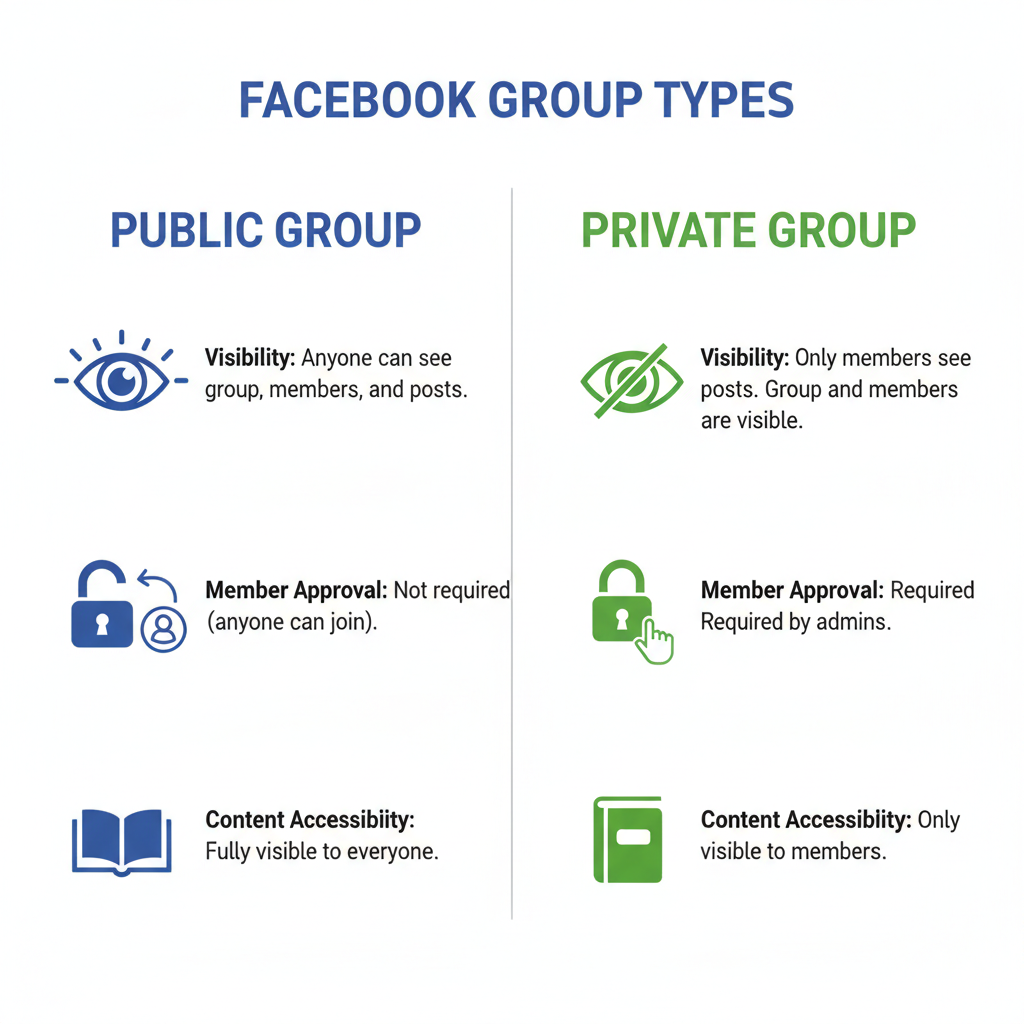
Understanding Facebook Group Types
Before setting up your group, understand the difference between Public, Private, and Hidden to choose the option that matches your privacy needs.
| Group Type | Visibility | Joining | Content Access |
|---|---|---|---|
| Public | Anyone can find and see posts | Anyone can request or join | All content visible to non-members |
| Private | Anyone can find group (unless hidden) | Joining requires approval | Only members can see posts |
| Hidden (Private) | Only members can find group | Joining requires invitation | Content exclusive to members |
---
Decide on Your Group’s Purpose and Audience
Define the mission for your private Facebook group to guide its tone and membership policies:
- Who is your ideal member profile?
- What key topics will be discussed?
- Will it serve networking, learning, hobby exchange, or support?
A clear purpose makes naming, description writing, and rule-setting far easier.
---
Step-by-Step Guide to Creating a Facebook Group
You can create a private group via Facebook’s desktop site or mobile app. The main steps are similar, but the layout differs.
Creating on Desktop
- Log in to Facebook
- Visit www.facebook.com and sign in.
- Navigate to Groups
- Click “Groups” on the left sidebar.
- Click “Create New Group”
- Look for the “+” or “Create group” button.
- Enter Group Name
- Make it clear, memorable, and relevant.
- Add Members
- Invite at least one friend to start.
- Set Privacy to “Private”
- Select Private in privacy settings.
- Choose Visibility (Visible or Hidden)
- Visible groups appear in searches; Hidden ones need direct invites.
- Click “Create” to confirm.
Creating on Mobile (Facebook App)
- Open the Facebook App and log in.
- Tap Menu (≡) → select “Groups.”
- Tap “Create” (usually top-right).
- Fill in Name and Members.
- Select “Privacy” → “Private.”
- Choose Visibility (Visible or Hidden).
- Tap “Create.”
---
Setting Privacy and Visibility Preferences
After creation, revisit your privacy settings:
- Privacy: Confirm it’s set to Private for restricted content access.
- Visibility: Decide if the group should be discoverable or hidden.
Visibility affects how potential members locate your group.
---
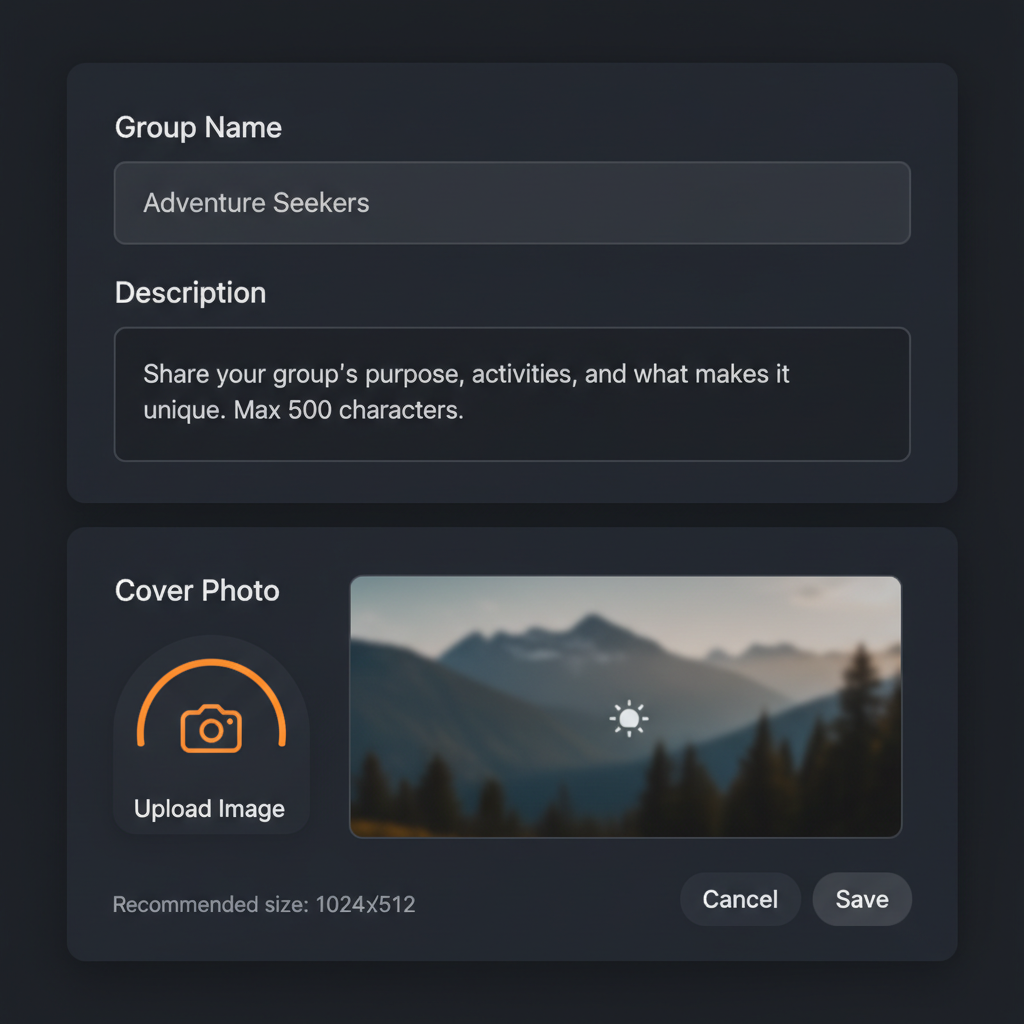
Customize Group Identity: Name, Description, and Cover Photo
A strong identity improves trust and member retention.
- Name: Short, descriptive, memorable.
- Description: Outline mission, rules, and focus areas.
- Cover Photo: Visually represent group theme.
Example:
Name: Freelance Writers Network
Description: A private community for sharing tips, jobs, and networking opportunities among freelance writers worldwide.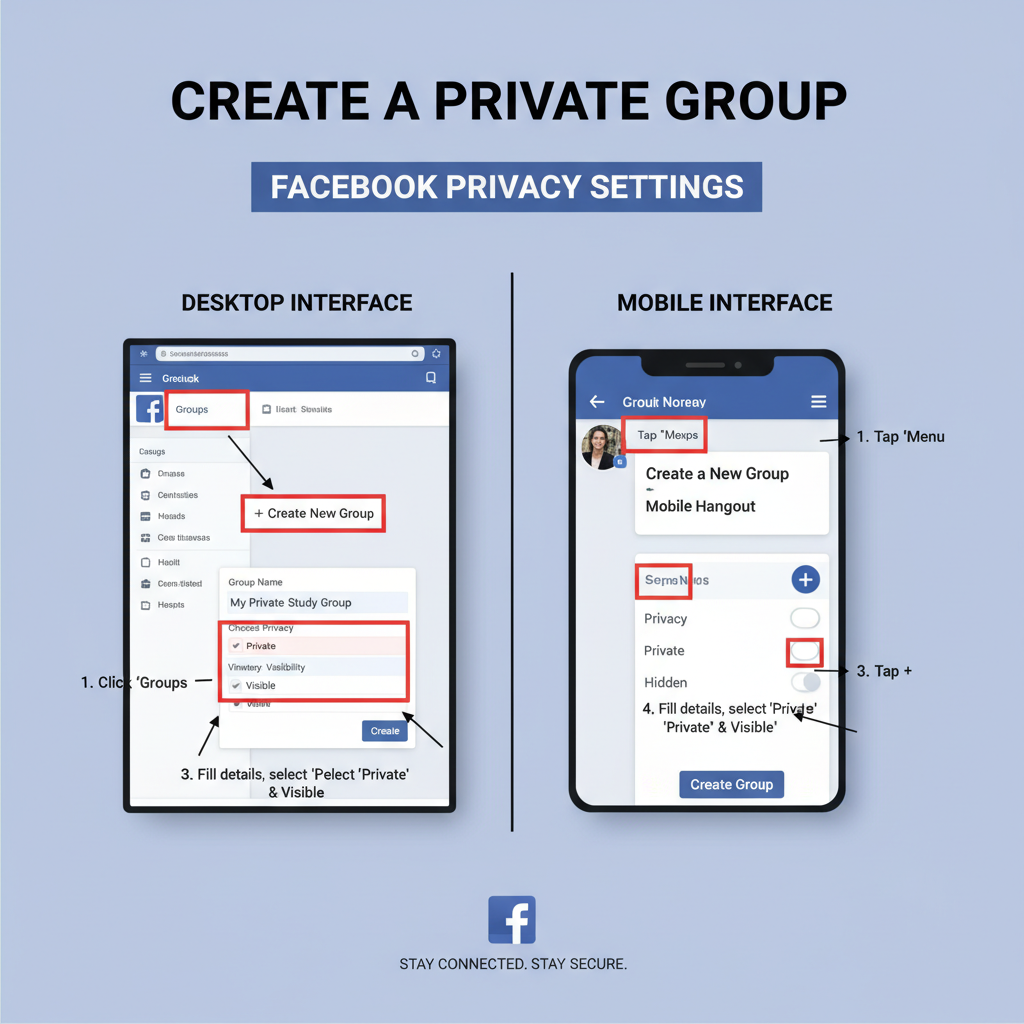
---
Adjust Membership Approval Settings
You control membership entry through:
- Manual Approval: High security; admins review each request.
- Automatic Approval: Based on Facebook-set criteria (location, answered questions).
Change these in Group Settings → Membership Approval.
---
Configure Posting Permissions
Regulate who can post content:
- Admins/Moderators Only: Great for broadcast-style updates.
- Members with Approval: Balanced oversight for larger audiences.
- Members without Approval: Suited for smaller, trusted groups.
---
Setting and Displaying Group Rules
Rules safeguard member experience:
- Respect others.
- No spam or unsolicited promotion.
- Stay on-topic.
- Keep discussions confidential.
Create these via Group Settings → Create Rules so members see them at entry.
---
Invite Members Safely
Grow your group without compromising privacy:
- Invite trusted individuals directly.
- Share links via private channels only.
- Collaborate with related small communities.
Avoid public link-sharing to control membership quality.
---
Engaging and Moderating Your Private Group
Sustained engagement keeps your group vibrant:
- Post regular updates and prompts.
- Respond quickly to member interactions.
- Use built-in tools like polls, events, watch parties.
- Remove spam or disruptive content swiftly.
---
Updating Privacy Settings Over Time
With growth, periodically revise settings:
- Assess whether visibility should change.
- Update rules for evolving needs.
- Tighten posting controls if required.
Note: You can switch Public → Private, but after a certain size, reverting to Public isn’t allowed.
---
Common Privacy and Access Troubleshooting
Here are fixes for frequent issues:
| Issue | Possible Cause | Solution |
|---|---|---|
| Member can’t find group | Group set to hidden | Send direct invite link |
| Private posts visible outside | Member sharing screenshots | Reinforce confidentiality rules |
| Unwanted members joining | Loose approval settings | Switch to manual approval |
---
Summary & Next Steps
Setting up a private Facebook group is straightforward, but sustaining its quality requires careful privacy management, clear rules, and active moderation. By defining your audience, customizing identity, and regularly reviewing settings, you’ll foster a safe, engaged community.
Ready to build your own? Follow the steps above today and start connecting securely with the people who matter most.