Pinning Facebook Posts: A Complete How-To Guide
Learn how to pin Facebook posts on profiles, pages, and groups, with step-by-step desktop and mobile instructions, plus optimization tips.
Pinning Facebook Posts: A Complete How-To Guide
Pinning Facebook posts is one of the quickest, most effective ways to keep high-priority content at the top of your feed—ensuring your audience sees it the moment they visit. Whether you use Facebook for personal branding, business marketing, or community management, mastering this feature can significantly boost visibility and engagement.
In this updated guide, you’ll learn exactly what pinning means on Facebook, the differences between profiles, pages, and groups, step-by-step instructions for desktop and mobile, plus optimization and troubleshooting tips so your pinned posts deliver maximum impact.

---
What Does Pinning a Facebook Post Mean?
Pinning a post means selecting a specific update and keeping it "permanently" visible at the top of your feed. While new posts normally push older ones down, a pinned post stays fixed until you choose to unpin it or replace it with another.
Why Pinning Matters
- Visibility – Keep your most important content from getting buried.
- Engagement – Drive clicks to promotions or key updates.
- Branding – Consistently highlight your mission or core message.
Whether you’re running a personal profile, a business page, or a group, pinning improves clarity and focus for your audience.
---
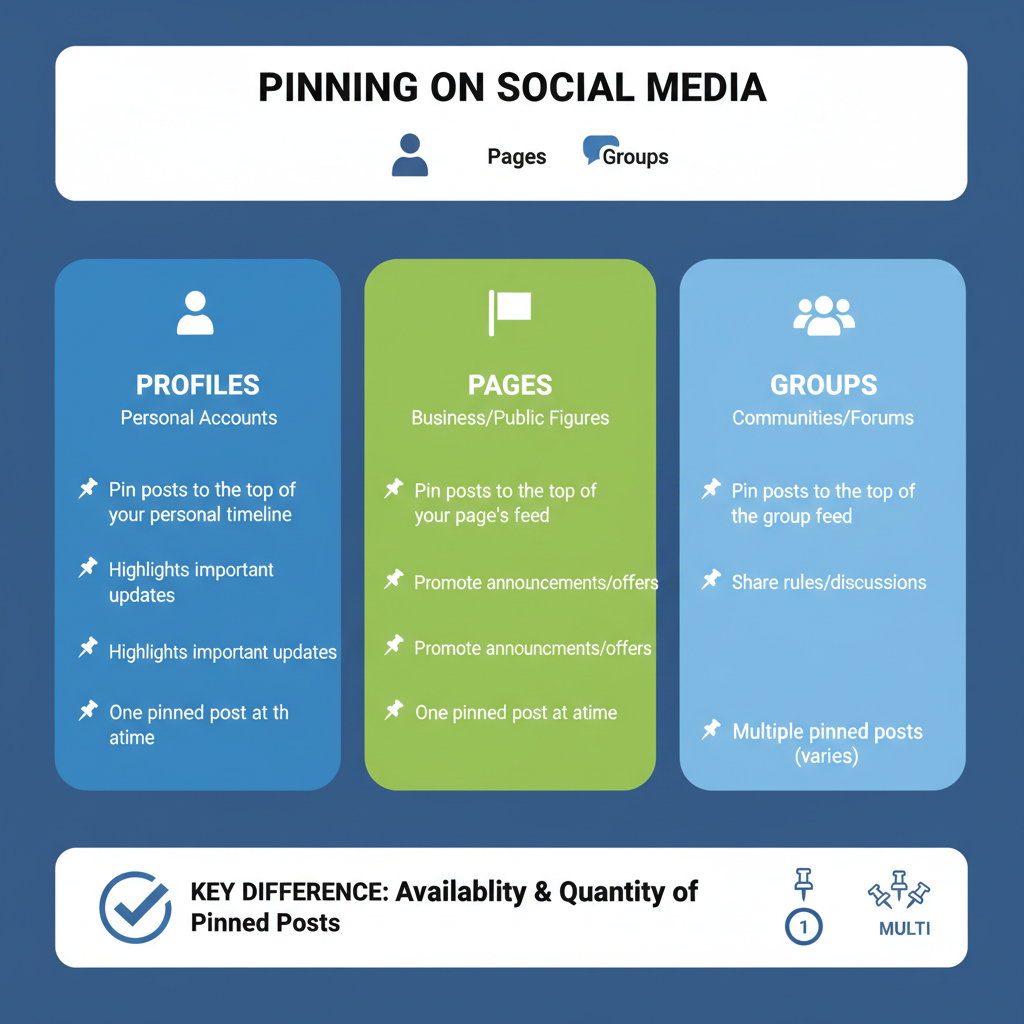
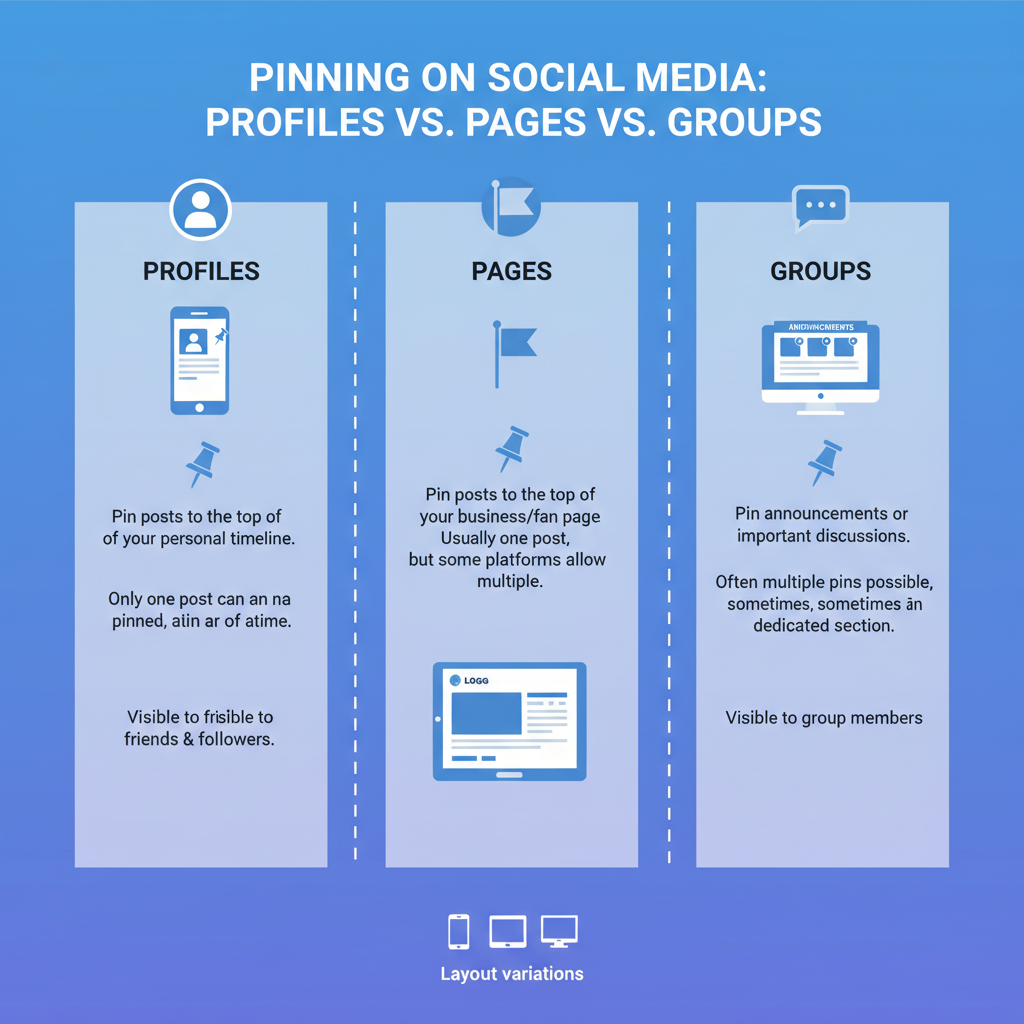
Pinning on Profiles vs Pages vs Groups
Not all Facebook locations have identical pinning capabilities, so it’s important to know what’s available in each.
| Platform | Pinning Availability | Special Notes |
|---|---|---|
| Personal Profiles | Yes | Can pin only your own posts; displays on your Timeline top. |
| Pages | Yes | Ideal for marketing content, campaign launches, and notices. |
| Groups | Yes (Admin/Moderator) | Shown as “Pin to Top” or “Mark as Announcement.” |
---
How to Pin a Facebook Post on Desktop
Pinning from a desktop browser is straightforward:
- Navigate to Your Page/Profile/Group
- Locate the Target Post
- Click the Ellipsis (“...”) Menu
- Select ‘Pin to Top’ (or ‘Mark as Announcement’ in groups)
- Confirm – Your post now appears pinned.
Pro Tip: Facebook allows only one pinned post at a time, so new pins replace old ones.
---
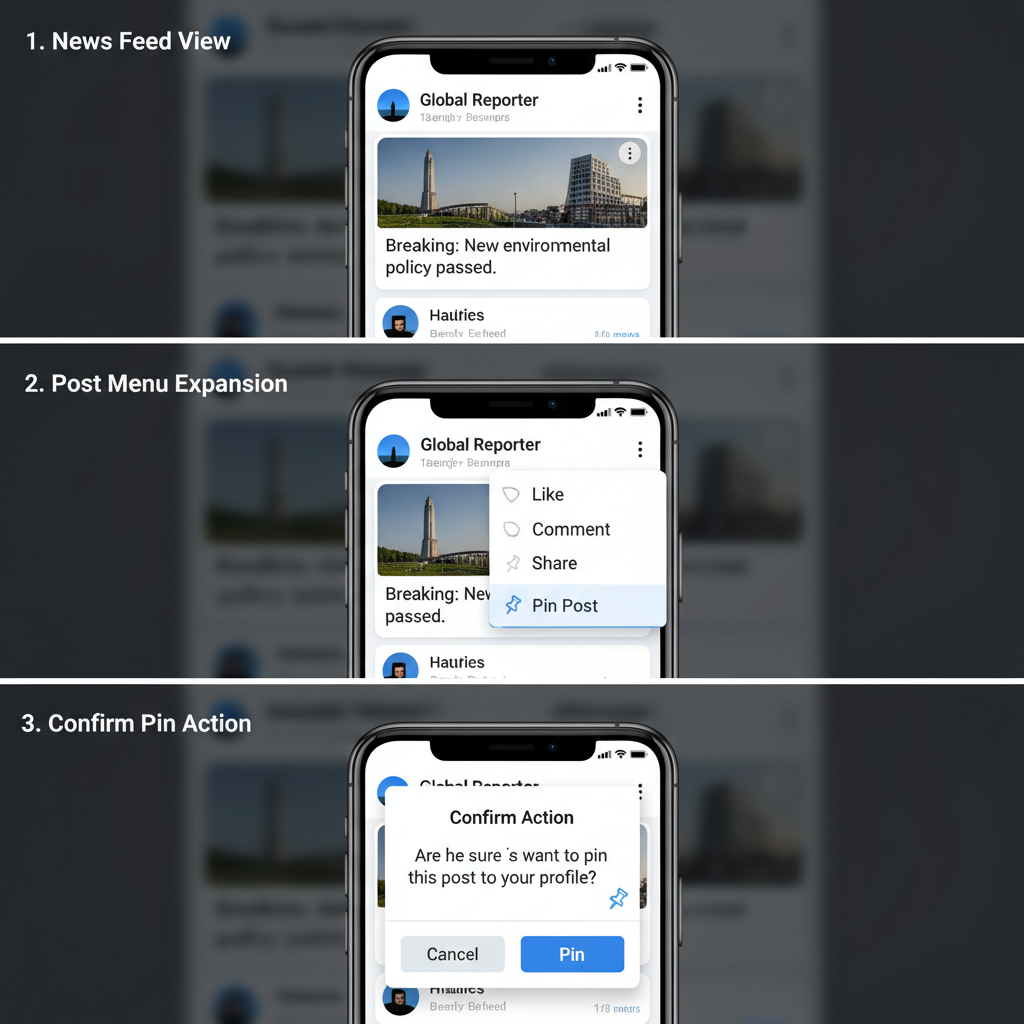
How to Pin a Facebook Post in Mobile App
On mobile devices, the interface is slightly different:
- Open the Facebook App and log in.
- Visit Your Timeline, Page, or Group.
- Find the Post you want to feature.
- Tap the Three-Dot Menu on that post.
- Choose ‘Pin Post’ or ‘Mark as Announcement.’
- Verify that your post is now pinned to the top.
---
Best Types of Posts to Pin
Pin only strategic, high-value posts:
- Announcements – Product launches, event alerts, important updates.
- Special Offers – Discounts, flash sales, limited-time promotions.
- Popular Content – Posts with high activity or virality.
- Guidelines – Community rules or onboarding information.
---
How Often to Update or Change a Pinned Post
Keeping pinned content fresh is vital for continued engagement:
- Rotate monthly during ongoing campaigns.
- Swap immediately when a campaign ends.
- Update instantly during a crisis or urgent event.
---
Optimizing a Pinned Post for Clicks
Maximize the impact of your pinned content.
Use Strong Visuals
Eye-catching images or videos stop the scroll.
Craft Compelling Captions
Hook the audience early with concise, value-driven text.
Add Links and CTAs
Instruct viewers clearly:
- “Shop Now”
- “Learn More”
- “Join Our Community”
---
Measuring Pinned Post Performance via Facebook Insights
Tracking performance helps you evaluate effectiveness.
Monitor:
- Reach – Unique views count.
- Engagement – Likes, comments, shares.
- Click-through Rate (CTR) – For external links.
- Conversions – Leads, sales, sign-ups.
How to Access Insights
- Open your Facebook Page.
- Select Insights in the left menu.
- Click Posts to view data for pinned content.
---
Troubleshooting When Pin Option Is Unavailable
If you can’t find the pin function, check:
- Permissions – Group pinning requires admin/moderator rights.
- Post Type – Auto-generated posts may be restricted.
- Software Updates – Refresh or update your app/browser.
- Temporary Bugs – Try logging out and clearing cache.
---
Common Mistakes to Avoid When Pinning
- Pinning outdated or irrelevant posts.
- Changing pins too often, confusing visitors.
- Overlooking mobile display issues.
- Not analyzing performance data.
---
Advanced Tips: Scheduling and Swapping Pins for Campaigns
Elevate your pinning strategy with planned updates.
Schedule Posts
Facebook won’t schedule pins directly, but you can schedule a post to publish, then manually pin once live.
Step 1: Create and schedule the post.
Step 2: Post goes live.
Step 3: Pin manually via desktop or mobile.
Swap Pins Strategically
- Align pin changes with campaign phases.
- Archive successful pinned posts for later reuse.
---
Summary and Next Steps
Pinning Facebook posts is a low-effort tactic that delivers high visibility, driving engagement and reinforcing your brand message across profiles, pages, and groups. By following best practices—fresh updates, strong visuals, and clear CTAs—you can turn a single post into a lasting touchpoint for your audience.
Ready to boost your Facebook strategy? Experiment with different types of pinned posts this week, monitor their performance, and refine your approach for even greater impact. Start pinning smarter today.