How to Post a Live Photo on Instagram from iPhone
Learn how to post Live Photos from your iPhone to Instagram by converting, editing, and optimizing them for Stories, Reels, and feed posts.
How to Post a Live Photo on Instagram from iPhone
Instagram is all about visual storytelling, and iPhone’s Live Photos take your images a step further by adding subtle motion and sound. Many creators ask how to post live photo on Instagram seamlessly. This guide explains every step — from understanding Live Photos to converting, editing, optimizing, and sharing them effectively — so you can showcase these dynamic moments across your feed, Stories, and Reels.
---
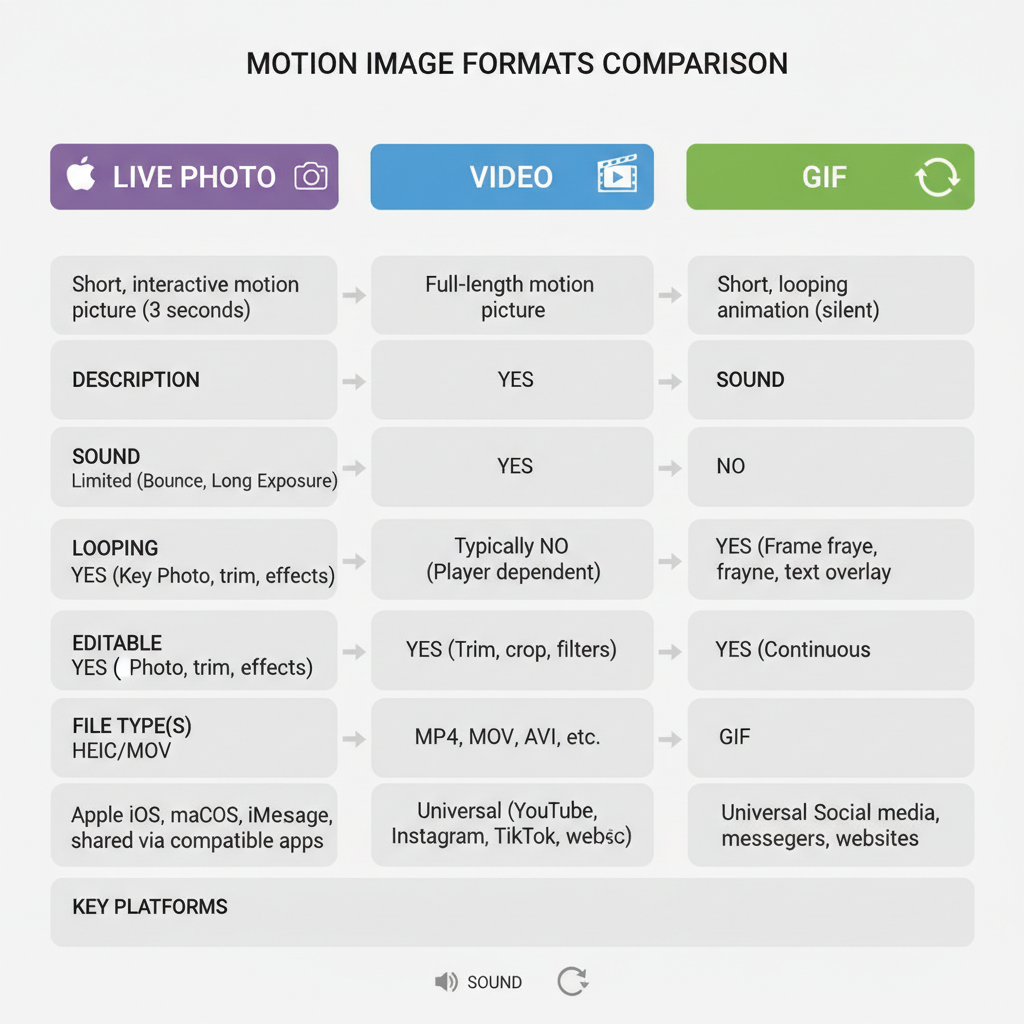
Understanding What a Live Photo Is
Live Photos are an iPhone feature that records 1.5 seconds before and after you take a still shot, resulting in a mini video clip with audio. Each Live Photo consists of:
- A high-quality still image (`.JPEG`)
- A short motion clip (`.MOV`)
On your iPhone, tapping and holding the photo reveals the motion. Instagram doesn’t directly support Live Photos in feed posts, but you can convert them into compatible formats for upload.

---
Device and App Requirements
Confirm you meet these basic requirements before posting your Live Photo:
| Requirement | Details |
|---|---|
| iPhone model | iPhone 6s or newer (supports Live Photos) |
| iOS version | iOS 9 and above (latest recommended for app compatibility) |
| Instagram app | Latest version from App Store |
| Storage space | Sufficient free space to save converted videos |
---
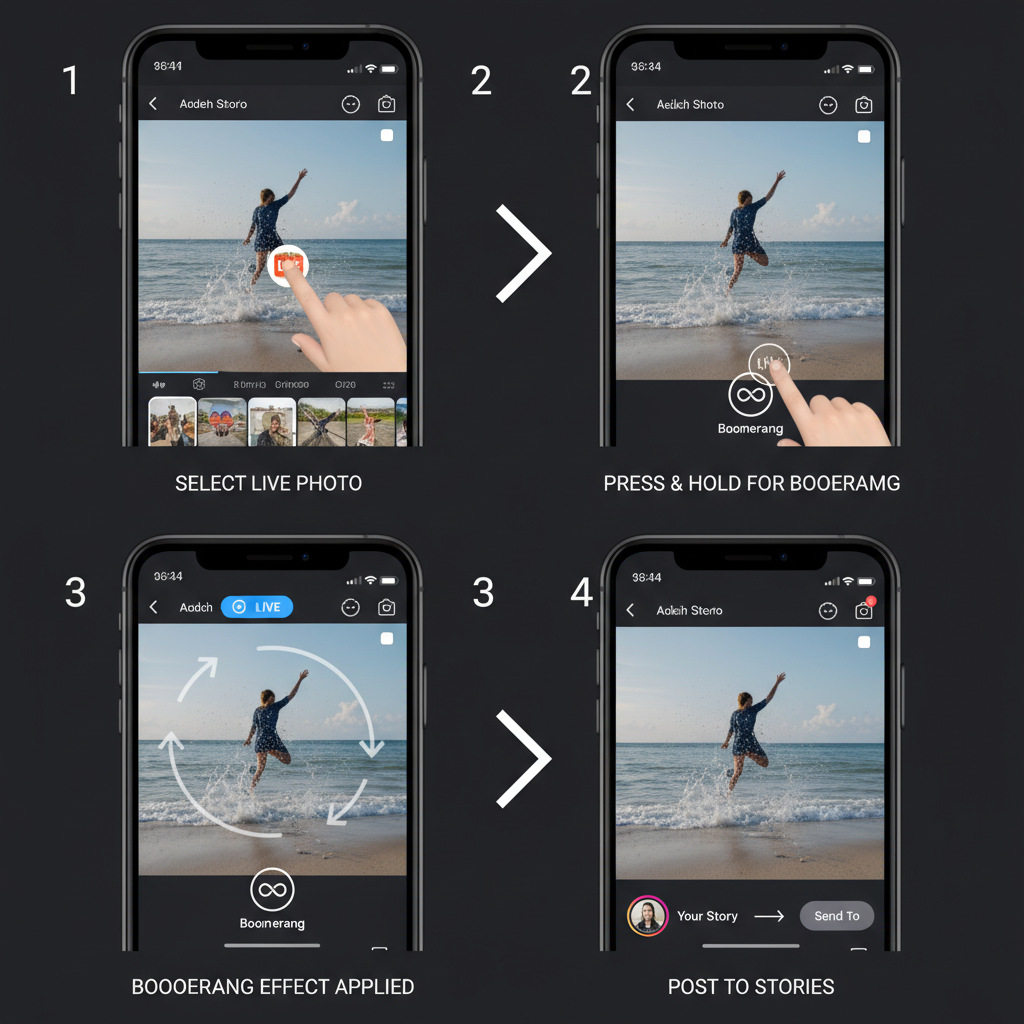
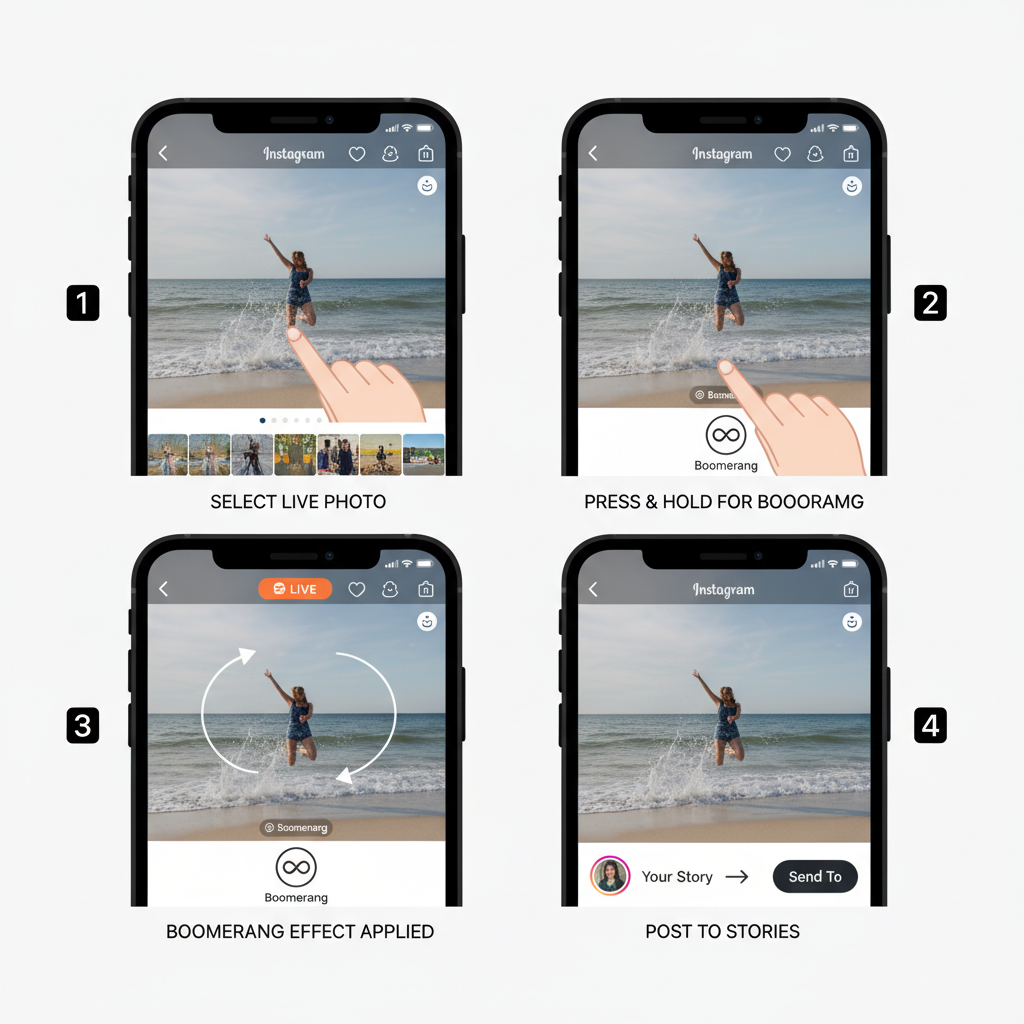
Convert a Live Photo into a Boomerang via Instagram Stories
Instagram Stories offers built-in support for turning Live Photos into looping Boomerangs.
Steps:
- Open Instagram and swipe right to access Stories.
- Tap the camera roll icon to view recent content.
- Select your Live Photo from the gallery.
- Press and hold on the screen — the app will convert it into a Boomerang automatically.
- Customize with stickers, text, or filters, then post to your Story.
Pro Tip: Save that Boomerang to your camera roll so you can repurpose it for your feed or Reels later.
---
Use Third-Party Apps to Turn Live Photos into Videos or GIFs
Feed posts require standard video formats for motion content. Third-party tools make conversion easy.
Recommended Apps:
- Lively – Export Live Photos as GIFs or MP4 videos.
- Motion Stills – Stabilizes images and converts them.
- IntoLive – Adds extensive editing features before conversion.
Conversion Workflow:
- Install and open your chosen app.
- Import your Live Photo.
- Choose MP4 output and set desired resolution.
- Save to your camera roll.
- Upload to Instagram feed or Reels.
---
Add Creative Edits Before Posting
Creative edits help your content stand out. You can use Instagram’s built-in tools or external apps like InShot and Adobe Premiere Rush for more control.
Editing Options:
- Trimming – Focus on the most engaging part.
- Filters – Keep visual consistency with your brand.
- Text overlays – Call out key moments or context.
- Stickers and emojis – Enhance mood and engagement.
Example workflow in InShot:
1. Import converted Live Photo video.
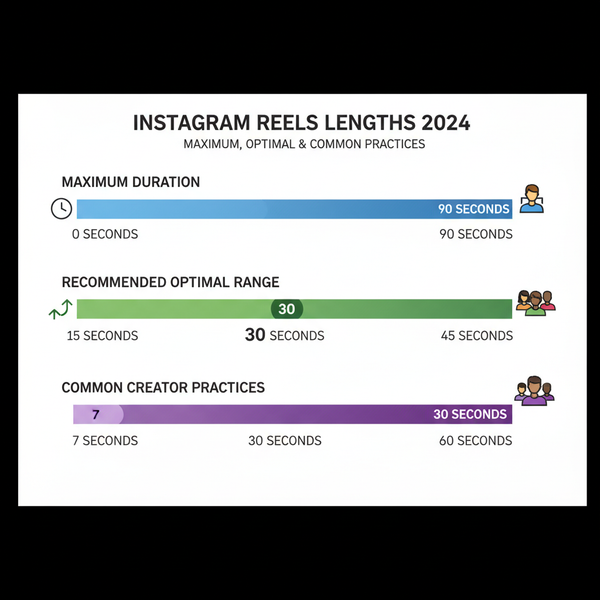
2. Trim to length (15s for stories, <60s for feed).
3. Apply filters for style cohesion.
4. Export as MP4 at 1080x1920 resolution.---
Best Practices for Aspect Ratio, Resolution, and File Size
Maintaining correct formats ensures professional quality and better reach.
| Post Type | Aspect Ratio | Resolution | Max File Size |
|---|---|---|---|
| Feed Video | 1:1 Square / 4:5 Portrait | 1080x1080 / 1080x1350 | 4GB |
| Story/Reels | 9:16 Portrait | 1080x1920 | 4GB |
| IGTV | 9:16 Portrait / 16:9 Landscape | 1080x1920 / 1920x1080 | 4GB |
---
Tips for Captions and Hashtags That Drive Engagement
Strong captions and strategic hashtags extend your reach.
Captions:
- Lead with a hook to grab attention.
- Share the story or moment behind the Live Photo.
- Include a call-to-action: “Tag a friend who loves this spot!”
Hashtags:
Use both broad and niche terms:
- #LivePhoto
- #iPhonePhotography
- #Boomerang
- #InstaDaily
- #BehindTheScenes
---
Sharing to Feed, Story, and Reels
Decide where your converted Live Photo shines best:
- Feed – For thoughtfully edited, evergreen content.
- Story – For casual, timely updates.
- Reels – To reach new audiences via Instagram’s algorithm.
Tagging: Mention friends, collaborators, or brands for increased visibility.
---
Troubleshooting Common Issues
When posting, you may run into problems:
- Format Errors
- Confirm final file format is MP4 or MOV.
- Use a converter app if needed.
- Quality Loss
- Export in high resolution.
- Avoid repeated compressions.
- Playback Problems
- Test playback before uploading.
- Ensure your Instagram app is updated.
---
Optimize Posting Times for Best Results
Posting when followers are active boosts interaction.
- Weekdays: 11 AM – 1 PM and 7 PM – 9 PM (local time)
- Weekends: Early mornings or late evenings
Check Instagram Insights regularly to fine-tune your schedule.
---
Final Thoughts
Posting live photo on Instagram from your iPhone is easy once you know the process: convert the image to a supported format, edit for impact, align with Instagram’s technical specs, and post with compelling captions and hashtags. Follow these tips to turn simple moments into captivating content that engages followers.
Ready to elevate your Instagram? Start experimenting with your Live Photos today and share your unique perspective with the world.