Post Longer Instagram Reels to Your Story Seamlessly
Learn how to post longer Instagram Reels to your Story by splitting clips seamlessly, keeping quality high, and optimizing playback for engagement.

Post Longer Instagram Reels to Your Story Seamlessly
Sharing a longer Reel on Instagram Story without losing flow or quality is absolutely possible — you just need the right approach. This article covers step-by-step methods to bypass the default 15-second Story split, maintain professional transitions, and keep engagement high.
---
Understanding Instagram Story Time Limit
Instagram Stories have been historically capped at 15 seconds per clip. If you choose a video longer than 15 seconds when adding it to your Story, the app automatically splits it into segments.
Key points to remember:
- Max per segment: 15 seconds
- Auto-split: Happens when uploading longer videos into Story editor
- Playback: Stories play segments sequentially in the order uploaded
While Instagram has occasionally tested 60-second Stories, the standard rule still applies to many accounts. If you want control over transitions and quality, splitting your Reel yourself often yields better results than relying solely on Instagram’s auto-cut.
---
Step 1: Confirm Your Reel Length and Prepare High-Quality Video
Before starting the Story upload process:
- Check your Reel’s total duration in the Reels editor or your camera roll.
- Export or save the highest-resolution version possible (1080 x 1920 pixels recommended for Stories).
- If it’s significantly longer than 15 seconds, you will need multiple segments.
Preparation ensures no unexpected cropping or audio mismatch during upload.
---
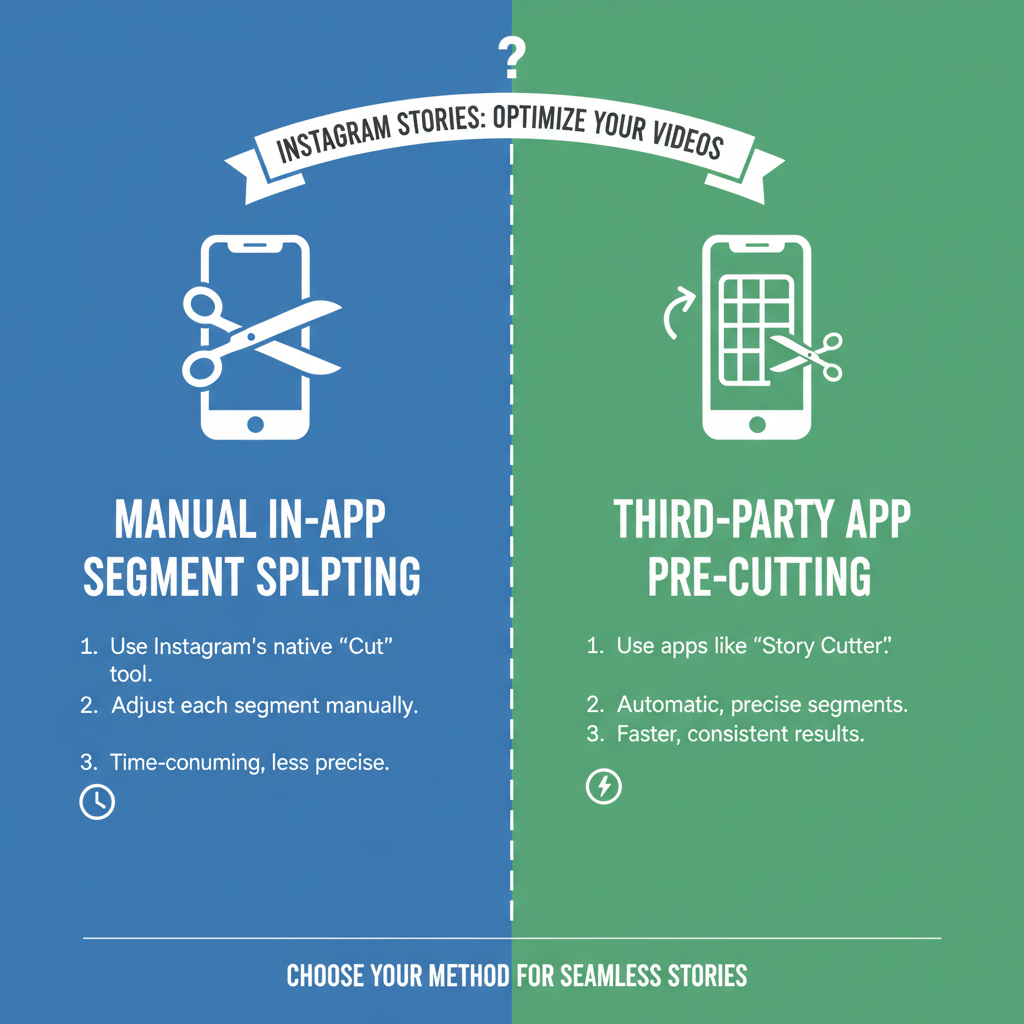
Step 2: Use Instagram’s Automatic Reel Trimming in Story Mode
The easiest route:
- Open Instagram and swipe right to the Story camera.
- Tap the gallery icon and select your Reel.
- If longer than 15 seconds, Instagram automatically slices it into multiple 15-second segments.
Benefits:
- No manual editing required
- Fast and beginner-friendly
Drawbacks:
- Cuts may feel abrupt or mid-sentence
- Occasionally slightly degrades quality due to compression
---
Step 3: Manually Split Reel into Segments Using In-App Editing
To keep control:
- Open your Reel in Instagram’s editor.
- Use the Trim option to create multiple exports, each exactly 15 seconds.
- Save each segment to your camera roll.
This way, you control where cuts happen — preferably at natural pauses or scene changes.
---
Step 4: Use Third-Party Apps to Pre-Cut Reel into Story-Friendly Clips
If you want precision and more advanced options:
Popular tools:
- InShot — Custom trim lengths, filters, text overlay.
- Splice — Professional trimming, transitions.
- CapCut — Timeline editing, effects, music syncing.
Steps:
- Import the Reel into the app.
- Create cuts every 15 seconds.
- Export as numbered segments (Part 1, Part 2, etc.).
| App | Platform | Strength | Best For |
|---|---|---|---|
| InShot | iOS/Android | User-friendly editing | Quick trims, captions |
| Splice | iOS | Professional quality | High-end transitions |
| CapCut | iOS/Android | Creative effects | Music sync + effects |
---
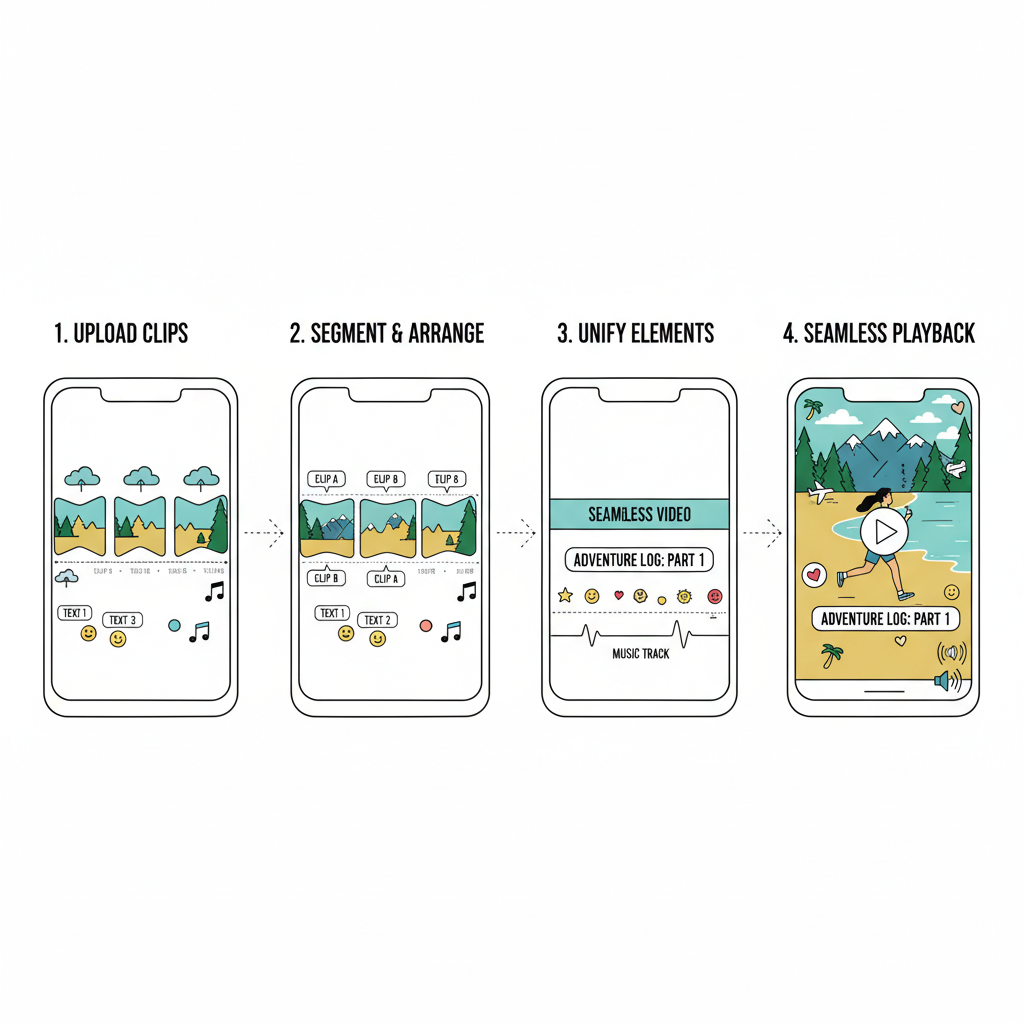
Step 5: Upload Segments Sequentially to Create Seamless Playback in Stories
When uploading:
- Start with segment 1, then add segment 2, and so on.
- Ensure order is correct to avoid confusing playback.
- You can preview the full row of uploaded clips before hitting "Share".
---
Step 6: Maintain Continuity with Consistent Captions, Stickers, and Music Syncing
Breaks between clips can become jarring if captions, stickers, or music change too much.
Tips:
- Use uniform text style and placement across segments.
- Apply stickers only when they enhance—not distract.
- Keep music aligned; trim audio properly so playback feels continuous.
---
Step 7: Optimize Visual Quality and Aspect Ratio for Story Format
For best results:
- Resolution: 1080 x 1920 px
- Aspect Ratio: 9:16
- Avoid borders or letterboxing; fill the entire frame.
- Use high-bitrate exports from editing apps to minimize Instagram compression artifacts.
---
Step 8: Add Engagement Elements to Each Segment
Stories allow interactive features that Reels don’t always emphasize. Consider adding:
- Poll Sticker — Boosts interaction
- Question Box — Encourages replies
- Emoji Slider — Fun, low-effort engagement
Strategically place these at relevant moments to keep viewers tapping and watching through all parts.
---
Step 9: Test Playback Before Publishing
Preview your Story sequence before publishing to ensure:
- Segments play back smoothly and in correct order
- Audio sync is consistent
- Engaging elements appear where intended
---
Step 10: Analyze Story Insights to Measure Engagement and Retention
After publishing, go to your Story Insights:
- Forward taps indicate interest continuing
- Exits suggest drop-off or loss of engagement
- Replies measure active interaction
Use this data to refine how you cut, caption, and design future story sequences from Reels.
---
Summary & Next Steps
Mastering how to post longer Reel on Instagram Story means balancing platform limits with creative editing strategies. Whether you rely on Instagram’s auto-split or meticulous manual cuts with third-party apps, preserving flow, audio sync, and uniform style will elevate your content.
These techniques not only make longer Reel Stories visually smooth but also boost viewer engagement. Now it’s your turn — start experimenting with your next Reel and share it in Story form to captivate your audience from start to finish.