How to Post on Instagram from iPhone Step-by-Step Guide
Learn step-by-step how to post on Instagram from your iPhone, including editing photos, writing captions, tagging, and using advanced settings.

How to Post on Instagram from iPhone: Step-by-Step Guide
If you’ve ever wondered how to post on Instagram iPhone quickly and effectively, this comprehensive guide will show you every step—from updating the app to crafting eye-catching captions—so your posts look professional and reach the right audience. By following these tips, you can maximize engagement while taking full advantage of your iPhone’s powerful camera and editing tools.
---
Ensure Your Instagram App is Updated on iOS
Before posting, make sure your Instagram app is up-to-date. Updates often include new features, security patches, and bug fixes.
Steps to update Instagram on iPhone:
- Open the App Store.
- Tap your profile icon in the top right.
- Scroll to see pending updates.
- If Instagram appears, tap Update.
Keeping the app updated ensures you have access to all current tools such as Reels, Stories stickers, and editing options.
---
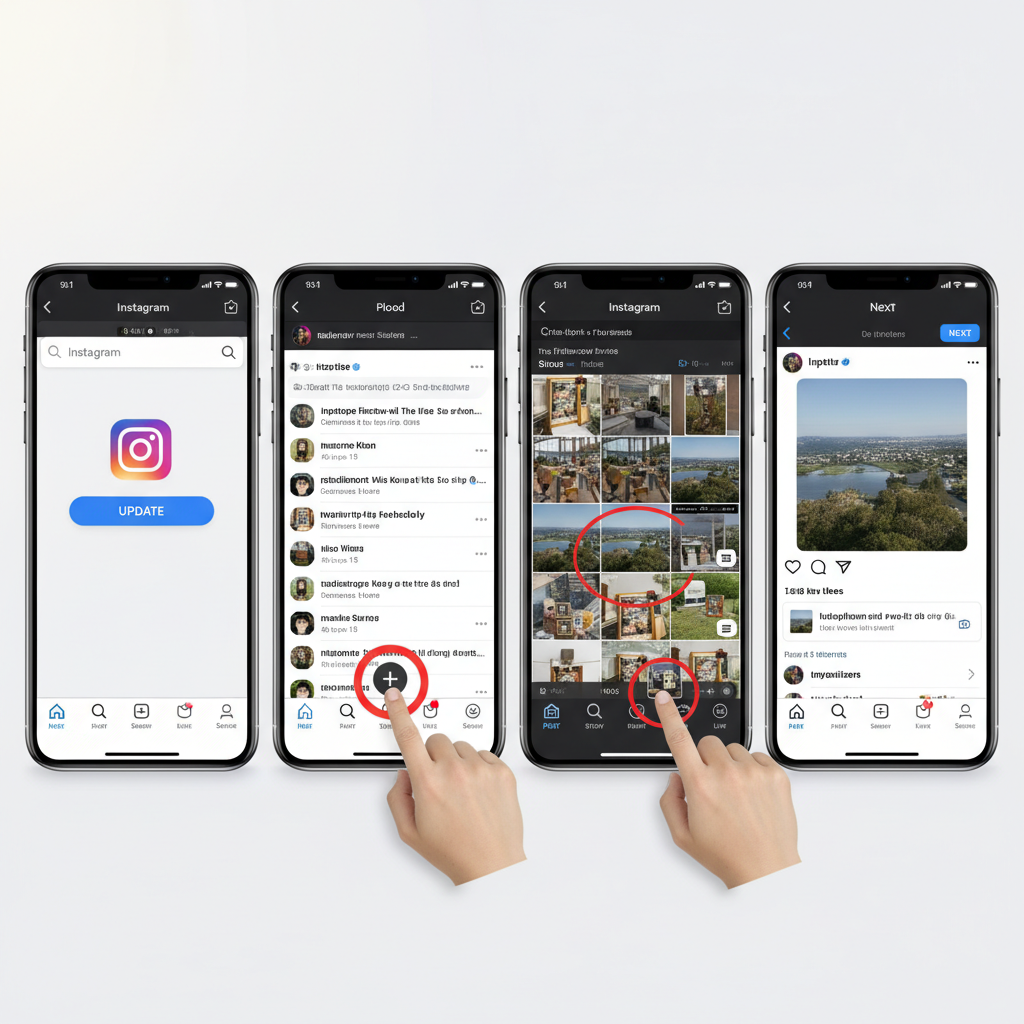
Open Instagram and Navigate to the "+" Icon
The "+" icon is the gateway to posting on Instagram.
From the Home Feed:
- Tap the "+" icon at the bottom center or top right (depending on app version).
From Your Profile Page:
- Tap the "+" in the upper right corner to start crafting a new post.
These options lead to the creation interface, where you can choose your content type.
---
Choose Photo, Video, or Carousel from Camera Roll
Once you tap "+":
- Photo – Pick an existing image from your camera roll.
- Video – Select a video clip for your post.
- Carousel – Select multiple images or videos to create a swipeable post.
Alternatively, you can take a new shot/video directly using the Instagram camera interface.
To capture:
- Grant camera permissions if prompted.
- Use tools like flash control and grid lines for better composition.
---
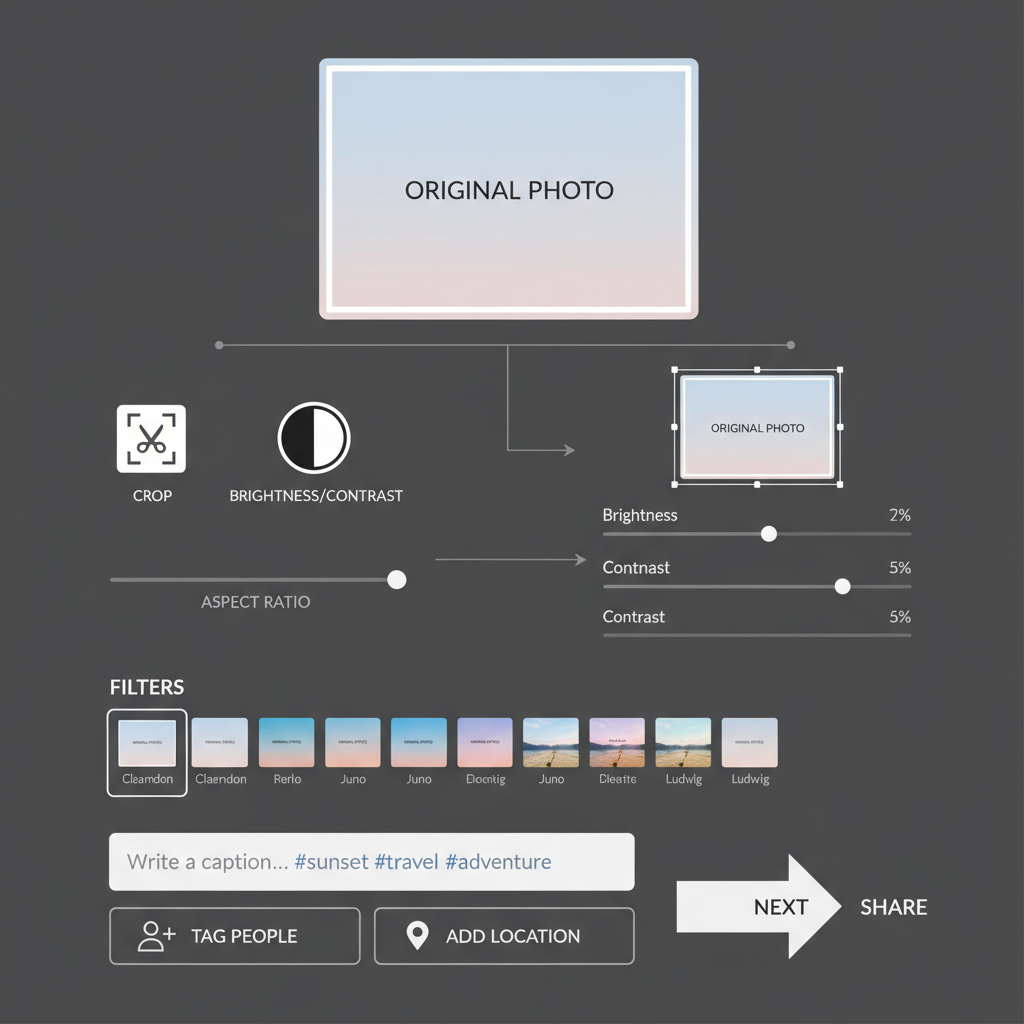
Edit Media: Crop, Adjust Brightness, Contrast, Filters
Instagram’s basic editor allows for quick adjustments:
Editing Options:
- Crop – Resize to square, portrait, or landscape.
- Adjust – Fine-tune brightness, contrast, warmth, and saturation.
- Filters – Apply preset color and tone changes.
- Tilt/Rotate – Straighten horizons and correct angles.
Pro Tip:
iPhone’s built-in photo editing is powerful. Pre-edit your media in the Photos app for precise control, then import into Instagram.
---
Add Captions with Keywords and Hashtags
A great visual needs a strong caption. This step is essential for engagement and in-app discoverability.
Best practices when adding captions:
- Start with a hook to grab attention.
- Include relevant keywords like how to post on Instagram iPhone for search optimization.
- Use hashtags strategically: Aim for a mix of popular (#iphonephotography) and niche (#coffeelovers).
Example caption:
> Loving the clean lines and vivid colors captured today! 📸
> #howtopostoninstagramiphone #creativephotography #citylife
---
Tag People and Add Location for Discoverability
Tagging and location can significantly extend your post’s reach.
Tagging people:
- Tap Tag People in the post composer.
- Search for a username and tap their profile.
Adding a location:
- Tap Add Location.
- Search or choose from nearby places.
Location tagging is especially useful for local businesses, events, or travel content.
---
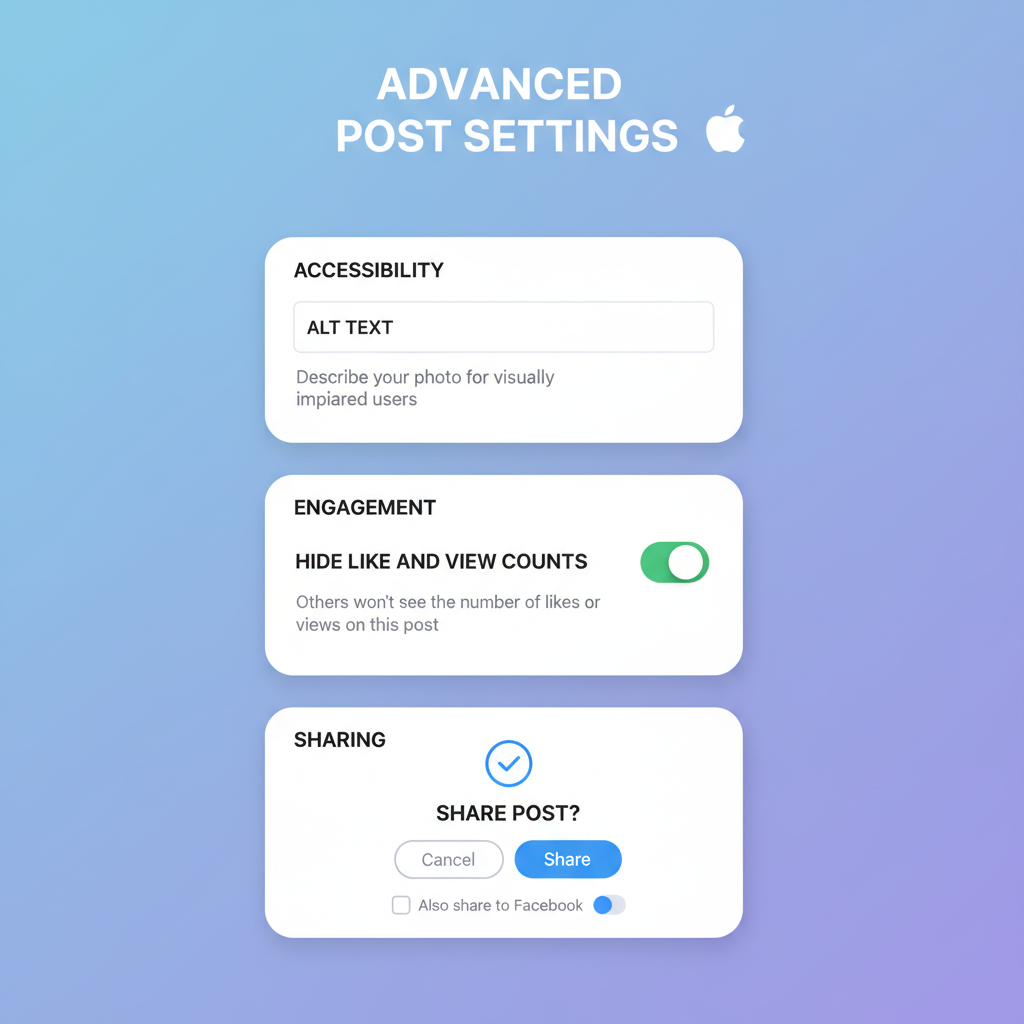
Choose Advanced Settings (Alt Text, Hide Like Counts)
Instagram advanced settings offer extra control:
- Alt Text – Describe your image for visually impaired users and boost accessibility.
- Hide Like Counts – Reduce pressure and focus on content quality.
- Disable Comments – Ideal for announcements or sensitive topics.
Accessibility example alt text: "Golden retriever puppy playing in the park during sunset."
---
Share to Feed, Story, or Reels from iPhone
Final step: Decide where your content shines.
Options:
- Feed – Appears on your profile grid and followers’ home feed.
- Story – Ephemeral content lasting 24 hours; allows interactive stickers, polls, and links.
- Reels – Short-form vertical videos for creative, engaging clips.
Cross-posting:
Instagram lets you share simultaneously to connected Facebook accounts for extended reach.
---
Troubleshoot Common iPhone Posting Issues
Sometimes posting may fail due to common problems. Here’s how to fix them:
| Issue | Possible Cause | Solution |
|---|---|---|
| Upload stuck or fails | Weak internet connection | Switch to Wi-Fi or ensure strong mobile data signal |
| Cannot access camera roll | Permissions denied | Go to Settings → Instagram → Photos and allow access |
| App crashes | Outdated app or iOS version | Update Instagram and your iOS software |
| Low storage error | Insufficient device storage | Delete unused apps, photos, or videos to free space |
---
Tips for Optimizing Content Using iPhone Features
Your iPhone offers advanced photography tools that can make Instagram posts stand out.
Utilize these features:
- Live Photos – Capture motion and sound; convert to video or GIF.
- Portrait Mode – Create depth with blurred backgrounds.
- Photos App Editing Tools – Crop, adjust lighting, apply filters before importing into Instagram.
- Burst Mode – Capture action shots; select the best frame.
- Screen Recording – Create app tutorials or BTS edits for Reels.
Extra Tip:
Plan your posts with the iPhone Notes app for organized hashtags and caption drafts.
---
Final Thoughts
Learning how to post on Instagram iPhone is straightforward, but optimizing content takes practice and attention to detail. From updating your app to mastering captions and hashtags, each step helps your posts attract more views and engagement.
Start applying these tips today and share your most stunning photos, engaging videos, and creative Reels right from your iPhone—your audience will appreciate the quality, and your profile will stand out in the feed.


