How to Post to Facebook Timeline Step by Step
Learn step-by-step how to post on Facebook timeline, choose post types, adjust privacy, and boost engagement with tagging, media, and formatting tips.

How to Post to Facebook Timeline Step by Step
If you’re wondering how to post to Facebook timeline in an easy, effective way that draws attention, you’ve come to the right place. This guide walks you through the process from login to publication, with practical tips for maximizing post visibility and engagement. Whether you want to share a vacation highlight, announce exciting news, or post a laugh-out-loud meme, mastering the timeline post process will ensure your Facebook activity gets noticed.
---
Understanding Facebook Timeline and Privacy Settings
Your Facebook timeline is the personal feed where your posts, photos, and activities appear in chronological order. Every status update you share can be shown to a specific audience according to your privacy settings.
- Privacy settings let you control who sees each post.
- Adjust privacy per post or globally via Settings.
Key privacy audiences:
- Public – Anyone on or off Facebook can view.
- Friends – Only approved friends on your list.
- Custom – Include or exclude specific people or friend lists.
Regularly reviewing these settings safeguards your personal information and enhances audience targeting.
---
Logging In to Your Facebook Account
You can post using the desktop site or the mobile app.
Desktop Login Steps
- Open your browser and go to facebook.com.
- Enter your email/phone and password.
- Click Log In.
Mobile Login Steps
- Launch the Facebook app.
- Input your login credentials.
- Tap Log In.
Ensure you have a stable internet connection for a smooth experience.
---
Navigating to Your Profile or Home Feed
Once logged in, choose where you’ll start your post:
- Home Feed – Share directly from the main feed for broader reach.
- Profile Page – Post within the context of your own timeline.
Tip: Anything posted from your profile appears both on your timeline and in followers’ feeds.
---
Locating the “What’s on Your Mind?” Post Box
At the top of the feed or profile is Facebook’s post editor.
- Desktop: A large white box with the prompt “What’s on your mind, [Name]?”
- Mobile: A compact box, same prompt.
Click or tap to open the expanded post creation interface.
---
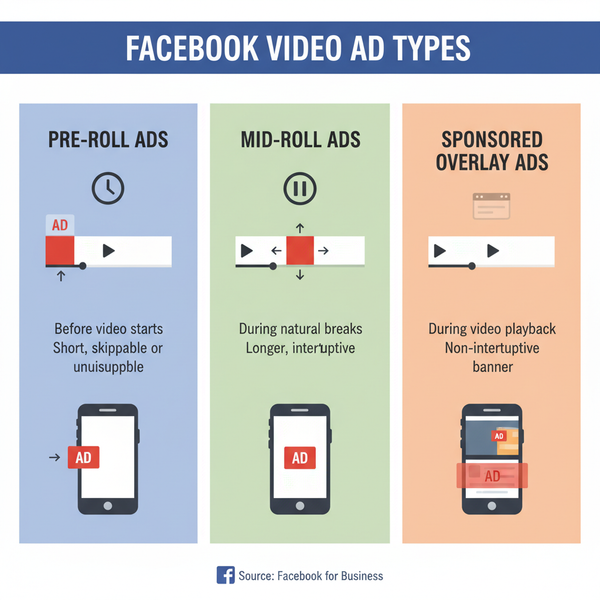
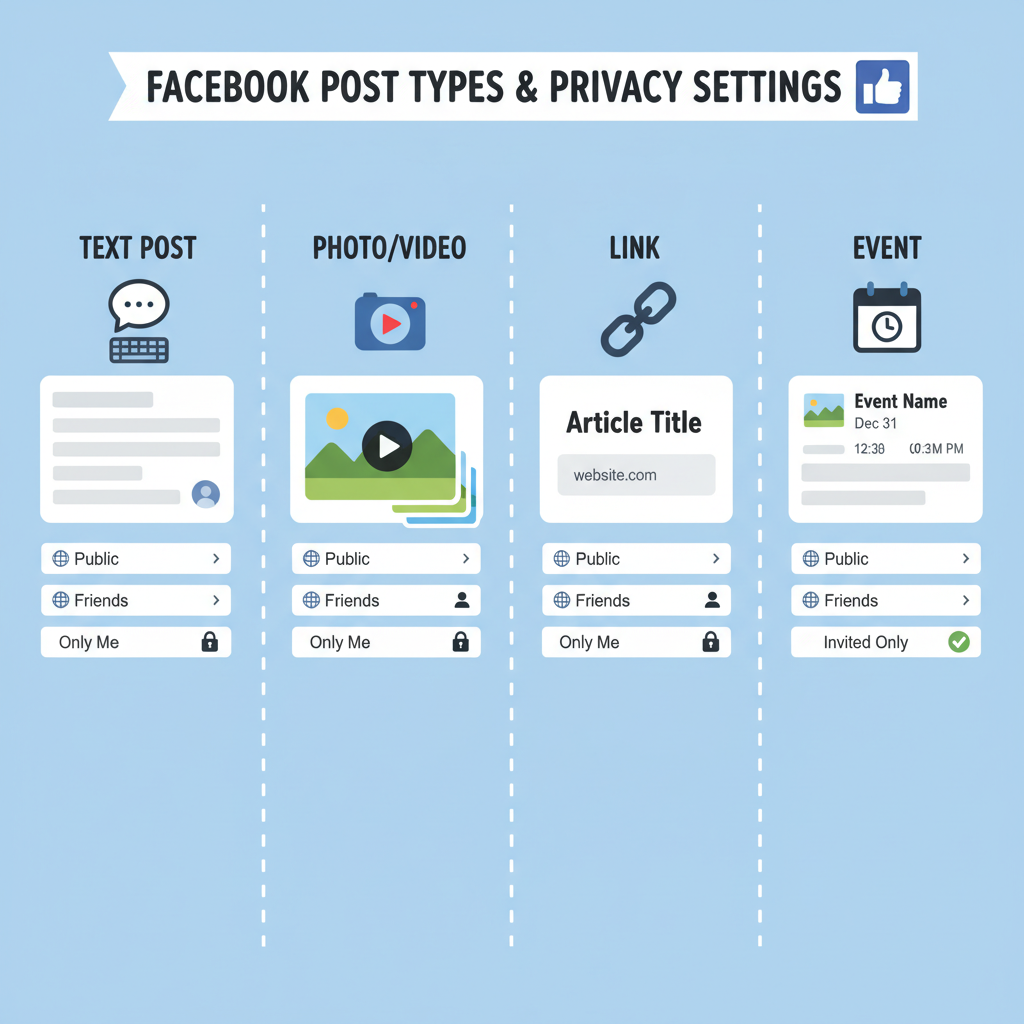
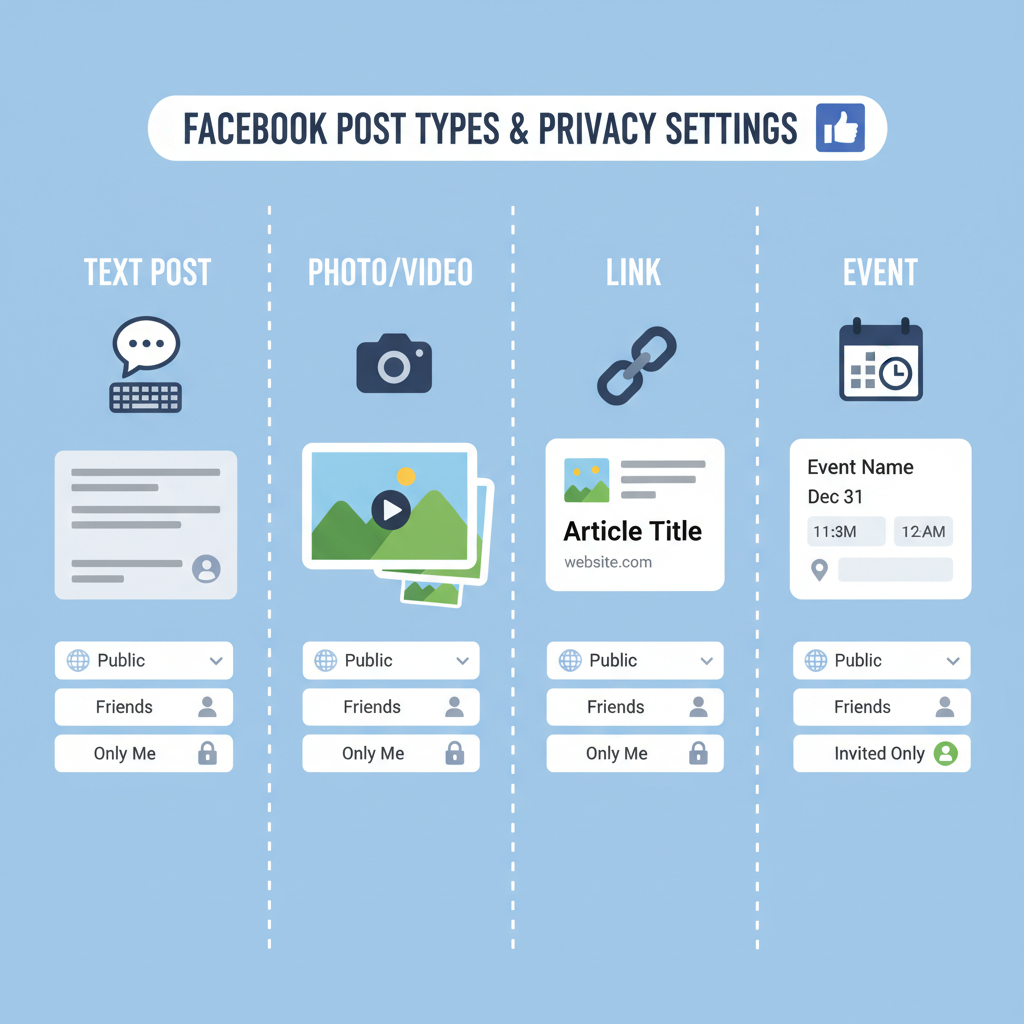
Choosing Your Post Type
Facebook supports multiple formats:
| Post Type | Purpose | Example |
|---|---|---|
| Text | Quick updates, ideas, questions | "Happy Monday everyone! ☀️" |
| Image | Visual sharing | Vacation photo at the beach |
| Video | Dynamic storytelling | Short clip of an event |
| Link | Share articles, pages | News article link preview |
| Combination | Mix of visuals and text | Status update with attached photo |
---
Uploading Media or Adding Link Previews
- Images/Videos: Click Photo/Video and choose files from your device.
- Links: Paste into the text field for automatic preview generation.
Pro Tip: Let previews finish loading before posting to ensure correct thumbnail display.
---
Formatting Text for Readability
Engaging posts are easy to skim:
- Use short paragraphs (1–2 sentences).
- Add emojis for tone and variety.
- Tag relevant people or pages for extended reach.
Example:
Just arrived in Paris! 🇫🇷✨
Can’t wait to explore the city. 🗼
Anyone have dinner recommendations? Tagging @JohnDoe for ideas.
---
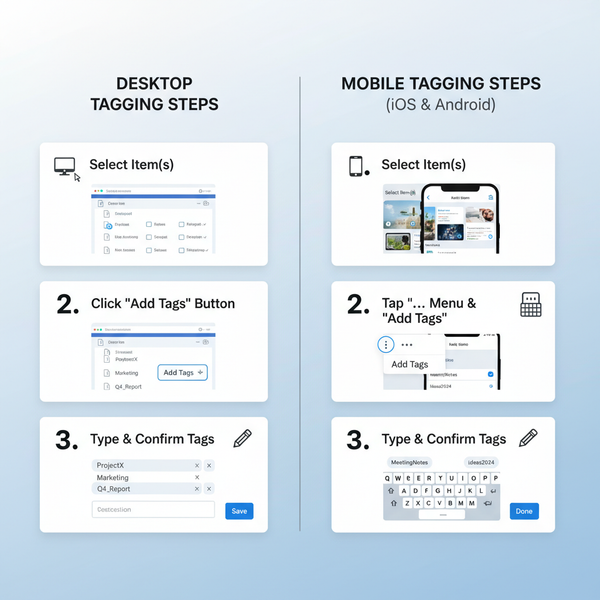
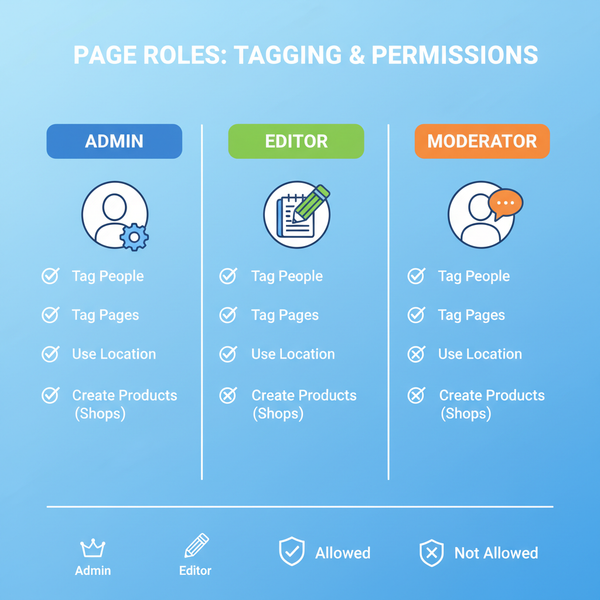
Tagging, Location, and Feeling/Activity Options
Personalize posts with extras:
- Tag Friends – Include companions.
- Add Location – Share where it happened.
- Feeling/Activity – Choose moods like “Feeling joyful” or “Watching a concert”.
These elements help posts feel more authentic and relatable.
---
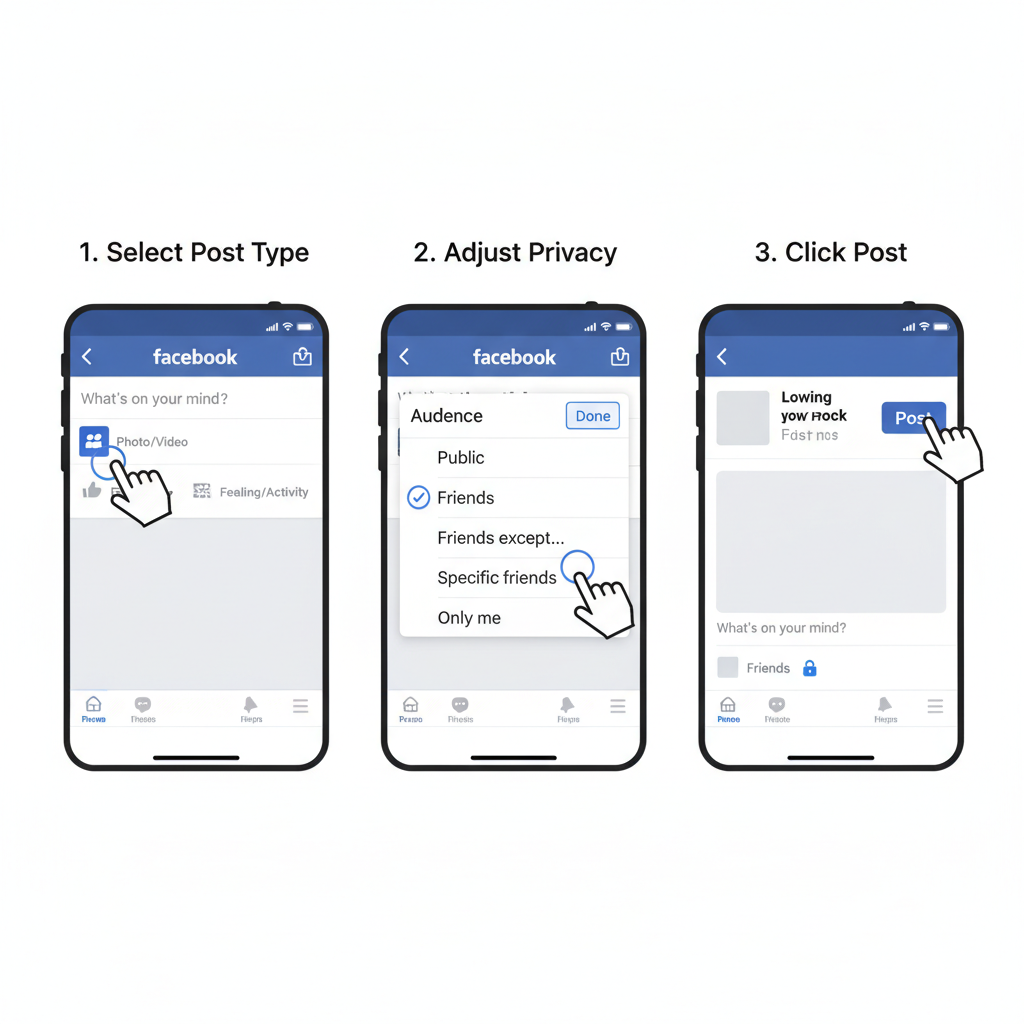
Adjusting Audience Visibility
Before posting:
- Use the audience selector beside your name.
- Set visibility to Public, Friends, or a Custom list.
Thoughtful audience selection prevents unintended exposure.
---
Previewing Before Publishing
Double-check:
- Spelling and grammar.
- Correct media attached.
- Accurate tags and location.
On mobile, preview appears before confirmation; desktop allows review instantly before clicking Post.
---
Publishing Your Post
Steps:
- Click/tap Post.
- Wait for uploads to finish (videos take longer).
- Verify the post appears correctly on your timeline.
---
Editing or Deleting Posts
To fix errors:
- Edit: Menu (three dots) > Edit.
- Delete: Menu > Move to trash.
Deleted posts stay in trash up to 30 days before permanent removal.
---
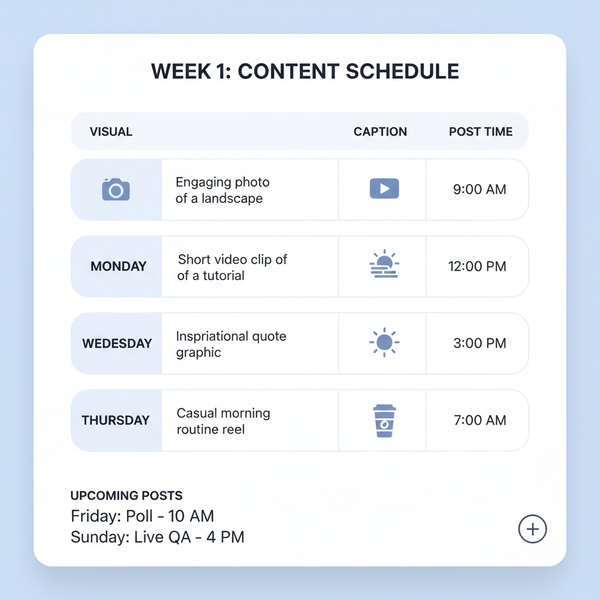
Tips to Increase Timeline Engagement
Boost visibility with these tips:
- Post during peak hours – mornings and evenings often yield higher reach.
- Use high-quality images – sharp visuals grab attention.
- Ask open-ended questions – invite comments and interaction.
- Reply to comments promptly.
- Alternate content formats to keep your feed dynamic.
---
Common Mistakes to Avoid
Avoid:
- Excessive posting, which may overwhelm followers.
- Low-quality images.
- Ignoring privacy settings.
- Over-tagging or hashtag spamming.
- Posting without proofreading.
Correcting these mistakes keeps your timeline professional and appealing.
---
Summary
Understanding how to post to Facebook timeline step by step ensures your content publishes smoothly and reaches the right audience. Combining clear text, engaging media, and strategic privacy choices turns your timeline into a lively and interactive space. Revisit your posting habits regularly, track engagement, and adapt as Facebook introduces new features.
Try these techniques in your next post and watch your Facebook presence grow—start posting smarter today!