Step-by-Step Guide to Publish a Page on Facebook
Learn how to publish a Facebook Page with this step-by-step guide covering setup, customization, visibility settings, and promotion strategies.

Step-by-Step Guide to Publish a Page on Facebook
If you're looking for how to publish a page on Facebook, this comprehensive guide will take you through every crucial stage — from setting up and customizing your page to making it live and promoting it for maximum engagement. Whether it’s for a startup, nonprofit, or personal brand, Facebook Pages are a highly effective way to reach and interact with your audience.
---
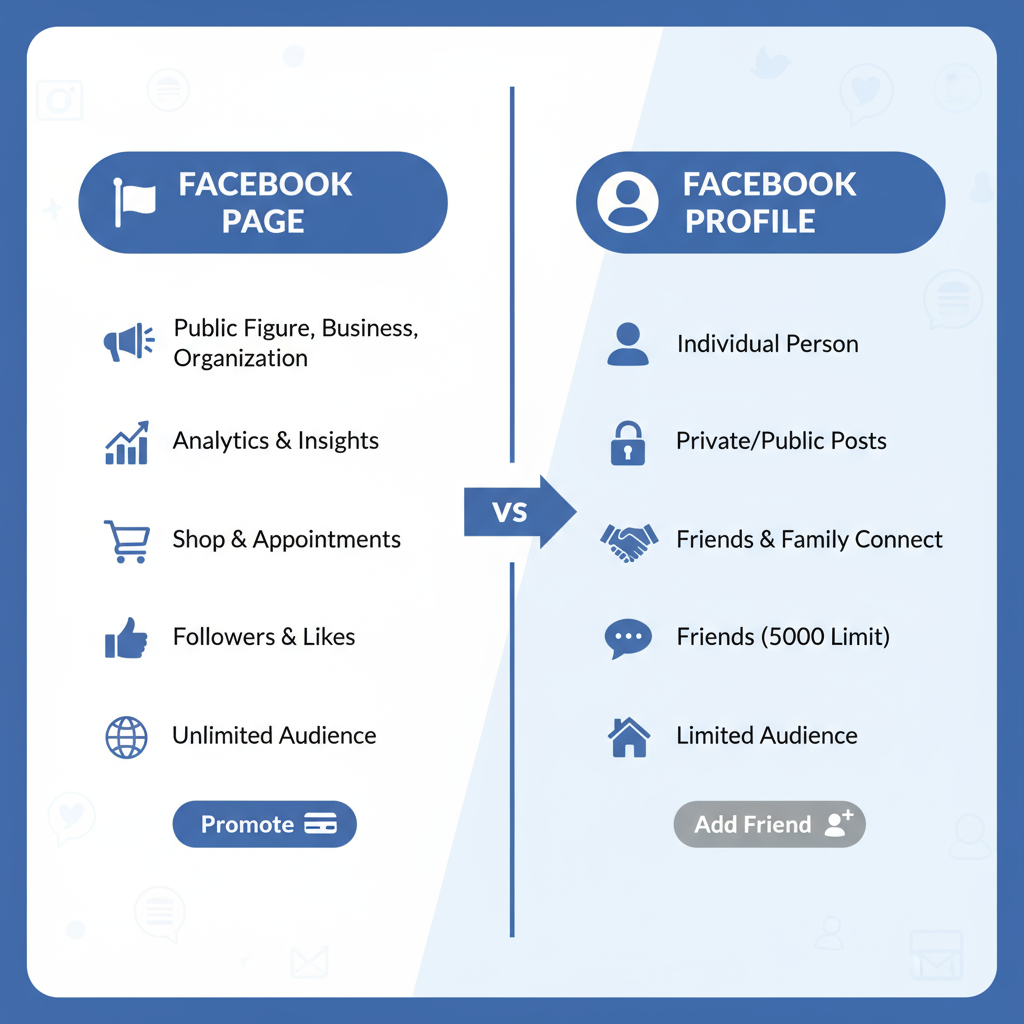
Understanding Facebook Page vs. Profile
Before you start building or publishing, it’s essential to understand the core difference between a Facebook Page and a Facebook Profile:
- Facebook Profile: Used for personal purposes, representing an individual. You can connect with friends, post updates, and chat via Messenger.
- Facebook Page: A public entity designed for businesses, brands, organizations, or public figures. It comes with access to insights, advertising tools, and audience targeting.
> Note: Using a personal profile for business violates Facebook’s terms of service; always opt for a Page for professional or promotional activities.
---
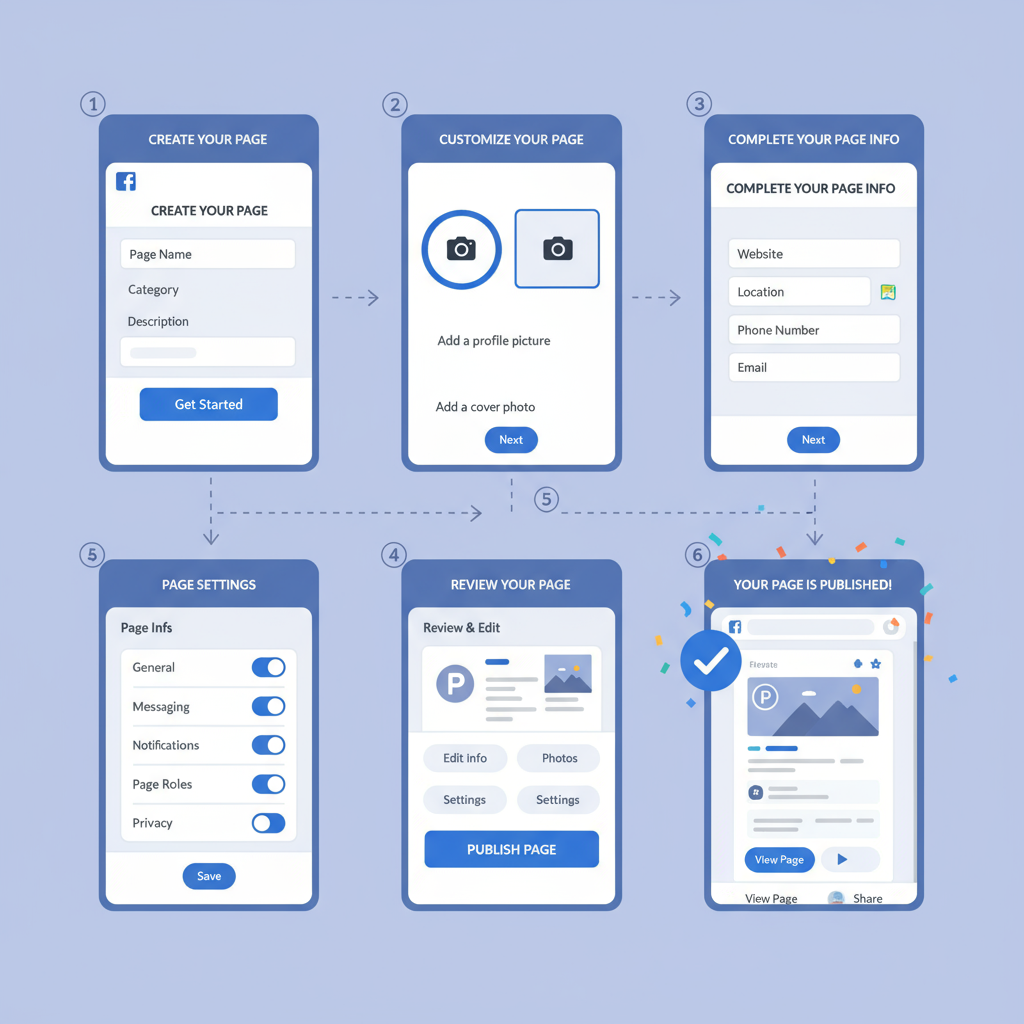
Prepare Key Page Essentials
Before hitting “Create Page,” gather all your essential details to streamline setup:
- Page Name: Clear, memorable, and accurately reflects your brand or cause.
- Category: Defines your page type (e.g., Restaurant, Consulting Agency, Community) and improves discoverability.
- Description: A concise (up to 255 characters) summary that highlights why people should follow your page.
Preparing this information in advance ensures a smoother setup process and faster publishing.
---
Add Profile Picture and Cover Image
Your images are the first visual impression for visitors.
- Profile Picture: Recommended 170 × 170 px (displays as 160 × 160 px on desktop).
- Cover Photo: Recommended 820 × 360 px on desktop; keep important elements within the center to suit mobile display.

Tips for Selecting Images
- Use clear, high-quality JPEG or PNG files.
- Maintain brand consistency (e.g., logo or signature imagery).
- Avoid excessive text for a cleaner, more professional look.
---
Fill in Contact Info, Location, Hours, and CTA
Adding comprehensive page details improves professionalism and trust:
- Contact Info: Include phone, email, and website link.
- Location: For local businesses, list your address.
- Hours: Provide accurate operating times.
- Call-to-Action Button: Encourage direct actions such as booking, shopping, or contacting your business.
---
Customize Username (Vanity URL)
After initial setup, create a memorable username:
Example: `facebook.com/YourBrandName`
Advantages:
- Easier to place on business cards or marketing materials.
- Enhances brand recognition.
- Benefits SEO for branded searches.
---
Adjust Privacy, Page Visibility, and Moderation Settings
Control how and when your page goes public and how you manage interactions:
- Page Visibility: Keep unpublished until fully ready to launch.
- Moderation Tools: Block inappropriate words, apply restrictions by country or age.
- Visitor Posts Settings: Choose whether visitors can post directly or only comment.
---
Review Facebook Publishing Tools and Page Roles
Leverage built-in tools and delegate tasks to your team:
- Publishing Tools: Create, schedule, and manage content; review drafts; track performance metrics.
- Page Roles: Assign varying levels of permissions for collaborative management.
| Role | Permissions |
|---|---|
| Admin | Full control over page, content, settings, roles |
| Editor | Edit page, send messages, create posts, ads |
| Moderator | Respond to comments, remove posts, ban users |
| Advertiser | Create ads and view insights |
| Analyst | View insights only |
---
Preview Your Page Before Publishing
Always perform a final check before making your page public:
- Proofread all text to prevent typos.
- Test all embedded links.
- Confirm that images display properly on both desktop and mobile.
- Verify CTA buttons and contact details.
---
Publish the Page and Announce to Your Network
When you’re satisfied:
- Go to Settings → Page Visibility and set it to Published.
- Click Save Changes.
- Share your new page with friends, colleagues, and existing customers.
Consider cross-promoting via email newsletters and other social channels for initial exposure.
---
Tips for Promoting Your Published Page
A combination of organic initiatives and paid campaigns yields the best results.
Organic Promotion
- Invite your personal friends and contacts.
- Consistently post engaging content such as videos, images, polls, and stories.
- Participate in relevant Facebook Groups to expand visibility.
Paid Promotion
- Use Facebook Ads to reach target demographics and interests.
- Boost posts that perform well to broaden reach.
- Create lookalike audiences to target similar potential followers.
---
Monitor Insights and Keep Content Fresh
Facebook Insights provides valuable data on:
- Likes, follows, and audience growth.
- Post reach, engagement, and shares.
- Audience location, age, and other demographics.
Use these analytics to fine-tune your content plan and posting times. Continuous updates help sustain audience interest and brand loyalty.
---
Summary and Next Steps
Publishing a Facebook Page is more than simply flipping a switch — it’s about creating a complete, appealing, and informative presence that attracts the right audience. By following the above process for how to publish a page on Facebook, you can launch with professionalism and start building meaningful connections immediately.
Now it’s time to take action: set up your page, personalize it with strong visuals and accurate details, and then share it confidently with the world. Engage with your followers consistently, track your performance, and adjust your strategy to maximize your reach and impact.