How to Publish a Page on Facebook Step by Step
Learn how to create, customize, and publish a Facebook Page step-by-step, from setup and branding to initial posts and follower growth.

How to Publish a Page on Facebook Step by Step
Publishing a page on Facebook is a powerful way to promote your brand, business, or personal project. If you’ve been looking for how to publish page on Facebook, this comprehensive guide walks you through each stage — from creating a personal account, customizing your page, and publishing initial posts to going live and attracting your first followers. Whether you’re launching a local business profile, a community hub, or a portfolio, these step-by-step instructions will make the process smoother and more effective.
---
Create a Facebook Account (Personal Profile Required)
To create a Facebook Page, you’ll need a personal Facebook account. A Page always has an administrator tied to a personal profile, though this link is not visible to the public.
- Go to Facebook.com.
- If you don’t have an account, click Create new account.
- Enter your name, email (or phone), password, birth date, and gender.
- Verify your email or phone number.
- Log into your account.
Without a personal profile, page creation or management isn’t possible.
---
Access Facebook Pages Dashboard
Once logged in, navigate to the Pages section:
- Desktop: Left-hand navigation panel.
- Mobile: Tap the hamburger menu (☰), then tap Pages.
Here, you’ll see any pages you manage or an option to create a new one.
---
Click “Create New Page” and Choose Category
From the dashboard, select Create new Page. In the setup panel, fill in:
- Page name
- Category (choose up to 3 relevant ones)
- Description (brief overview)
Your chosen category frames how Facebook classifies your Page, such as Local Business, Public Figure, or Community Organization.
---
Fill in Page Name, Description, and Details
For your Page name:
- Keep it clear and on-brand
- Avoid excessive symbols or unrelated terms
The description should be concise (255 characters max initially); you can expand later in the “About” section.
---
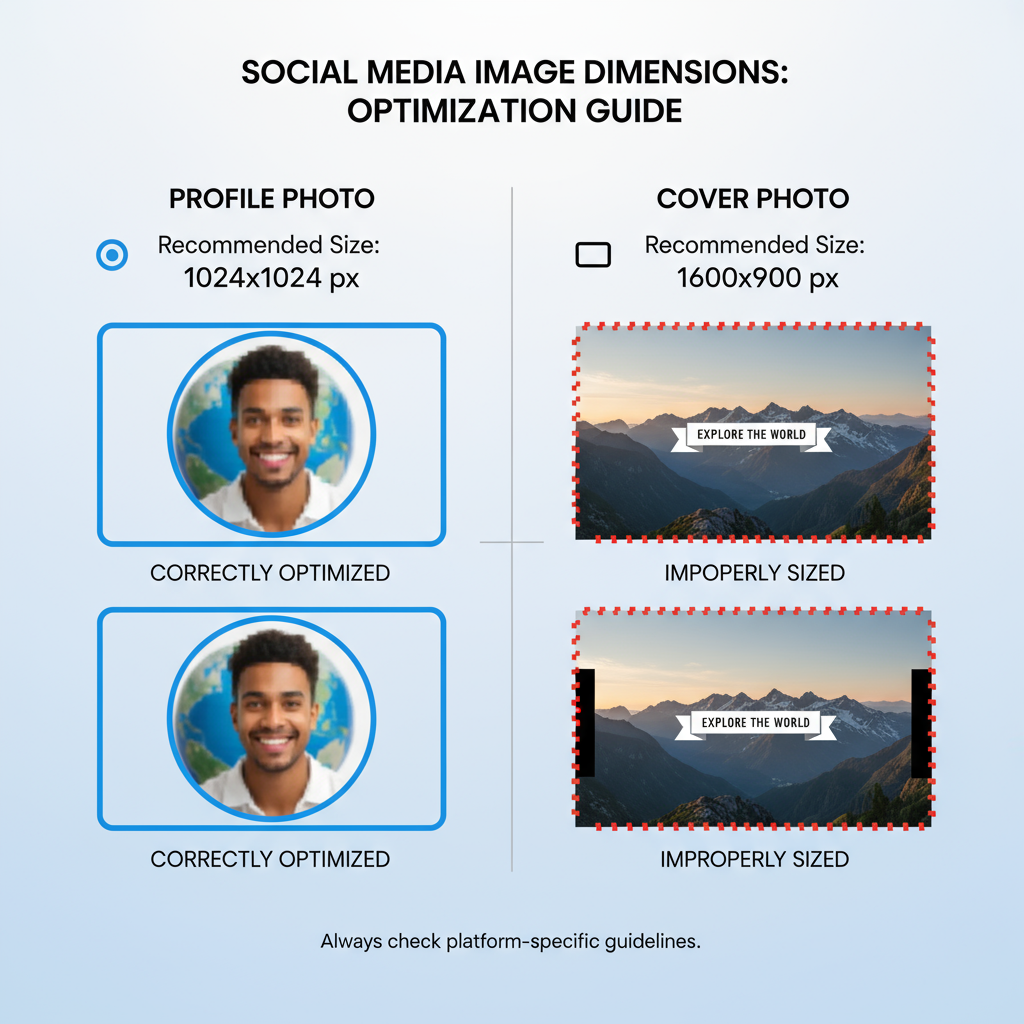
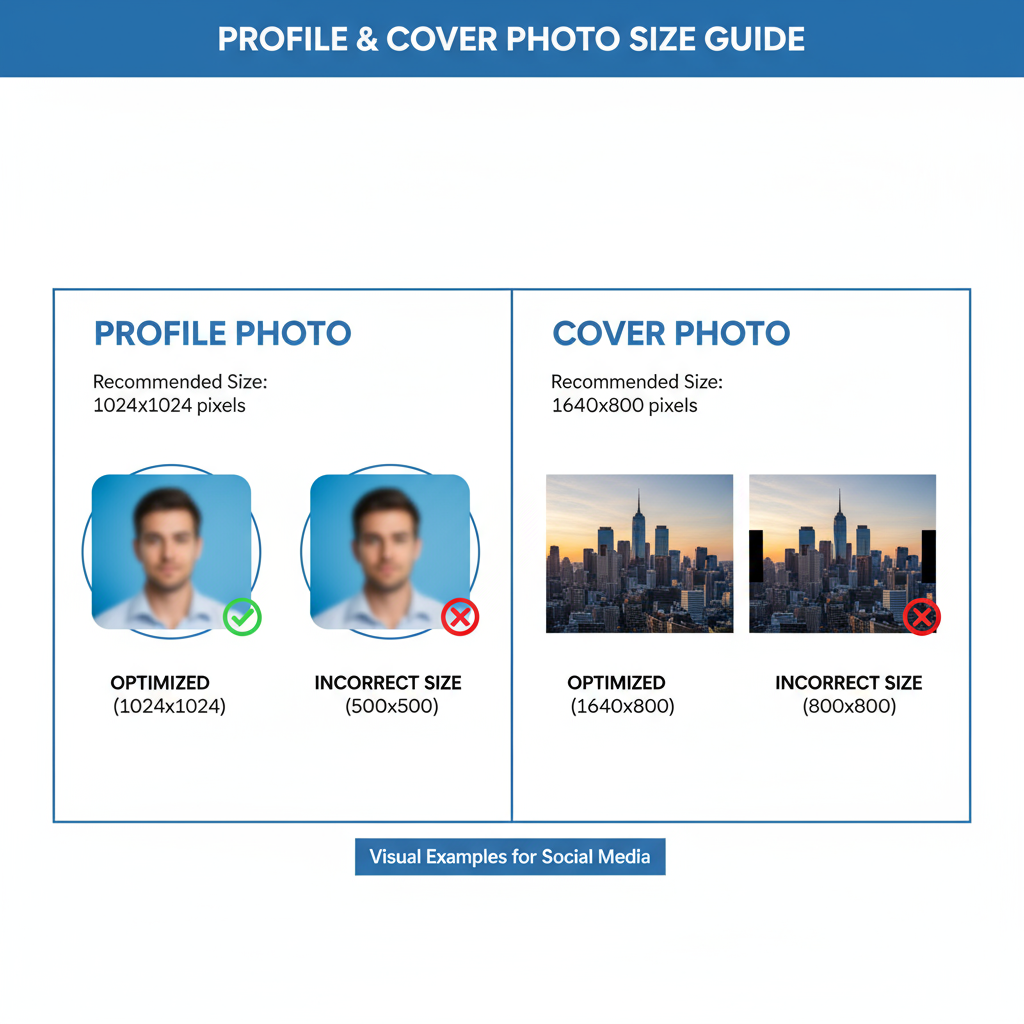
Add Profile Picture and Cover Photo (Optimize for Size)
Strong visuals make your Page recognizable. Facebook recommends:
- Profile picture: 170 × 170 px (desktop), cropped circularly
- Cover photo: 820 × 312 px (desktop), 640 × 360 px (mobile safe)
Use high-resolution images with minimal text.
Tip: Center text in your cover to avoid mobile cropping.
---
Customize Username (@Handle) for Easy Search
Your username becomes part of your Page’s custom URL:
`facebook.com/YourHandle`
Steps:
- Go to Page settings or below the Page name.
- Click Create @Username.
- Choose something short and relevant.
- Check availability and save.
---
Complete “About” Section, Contact Info, and Location
In the About tab, add:
- Website link
- Phone number or email address
- Physical location & hours (if applicable)
This information boosts credibility and discoverability.
---
Adjust Page Settings (Privacy, Messaging, Notifications)
Under Settings, configure:
- General: Control visibility, invitations, and visitor posts.
- Messaging: Enable instant messages or automated replies.
- Notifications: Choose how often you receive updates.
Adjust before publishing so your page operates smoothly from day one.
---
Add a Call-to-Action Button
Feature a prominent CTA button at the top of your Page to guide visitors.
| Goal | Suggested CTA Button |
|---|---|
| Generate leads | Contact Us |
| Increase bookings | Book Now |
| Promote e-commerce | Shop Now |
| Provide support | Send Message |
Select a CTA that aligns with your objectives.
---
Publish Initial Content Before Going Live
Before making your Page public, upload several posts:
- 2–3 high-quality images or short videos
- A welcome/introduction note
- Behind-the-scenes content
New visitors are more likely to engage with an active page.
---
Review Draft Mode vs. Published Mode
New Pages may start in draft mode:
- Draft mode: Visible only to admins and editors.
- Published mode: Accessible to all Facebook users.
Switch modes via Settings → General → Page Visibility.
---
Click “Publish” and Confirm Page Is Live
To go live:
- Go to Settings.
- Under Page Visibility, select Page published.
- Click Save changes.
Your Page becomes public.
---
Share Page Link with Friends and Invite Followers
Jump-start growth with your network:
- Use Invite friends on your Page.
- Share the link in Messenger groups and forums.
- Post about it on your personal timeline.
---
Promote Page Through Facebook Ads or Organic Tactics
Organic tactics:
- Post consistently
- Use relevant hashtags
- Reply to comments and messages
Paid ads:
- Run targeted ads via Ads Manager
- Segment audience by location, interests, demographics
---
Monitor Page Insights and Engagement
Track performance via Insights:
- Post reach
- Engagement metrics
- Follower growth
- Page views
Regular analysis lets you refine posting strategies and improve reach.
---
Final Tips for Publishing a Page on Facebook
- Maintain brand consistency across images, handle, and tone.
- Keep your info updated to build trust.
- Test varied post formats (images, videos, polls).
- Respond quickly to messages and comments.
By following this guide on how to publish page on Facebook, you can build a professional, engaging presence that attracts and retains followers. Get started today — create your page, publish your first content, and start connecting with your audience.