How to Put Date on Instagram Story Using Date Sticker
Learn how to add, style, and customize dates on Instagram Stories using the native date sticker, manual text, or third‑party design apps.

Introduction: How to Put Date on Instagram Story for Maximum Impact
Instagram Stories have evolved well beyond quick, throwaway snaps. Adding a date to your Story is more than a timestamp — it’s part of the visual storytelling language on social media. If you’ve ever wondered how to put date on Instagram Story for better aesthetics, clarity, and engagement, the good news is it’s simple to do and highly customizable. Whether you want to preserve a personal memory, promote an upcoming event, or tap into a trending retro style, you can combine native tools with creative techniques to make your posts more engaging and informative.
In this guide, you’ll learn the different methods for adding dates, from Instagram’s built‑in stickers to third‑party design tools, plus pro‑level styling and placement ideas.
---
Overview of Instagram’s Native Date Sticker Feature
Instagram’s “Date Sticker” automatically pulls the date from your device and displays it in clean, pre‑set styles. Key characteristics include:
- Automatic sync with your phone’s date settings for real‑time accuracy.
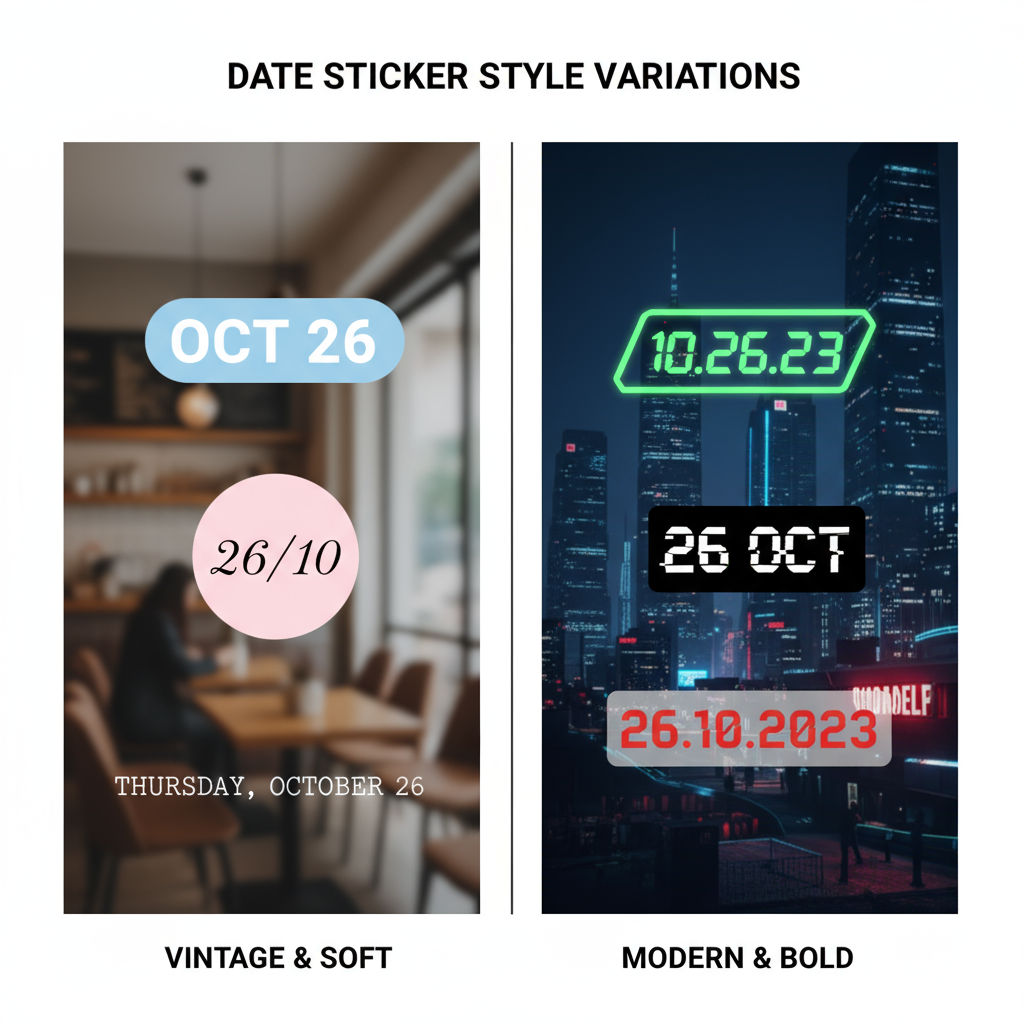
- Style variations: classic, modern, and minimal.
- Drag‑and‑drop placement anywhere in the frame.
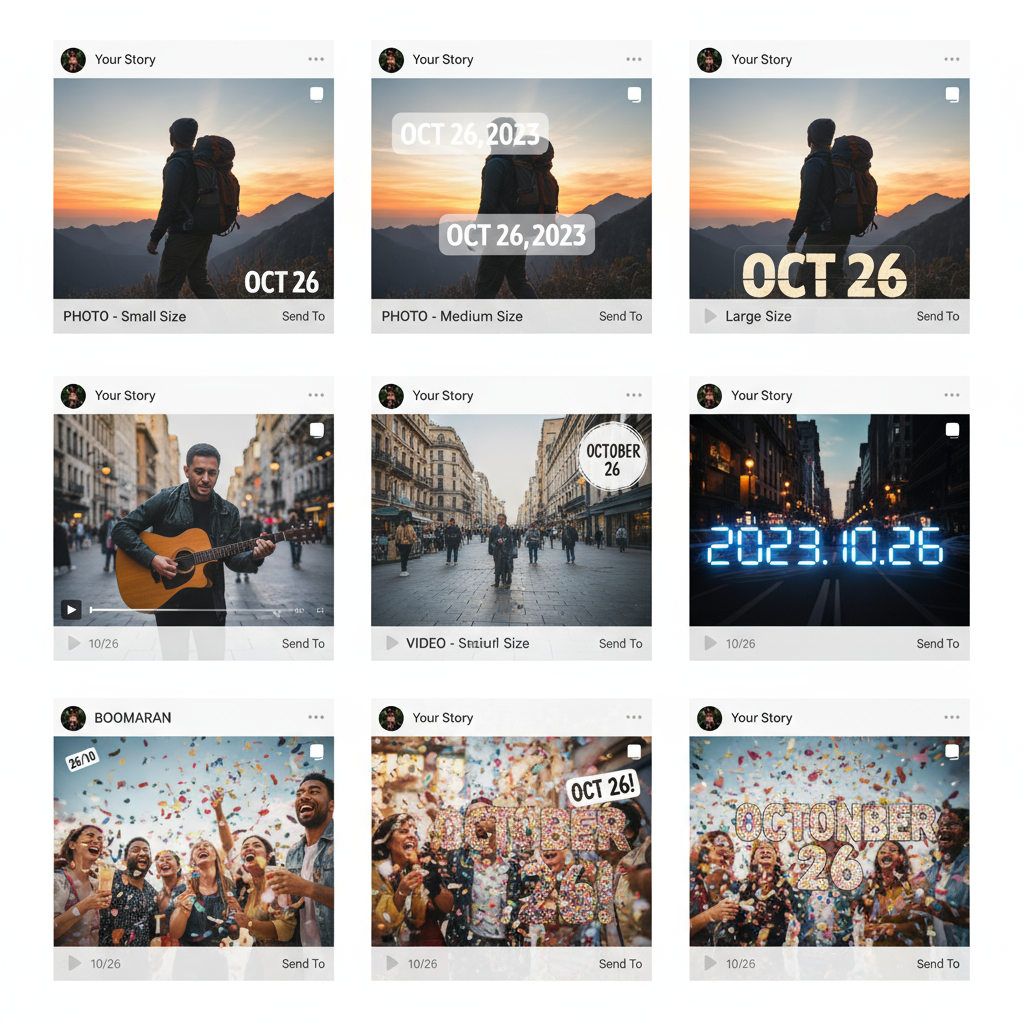
- Scalable size for high visibility or discreet timestamps.
This feature is the fastest way to label your Story when documenting moments or building a timeline.
---
Step‑by‑Step Guide: Using the Date Sticker
Below is the complete process for adding the native date sticker to an Instagram Story.
1. Open Instagram & Access Stories
- Launch the Instagram app on your device.
- Swipe right from your feed or tap your profile picture at the top‑left corner to open the Stories camera.
2. Capture or Upload Content
- Snap a new photo or video within Stories.
- Or swipe up to open Camera Roll and choose an existing picture or clip.
3. Add the Sticker
- Tap the Sticker icon — a square smiley face at the top of the screen.
4. Select the Date Sticker
- Scroll until you find the sticker showing today’s date.
- Tap it to insert into your Story.
5. Customize the Style
- Tap the sticker to cycle between Classic, Modern, and Minimal.
- Select the one that matches your visual style.
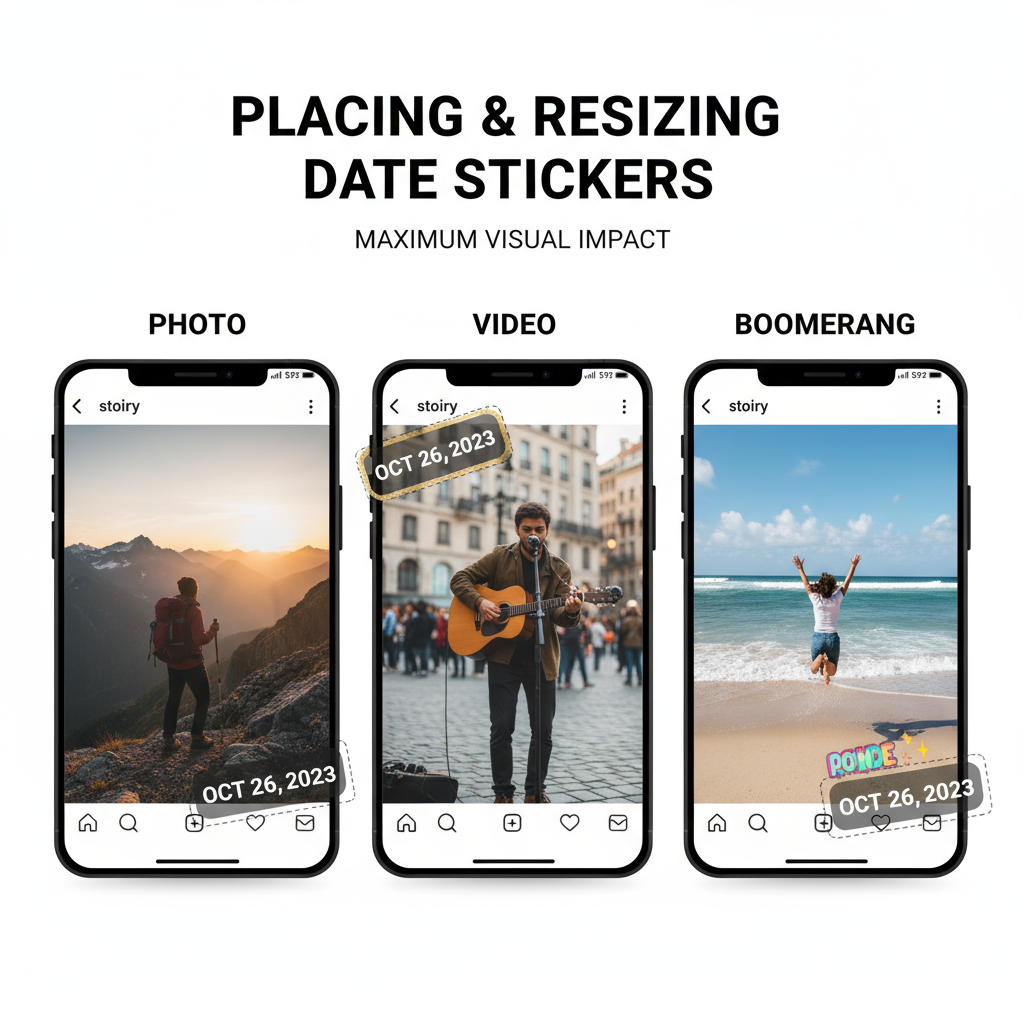
6. Position and Size the Date
- Drag with one finger to position.
- Pinch with two fingers to resize or rotate.
---
Customizing the Date Appearance
The preset styles are clean, but combining them with text tools can add personality:
- Change colors: Manually type the date in the Text tool and match it to your palette.
- Experiment with fonts: Choose from Instagram’s built‑in fonts like Typewriter, Strong, or Neon for unique flair.
- Mix elements: Pair the date sticker with emojis or icons to emphasize the mood.
---
Manual Date Entry When Sticker Is Missing
If the date sticker isn’t in your sticker tray:
- Tap the Text tool.
- Type the date manually (e.g., “March 14, 2024”).
- Style with your choice of font, color, and alignment.
- Add decorative emoji (📅, 🗓️) for character.
Manual entry also lets you display past or future dates without changing your phone’s settings.
---
Adding Past or Future Dates Creatively
For event previews, throwbacks, or themed posts, try:
- Past dates: Repost archived content with its original date for storytelling.
- Future dates: Combine with the Countdown sticker for upcoming launches or events.
- Nostalgia themes: Use retro filters and backgrounds that evoke a specific time period.
---
Using Third‑Party Apps for Custom Date Graphics
External editing tools offer enhanced typography and design options.
Popular Options
- Canva – Add dates with premium fonts, shapes, or custom templates and export to upload.
- InShot – Apply creative text overlays with reusable styles.
- PicsArt – Merge date graphics with filters, textures, and stickers.
Process:
- Edit or create your image in the app.
- Add the date as text or a graphic overlay.
- Save and upload to Instagram Stories.
---
Tips for Date Placement and Visibility
Placement ensures both aesthetics and legibility:
- Avoid clutter: Target solid or blurred backgrounds for clarity.
- Balance layout: Align with other visual elements to avoid awkward spacing.
- Calibrate size: Big enough to read but not overpowering.
| Content Type | Suggested Date Position | Reason |
|---|---|---|
| Travel Shots | Bottom‑right corner | Preserves main scene visibility |
| Food Photos | Top‑left corner | Avoids covering the dish |
| Event Flyers | Top‑center | High visibility for event details |
| Selfies | Bottom‑left corner | Keeps emphasis on the face |
---
Troubleshooting Missing Date Sticker
If you can’t find the date sticker:
- Update Instagram via App Store or Google Play.
- Log out and back in to your account.
- Restart your device to fix temporary glitches.
- Check OS compatibility — some older systems have reduced features.
---
Creative Ideas for Using Dates on Stories
Dates can move beyond functionality into creative territory:
- Daily Diaries – Document each day with date‑marked posts.
- Trip Logs – Date label every location visited.
- Anniversary Countdowns – Build excitement for milestones.
- Event Highlights – Attach the date for clear archiving.
- Seasonal Posts – Match the date with relevant graphics (snowflakes, flowers, leaves).
---
Summary & Next Steps
Adding dates to Instagram Stories is an easy but powerful technique to enhance your storytelling. Whether you use the native date sticker for speed, manual entry for customization, or third‑party apps for advanced design, knowing how to put date on Instagram Story can help you create posts that are more engaging and visually cohesive.
Start experimenting with different placements, styles, and creative concepts. A well‑placed date doesn’t just timestamp your Story — it anchors your content in a moment, turning a fleeting 24‑hour post into part of a lasting narrative. Now open Instagram and try it for your next post to see the difference.