How to Record Instagram Stories with Professional Quality
Learn how to record Instagram Stories with pro-level audio, lighting, and editing tips to create engaging vertical videos that captivate viewers.

How to Record Instagram Stories with Professional Quality
Instagram Stories are one of the most dynamic ways to engage followers in real time. Whether you’re a creator, marketer, or just someone who loves sharing moments, knowing how to record Instagram Stories with professional quality can elevate your content. This guide walks you through the essentials — from setup to editing — to help your Stories shine.
---
Understanding Instagram Story Basics
Before hitting record, understand the Story format so your videos fit perfectly:
- Duration: Each clip lasts up to 15 seconds. Longer videos are split automatically.
- Aspect Ratio: Record in a 9:16 vertical format for optimal smartphone display.
- Ephemeral Nature: Stories disappear after 24 hours unless saved to Highlights or archived.
Why Basics Matter
By planning your shots around these constraints, you’ll ensure seamless pacing and avoid awkward cuts.
---
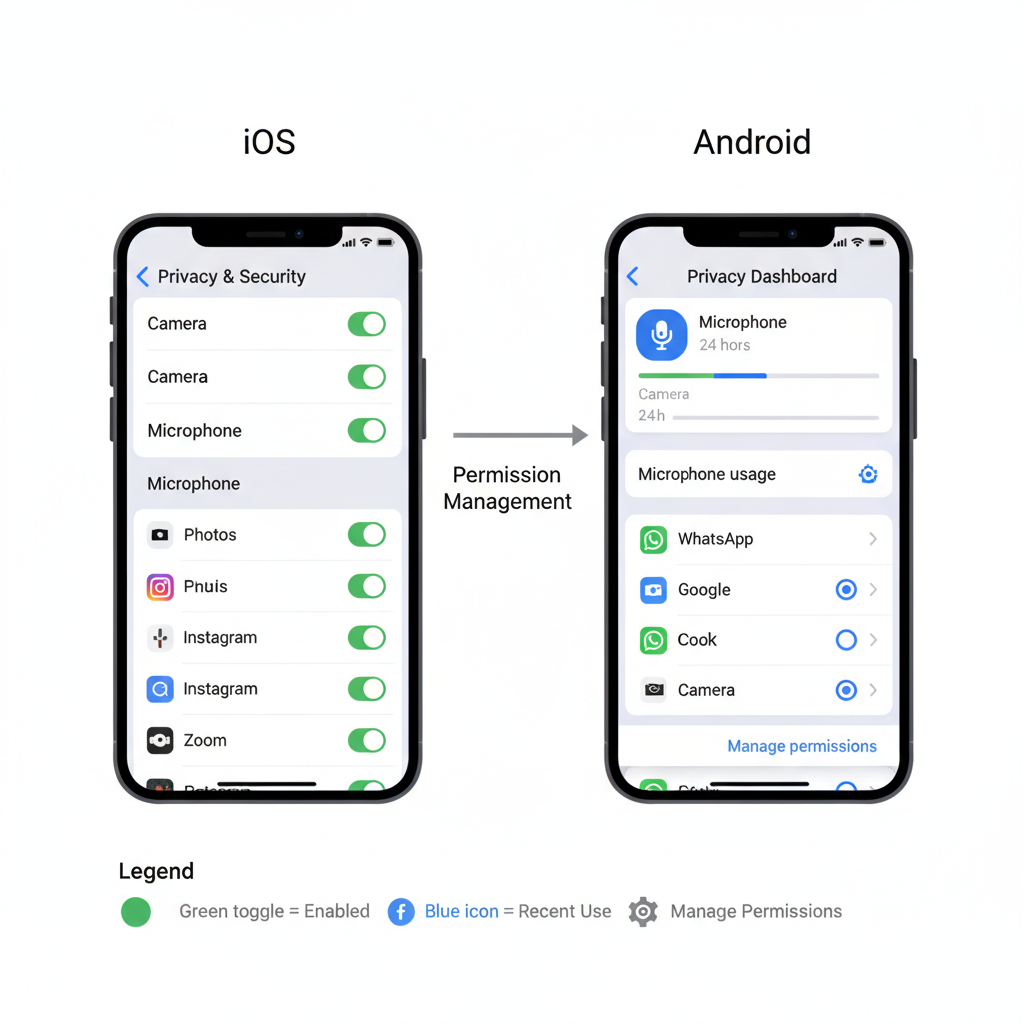
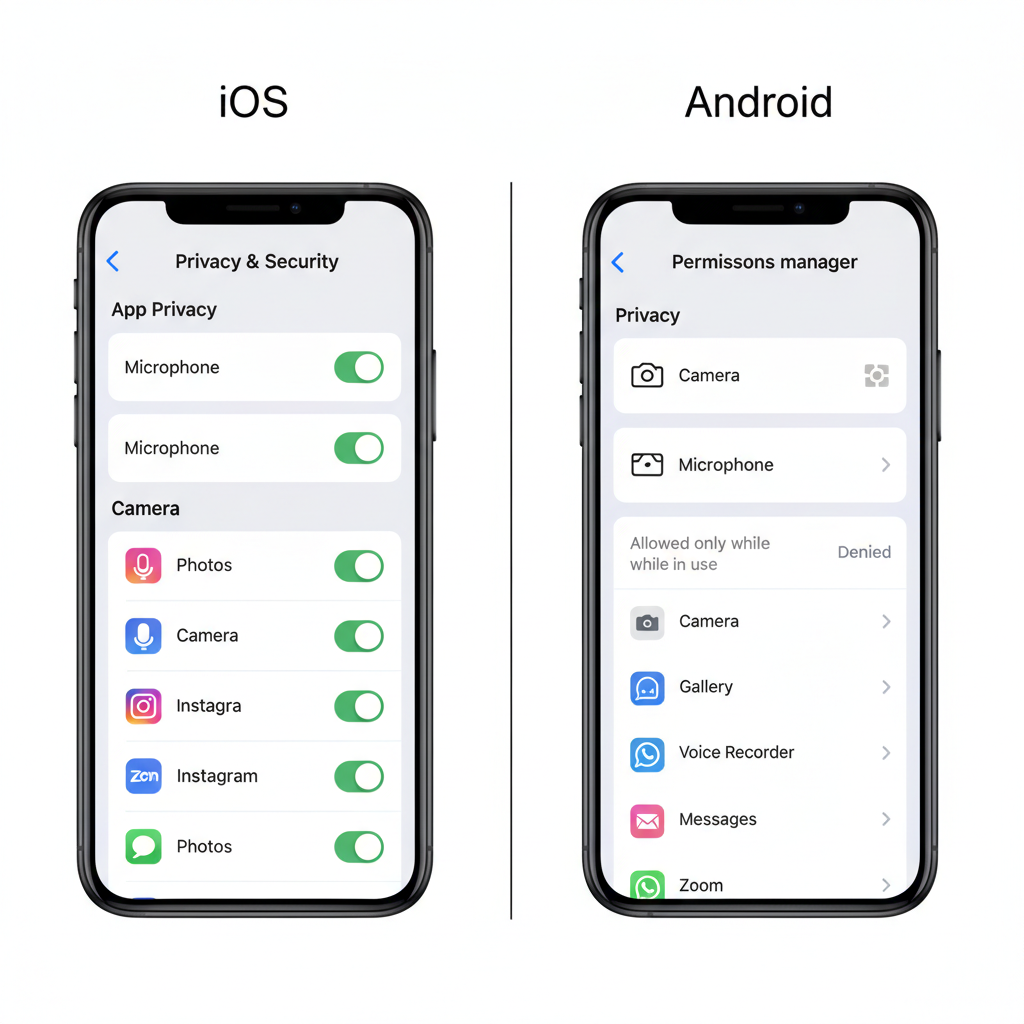
Check and Enable Microphone/Camera Permissions
Without proper permissions, Instagram can’t access your hardware:
Steps to Enable on iOS:
- Go to Settings → Instagram.
- Toggle Camera and Microphone to ON.
Steps to Enable on Android:
- Open Settings → Apps → Instagram → Permissions.
- Enable Camera and Microphone.
---
Choose Between Native Camera or Pre-recorded Videos
Instagram lets you:
- Record directly in-app for spontaneity and instant effects.
- Upload pre-recorded videos for more control or pro gear footage.
Use Native Recording When:
- Capturing events live.
- Leveraging real-time filters.
Use Pre-recorded Clips When:
- Editing externally before posting.
- Shooting with DSLRs or mirrorless cameras.
---
Use Instagram’s Built-in Creative Tools
Enhance your Stories with interactive features:
- Filters for mood and tone.
- Stickers like polls, hashtags, and location tags.
- Music from Instagram’s licensed library.
- Text overlays for captions or emphasis.
Pro Tip: Combining music with stickers boosts engagement metrics.
---
Record Hands-Free with Timer Mode
For demonstrations or product showcases:
- Swipe to Hands-Free mode.
- Tap once to start without holding the record button.
This keeps your presentation smooth and camera stable.
---
Master Lighting and Framing
Visual quality hinges on light and composition.
Lighting Guidelines:
- Position yourself facing a window for flattering natural light.
- Avoid harsh backlighting that creates silhouettes.
- For indoor shoots, use ring lights or LED panels.
Framing Guidelines:
- Center your subject or apply the rule of thirds.
- Stick to vertical orientation to prevent cropping.
- Use a tripod or gimbal for stability.
---
Edit Before Posting
Editing tightens your narrative and improves polish.
Editing Steps:
- Trim start/end for concise content.
- Adjust brightness and contrast.
- Add captions for accessibility and retention.
- Apply consistent color grading for brand aesthetics.
---
Save Stories to Highlights or Archive
Keep key Stories visible beyond 24 hours:
How to Save:
- In your Story, tap Highlight → choose/create a collection.
- Turn on Archive in settings to auto-save expired Stories privately.
---
Download Your Own Stories
To reuse content:
- Open your Story.
- Tap three dots → Save Video or Save Story.
Great for cross-posting to TikTok, Facebook Reels, or YouTube Shorts.
---
Capture Others’ Stories With Care
You can screen record someone’s Story, but follow copyright and privacy best practices:
- Get permission first.
- Always credit creators.
- Avoid sensitive content.
---
Best Practices for Crisp Audio & Video
| Practice | Benefit |
|---|---|
| Use an external microphone | Improves clarity and reduces noise |
| Clean the camera lens | Ensures sharp images |
| Stabilize with tripod/gimbal | Prevents shaky footage |
| Record in a quiet space | Minimizes background interference |
| Check resolution settings | Maintains high-definition quality |
---
Troubleshoot Common Recording Issues
Even pros may face these challenges:
Sync Errors:
- Match audio length to video.
- Adjust timing in editing software.
Lag:
- Close unused apps.
- Free up device storage.
Low Resolution:
- Set camera to 1080p or higher.
- Avoid compression by recording within Instagram or importing HQ files.
---
Summary & Next Steps
Mastering how to record Instagram Stories professionally involves preparation, creative tool use, and smart editing. By following best practices for lighting, framing, and audio, plus leveraging Instagram’s own features, you’ll produce Stories that captivate viewers and strengthen your brand presence.
Ready to enhance your Stories game? Try these techniques in your next upload and watch your engagement soar.