Reduce Graphic File Size Without Quality Loss
Learn practical strategies to reduce graphic file size without losing quality, using optimal formats, compression methods, and export settings.
Reduce Graphic File Size Without Quality Loss
Reducing graphic file size without quality loss is essential for web designers, developers, marketers, and content creators aiming to enhance page performance, SEO rankings, and user experience. By strategically choosing formats, adjusting export settings, and leveraging modern compression methods, you can deliver fast-loading visuals that look professional while conserving bandwidth and storage.

---
Why Graphic File Size Matters
Graphic file size directly affects:
- Page Load Speed: Large images slow down websites, increasing bounce rates and lowering search engine rankings.
- Bandwidth Usage: Heavier files consume more data, impacting mobile users and server hosting costs.
- Storage Requirements: Oversized graphics quickly fill local or cloud storage.
- Workflow Efficiency: Smaller files are faster to share, edit, and back up.
For high-traffic websites, every kilobyte saved benefits server responsiveness and user satisfaction.
---
Common Graphic Formats and Their Typical Sizes
Each image format has unique compression methods and purposes. Selecting the right format is fundamental to managing file size effectively.
| Format | Type | Typical Uses | File Size Characteristics |
|---|---|---|---|
| JPEG | Raster | Photos, complex imagery | Small size with lossy compression |
| PNG | Raster | Transparent graphics, icons | Larger size, lossless compression |
| GIF | Raster | Animations, low-color images | Small size for low color depth |
| SVG | Vector | Logos, scalable illustrations | Extremely small and resolution-independent |
---
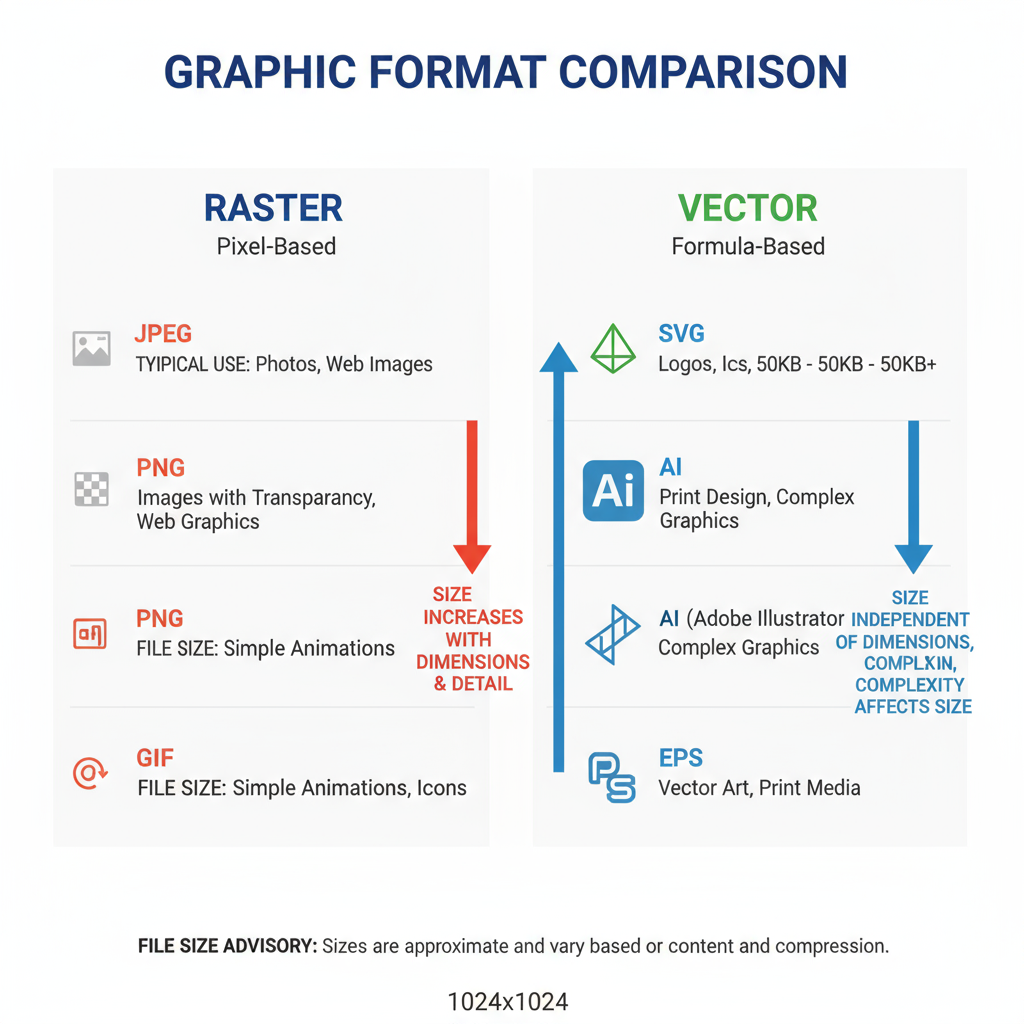
Raster vs Vector Graphics: Impact on File Size
Raster graphics (JPEG, PNG, GIF) are pixel-based and size depends on resolution and color depth. High-resolution images can grow very large.
Vector formats (SVG, EPS, PDF) use mathematical paths, remaining lightweight regardless of scaling, making them ideal for logos, icons, and illustrations where precision is preferred over pixel detail.
Key takeaway: Favor vector formats for simple shapes and line art to minimize size without reducing clarity.
---
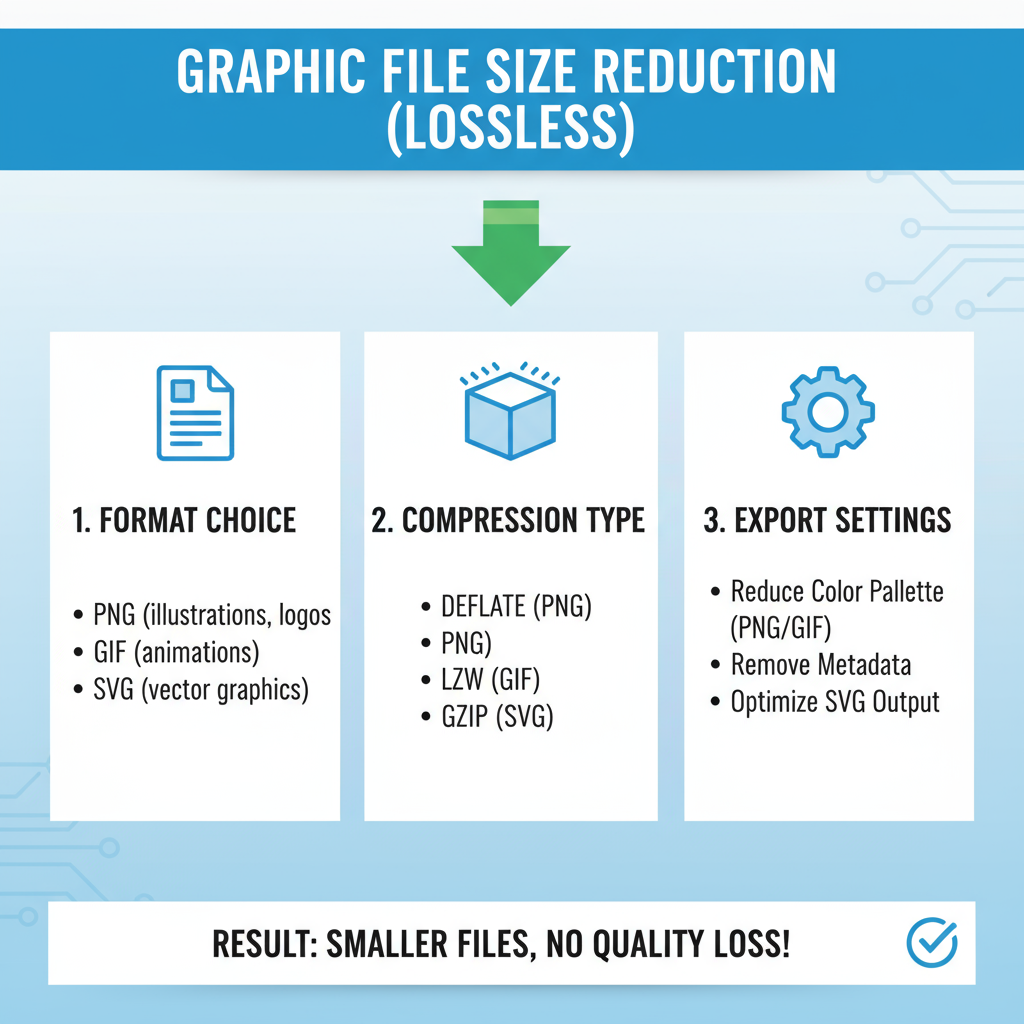
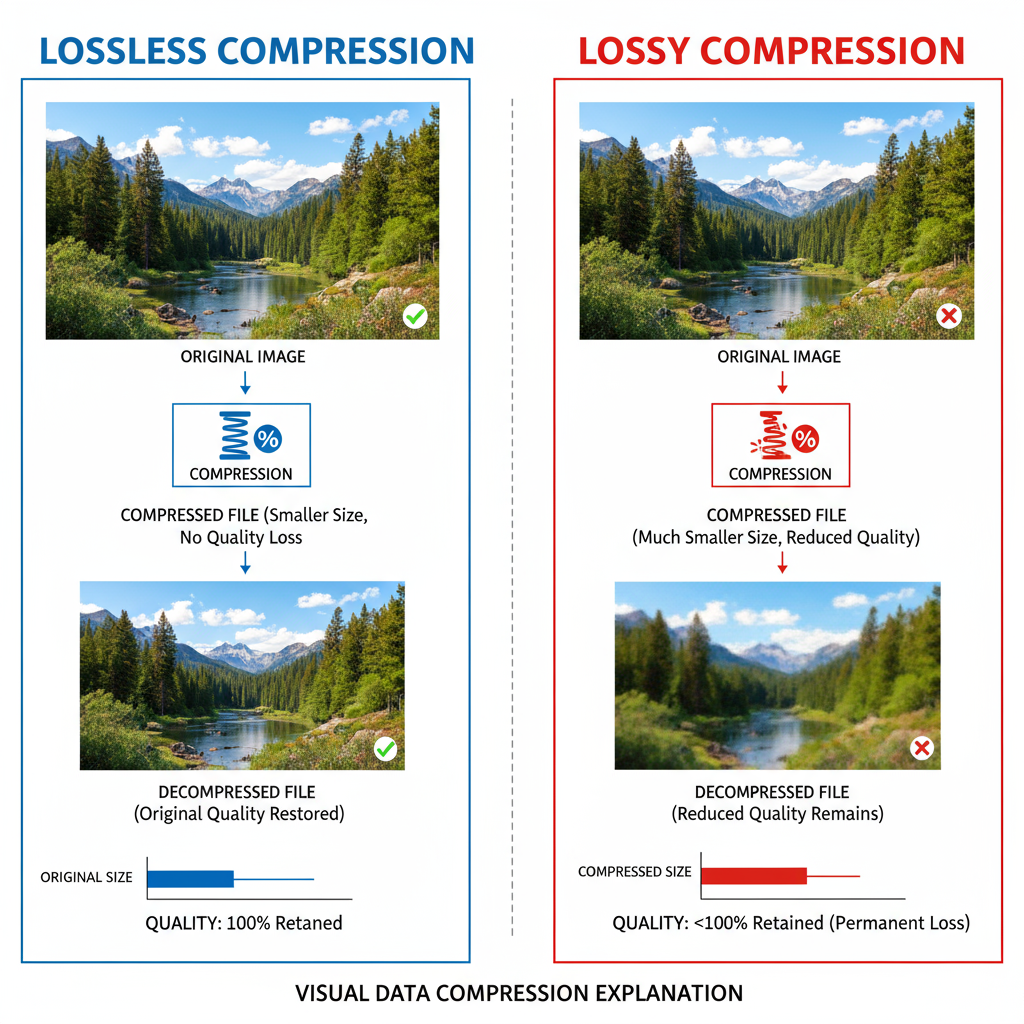
Lossless vs Lossy Compression Explained
Lossless Compression
Keeps all original image data, reducing size without degrading visual quality. Examples: PNG, certain TIFF formats. Ideal for archival or exact reproductions.
Lossy Compression
Removes some data to achieve smaller sizes. JPEG and WebP (lossy) excel here, delivering significant reductions at modest quality settings.
Advantages of lossy compression:
- Substantially smaller files
- Faster upload/download speeds
---
Choosing the Right Export Settings in Design Tools
Popular tools like Photoshop, Illustrator, and Affinity Designer allow precise control over export quality:
- Photoshop: Use "Save for Web" for format, quality, and dimensions control.
- Illustrator: Export SVG for scalable vector graphics; reduce decimal precision for smaller files.
- Figma/Sketch: Adjust quality sliders and select optimal formats per asset.
Pro tip: Lowering JPEG quality from 100% to 85% can cut size by half with minimal visible change.
---
Optimize Image Dimensions for Target Platforms
Avoid oversized exports:
- Web banners: 1200–2000px wide
- Social media: Match platform-specific resolution (e.g., Instagram 1080×1080)
- Print: High DPI (300) but exact physical dimensions
Reducing resolution reduces pixel count, lowering file size without sacrificing clarity.
---
Web-Based Optimizers and Batch Compression
Services like TinyPNG, Compressor.io, and Squoosh offer fast online optimization:
- Pros: No installation required, beginner-friendly
- Cons: Limited free batch processing options
For large volumes, use tools like ImageOptim, JPEGmini, or command-line utilities such as ImageMagick:
magick input.jpg -quality 85 output.jpgBatch processes maintain consistency across many images.
---
Reduce Color Depth and Remove Metadata
Reduce Color Depth
Decrease bits per pixel for diagrams or charts. Switching from 24-bit to 8-bit color can drastically reduce file size without hurting simple graphics.
Remove Metadata
Strip EXIF (camera data, GPS coordinates) for additional savings without visual impact:
exiftool -all= image.png---
Modern Formats: WebP and AVIF
Emerging formats offer efficient compression and quality retention:
| Format | Compression Type | Benefits |
|---|---|---|
| WebP | Lossy/Lossless | Smaller than JPEG/PNG, supports transparency |
| AVIF | Lossy/Lossless | Superior compression, excellent quality |
These formats help achieve reduced file sizes while keeping images sharp and appealing.
---
Test Files for Quality and Performance
Before publishing optimized images:
- Visual Inspection: Check for compression artifacts
- Performance Check: Use browser dev tools or GTmetrix to measure load times
- Metrics Comparison: Analyze KB savings versus original
Testing ensures optimization preserves user experience.
---
Maintain Quality in Repeated Edits
Prevent cumulative degradation by:
- Keeping a master file in a lossless format (TIFF, PSD).
- Exporting lossy versions only for final publishing.
- Automating exports to avoid manual errors.
---
Summary
Optimizing graphic file size without quality loss hinges on smart format choices, thoughtful compression, and resolution tailoring. Combining vector formats where feasible, modern WebP/AVIF adoption, and metadata/color depth reduction will yield lightweight, high-quality visuals. Test every change to confirm performance gains without sacrificing aesthetics.
Call to action: Start applying these optimization techniques today to enhance your site’s speed, improve SEO rankings, and delight your audience with crisp, fast-loading graphics.