How to Schedule a Story on Instagram Step by Step Guide
Learn how to schedule Instagram Stories step-by-step, choose the best tools, and plan engaging content to boost reach and consistency.

How to Schedule a Story on Instagram: Step-by-Step Guide
Scheduling Instagram Stories is one of the most effective ways to maintain a consistent online presence without being tied to your device. If you’ve ever wondered how to schedule a story on Instagram, this guide will walk you through everything — from understanding the benefits and requirements, to choosing tools, following detailed steps, and boosting engagement. Whether you’re a solo creator or a brand, using a scheduling strategy ensures your stories reach audiences at the perfect moment, even across different time zones.
---
Why Schedule Instagram Stories?
Scheduling Instagram Stories isn’t just a convenience — it’s a powerful strategic approach that improves consistency and reach.
Benefits of Instagram Story Scheduling
- Consistency – Regular posting builds trust and brand recognition.
- Time-Saving – Batch-create stories and avoid last-minute stress.
- Global Reach – Publish during peak times for worldwide followers.
---
Check the Requirements First
Before you start scheduling, confirm that you meet these requirements:
- Instagram Creator or Business Account – Personal profiles cannot access scheduling features. Switching account type is easy in settings.
- Linked Facebook Page – Required for native scheduling through Meta Business Suite.
---
Choosing the Right Scheduling Tool
There are multiple tools available to schedule Instagram Stories, each with unique advantages.
| Tool | Advantages | Limitations |
|---|---|---|
| Meta Business Suite | Free, native integration with Instagram and Facebook | Limited advanced analytics |
| Later | Visual planner, easy drag-and-drop | Occasional manual posting needed |
| Buffer | Cross-platform scheduling, analytics dashboard | Push notification needed for Stories |
| Hootsuite | Robust analytics, team collaboration | Requires paid plan for full features |
| Planoly | Bulk upload, storyboard interface | Manual actions for certain formats |
---
Prepare Your Story Content
To maximize results, prepare content before scheduling:
- Images & Videos – Match 9:16 aspect ratio (1080x1920 pixels).
- Captions – Keep them short and impactful.
- Stickers & GIFs – Add personality and interactivity.
- Links – Use the link sticker to drive traffic.
- Hashtags & Mentions – Boost discoverability.

---
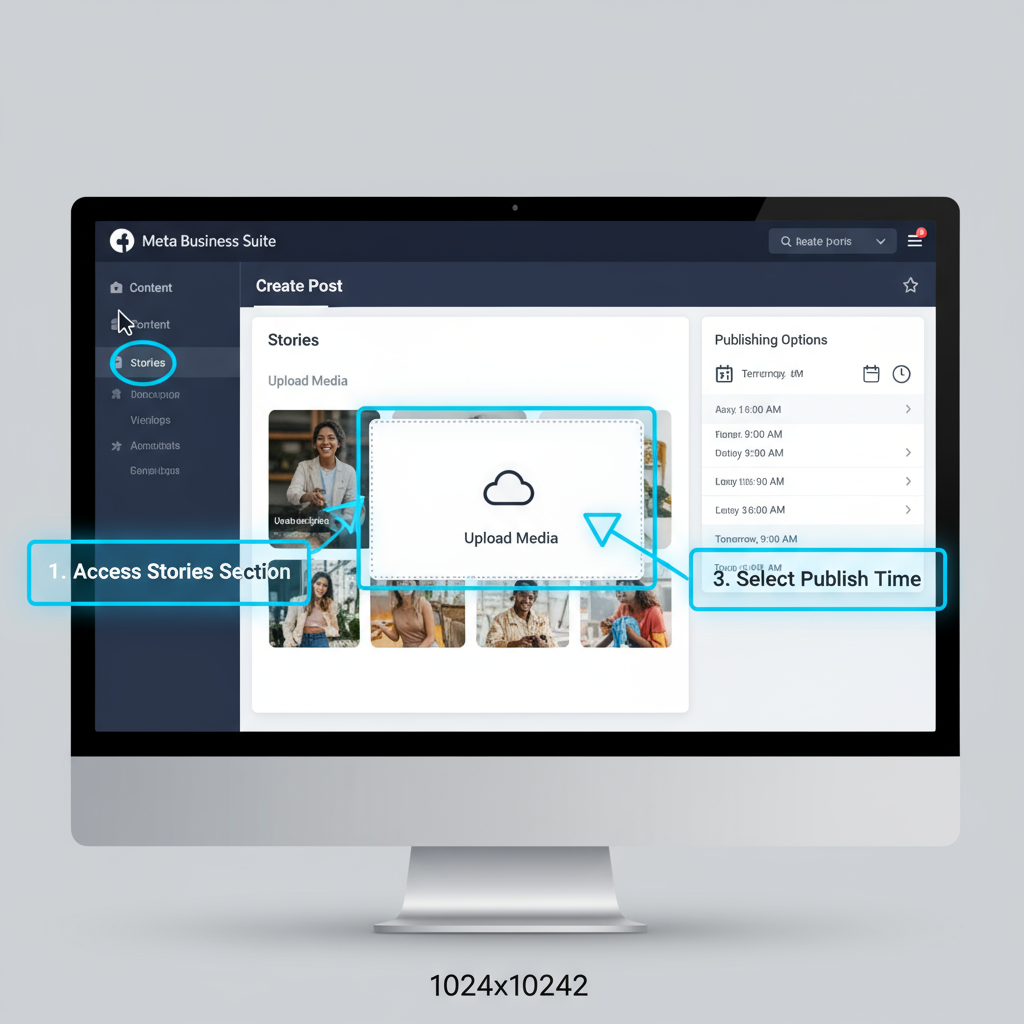
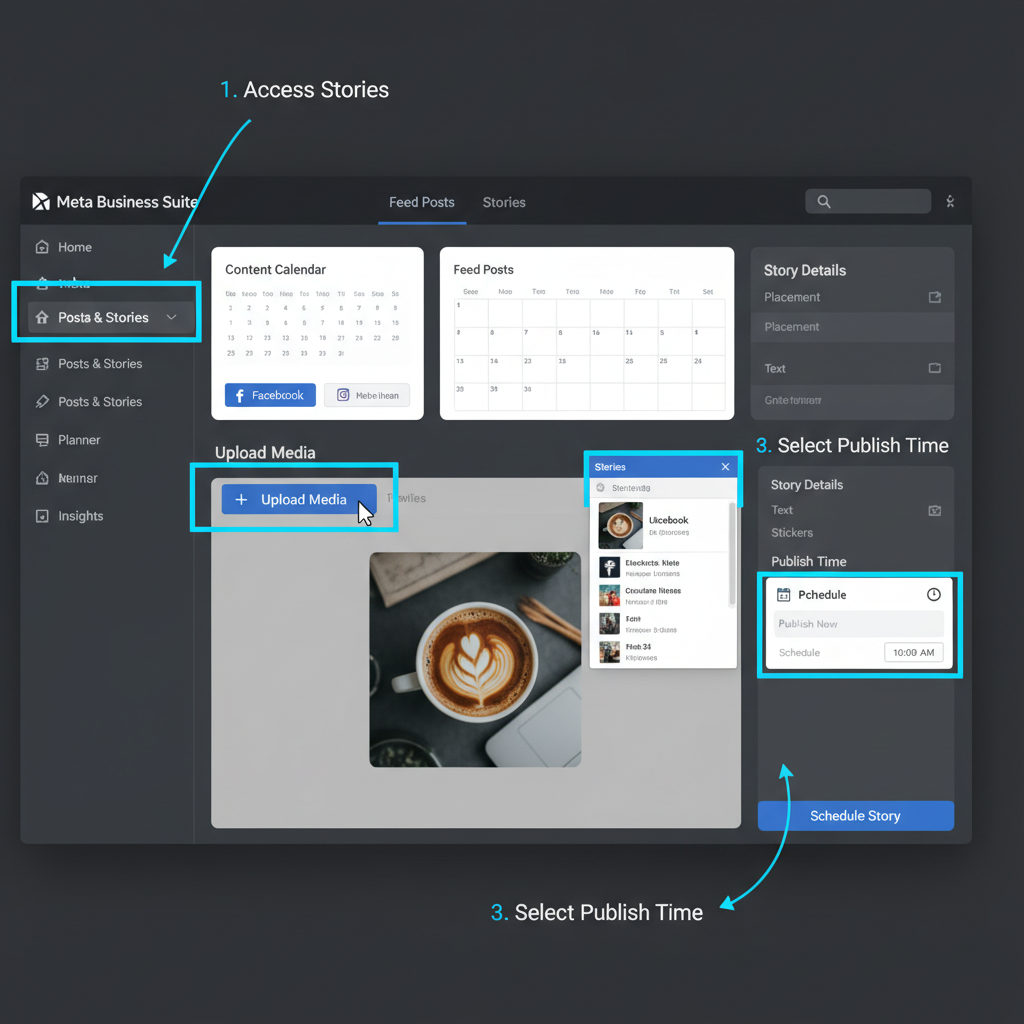
Step-by-Step: Scheduling a Story Using Meta Business Suite
Meta Business Suite is Meta’s official free tool for managing Instagram and Facebook content.
1. Access Meta Business Suite
- Visit business.facebook.com.
- Log in with your account connected to Instagram.
2. Switch to Your Instagram Profile
- Click your profile icon in the sidebar.
- Select the connected Instagram account.
3. Create a Story
- Go to Posts & Stories.
- Click Create Story and select Instagram (or both Instagram and Facebook).
4. Upload Your Content
- Add your prepared images or videos.
- Use the editor for quick adjustments.
5. Schedule Your Story
- Click Schedule instead of Publish.
- Choose your date and time based on peak engagement.
6. Confirm and Save
- Review all details, stickers, and tags.
- Click Schedule Story to finalize.
---
Alternatives: Using Third-Party Scheduling Tools
If Meta Business Suite isn’t ideal, try:
- Later – Reminder-based Story posting with storyboard preview.
- Buffer – Push notification-based publishing.
- Hootsuite – End-to-end social scheduling with strong analytics.
- Planoly – Visual-first planning with bulk upload.
Note: API limitations may require manual confirmation when posting Stories via third-party tools.
---
Best Practices for Timed Posting
To maximize your results:
- Use Insights – Identify when your followers are most active.
- Plan a Content Calendar – Keep campaigns cohesive.
- Mix Formats – Alternate between videos, photos, polls, and boomerangs.
---
Tips for Making Scheduled Stories Engaging
Enhance engagement with these tactics:
- Polls & Quizzes – Invite participation.
- Countdown Stickers – Build anticipation.
- Emoji Sliders – Encourage instant feedback.
- Branding – Keep colors, fonts, and logos consistent.
---
Troubleshooting Common Issues
Here’s how to handle common scheduling challenges:
| Issue | Cause | Solution |
|---|---|---|
| Upload fails | Poor internet or unsupported format | Check connection; use .jpg/.mp4 |
| Low-quality images | Compression during upload | Export high-resolution files |
| Wrong aspect ratio | Improper image dimensions | Resize to 1080x1920 pixels |
| Story didn’t post | Manual action required | Enable notifications and confirm |
---
Track and Analyze Scheduled Stories’ Performance
After posting, evaluate your efforts:
- Reach – Number of users who viewed your story.
- Taps Forward/Back – Gauge content retention.
- Exits – Identify drop-off points.
- Sticker Interactions – Measure engagement rate.
Regular tracking lets you refine posting times and creative assets.
---
Conclusion & Recommendations
Learning how to schedule a story on Instagram helps you post more strategically, free your time, and maintain consistent brand visibility. Start by using Meta Business Suite for its simplicity and cost-effectiveness. As your content needs grow, explore alternative scheduling tools for more features and analytics.
Key takeaways:
- Prepare visually compelling content in advance.
- Post at optimal engagement times.
- Keep content interactive and brand-aligned.
- Use analytics to improve future stories.
By combining automation with creative storytelling, you can reach audiences at the right time, increase engagement, and grow your Instagram presence without daily posting stress. Ready to get started? Choose your scheduling tool today and plan your next week of stories.


