How to Screenshot on Instagram on iPhone, Android, and PC
Learn step-by-step how to screenshot Instagram content on iPhone, Android, and PC, plus tips for privacy, quality, and alternative capture methods.

How to Screenshot on Instagram on iPhone, Android, and PC
Instagram is one of the most popular social platforms for sharing photos, videos, Reels, and Stories. Whether you want to save inspiration, document a conversation, or share something later, learning how to screenshot on Instagram is an essential skill. In this guide, we’ll walk through step-by-step methods for iPhone, Android, and desktop users, plus tips for preserving quality, editing, and staying within legal and ethical boundaries.
---
Why You Might Screenshot on Instagram
People capture screenshots on Instagram for several reasons, including:
- Saving Ideas: Store outfit inspiration, recipes, or travel destinations.
- Keeping Records: Document conversations, comment threads, or announcements.
- Sharing Content: Show friends a post without using Instagram’s share function.
- Personal Reference: Keep a bookmark without publicly liking or saving it.
This applies across key Instagram formats:
- Stories: Time-limited posts visible for 24 hours.
- Posts: Images, carousels, or videos in a feed.
- Reels: Short vertical videos.
- Profiles: Complete bio and layout.
---
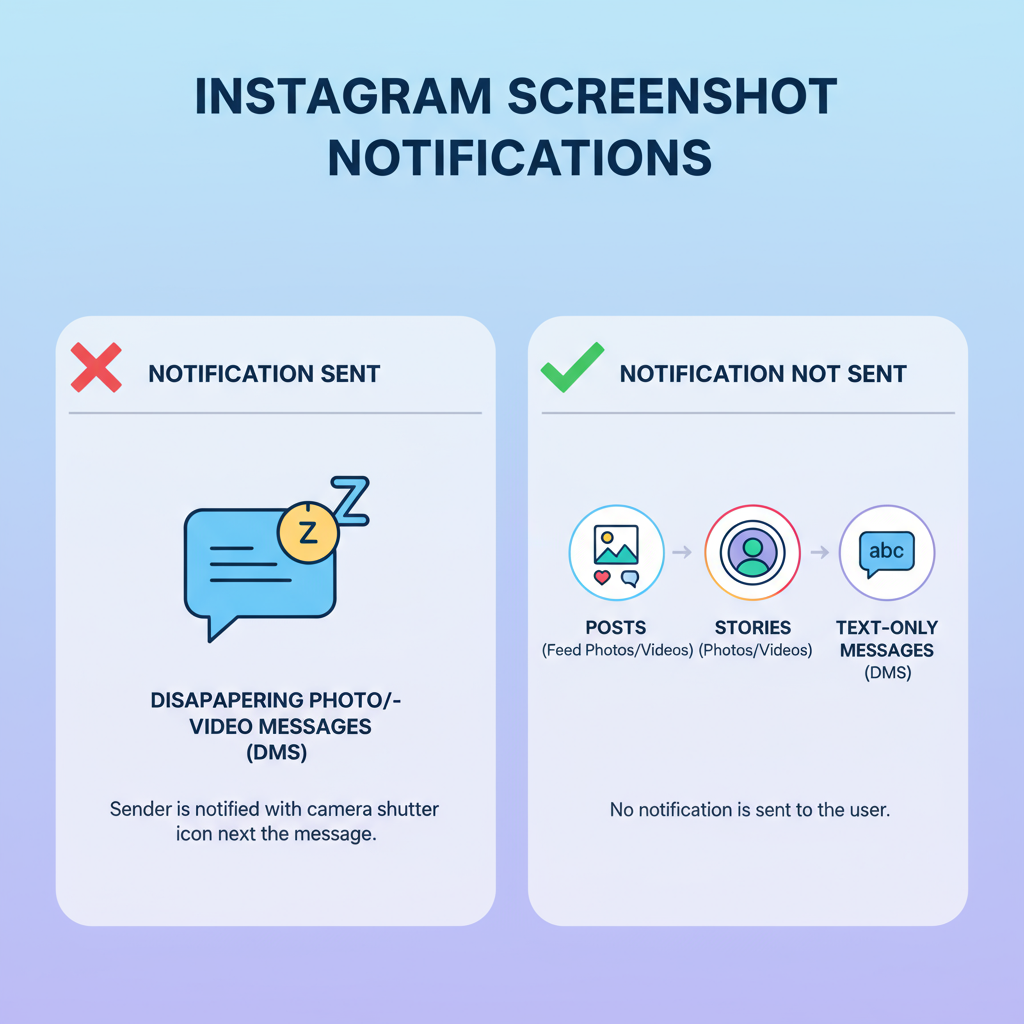
Does Instagram Notify When You Screenshot?
As of the 2024 update, Instagram does not notify users if you take a screenshot of posts, Stories, Reels, or profiles — with one notable exception: disappearing direct messages in DMs. If you screenshot a vanishing photo or video sent privately, Instagram alerts the sender.
Privacy Tip: Just because Instagram doesn’t notify most screenshots doesn’t mean you should capture everything. Always respect content owners’ rights and personal privacy.
---
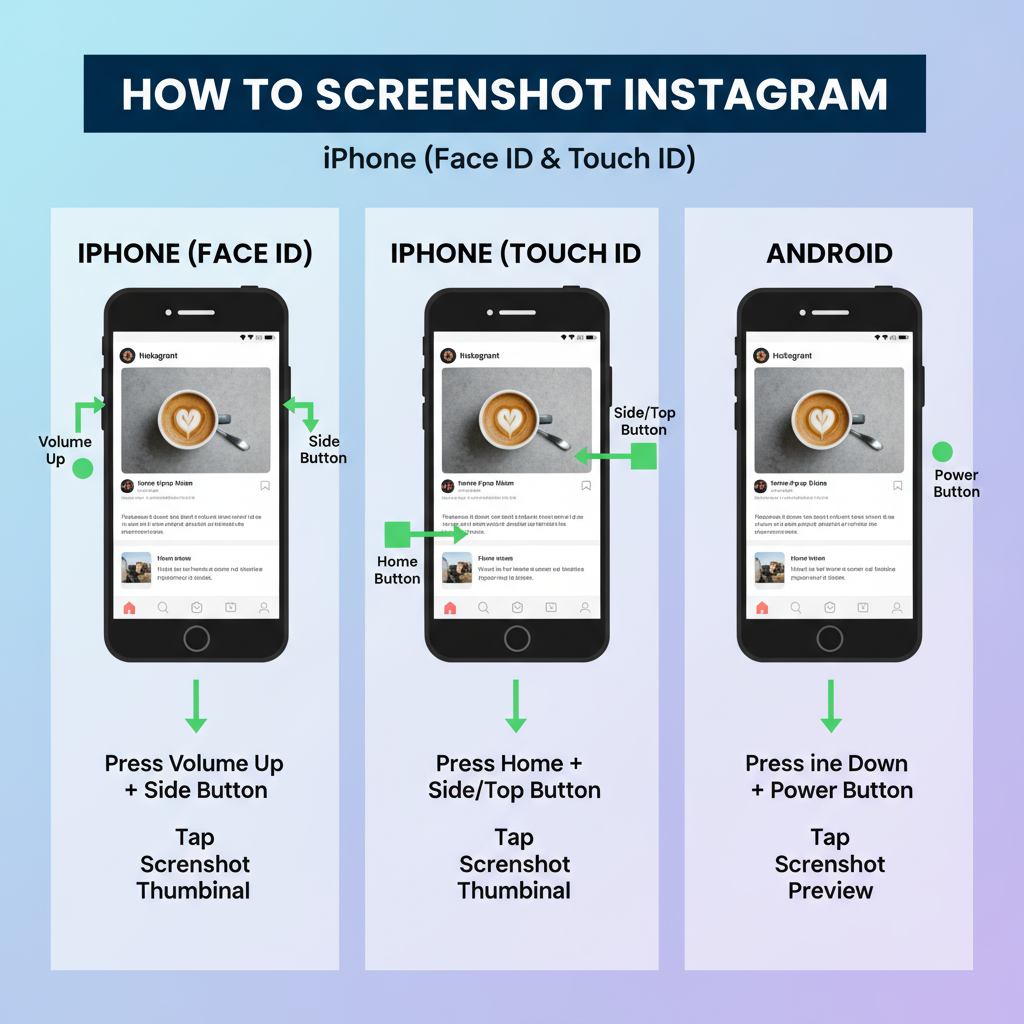
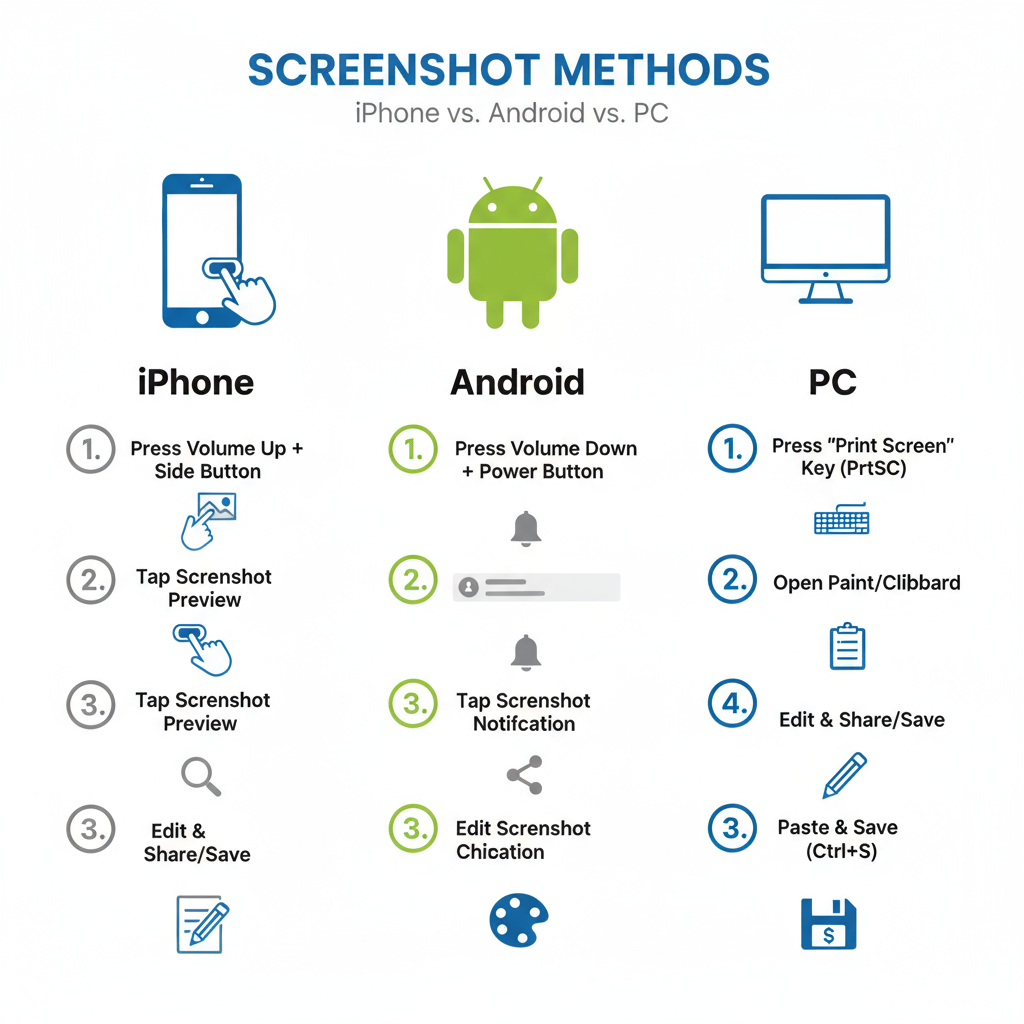
How to Screenshot Instagram on iPhone
The method depends on your iPhone model.
Face ID Models (iPhone X and later)
- Open Instagram and find the content you want to capture.
- Press Side Button + Volume Up at the same time.
- The screenshot preview appears in the bottom-left corner.
- Tap to edit or swipe left to save silently.
Touch ID Models (iPhone SE, 6, 7, 8)
- Open the Instagram post, Story, or Reel.
- Press Home Button + Power/Side Button together.
- Edit from the preview if desired.
Pro Tip: Enable AssistiveTouch in Settings → Accessibility → Touch to capture screenshots without button combos.
---
How to Screenshot Instagram on Android
Android devices vary by brand, but most offer similar options.
Common Methods
- Power + Volume Down: Press and hold for about 1–2 seconds.
- Palm Swipe: On Samsung, enable under Settings → Advanced Features → Motions & Gestures.
- Three-Finger Swipe: On Xiaomi or OnePlus, enable in gesture settings.
Popular Manufacturer Shortcuts
| Brand | Method |
|---|---|
| Samsung | Power + Volume Down, or Palm Swipe |
| Google Pixel | Power + Volume Down, or hold Power for menu screenshot |
| OnePlus | Power + Volume Down, or Three-Finger Swipe |
| Xiaomi | Power + Volume Down, or Quick Ball shortcut |
| Oppo/Vivo | Power + Volume Down, or gesture in settings |
---
How to Screenshot Instagram on Desktop
Instagram can be accessed on a PC or Mac, and taking screenshots is straightforward.
Windows
- Full Screen: Press `PrtScn`, then paste into Paint or another editor.
- Active Window: Press `Alt + PrtScn` for the active window only.
- Snipping Tool: Press `Windows + Shift + S` to choose screen areas.
Mac
- Entire Screen: Press `Command + Shift + 3`.
- Selected Portion: Press `Command + Shift + 4`.
- Advanced Controls: Press `Command + Shift + 5` for more options.
---
Alternative Methods: Screen Recording and Cropping
For moving content like Reels or video Stories:
- iPhone: Control Center → Screen Recording.
- Android: Built-in screen recorder in quick settings (varies by brand).
- Windows/Mac: Use OBS Studio, Windows Game Bar, or QuickTime.
Pause the recorded video at the desired frame and take a still screenshot.
---
Tips to Preserve Image Quality
- Zoom Moderately: Avoid excessive zoom before capturing.
- Portrait Orientation: Matches Instagram’s default ratio.
- Reduce Compression: Minimize repeated saves/edits.
- Use Built-in Tools: Native screenshot methods generally offer higher resolution.
---
How to Edit and Organize Your Screenshots
After capturing, you may want to:
- Crop out unwanted interface elements.
- Adjust Lighting for better clarity.
- Annotate with highlights or text using built-in markup tools.
- Organize into folders or cloud storage for easy access.
---
Legal and Ethical Considerations
- Copyright: Content belongs to its creator — seek permission before reposting.
- Privacy: Avoid publishing personal or sensitive content without consent.
- Fair Use: Applies in certain educational or news contexts, but not for monetized reposts.
- DMs: Always respect sender consent, especially for disappearing media.
---
Quick Troubleshooting
If screenshots fail:
- Restart your device to resolve glitches.
- Check physical button health.
- Update operating system for bug fixes.
- Ensure permissions aren’t blocking captures.
- Use gesture controls or on-screen features if hardware is unresponsive.
---
Conclusion: Best Practices for Instagram Screenshots
Mastering how to screenshot on Instagram means you can quickly save, share, or archive the content you care about across iPhone, Android, and PC. Use native capture tools for the highest quality, edit thoughtfully to enhance images, and always respect the privacy and rights of others.
Done right, screenshots can be a practical way to reference inspiration, record information, and share moments — all while maintaining ethical standards. Ready to try it? Open Instagram, pick your device method above, and start capturing responsibly.