How to View Scheduled Posts on LinkedIn Desktop and Mobile
Learn step-by-step how to view, edit, delete, and troubleshoot scheduled posts on LinkedIn using both desktop and mobile for better content management.

How to View Scheduled Posts on LinkedIn Desktop and Mobile
If you’ve started using LinkedIn’s built-in scheduling tool, it’s natural to ask how to see your scheduled posts on LinkedIn so you can manage your content efficiently. This guide explains step-by-step how to view, edit, delete, and optimize scheduled posts on both LinkedIn desktop and the LinkedIn mobile app. You’ll also discover effective troubleshooting tips, alternatives using third-party tools, and best practices for keeping your LinkedIn content calendar on track.

---
Understanding LinkedIn’s Native Post Scheduling Feature
LinkedIn’s native scheduling option allows professionals and brands to plan content well in advance without relying on outside apps. With this feature:
- You can schedule directly from the “Start a Post” composer.
- The scheduling calendar lets you set a posting date/time up to 90 days ahead.
- All scheduled posts are saved in a dedicated section for easy viewing and management.
Before using it extensively, make sure your LinkedIn is updated, as rollouts sometimes vary by user or region.
---
Access Scheduled Posts from the LinkedIn Homepage Menu
To view scheduled posts on LinkedIn, start from your homepage and follow the navigation suited to your device.
On Desktop:
- Log in to LinkedIn.
- Select the Home tab from the top navigation bar.
- Locate your Manage Posts or My Items section.
- Open the section to view your latest posts, drafts, and scheduled content.
On Mobile:
- Launch the LinkedIn app.
- Tap your profile picture.
- Select Posts & Activity.
- Switch to the Scheduled tab (if visible).
> Note: Labels and layout may vary between desktop and mobile interfaces.
---
Use the “My Items” or “Manage Posts” Section to See Scheduled Content
These built-in sections act as a hub for all your saved content, including posts scheduled for future publishing.
Inside these areas, you can:
- View thumbnails and previews of scheduled posts.
- See the scheduled publication date and time.
- Filter to show only scheduled content for faster access.
---
LinkedIn Desktop vs Mobile Scheduled Post View
The core features are the same, but the interface presentation is different.
| Feature | LinkedIn Desktop | LinkedIn Mobile App |
|---|---|---|
| Navigation | Top menu > My Items or Manage Posts | Profile picture > Posts & Activity |
| Post List View | Compact layout with detailed timestamps | Scrollable card tiles with limited text |
| Editing Tools | Edit directly in scheduled list | May need to open draft to edit |
| Filters | Filter by scheduled, published, or drafts | Limited filters, scrollable list |
---
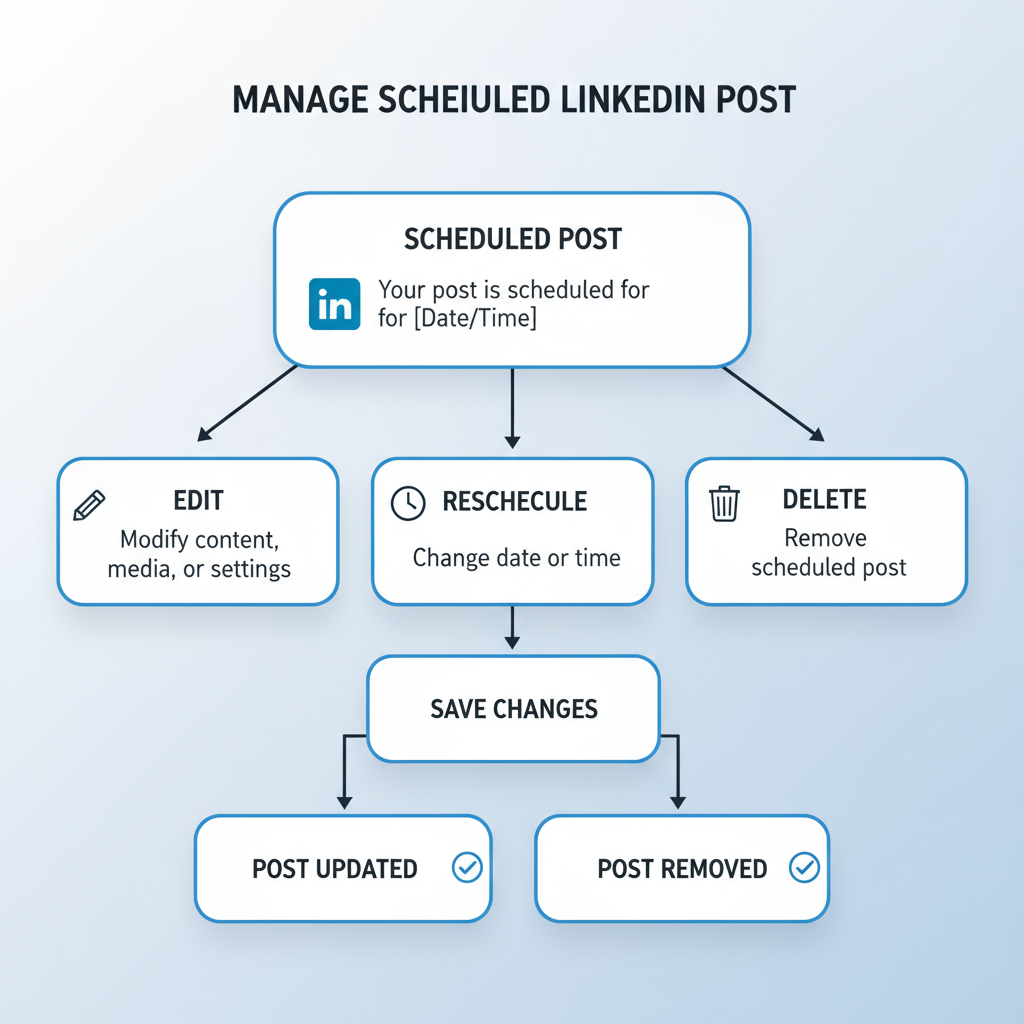
Edit or Reschedule LinkedIn Posts Before Publishing
One major advantage of LinkedIn’s scheduling tool is in-platform editing or rescheduling.
To Edit or Reschedule:
- Find the post in your scheduled list.
- Click Edit (pencil icon) to reopen it in the composer.
- Make changes to text, media, or hashtags.
- Adjust the scheduled time by clicking the clock icon.
- Save your updates.
> Tip: Consider audience time zones when rescheduling to maximize engagement potential.
---
Delete a Scheduled Post if Plans Change
When strategies shift, deleting a scheduled post is simple:
- Desktop: Select the scheduled post, click More (three dots), then Delete.
- Mobile: Open the scheduled post preview, tap the three-dot menu, and select Delete.
Once removed, the post won’t publish and must be recreated if needed later.
---
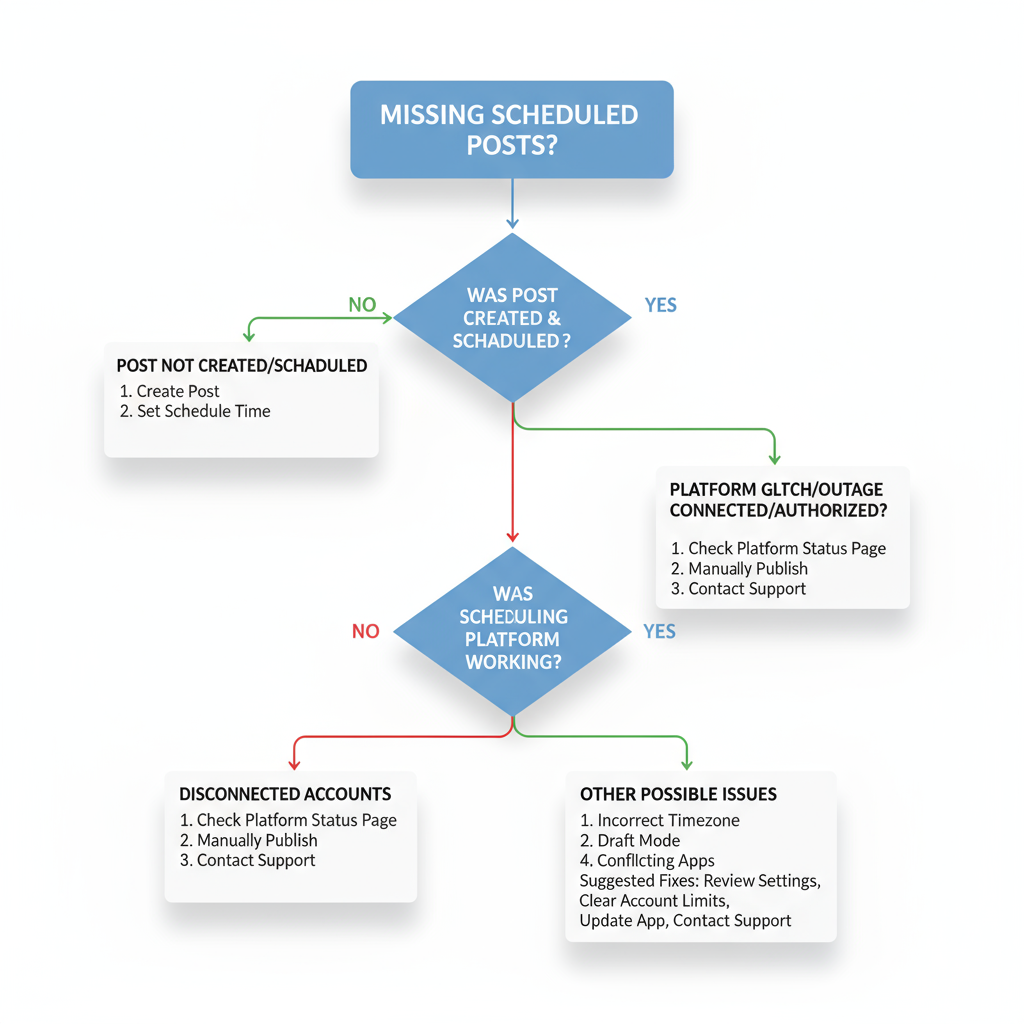
Troubleshooting Missing Scheduled Posts
If a scheduled post seems to have disappeared:
Possible Reasons:
- Temporary sync delays between devices.
- Post was saved as a draft instead of being scheduled.
- Permission or feature access was revoked.
- The scheduled time passed, and the post automatically published.
How to Fix:
- Refresh your browser or restart the app.
- Check the drafts folder.
- Search your activity feed.
- Ensure your LinkedIn version is up to date.
---
Alternatives: Use Third-Party Tools for Unified Scheduling
For professionals managing multiple social channels, external scheduling platforms can consolidate tasks.
Popular Tools:
- Buffer
- Hootsuite
- Sprout Social
- SocialBee
These tools offer:
- Cross-platform scheduling dashboards.
- Collaboration features for teams.
- Bulk content scheduling.
> Keep in mind that posts scheduled through third parties may not appear in LinkedIn’s native scheduled posts list.
---
Pro Tips for Building a LinkedIn Content Calendar
Maximize scheduling effectiveness with a planned approach:
- Batch create your posts weekly or monthly.
- Mix content formats — images, videos, polls, articles.
- Align with industry events and trending topics.
- Maintain a content tracker with ideas, drafts, and publish dates.
---
Best Practices for Post-Performance After Publishing
Scheduling is only the start — engagement is key.
- Respond quickly to comments after your post goes live.
- Use analytics to identify the best posting times.
- Add visual elements to drive attention.
- Incorporate relevant hashtags for greater reach.
- Continuously test and refine timing and content.
---
Summary & Next Steps
Mastering how to see your scheduled posts on LinkedIn helps keep your publishing consistent, timely, and effective. By regularly monitoring, editing, and optimizing your scheduled list — whether in LinkedIn’s native tool or via third-party schedulers — you can ensure your professional presence stays strong. Start applying these strategies today to streamline your workflow, increase engagement, and maintain a steady, impactful LinkedIn presence.


