How to Share a Reel on FB from Instagram or Facebook
Learn how to share Reels from Instagram to Facebook with automatic or manual methods, adjust privacy settings, and optimize captions for more reach.

Introduction to Facebook Reels and Cross-Platform Sharing
Facebook Reels are Facebook’s answer to the short-form video trend, offering a dynamic way to capture attention and drive engagement — much like Instagram Reels and TikTok videos. These quick, visually appealing clips are designed for high discoverability, making them perfect for reaching beyond your current follower base.
Cross-platform sharing — especially from Instagram to Facebook — lets you maximize exposure without doubling your content creation workload. By strategically reusing Reels, you maintain brand consistency while tapping into the unique algorithms and audience behaviors of each platform.
Whether you’re a content creator, small business owner, or marketer, learning how to share a reel on FB effectively will help you expand your reach and deepen audience engagement.
---
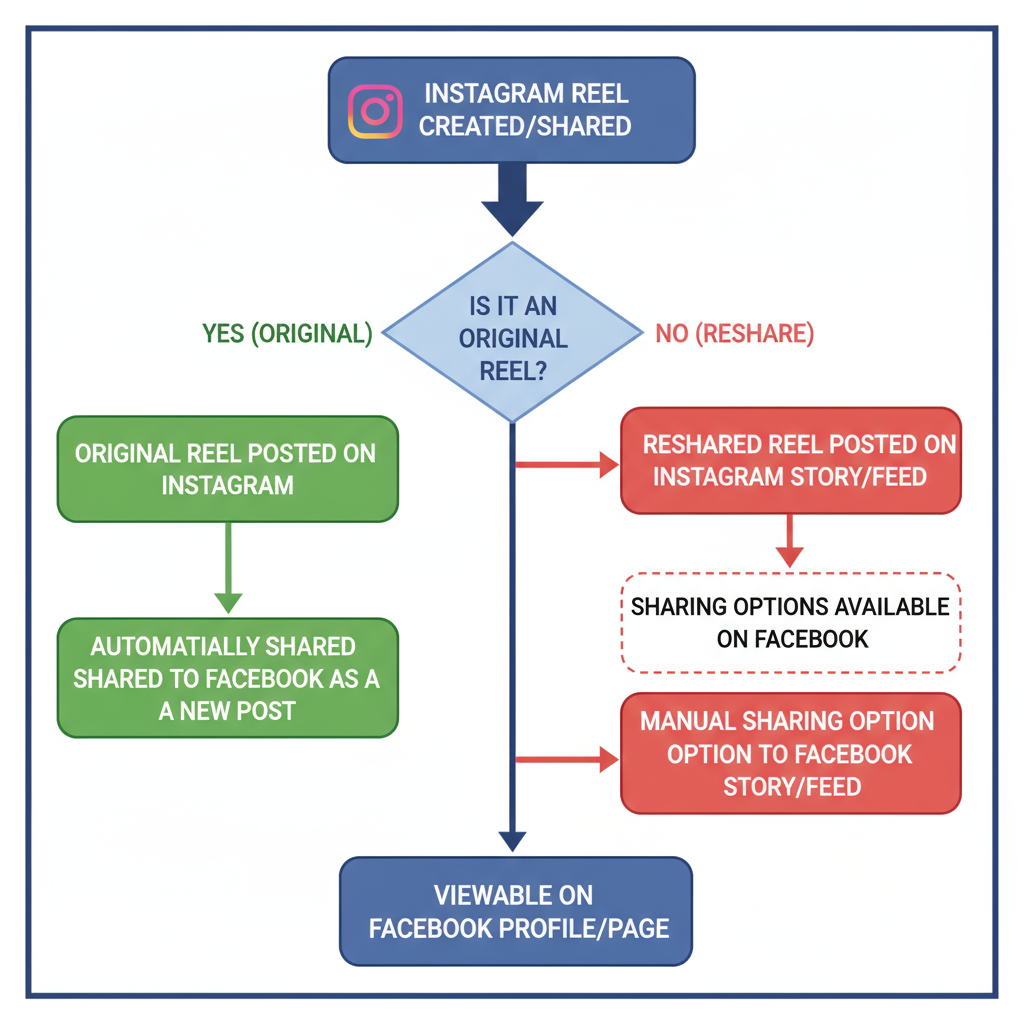
Understanding the Difference: Original vs. Reshared Reels
Before exploring the methods, know the distinction:
- Original Reels: Newly created videos uploaded directly to Facebook from your device.
- Reshared Reels: Content already posted on Instagram or Facebook and then shared again to a different feed or Story.
Key takeaway: Original Reels often benefit more from Facebook’s native reach algorithms, while reshared content is ideal for cross-promotion but may not always get the same organic boost.
---
Automatic Sharing from Instagram to Facebook
Instagram includes a built-in cross-posting feature for effortless Reel sharing.
Steps to enable automatic sharing:
- Open your Instagram app.
- Create a new Reel or open a draft.
- On the posting screen, toggle “Share to Facebook”.
- Adjust your audience settings (Public, Friends, etc.) before posting.
- Tap Share — your Reel will publish to both Instagram and Facebook instantly.
Pro tip: Go to Instagram Settings → Account → Sharing to Other Apps → Facebook and turn on “Automatically Share Reels” for full automation.
---
Manual Method: Saving and Uploading Reels to Facebook
For selective sharing or customized captions:
Save your Reel from Instagram:
- Open the Reel from your profile.
- Tap the three dots menu.
- Select Save to Camera Roll (or record the screen if not available).
Then upload to Facebook:
- Open the Facebook app.
- Navigate to Reels or your timeline.
- Tap Create and select the saved video.
- Add captions, hashtags, and set privacy preferences.
- Publish.
This hands-on method allows for editing or tailoring content for Facebook’s audience.
---
Sharing an Existing Facebook Reel to Feed or Story
Already have a popular Reel on Facebook? Amplify its impact:
- Open the Reel.
- Tap the Share button.
- Select Share to Feed or Share to Your Story.
- Add optional notes or stickers to increase engagement.
Resharing is a smart tactic for reigniting interest among your followers.
---
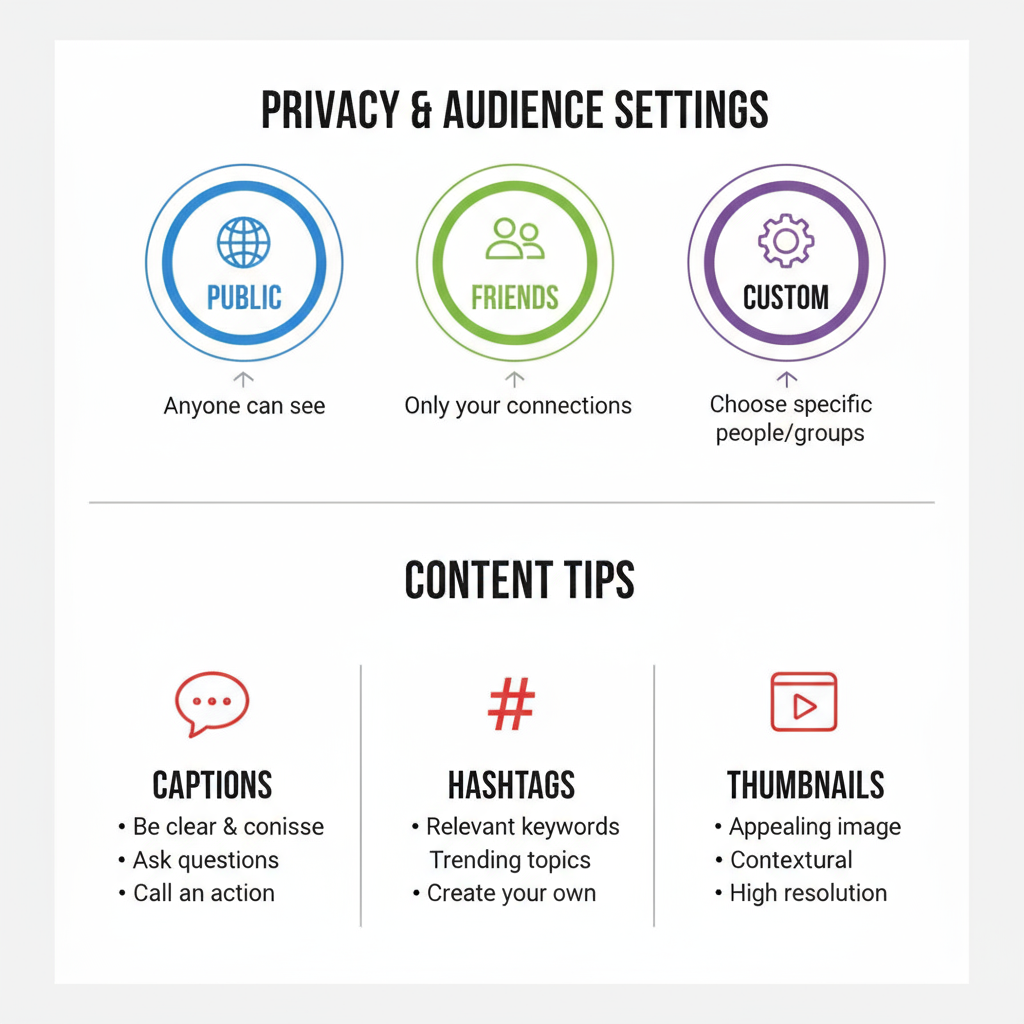
Privacy and Audience Settings for Facebook Reels
Always verify your privacy settings before posting:
- Public: Viewable by everyone on or off Facebook.
- Friends: Only your friend list can see it.
- Custom: Share with selected people or lists only.
Audience growth tip
Choosing Public can significantly increase visibility, allowing your Reel to appear in the general Facebook Reels feed.
---
Optimizing Captions, Hashtags, and Thumbnails
Compelling presentation drives engagement:
- Captions: Keep them concise and captivating; lead with a hook.
- Hashtags: Combine broad (#funny, #travel) and niche (#bakinghacks, #contentmarketing) — aim for 5–10.
- Thumbnails: Choose a visually striking frame with the subject in focus.
| Element | Best Practice |
|---|---|
| Caption | Use a strong hook in the first sentence to stop scrolling |
| Hashtags | Balance high-volume and niche keywords |
| Thumbnail | Bright, clear, and relevant image with main subject in focus |
---
Best Posting Times for Facebook Reels
Timing can influence reach:
- Weekdays: 12 PM – 1 PM (lunch) and 6 PM – 8 PM.
- Weekends: 9 AM – 11 AM and 5 PM – 7 PM.
Pro tip: Test various posting times and monitor Facebook Insights to pinpoint when your audience is most active.
---
Troubleshooting Reel Sharing Problems
If Reel sharing fails, common causes include:
- Unsupported format: Convert your video to MP4 with H.264 codec.
- Permissions: Ensure Instagram is authorized to post to Facebook.
- Copyright issues: Use licensed audio or original sound.
- Feature availability: Not all regions support automatic cross-posting.
---
Measuring Reel Performance with Facebook Insights
Track the impact of your Reels in Facebook Insights:
- Reach: The number of people who viewed your Reel.
- Engagement: Likes, comments, and shares.
- Retention: Average watch duration.
- Click-through rate: For Reels with links or CTAs.
Access Insights through your Facebook Page dashboard or Creator Studio to refine your strategy.
---
Repurposing Reels into Other Facebook Content
Extend the lifespan and reach of each Reel:
- Stories: Share short excerpts with added text or GIFs.
- Static posts: Use high-quality frames as standalone images.
- Live sessions: Turn Reel topics into live discussions.
- Ads: Promote top-performing Reels as targeted ads.
---
Conclusion: Grow with Consistent, Strategic Sharing
Mastering how to share a reel on FB — whether from Instagram or within Facebook — can help you sustain visibility, expand reach, and engage more meaningfully.
By combining automation with manual curation, refining privacy and optimization settings, posting when your audience is most receptive, and tracking data-based results, you’ll make Facebook Reels a strategic asset.
Final takeaway: Audit your Instagram library, select high-potential Reels, and implement a consistent Facebook posting rhythm. Over time, you’ll boost brand awareness, build deeper audience connections, and enhance your digital growth.
Ready to elevate your reach? Start sharing your best Reels across platforms today and watch your engagement soar.


