Tips for Capturing High-Quality Photos of Posts for Social M
Learn practical tips for capturing high-quality, well-lit, and brand-ready photos of posts to boost engagement on social media and marketing platforms.

Tips for Capturing High-Quality Photos of Posts for Social Media
Capturing photos of posts—whether they are printed flyers, signage, blog features, or digital layouts—is more than just snapping a quick shot. These images help audiences visually connect with your message on social media, blogs, and marketing platforms, making them an essential part of modern digital marketing. In this guide, you’ll learn actionable tips to ensure your photos of posts are both visually appealing and optimized for engagement.
---
What Are “Photos of Posts”?
When we talk about photos of posts, we mean photographs that showcase content pieces in real-world or staged contexts. They can include:
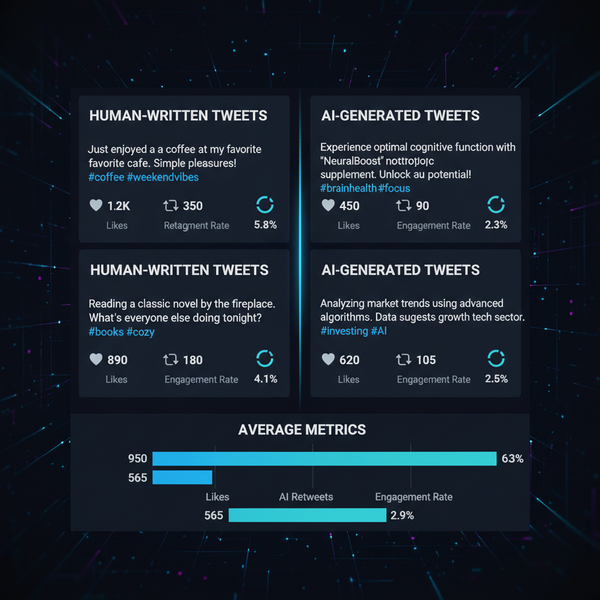
- Social media posts: Screenshots or staged shots highlighting a post on Instagram, Facebook, LinkedIn, or Twitter.
- Blogs and articles: Capturing a blog layout on a laptop, tablet, or print.
- Printed materials: Flyers, posters, magazine ads, brochures.
- Signage: Physical signs, banners, or boards used for promotions.
These types of photography serve both as documentation and promotion, helping audiences see the post content in context and increasing reach across visual platforms.
---
Choosing the Right Camera or Smartphone Settings
Both modern smartphones and professional cameras can produce excellent photos of posts when set correctly.
Smartphone Tips:
- Use the highest resolution available.
- Enable grid lines for composition.
- Avoid digital zoom; move closer physically.
- Use portrait or pro mode for control over focus and exposure.
Camera Tips:
- Choose a lens with minimal distortion like a 50mm prime for flat objects.
- Use an aperture between f/4–f/8 for sharpness across the frame.
- Keep ISO low (100–400) to reduce noise.
Pro Tip: Clean your lens before every shoot. Dust or fingerprints will be extra visible against flat, graphic designs.
---
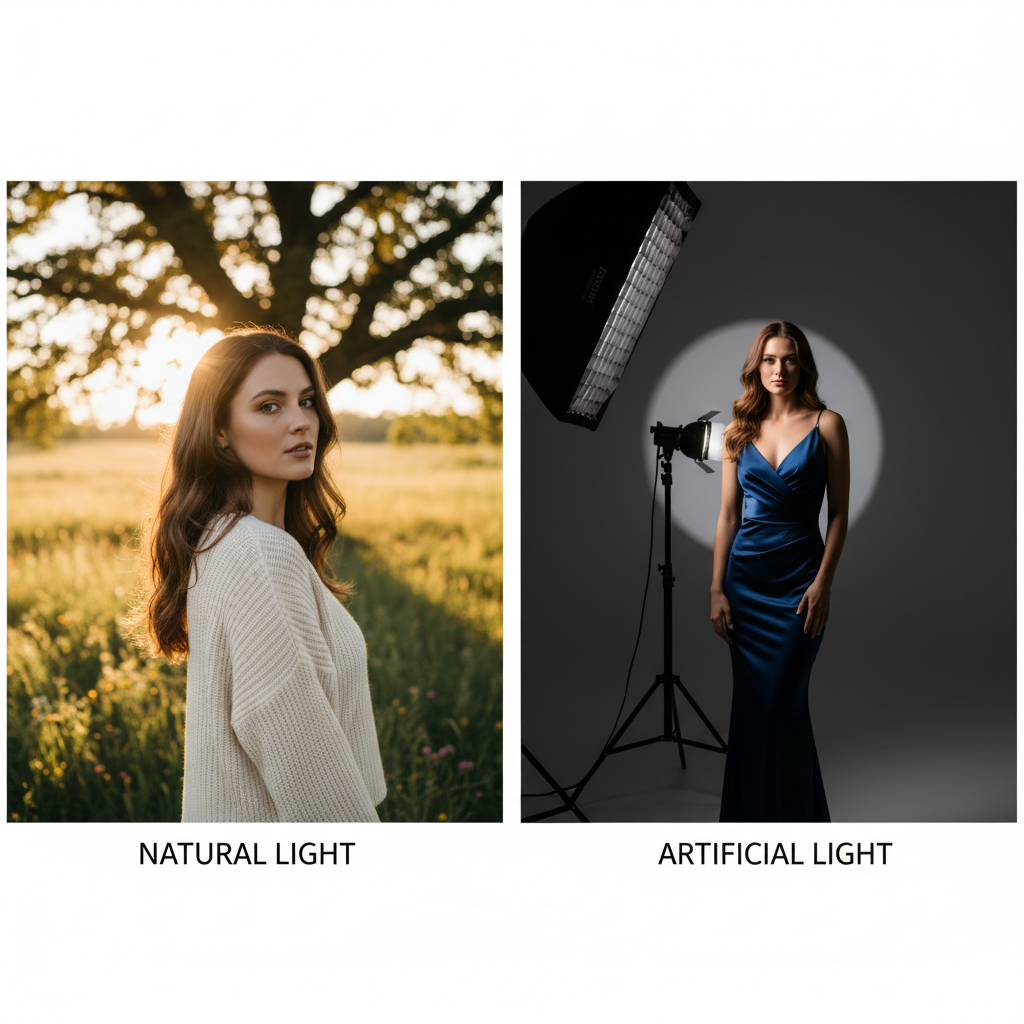
Lighting Techniques: Natural vs Artificial
Lighting dramatically impacts how detailed and appealing your photos of posts look. Soft, even illumination helps avoid gloss glare and shadows.
Natural Light:
- Shoot near a window with diffused sunlight.
- Overcast days offer perfect, even lighting.
- Use white curtains or reflectors to spread light evenly.
Artificial Light:
- LED panels or softboxes can simulate daylight.
- Position lights at a 45° angle from the post to prevent glare.
- Opt for bulbs with ~5500K color temperature for neutral tones.
Avoid direct overhead lighting, which often creates unflattering shadows.
---
Framing and Composition Tips
Good composition directs attention straight to your post.
- Rule of Thirds: Place the post along intersecting grid lines for balance.
- Leading Lines: Use objects or background patterns to guide the eye toward the post.
- Symmetry: Center important elements for a clean look.
- Negative Space: Leave empty background around the subject to make it stand out.
Example: If photographing a flyer on a wall, include a little wall texture around the edges for visual context.
---
Background Setup to Match Brand Style
Support your post content with backgrounds that enhance—not compete with—it.
Ideas:
- Neutral walls for minimal branding.
- Wooden textures for warmth and rustic appeal.
- Branded colors for a cohesive look.
- Lifestyle settings like cafés or desks for relatability.
Bold content designs work best with more muted backgrounds to avoid clutter.
---
Editing Basics: Refining Without Overdoing
Post-processing can polish your image without distorting your brand.
Color Correction:
- Adjust white balance for accuracy.
- Add slight contrast for better readability.
Cropping:
- Remove distractions at edges.
- Keep correct aspect ratios for text clarity.
Sharpening:
- Increase clarity slightly for crisp text.
- Avoid over-sharpening to prevent jagged edges.
Recommended Tools:
- Lightroom (desktop & mobile)
- Snapseed (mobile)
- Photoshop (advanced)
---
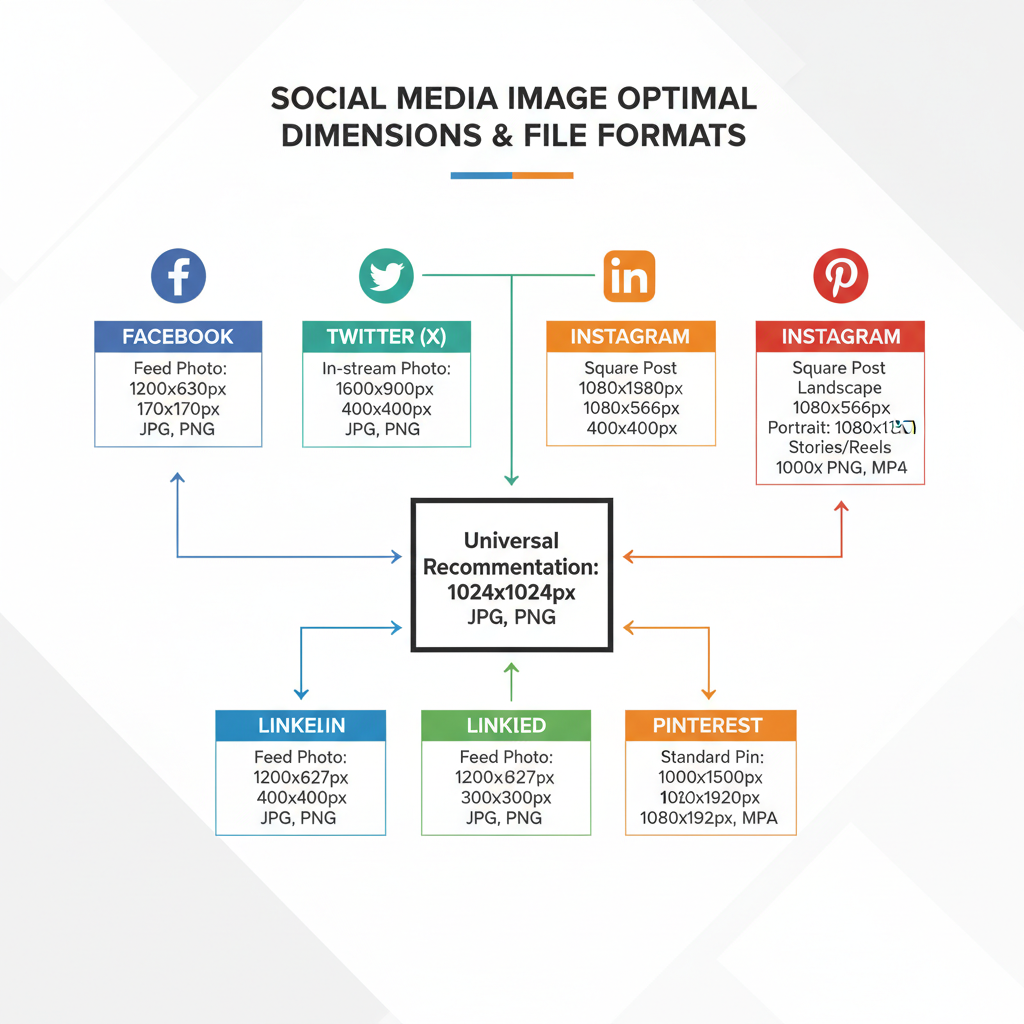
Optimizing Image Dimensions & File Formats
Different platforms have specific image ratio requirements.
| Platform | Recommended Ratio | Resolution | Format |
|---|---|---|---|
| Instagram Feed | 1:1 square | 1080x1080 px | JPEG/PNG |
| Instagram Stories | 9:16 vertical | 1080x1920 px | JPEG/PNG |
| 1.91:1 landscape | 1200x628 px | JPEG/PNG | |
| 1.91:1 landscape | 1200x628 px | JPEG | |
| 2:3 vertical | 1000x1500 px | JPEG/PNG |
Tip: Use compression tools like TinyPNG before uploading to reduce load times while keeping image quality.
---
Watermarks and Branding
Watermarks protect your work and reinforce brand presence.
Best Practices:
- Place watermark in a corner.
- Use semi-transparent opacity to avoid distraction.
- Keep consistent placement across all content.
---
Scheduling Shares for Maximum Engagement
Strategic timing increases engagement on social media platforms.
Optimal Times:
- Instagram: 6–8 pm and 11 am–1 pm
- Facebook: Mid-morning mid-week
- LinkedIn: 7–9 am weekdays
- Pinterest: Evenings and weekends
Automation tools like Buffer, Later, or Hootsuite can help maintain a consistent posting schedule.
---
Analyzing Engagement Metrics
Tracking results improves future photos of posts.
Metrics to evaluate:
- Likes, comments, shares
- Click-through rate
- Watch time (for video-based posts)
- Saves (Instagram, Pinterest)
Tools:
- Instagram Insights
- Facebook Page Analytics
- Google Analytics
- Pinterest Analytics
Adjust strategies based on which image styles drive the most interaction.
---
Common Mistakes to Avoid
Pitfalls to steer clear of:
- Covering text with props or fingers.
- Allowing glare on glossy surfaces.
- Overusing filters.
- Uploading low-resolution files.
- Inconsistent branding between post and background.
---
Summary and Next Steps
Photography of posts demands a mix of technical skill, composition awareness, and platform optimization. From careful camera settings to tailored lighting, on-brand backgrounds, and analytics-driven adjustments, following these steps can transform simple snapshots into high-impact marketing visuals. Start implementing these tips today to elevate your brand storytelling and boost engagement across all visual platforms.