How to Capture Looks Good Images Every Time
Learn how to capture consistently stunning images by mastering composition, lighting, color harmony, sharpness, and depth for any photography style.

How to Capture Looks Good Images Every Time
If you want to consistently capture looks good images that impress viewers and elevate your personal or professional photography, you need more than an expensive camera. Achieving consistently appealing shots combines artistic vision, technical ability, and post-processing finesse. Whether using a DSLR, mirrorless, or smartphone, mastering composition, lighting, color harmony, and editing will help you produce engaging photographs in any genre.

In this comprehensive guide, you’ll learn proven techniques—from applying the rule of thirds and selecting the right lighting to enhancing colors and refining edits. We’ll also cover how to avoid common mistakes, build a distinctive style, and adapt your approach based on your subject matter.
---
Understanding What Makes an Image Visually Appealing
Before diving into specific methods, understand the foundational elements that make viewers pause and appreciate your work:
- Composition – How the elements are arranged within the frame.
- Lighting – Quality, direction, and color of light.
- Subject – Choice of subject and its emotional or aesthetic impact.
A truly looks good image addresses all three effectively.
---
Master the Rule of Thirds and Leading Lines
Composition is one of the most powerful tools for creating photos that look polished and professional.
Rule of Thirds
Divide your frame into nine equal rectangles using two equally spaced horizontal lines and two equally spaced vertical lines. Position key subjects along these lines or intersections for balance and intrigue.
Leading Lines
Use roads, fences, rivers, or architecture to guide the viewer’s eye naturally toward your subject.
Quick Tip: Enable your camera’s grid overlay to apply the rule of thirds more consistently.
---
Choosing the Right Lighting
Lighting can transform a merely good shot into a striking visual statement.
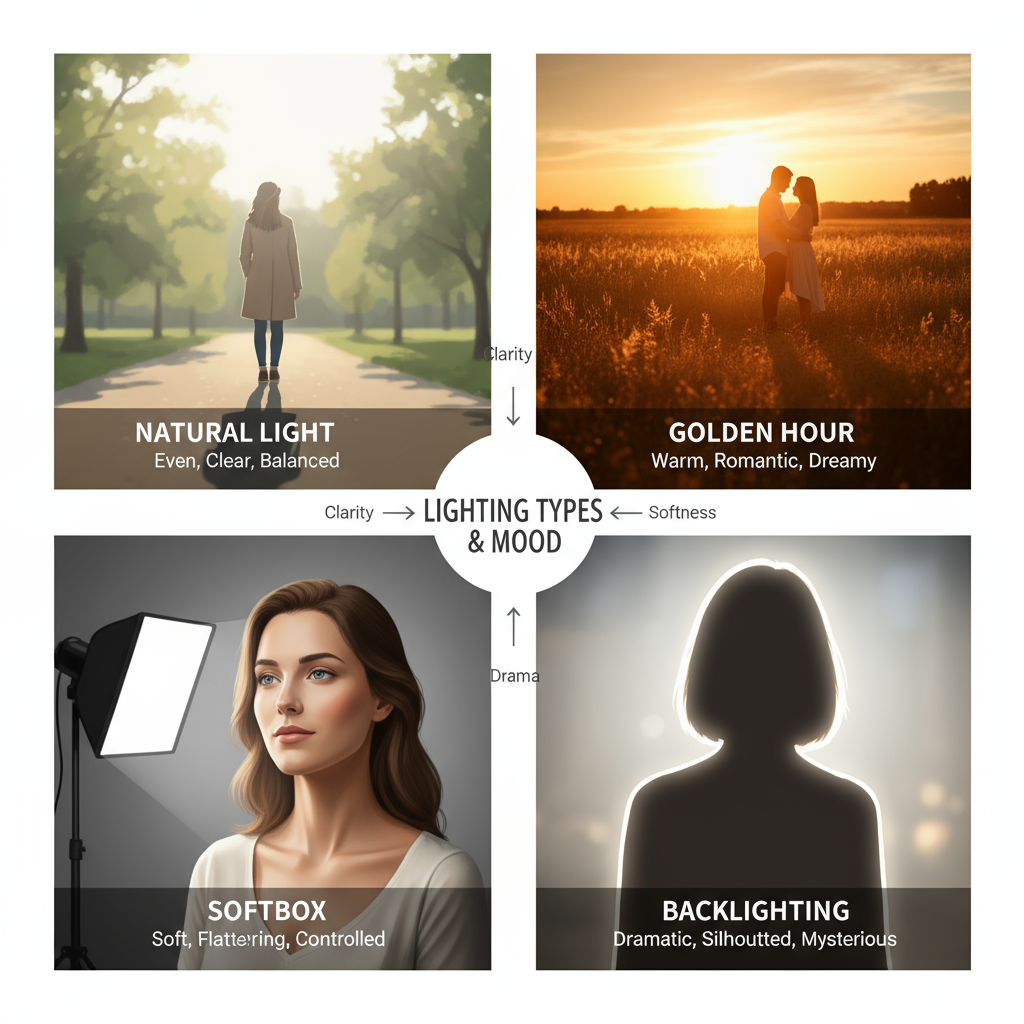
Types of Lighting
- Golden Hour – Just after sunrise or before sunset; warm hues and soft shadows.
- Soft Natural Light – Overcast skies; even illumination without harsh contrast.
- Avoid Harsh Midday Sun – Prevents blown highlights and deep shadows.
| Lighting Type | Best Use Case | Challenges |
|---|---|---|
| Golden Hour | Portraits, Landscapes | Short time window |
| Soft Natural Light | Product Photography | Low light needs adjustment |
| Artificial Light | Studio Shoots | Requires equipment setup |
Pro-Level Insight: Use reflectors or diffusers to control the light’s quality and direction.
---
Use Color Theory to Harmonize Tones and Convey Mood
Color strongly influences how looks good images are interpreted.
Color Harmony Concepts
- Complementary Colors – Opposite on the color wheel; produce vibrant, energetic contrast.
- Analogous Colors – Adjacent on the wheel; result in harmonious, calming visuals.
- Triadic Colors – Evenly spaced; balance vibrancy with harmony.
Colors convey emotions: blues for calmness, reds for energy, and greens for nature.
---
Focus on Sharpness and Clarity
Without sharpness, even the best-lit, most well-composed photo loses impact.
Techniques for Sharper Images
- Use autofocus strategically; select focus points manually when necessary.
- Employ a tripod or monopod to reduce camera shake.
- Clean lenses frequently to avoid smudges.

Smartphone Tip: Tap to focus before pressing the shutter to ensure crisp subjects.
---
Incorporate Depth and Layers for Visual Interest
Depth adds dimension and draws the viewer into your scene.
Strategies
- Foreground Elements – Add plants, fences, or objects close to the camera.
- Midground & Background – Ensure each layer enhances the subject.
- Experiment with aperture: Wide for blurred backgrounds (bokeh), narrow for full-scene clarity.
---
Frame Subjects Creatively
Effective framing emphasizes your main subject and tells a stronger story.
Examples
- Symmetry – Use architectural lines or reflections.
- Natural Frames – Trees, arches, or windows.
- Foreground Framing – Shoot through nearby elements.
Experiment to develop signature framing techniques and memorable looks good images.
---
Edit With Intention
Post-processing should enhance your photo without overpowering it.
Editing Workflow
- Adjust Contrast & Exposure – Correct lighting issues.
- Refine Color Balance & Saturation – Match mood and tone.
- Crop Thoughtfully – Strengthen composition, remove distractions.
Pro Warning: Avoid over-editing—oversaturation or extreme contrast can make an image appear artificial.
---
Adapt Techniques for Different Genres
Each photography genre demands specific technical and creative adjustments.
| Genre | Composition Focus | Lighting Preference |
|---|---|---|
| Portraits | Rule of Thirds, Soft Focus Background | Golden Hour, Soft Natural Light |
| Landscapes | Leading Lines, Wide Angle | Golden Hour, Diffused Light |
| Product Shots | Minimalist, Center Composition | Soft Natural Light, Studio Setup |
Tailor your approach to match your subject and desired outcome.
---
Test and Assess Images Using Feedback or A/B Comparisons
Consistent improvement comes from honest evaluation.
Methods
- Peer Review – Get feedback from experienced photographers.
- Social Media Reactions – Track audience engagement.
- A/B Testing – Compare two editing versions to see which resonates more.
---
Develop a Consistent Style
A consistent, recognizable style helps build your personal brand.
Steps
- Choose specific color palettes.
- Stick with certain composition approaches.
- Create signature presets for edits.
Over time, your distinctive style becomes part of your identity as a photographer.
---
Common Mistakes to Avoid
Don’t let easily avoidable errors diminish your photos’ appeal.
Frequent Issues
- Over-Editing – Leads to unnatural images.
- Busy Backgrounds – Distracts from the subject.
- Poor Lighting – Results in flat or noisy photos.
Quick Fix Tip: Scan the entire frame for distractions before taking the shot.
---
Final Thoughts
Capturing looks good images is a blend of mastering essential techniques—composition, lighting, color, sharpness, and editing—and adapting them to your creative vision. By applying these methods across different genres and continuously refining your skills, you’ll consistently produce eye-catching photographs that stand out in a crowded visual space.
Want to elevate your photography further? Start practicing these strategies today, experiment with your style, and share your results for feedback. The more you shoot with intention, the more naturally your looks good images will emerge.