Guide to Shooting and Printing Perfect 3x5 Photos
Learn how to shoot, edit, and print perfect 3x5 photos with tips on proportions, lighting, composition, and materials for professional-quality results.

Guide to Shooting and Printing Perfect 3x5 Photos
Capturing and printing a photo 3 5 may sound straightforward, but achieving professional-quality results requires more than pointing and clicking. From understanding the 3x5 ratio to mastering lighting, composition, editing, and print materials, every stage plays a role in producing a sharp, vibrant image that fits perfectly in its intended frame. This expert guide will walk you step-by-step through shooting and printing beautiful 3x5 photographs, ensuring accurate proportions, rich colors, and lasting quality.

---
Understanding the 3x5 Photo Ratio and Dimensions
A 3x5 photo measures 3 inches by 5 inches—a popular small print size for keepsakes, postcards, and album inserts. Its aspect ratio is 3:5 (or 0.6 width-to-height), which directly influences how you capture and crop images.
Why this matters:
- Preserves shape accuracy and prevents distortion during printing.
- Ensures seamless compatibility with frames and templates.
Common uses:
- Personal mementos and gifts
- Event or party takeaway prints
- Postcard-style souvenirs
---
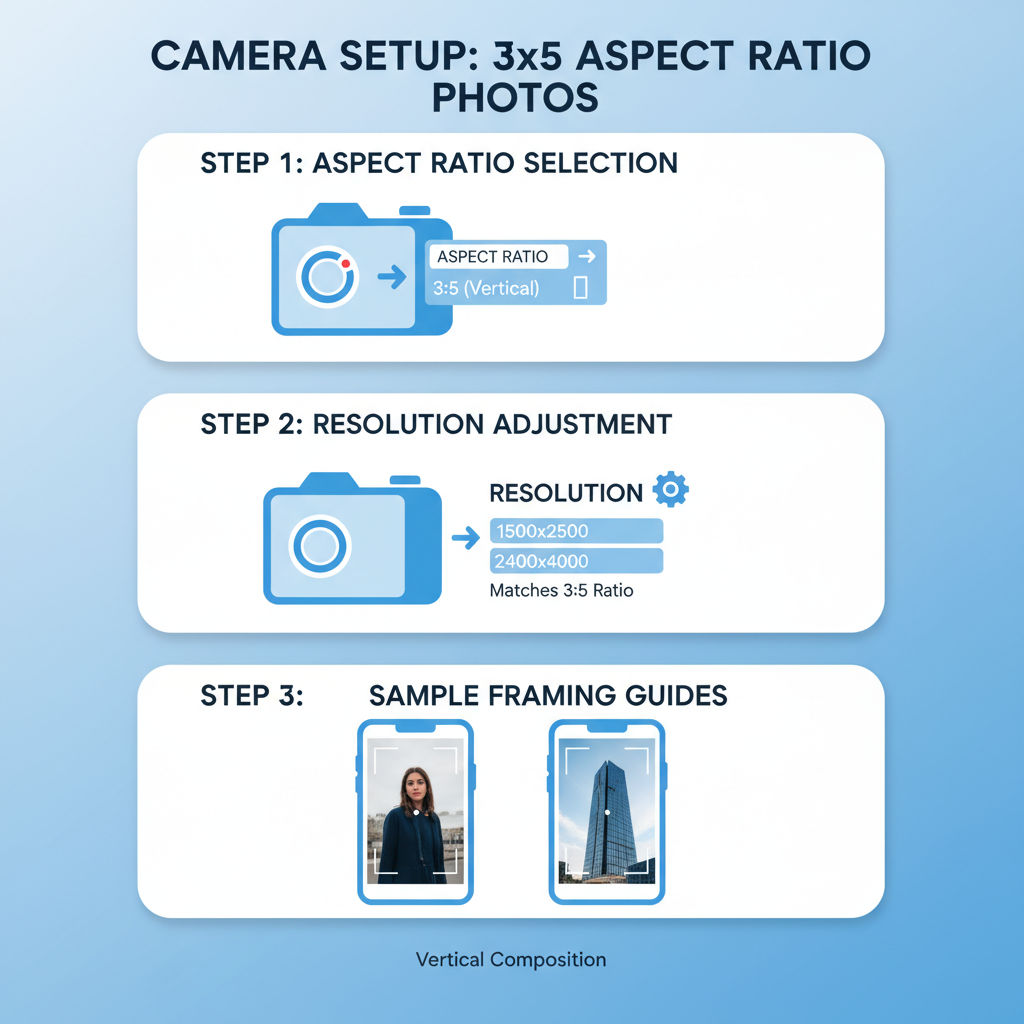
Choosing the Right Camera Settings for Optimal Resolution
High-quality 3x5 prints start with appropriate camera settings that capture enough detail for sharp results.
Recommended Settings:
- Resolution: Minimum 1500 × 900 pixels to meet professional print standards.
- Aspect ratio: Set your camera to 3:2 for a close match, or crop manually afterward.
- File format: Use RAW or high-quality JPEG to retain editing flexibility.
Pro tip: Many modern smartphones now allow aspect ratio settings right in the camera app.
---
Framing Your Subject for the 3x5 Layout
Framing ensures the subject sits comfortably within the final print dimensions.
Considerations:
- Keep borders around the subject to allow cropping without losing key elements.
- Position important content in the “safe zone” to prevent accidental cuts.
- Shoot a little wider than necessary to allow trimming later.
---
Using Proper Lighting Techniques
Lighting influences both clarity and color fidelity. Balanced illumination is key for attractive photo 3 5 prints.
Lighting tips:
- Natural light – Ideal for portraits, offering soft shadows and authentic colors.
- Studio lights – Provide control and uniformity for product photography.
- Avoid harsh overhead lighting – Prevents unwanted shadows and flatness.
For outdoor shots, aim for early morning or golden hour for warm, natural tones.
---
Selecting Backgrounds That Enhance the Subject
The background is part of your composition. In small prints like 3x5s, visual clarity is essential.
Best practices:
- Use neutral backgrounds that don’t compete with the subject.
- Apply shallow depth of field with a large aperture to blur distractions.
- Product photos benefit from clean textures like wood grain or fabric.
---
Adjusting Composition Using the Rule of Thirds
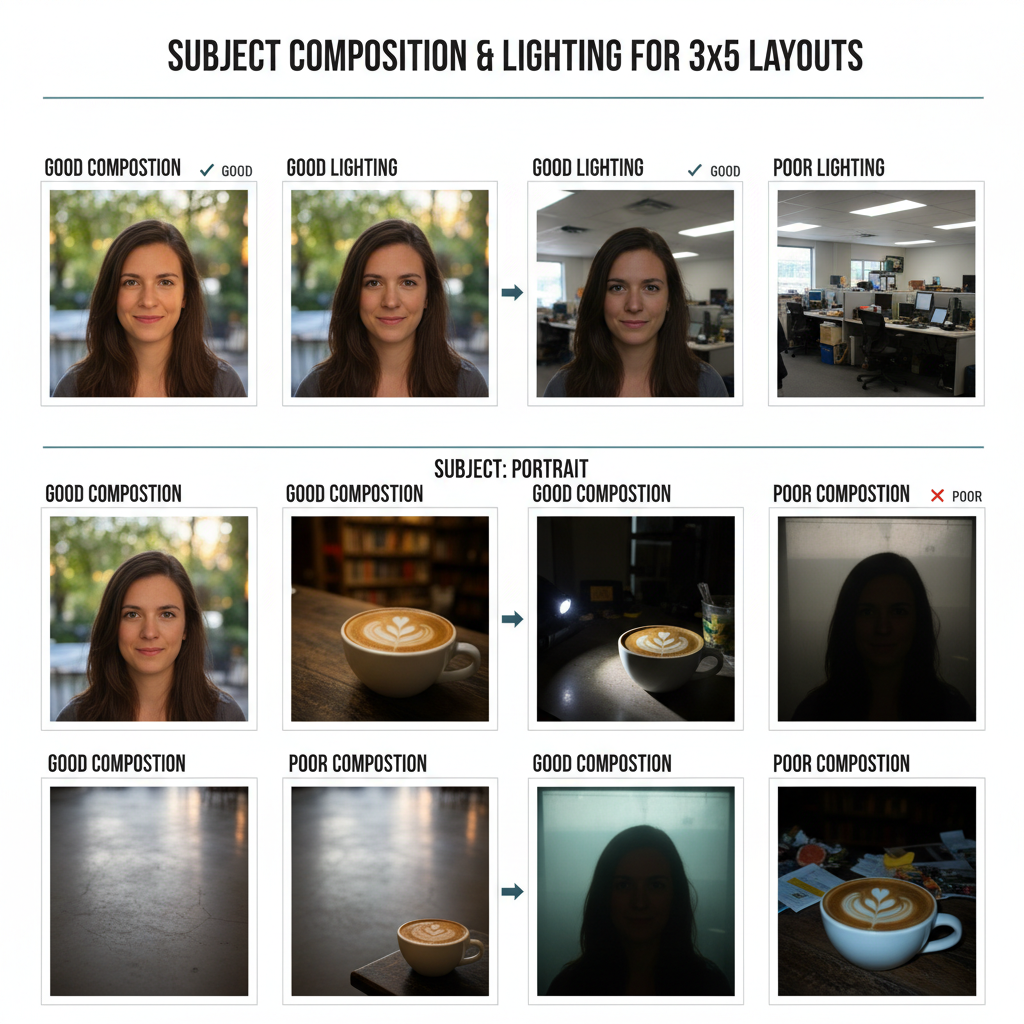
The rule of thirds divides the frame into nine equal parts, placing points of interest along the lines and intersections for balance.
Benefits for 3x5 photos:
- Maintains natural eye movement within the smaller format.
- Balances design elements without overcrowding.
- Works well for both portraits and landscapes.
---
Editing Photos to Maintain Exact Proportions
Even with the correct aspect ratio in-camera, fine-tuning during editing is common. Photo tools in Lightroom, Photoshop, and GIMP can help maintain the exact proportions.
Steps:
- Lock crop ratio to 3:5.
- Center essential elements within that frame.
- Adjust exposure, contrast, and saturation for optimal presentation.
Avoid: Stretching or resizing disproportionately, which distorts your image.
---
Choosing the Best Print Materials and Finishes
The physical medium influences how your photo 3 5 is perceived and how well it endures.
| Material | Finish | Advantages | Best Use |
|---|---|---|---|
| Standard Photo Paper | Glossy | Vibrant colors, sharp detail | Event keepsakes |
| Premium Photo Paper | Matte | Reduced glare, professional feel | Portraits and art prints |
| Canvas | Textured surface | Durable, artistic presentation | Decor or gifts |
| Metal Print | Satin or glossy | Ultra-modern look, resistant to fading | Special display photos |
---
Ensuring Correct DPI for Crisp Printing
DPI (dots per inch) defines how sharp a printed image appears.
- Minimum DPI for professional quality: 300
- For a 3x5 photo, this means 900 × 1500 pixels at printing size.
Why 300 DPI?
It strikes the best balance between sharpness and file size, matching industry print standards.
---
Tips for Storing and Displaying Printed 3x5 Photographs
Proper care extends the lifespan of your prints.
Storage tips:
- Use archival sleeves to protect from dust and scratches.
- Keep in a cool, dry space away from sunlight.
- Avoid touching the print surface directly.
Display ideas:
- Frame with mats to create visual depth.
- Build a collage wall of several 3x5 prints.
- Add to scrapbooks as part of a visual story.
---
Final Thoughts and Next Steps
Creating the perfect photo 3 5 is about precision and artistry. By understanding the aspect ratio, using the right camera settings, composing for the print size, editing carefully, and choosing the right materials, you can produce images that remain vibrant and sharp for years.
Follow this complete guide to avoid common mistakes and elevate your photography skills—whether for treasured personal memories or professional presentation. Start planning your next 3x5 project today and enjoy the satisfaction of prints that impress every viewer.