Upload Photos to Facebook Without Posting to Timeline
Learn how to upload photos to Facebook without posting them to your timeline using privacy settings, hidden albums, and other private storage methods.
Upload Photos to Facebook Without Posting to Timeline
Many Facebook users search for how to upload photo on Facebook without posting because they want to store, organize, or back up their images privately. Facebook’s built‑in privacy tools allow you to do just that — keeping uploads off your public timeline while still securely saving them to your account. This guide explains several methods, from “Only Me” privacy settings to hidden albums and Messenger storage, so you can protect your photos from unwanted viewing.
---
Understanding Facebook’s Photo Privacy and Storage Options
Facebook doubles as a social platform and personal image repository. Every uploaded picture resides on Facebook’s servers, and, on upload, you choose who can see it.
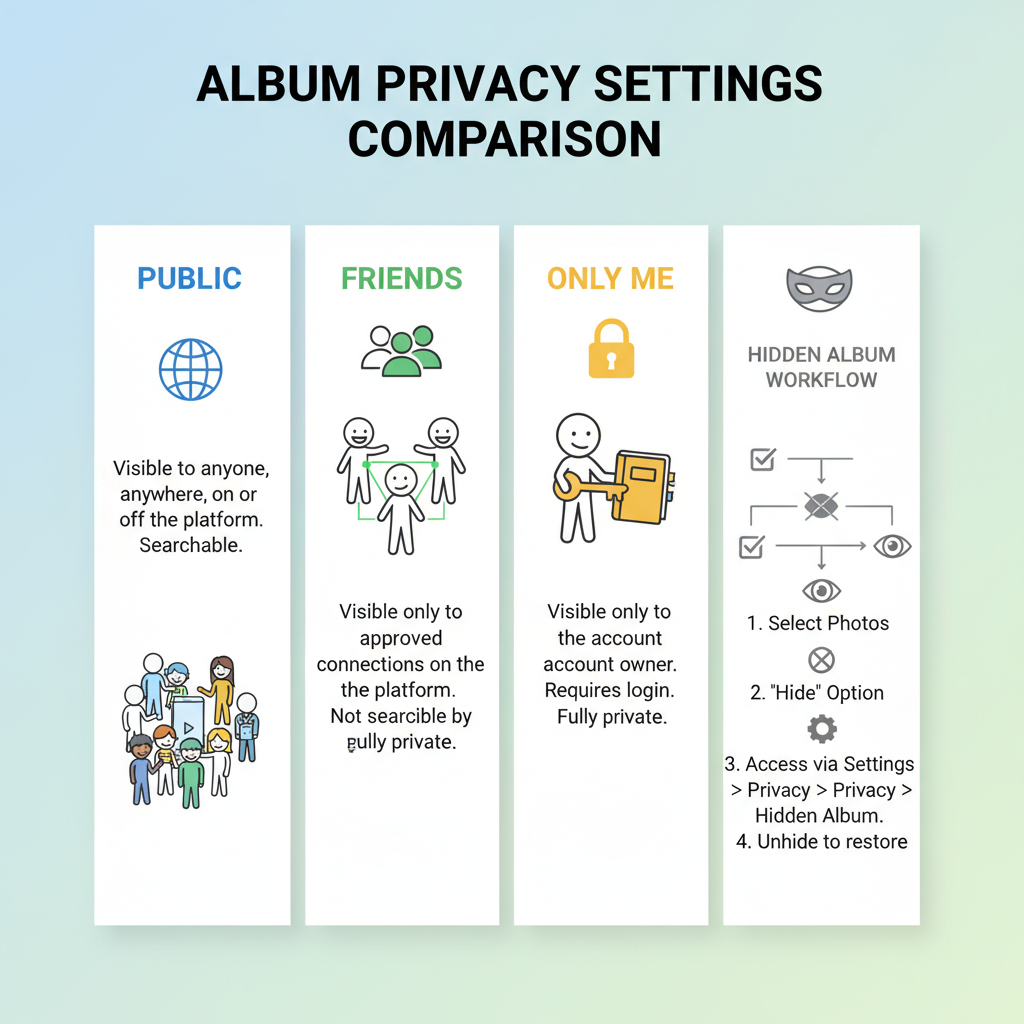
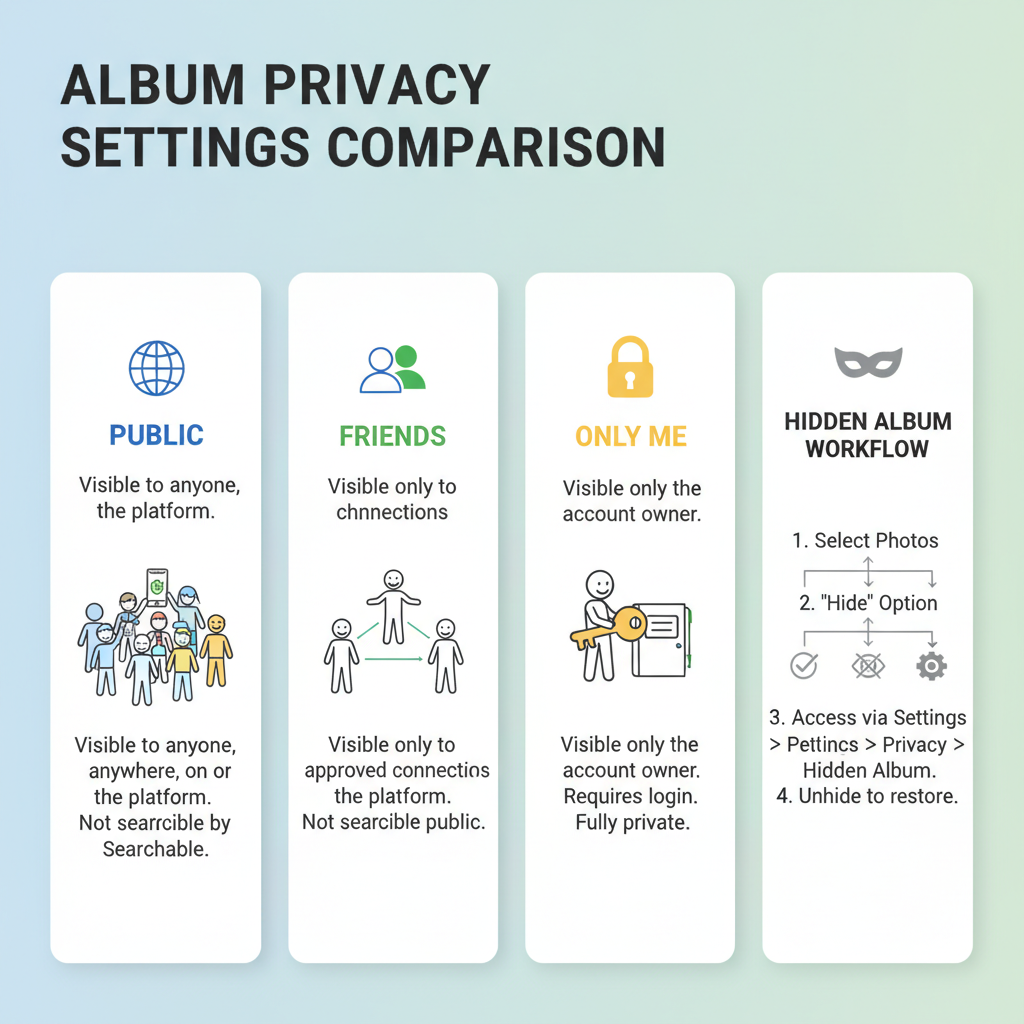
Available photo privacy settings include:
- Public – Visible to anyone, even outside Facebook.
- Friends – Only your Facebook friends can view.
- Specific Friends – Restricted to select individuals.
- Only Me – Visible only to you.
Mastering these options lets you upload while ensuring your images remain invisible to others.
---
Using the “Only Me” Privacy Setting for Uploads
The quickest way to avoid posting to your timeline is to set the audience to Only Me before uploading.
Steps:
- Go to the photo upload section.
- Select or upload your image.
- Before clicking “Post” or “Share,” click the Audience Selector icon.
- Choose Only Me from the list.
- Confirm and upload.
Your photo will be stored in your account yet hidden from everyone else.

---
Uploading Photos to Albums Without Sharing on Timeline
You can also upload directly to albums without broadcasting them in your feed.
Process:
- Go to your profile and select Photos.
- Click Create Album.
- Set the album’s visibility to Only Me before adding photos.
- Upload desired pictures and save without creating a timeline post.
Albums allow improved organization for long‑term storage compared to single uploads.
---
Creating a Hidden Album for Private Storage
A “hidden album” is essentially an album set to Only Me or Selected Friends.
Benefits:
- Store multiple pictures privately.
- Avoid accidental exposure if other privacy settings change.
- Categorize photos into logical groups (travel, documents, artwork, etc.).
Tip: Use a descriptive name like “Private Backup” for easy identification.
---
Disabling Automatic Sharing to Friends or Followers
To stop Facebook from defaulting to public or friend‑visible posts:
- Navigate to Settings & Privacy > Privacy Settings.
- Under Your Activity, set “Who can see your future posts” to Only Me.
- Keep this setting until you wish to share publicly.
This ensures uploads remain invisible across both desktop and mobile.
---
Using Draft Posts for Temporary Storage
While personal accounts lack a formal “draft” feature, you can simulate one:
- Start a photo post.
- Set privacy to Only Me.
- Save draft or leave unfinished; it remains private until later.
This approach works well for short‑term storage when you’re not ready to share.
---
Leveraging Messenger for Personal Cloud‑Like Storage
Messenger can serve as private storage:
- Open Messenger on desktop or mobile.
- Send the photo to yourself or a secret conversation.
These images live on Facebook’s servers but are accessible only through the chat.
Note: Messenger compresses images; avoid for professional‑quality backups.
---
Managing Privacy for Previously Uploaded Photos
If photos are already uploaded, you can make them private:
- Open the photo.
- Click the Privacy icon.
- Select Only Me.
- Save changes.
Albums can be batch‑edited to update privacy for multiple images.
---
Downloading and Backing Up Private Photos Offline
It’s wise to keep local backups of your photos:
Steps:
- Go to Settings & Privacy > Your Facebook Information.
- Select Download Your Information.
- Choose Photos and Videos and request the file.
Once Facebook sends you a download link, save it securely.
---
Troubleshooting Uploads on Mobile and Desktop
| Platform | Issue | Solution |
|---|---|---|
| Mobile App (iOS/Android) | Privacy selector hidden under more options | Expand “More” menu before uploading |
| Desktop Web | Default privacy resets after logout | Always check and set privacy before each upload |
| Messenger | Photo compression reduces quality | Use album uploads for high‑resolution storage |
---
Best Practices for Invisible Uploads
- Check privacy settings before each upload.
- Name albums clearly for private use.
- Avoid tagging yourself or others in private photos.
- Review album and photo privacy periodically.
---
Common Mistakes & How to Avoid Accidental Sharing
Mistake 1: Forgetting to set privacy before uploading.
Fix: Make “Only Me” your default audience setting.
Mistake 2: Adding photos to a private album without checking privacy afterwards.
Fix: Confirm settings after every edit.
Mistake 3: Sharing private images in public threads or large Messenger groups.
Fix: Use one‑on‑one or trusted group chats only.
---
Final Thoughts and Summary
Mastering how to upload photo on Facebook without posting means understanding privacy controls and using Facebook’s features strategically. Whether employing “Only Me” settings, creating hidden albums, storing via Messenger, or making retroactive edits, you can maintain a secure personal archive within Facebook.
By following these methods, you’ll enjoy the convenience of Facebook’s storage without risking public exposure. Start adjusting your privacy settings today to safeguard your memories and maintain control over your digital footprint.
Call to Action: Explore your Facebook privacy options now and apply “Only Me” or hidden album settings to your next upload — your private moments deserve to remain private.