How to Upload Vertical Pictures on Instagram Without Croppin
Learn how to upload vertical photos to Instagram without cropping by using the 4:5 aspect ratio, correct dimensions, and border techniques.

How to Upload Vertical Pictures on Instagram Without Cropping
If you’ve ever tried to share a tall, vertical photo on Instagram, you may have encountered the issue of the platform auto-cropping your image. Whether it's a striking travel shot, a portrait, or an architectural masterpiece, vertical compositions deserve to be seen in their entirety without losing essential details.
In this article, you’ll learn how to upload vertical pictures on Instagram without cropping, with practical tips to preserve image quality, follow Instagram’s aspect ratio rules, and maximize visual impact.
---
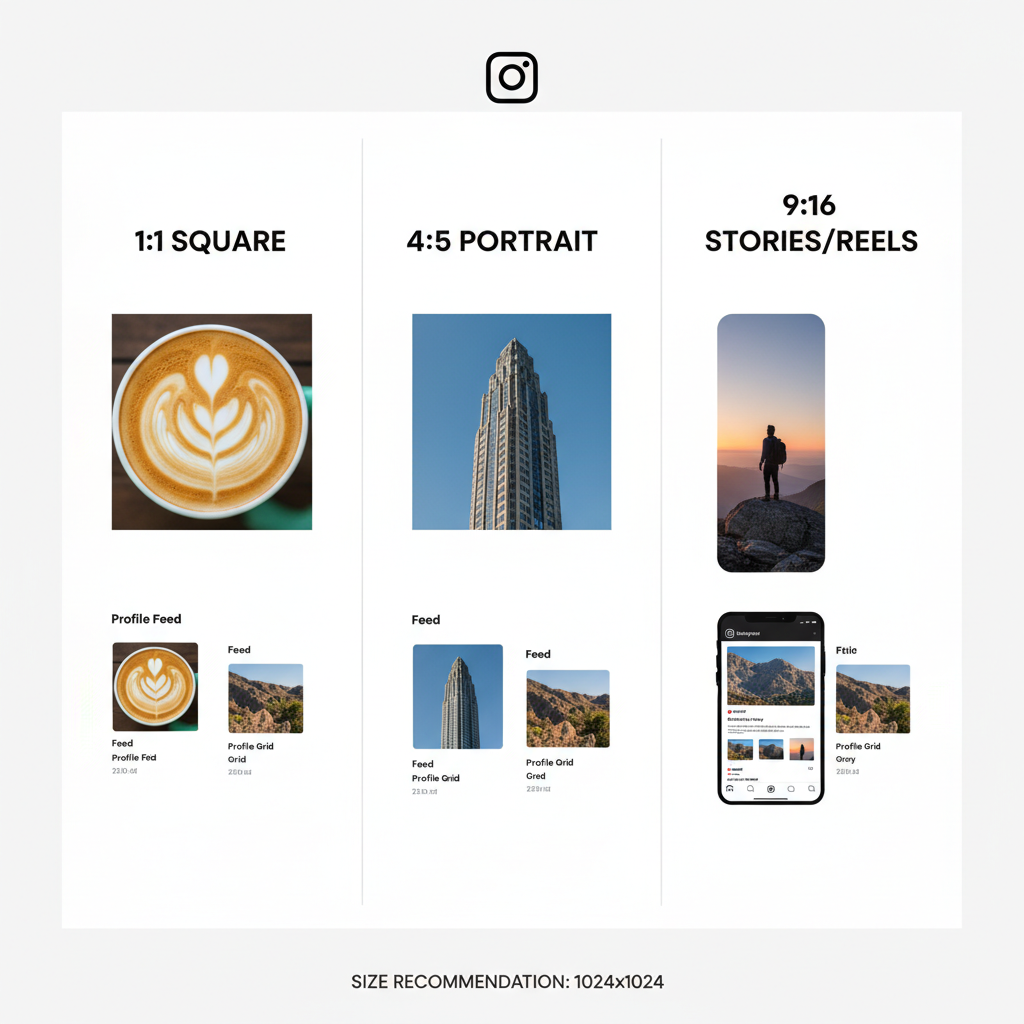
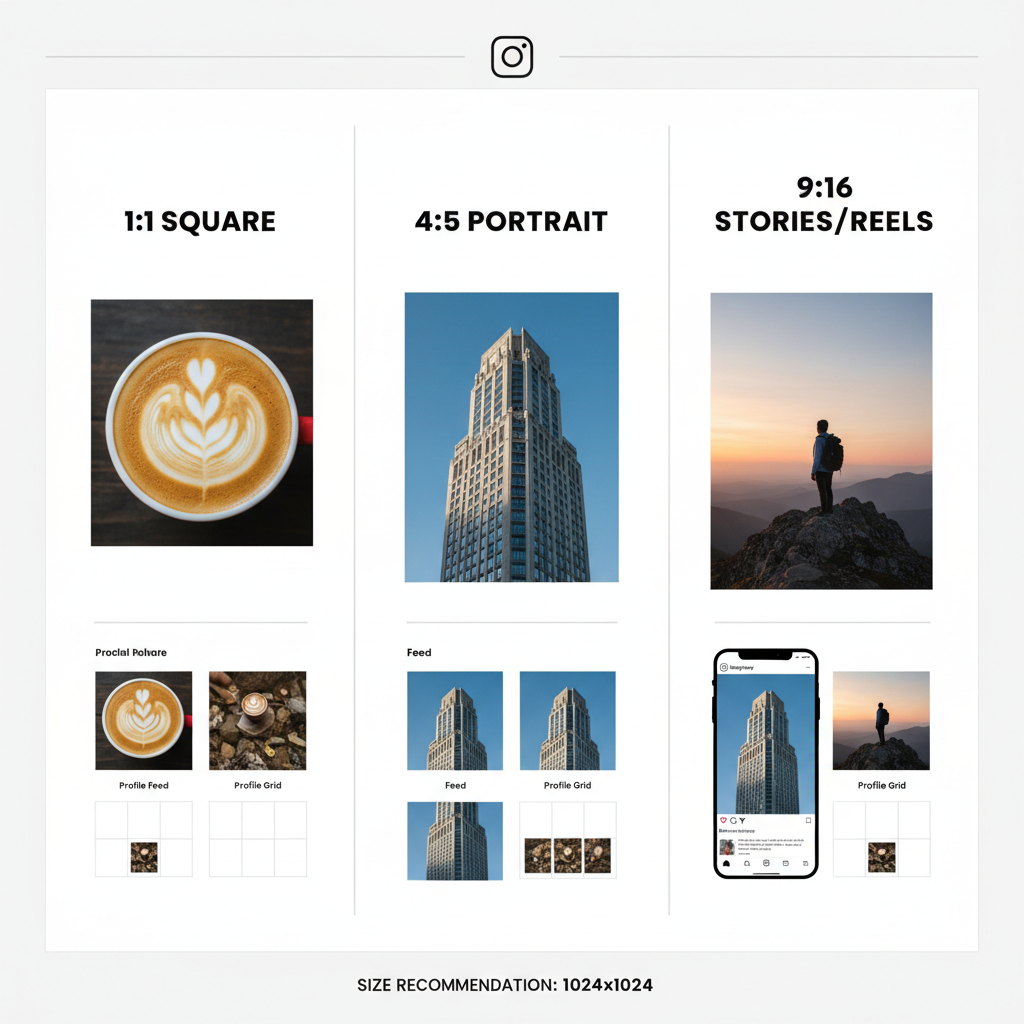
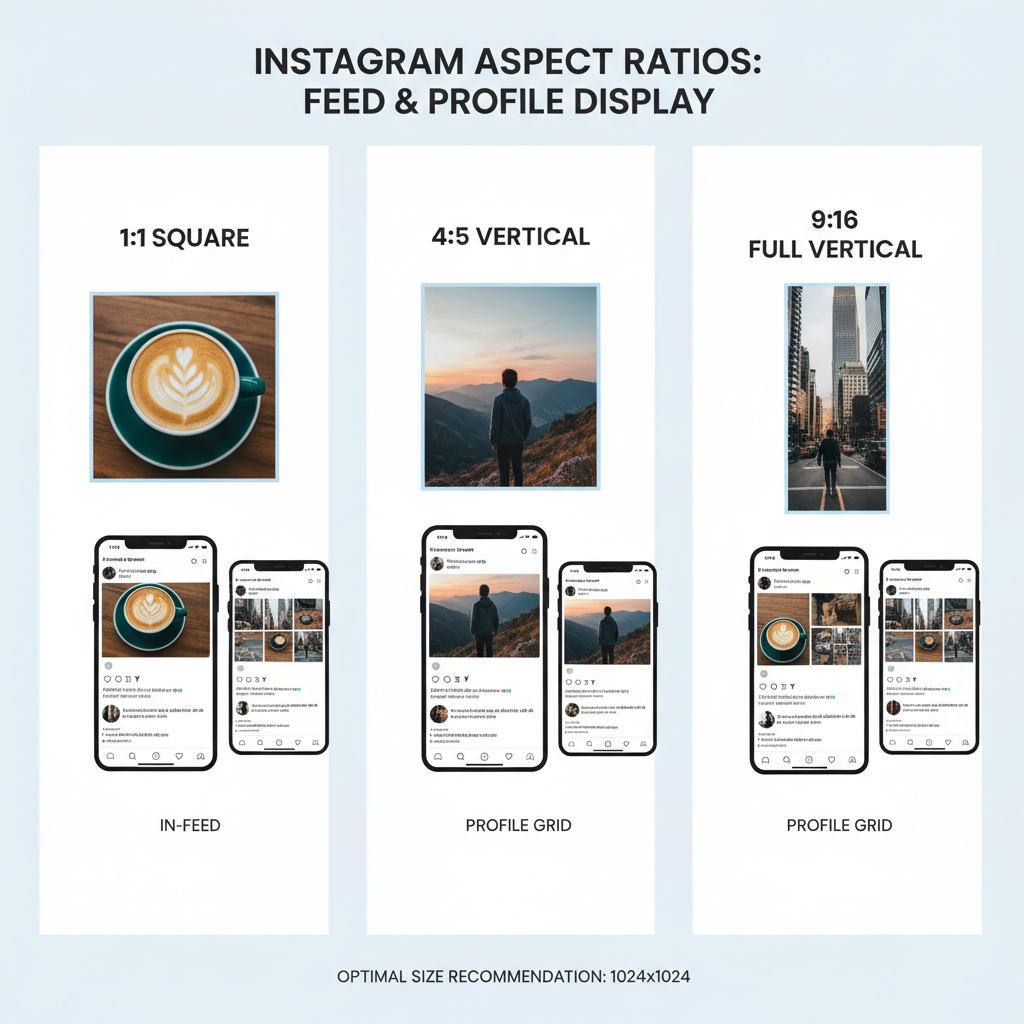
Understanding Instagram’s Aspect Ratio Limits
Before uploading, it’s important to know Instagram’s image restrictions. The app supports multiple aspect ratios, but for vertical photos, the maximum allowed ratio is 4:5 (width:height). Anything taller will be cropped automatically.
Supported photo ratios on Instagram:
| Orientation | Minimum Ratio | Maximum Ratio |
|---|---|---|
| Square | 1:1 | 1:1 |
| Landscape | 1.91:1 | 16:9 |
| Portrait (Vertical) | 4:5 | 4:5 |
Key takeaway: If your image is taller than 4:5, crop or add padding before uploading.
---
Choosing the Right Photo Dimensions Before Uploading
For sharp, professional-looking results, Instagram recommends uploading at 1080px width. For vertical posts that fit the 4:5 ratio:
- Ideal Size for Vertical Portraits: 1080px (width) x 1350px (height)
- Resolution: At least 72 DPI for web display
By preparing your images with these dimensions, you help prevent Instagram from applying unnecessary compression or resizing.
---
Editing Images with Mobile Tools to Fit Ratio
Use popular mobile apps to crop or resize images to the correct dimensions:
- Instagram’s built-in crop tool – Tap the “resize” icon (bottom left) to toggle between crop options.
- Adobe Lightroom Mobile – Offers precision cropping with custom ratios like 4:5 while maintaining quality.
- Snapseed – Simple interface for cropping, rotating, and applying preset aspect ratios.
Pro Tips:
- Always export at maximum resolution.
- Review the edges of your photo to ensure subjects aren’t accidentally cropped.
---
Using White Borders or Padding
When your photo exceeds the 4:5 ratio but you want to avoid cropping, add padding or borders to fit the allowed dimensions.
Tools for Adding Borders:
- Canva – Create a 1080x1350px canvas and center your image.
- InShot – Add colored or blurred backgrounds.
- PicsArt – Customize frames and gradients.
This method preserves your original composition while staying Instagram-compliant.
---
Uploading via Instagram App and Using the Resize Icon
To upload without cropping:
- Select your image.
- Tap the resize icon (two outward arrows).
- If your image is already 4:5, it will fill the frame naturally.
- Apply filters or edits as desired.
Using this method ensures your photo isn’t automatically square-cropped.
---
Preview in Feed and Adjust Thumbnail Crop
Instagram’s profile grid displays images as square thumbnails. To control your grid appearance:
- Use the cover/thumbnail crop tool during posting.
- Drag the crop box to highlight the most important area.
- Preview before publishing.
A well-composed thumbnail keeps your profile aesthetic consistent.
---
Tips for Photographers: Shooting in Portrait Mode and Framing
When capturing your photos:
- Shoot in Portrait Orientation – Fill the frame vertically.
- Leave Headroom & Footroom – Allows for safe cropping.
- Mind the Background – Avoid clutter near edges.
- Use Gridlines – Helps balance the composition.
These techniques make editing easier and preserve your intended framing.
---
Alternative Upload Methods Using Third-Party Scheduling Tools
Manage your Instagram posts with desktop-friendly publishing tools:
- Later – Scheduler with crop checking.
- Buffer – Post planning with image size validation.
- Planoly – Visual grid planner with vertical preview support.
Such platforms help maintain a consistent posting workflow and prevent last-minute size issues.
---
Common Mistakes to Avoid
When perfecting how to upload vertical pictures on Instagram:
- Using Overly Tall Ratios – Leads to forced cropping.
- Neglecting Thumbnail Crops – Causes awkward grid previews.
- Low-Resolution Files – Result in pixelation after compression.
- Wrong Export Settings – Oversized or undersized files hurt quality.
Avoid these pitfalls with a quick pre-upload checklist.
---
Optimizing Captions, Tags, and Locations for Engagement
After perfecting dimensions:
- Write Engaging Captions – Share a story or context.
- Use Relevant Hashtags – e.g., #portraitphotography, #verticalphoto.
- Tag Locations – Boosts discovery.
- Mention Collaborators – Encourages shares and engagement.
Pro Tip: Vertical posts occupy more screen space, increasing scroll-stop potential.
---
Conclusion
Uploading vertical pictures on Instagram without cropping is easy when you follow Instagram’s 4:5 aspect ratio rule and prepare images at 1080x1350px. Use mobile or desktop tools to crop, pad, or resize images, adjust thumbnails for grid aesthetics, and enhance stories with captions and hashtags.
Now that you know how to upload vertical pictures on Instagram effectively, review your photo library and optimize your favorite shots for a stronger, more engaging feed. Your audience will notice the improved quality and presentation—so start posting your best verticals today.