Fix Instagram Post Won’t Upload Problem on iOS and Android
Learn how to fix Instagram post upload problems on iOS and Android with tips for troubleshooting network issues, app bugs, and file limits.

Fix Instagram Post Won’t Upload Problem on iOS and Android
If you’re struggling with the Instagram post won’t upload problem on iOS or Android, you’re not alone. Millions of users encounter this frustrating error every day—whether they’re trying to post a photo, a carousel, a video, or a story. The issue often stems from network problems, app bugs, or account restrictions. In this comprehensive guide, you’ll learn the common causes, proven troubleshooting steps, and preventive measures to keep your posts from getting stuck again.

---
Common Error Messages and Possible Causes
When Instagram fails to upload a post, you may see:
- “Couldn’t upload. Try again.”
- “Upload failed.”
- A spinning loader that times out without posting
Most common causes include:
- Poor network connection: Weak Wi-Fi or unstable mobile data.
- Unsupported file formats: Instagram supports JPEG/PNG for images and MP4 (H.264, AAC) for videos.
- File size too large: Large videos may exceed the upload limit.
- Cache/data corruption: Stored app data might block normal operations.
- Account restrictions: Temporary bans due to violating community guidelines.
- App bugs: Older app versions with unresolved issues.
---
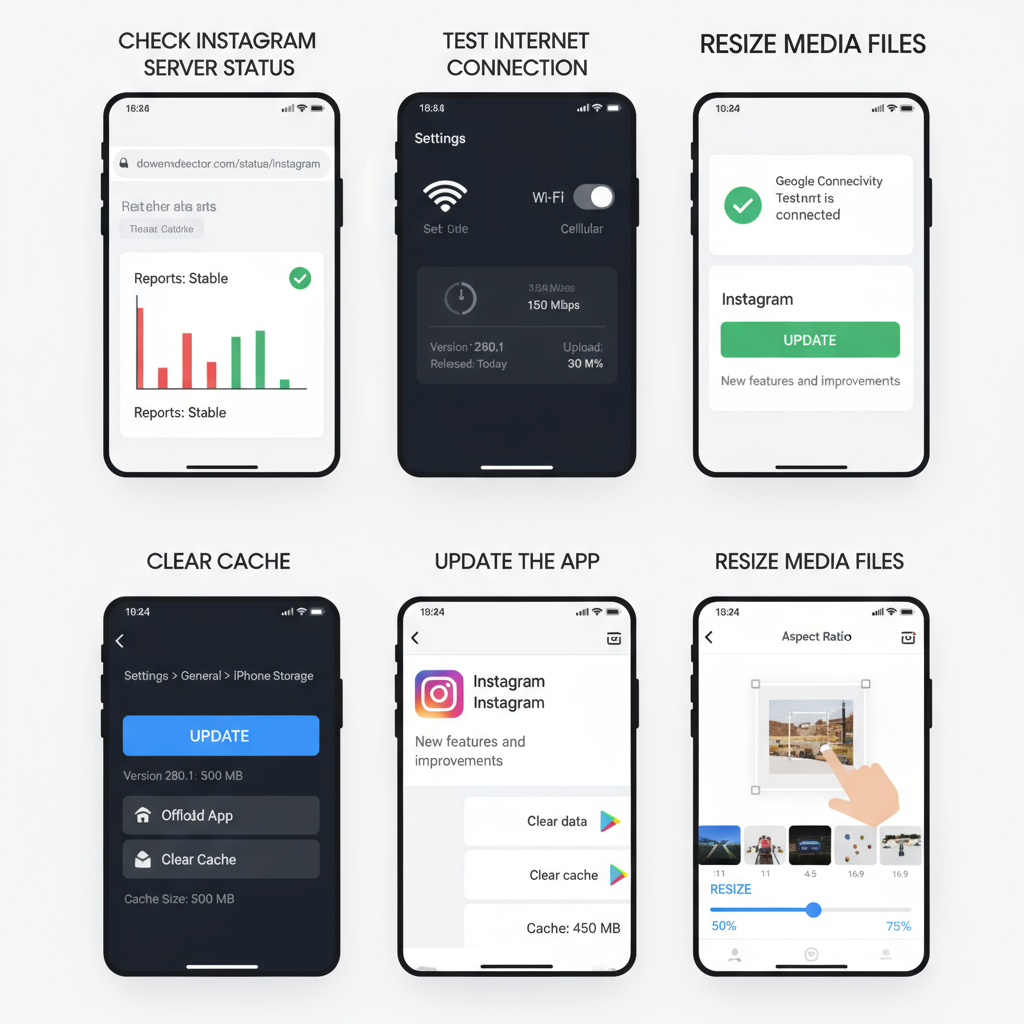
Step 1: Check Instagram Server Status
Sometimes the problem is not on your end at all. Instagram’s servers could be experiencing downtime or outages.
How to check:
- Visit status tracking sites like Downdetector.
- Check Meta’s official platforms or support channels.
- Search on Twitter/X for trending outage reports.
If others are posting about the same upload issue, waiting until Instagram resolves the problem might be the only action needed.
---
Step 2: Verify Your Internet Connection
Uploads require a reliable and fast connection.
- Test both Wi-Fi and Mobile Data:
- Switch between them to see if uploading works better.
- Restart your router if on Wi-Fi.
- Run a speed test and aim for at least 5 Mbps upload speed.
---
Step 3: Update the Instagram App
Running outdated versions may lead to compatibility issues with Instagram’s servers.
On iOS:
- Open App Store → Updates → Update Instagram.
On Android:
- Open Google Play Store → Manage apps & device → Update Instagram.
---
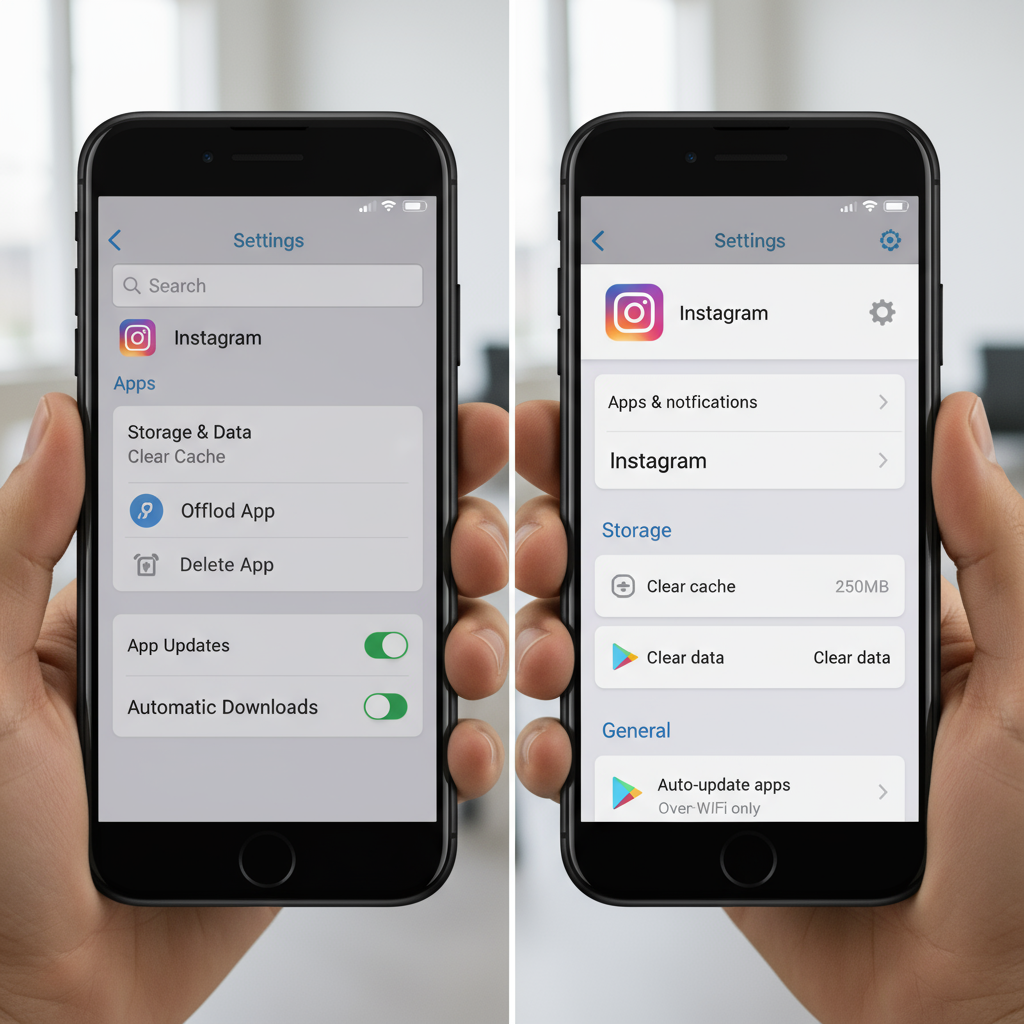
Step 4: Clear Instagram Cache
Clearing cache removes temporary files and often fixes stalled upload problems.
On Android:
- Go to Settings → Apps → Instagram.
- Tap Storage → Clear Cache.
On iOS:
iOS doesn’t offer a direct cache clear. Instead:
- Offload the Instagram app:
- Settings → General → iPhone Storage → Instagram → Offload App.
- Reinstall from App Store (data saved in the cloud is preserved).
---
Step 5: Reduce File Size or Change File Format
Instagram has upload specs:
- Images: Up to 30 MB, 1.91:1 to 4:5 aspect ratio.
- Videos: Max 650MB for videos under 10 minutes (1080p recommended).
Tips:
- Resize images to around 1080px width.
- Compress videos using tools like HandBrake.
- Export using MP4 (H.264 codec) and AAC audio.
---
Step 6: Log Out and Log Back In
Session glitches can cause upload failures.
- Go to Profile → Settings → Log Out.
- Close the app and reopen.
- Log back into your account.
---
Step 7: Restart Device and Reset Network Settings
A quick restart often resolves temporary system conflicts.
If issues persist:
On iOS:
Settings → General → Transfer or Reset iPhone → Reset → Reset Network Settings.
On Android:
Settings → System → Reset Options → Reset Wi-Fi, mobile & Bluetooth.
---
Step 8: Disable Data Saver and Battery Optimization
Instagram’s data saver limits media upload quality and can stall uploads.
Data Saver Off:
- Open Instagram → Profile → Menu → Settings & Privacy → Data usage → Disable Data Saver.
Battery Optimization Off:
- Android:
- Settings → Battery → Battery Optimization → Instagram → Don’t optimize.
- iOS:
- Ensure Low Power Mode is off in Settings → Battery.
---
Step 9: Check Account Restrictions or Temporary Bans
Instagram may block uploads if your account violated guidelines.
Check in-App Notifications:
- Open Instagram → Inbox → Check for “Account Warning” messages.
If there’s a restriction, you’ll need to wait until the period ends.
---
Step 10: Reinstall Instagram (Backup Drafts First)
Reinstalling gives you a fresh app copy, but can delete drafts.
To save drafts:
- Publish them privately or save media to local storage before reinstalling.
Then uninstall Instagram from the device and reinstall from the app store.
---
Step 11: Contact Instagram Support
If previous steps fail, submit a problem report.
On Instagram:
- Profile → Menu → Settings & Privacy → Help → Report a problem.
- Select Include and Continue, describe the issue clearly.
- Attach screenshots or screen recordings.
---
Quick Troubleshooting Table
| Issue | Suggested Fix |
|---|---|
| Upload stuck at 0% | Switch from Wi-Fi to mobile data or vice versa |
| Video fails every time | Compress and encode as MP4 (H.264) |
| Photo not supported | Save as JPEG or PNG under 30MB |
| Old app version | Update via App Store / Play Store |
| App behaves oddly | Clear cache or reinstall |
---
Preventive Tips to Avoid Future Upload Issues
- Maintain a stable Internet connection before uploading.
- Regularly update Instagram to benefit from bug fixes.
- Keep files within size/format limits.
- Avoid excessive third-party filters that inflate file size.
- Clear cache monthly to prevent data corruption.
- Monitor Instagram’s status during suspected outages.
---
Summary and Next Steps
The Instagram post won’t upload error can usually be fixed by systematically ruling out server issues, connection problems, and app-related glitches. By following the steps above—checking server status, optimizing your file sizes, keeping the app updated, and clearing cache—you can resolve most upload failures in minutes.
If you want to avoid this problem in the future, make sure your files meet Instagram’s specifications, maintain a strong network connection, and keep your app updated.
Ready to fix your Instagram uploads and share your content without interruptions? Follow this guide step-by-step and get posting again today!