Optimizing Ad Resolution for Clear, Effective Marketing
Learn how to optimize ad resolution for different platforms, balance clarity with file size, and ensure crisp, professional visuals in marketing.

Optimizing Ad Resolution for Clear, Effective Marketing
In the fast-paced world of digital marketing, ad resolution optimization plays a pivotal role in ensuring your visual campaigns stand out. From crisp social media graphics to high-DPI print advertisements, the resolution directly influences how professional and appealing your ads appear across devices and platforms. High-quality visuals can boost engagement rates, while poor resolution undermines brand credibility and conversion potential. This guide covers what ad resolution is, why it matters, and how to optimize it for various channels.
---
What Is Ad Resolution and Why It Matters
Ad resolution refers to the density of detail in a visual asset, measured in pixels. It determines clarity, sharpness, and definition.
When resolution is too low:
- Text becomes blurry.
- Product details get lost.
- Ads appear amateurish.
When resolution is high:
- Images look crisp and inviting.
- Brand elements remain consistent.
- Engagement rates often rise.
For marketers, resolution is a branding decision with tangible effects on click-through rates (CTR), conversions, and customer trust.
---
Understanding DPI, PPI, and Pixel Dimensions
Three core terms relate to resolution:
- DPI (Dots Per Inch) – For print ads; determines ink dot density.
- PPI (Pixels Per Inch) – Relevant to screens; affects perceived sharpness.
- Pixel Dimensions (Width × Height in pixels) – The total pixels in an image.
| Term | Usage Context | Impact on Ad Quality |
|---|---|---|
| DPI | Print media | Influences sharpness and detail in physical prints. |
| PPI | Digital screens | Determines clarity based on display density. |
| Pixel Dimensions | All formats | Defines the base resolution for the ad. |
Knowing these terms ensures your ad looks exceptional both online and in print.
---
How Resolution Affects Image Clarity Across Platforms
Different channels display ads uniquely:
- Social Media – Images are compressed; high resolution minimizes quality loss.
- Web Banners – Must balance sharpness with small file sizes for faster loading.
- Print Ads – Require ~300 DPI versus ~72 PPI for online.
- Video Ads – Resolution impacts viewing experience; typical ranges include HD and 4K.
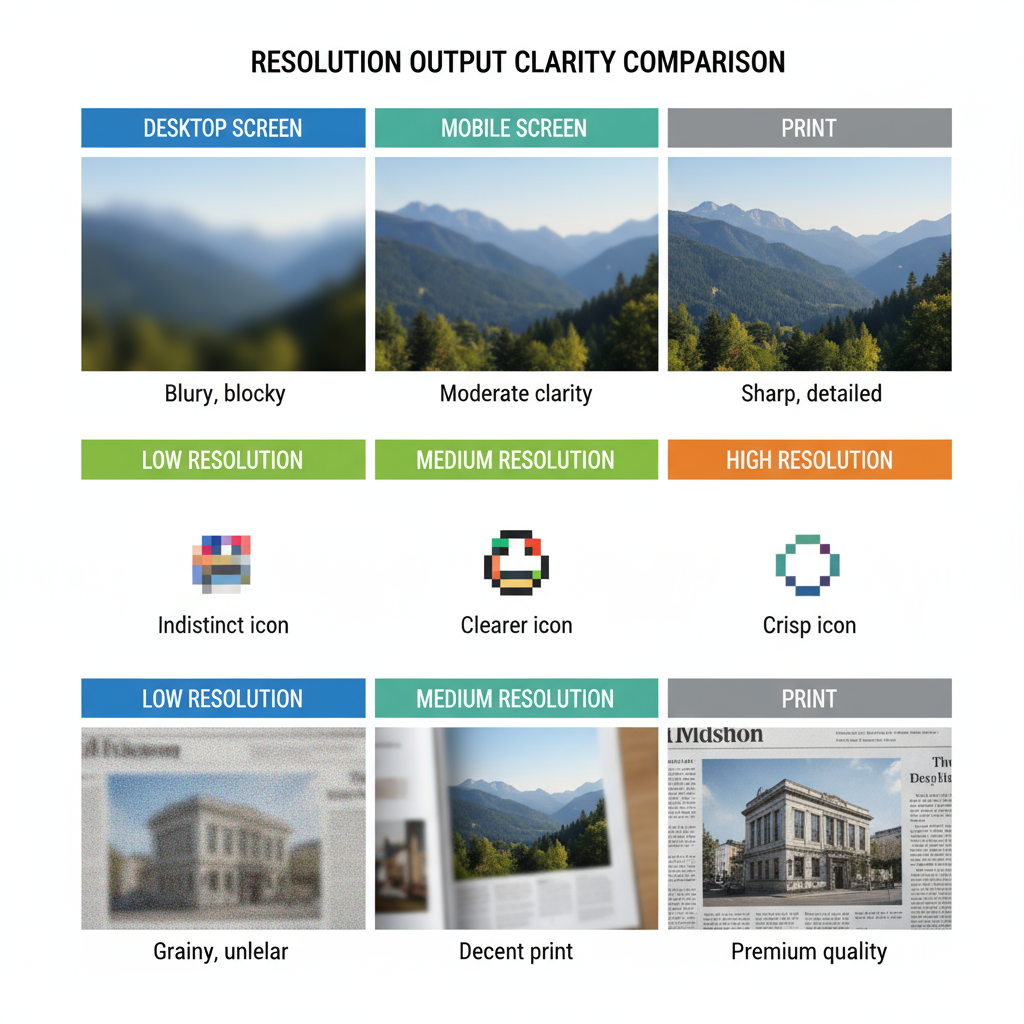
Ignoring platform-specific needs often results in pixelation, distorted branding, or unreadable text.
---
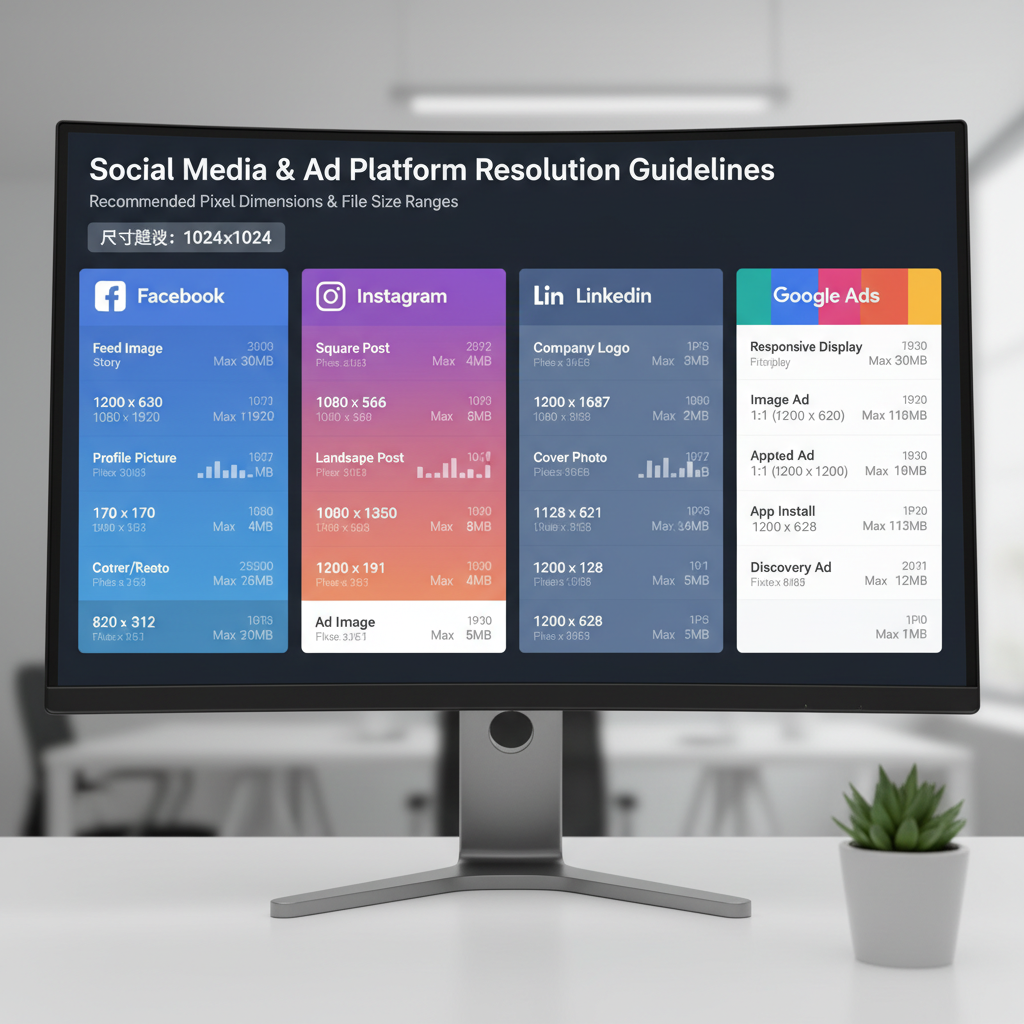
Recommended Resolution Settings by Platform
Aligning with platform specifications prevents visual degradation.
| Platform | Ad Type | Recommended Dimensions | Recommended Resolution |
|---|---|---|---|
| News Feed Image | 1200×628 px | 72 PPI | |
| Square Image | 1080×1080 px | 72 PPI | |
| Google Display | Banner Ad | 728×90 px | 72 PPI |
| Print Ads | Full Page | Varies by size | 300 DPI |
Always adjust exports to meet these standards while considering responsive variations.
---
Balancing File Size With Resolution
High resolution enhances clarity but can inflate file sizes. Large files:
- Slow loading.
- Harm SEO performance.
- Frustrate users.
Balance tips:
- Compress images without visible quality loss.
- Use WebP or optimized JPEG formats.
- Test load speed and tweak as needed.
Pro Tip: Aim for web images under 200 KB while retaining the necessary resolution.
---
Essential Tools for Resolution Optimization
Designers and marketers can use:
- Adobe Photoshop – Fine-tune DPI, PPI, and pixel dimensions.
- Canva Pro – Offers ready presets for social media.
- Figma – Enables collaborative design and multi-resolution output.
- TinyPNG / Squoosh – Compress images efficiently.
---
Common Resolution Mistakes to Avoid
Avoid these pitfalls:
- Upscaling small images – Leads to pixelation.
- Excessive compression – Adds artifacts.
- Ignoring format-specific specs – Can crop or distort designs.
- Using one size for all platforms – Causes mismatched quality.
Start from high-quality sources and export per platform.
---
Step-by-Step: Preparing High-Resolution Ads
Exporting correctly in Photoshop:
- Open the file.
- Go to `Image > Image Size`.
- Input required width/height.
- Adjust PPI or DPI as needed.
- Export via `File > Export > Save for Web` for optimal quality.
- Test on the destination platform.
## Example: Resize for Facebook using ImageMagick

convert ad_original.jpg -resize 1200x628 ad_facebook.jpg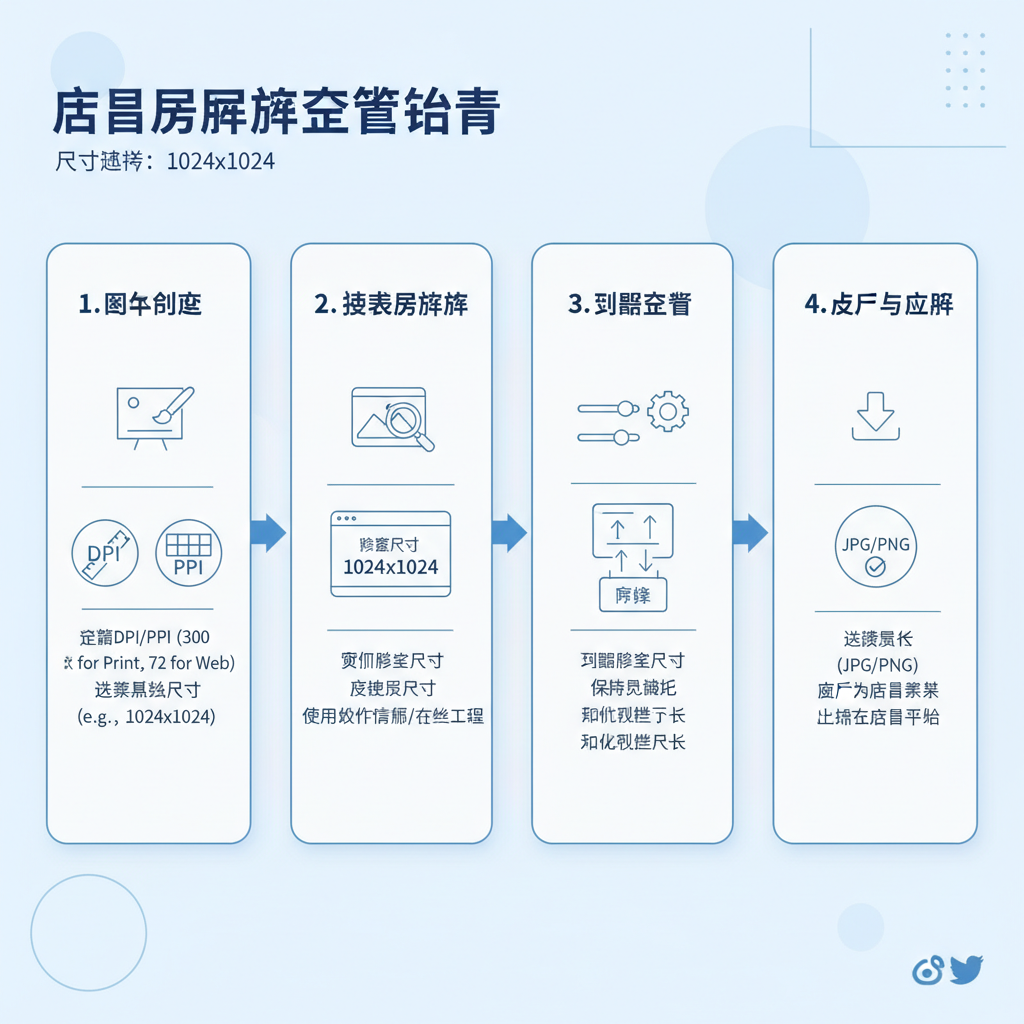
---
Case Study: Resolution Boost Driving Engagement
A retail brand’s Facebook carousel ads started at 800×600 px. After updating to 1200×1200 px under 200 KB:
- CTR rose 25%.
- Likes/shares increased 30%.
- Audiences praised the sharp visuals.
Proof that resolution can directly uplift KPIs.
---
Trends in High-Resolution Advertising
Stay ahead of these shifts:
- Retina Displays – Demand doubled pixel density.
- 4K/UHD Ads – Vital for video and digital signage.
- Responsive Assets – Must scale across resolutions.
- Dynamic Scaling via AI – Adjusts output based on device specs.
As display tech evolves, high-resolution becomes the baseline expectation.
---
Conclusion and Next Steps
Ad resolution optimization merges technical precision with marketing strategy. By mastering DPI, PPI, and pixel dimensions—and tailoring each export to its platform—you can deliver visuals that are sharp, credible, and fast-loading. Clarity builds trust, and trust drives conversion.
Ready to elevate your campaigns? Apply these resolution tips to your next ad and watch engagement soar.