Portrait Photo Size: Standard Dimensions and Ratios Guide
Learn standard portrait photo sizes, aspect ratios, and pixel dimensions for print and online platforms to ensure professional, high-quality images.
Introduction to Portrait Photo Size
Getting the portrait photo size right is essential for maintaining image clarity, proper composition, and professional presentation across both print and digital formats. Whether you’re photographing for a LinkedIn headshot, social media profile, or framed studio print, understanding portrait orientation, aspect ratios, and resolution ensures your subject is presented at its best. This guide will walk you through the fundamentals — from orientation differences to pixel dimensions — so you can confidently prepare portraits for any platform or purpose.
---
Understanding Portrait Orientation vs. Landscape
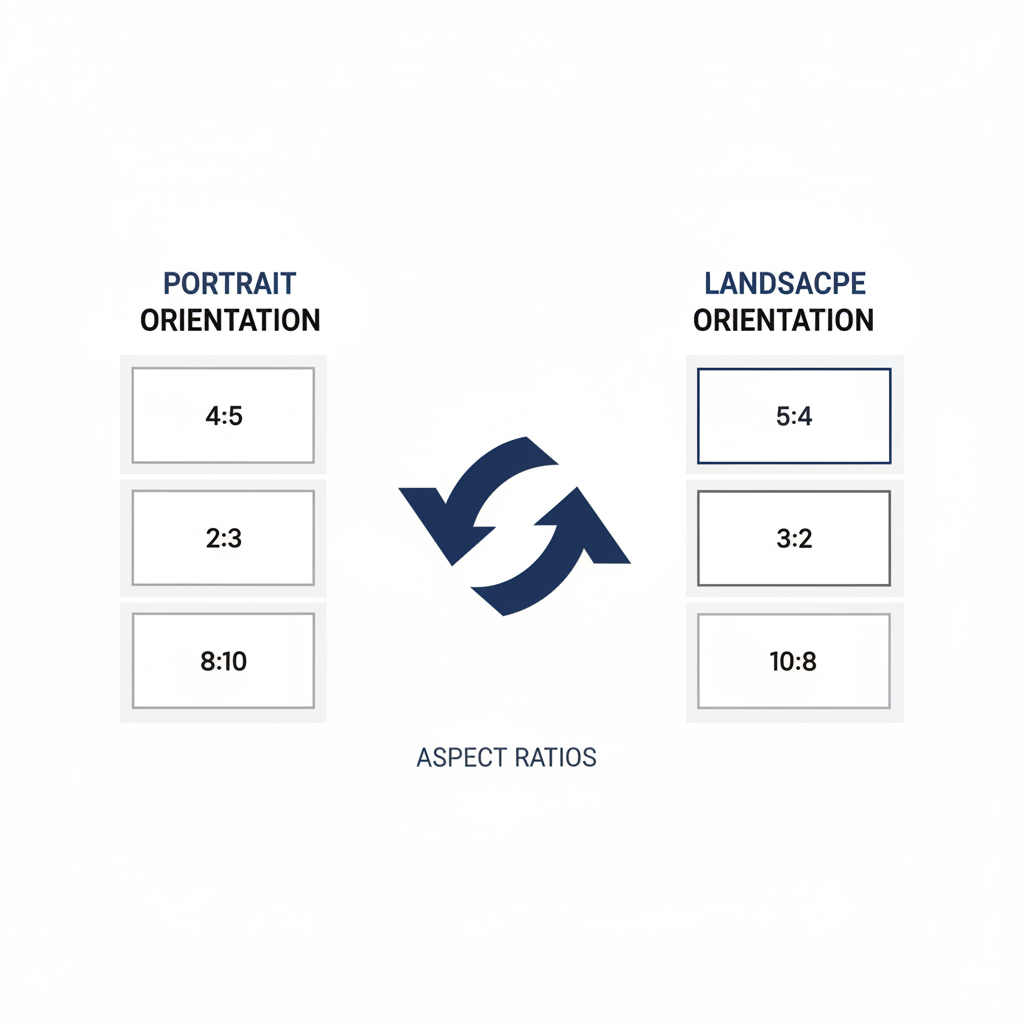
In photography and design, orientation refers to how an image is positioned.
- Portrait orientation means the image is taller than it is wide. The vertical dimension is greater, which is common for headshots, profile pictures, and art showcasing full-body shots.
- Landscape orientation means the image is wider than it is tall. This is often used for nature scenes, group photos, and any image intended to fill horizontal space.
Simply put: portrait = vertical, landscape = horizontal.
Recognizing this distinction is essential before diving into portrait photo size standards, because the correct orientation ensures the subject is framed naturally and effectively.
---
Common Portrait Photo Ratios
The aspect ratio is the relationship between the width and height of a photo. For portraits, several ratios are especially popular:
- 2:3 Aspect Ratio
- Common in DSLR photography.
- Ideal for standard frame sizes like 4×6 inches or 8×12 inches.
- Great when you want a balanced composition with breathing space above and below the subject’s head.
- 4:5 Aspect Ratio
- Popular in studio portraits.
- Matches sizes like 8×10 inches commonly found in photo albums.
- Preferred for tighter crops around the face or upper body.
- 1:1 Aspect Ratio (Square)
- Common in social media profile pictures (Instagram profile icons, LinkedIn headshots).
- Best for evenly centered portraits.
| Aspect Ratio | Common Print Size | Common Uses |
|---|---|---|
| 2:3 | 4×6 in, 8×12 in | Full-body portraits, event photography |
| 4:5 | 8×10 in | Studio sessions, upper body shots |
| 1:1 | Varies | Social media profile photos |
---
Standard Portrait Sizes for Printing
When printing, size is often measured in inches, but digital files should meet necessary pixel dimensions for high-quality output.
Popular portrait print sizes:
- 4×6 inches (2:3 ratio) — small frames, common prints.
- 5×7 inches — mid-sized prints for gifts.
- 8×10 inches (4:5 ratio) — standard studio portrait.
- 11×14 inches — wall display.
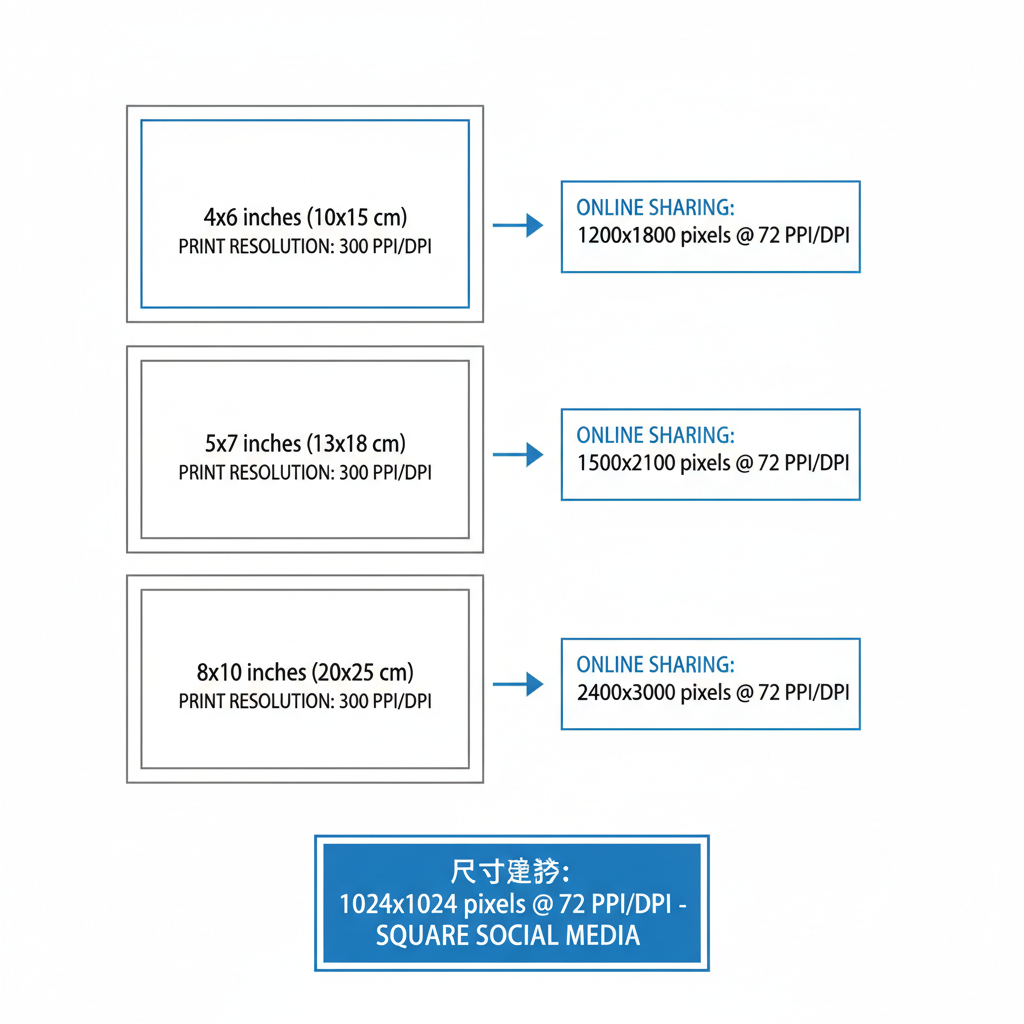
Here’s a handy chart linking inches to pixel dimensions for printing at 300 DPI (dots per inch):
| Print Size (inches) | Ratio | Pixel Dimensions at 300 DPI |
|---|---|---|
| 4×6 | 2:3 | 1200×1800 px |
| 5×7 | 5:7 | 1500×2100 px |
| 8×10 | 4:5 | 2400×3000 px |
| 11×14 | 11:14 | 3300×4200 px |
---
Portrait Sizes for Online Use
Online platforms have specific recommended pixel dimensions:
- Instagram grid posts: 1080×1350 px (4:5 ratio).
- Facebook profile photos: 400×400 px minimum (square).
- LinkedIn profile photos: 400×400 px (square).
- Website bio portraits: 600×900 px (2:3 ratio) for quick loading yet clear display.
Keeping a reference of these dimensions will save time when preparing images for multiple platforms.
---
How Resolution (PPI/DPI) Affects Image Clarity
- DPI (dots per inch) is used in print media. A typical high-quality print requires 300 DPI.
- PPI (pixels per inch) applies to digital screens. Modern devices may display images at 72–150 PPI, but higher PPI leads to crisper visuals.
Low DPI/PPI results in pixelation — jagged edges and blurry detail. Overly high DPI for a small print might be unnecessary and increase file size without noticeable improvement.
---
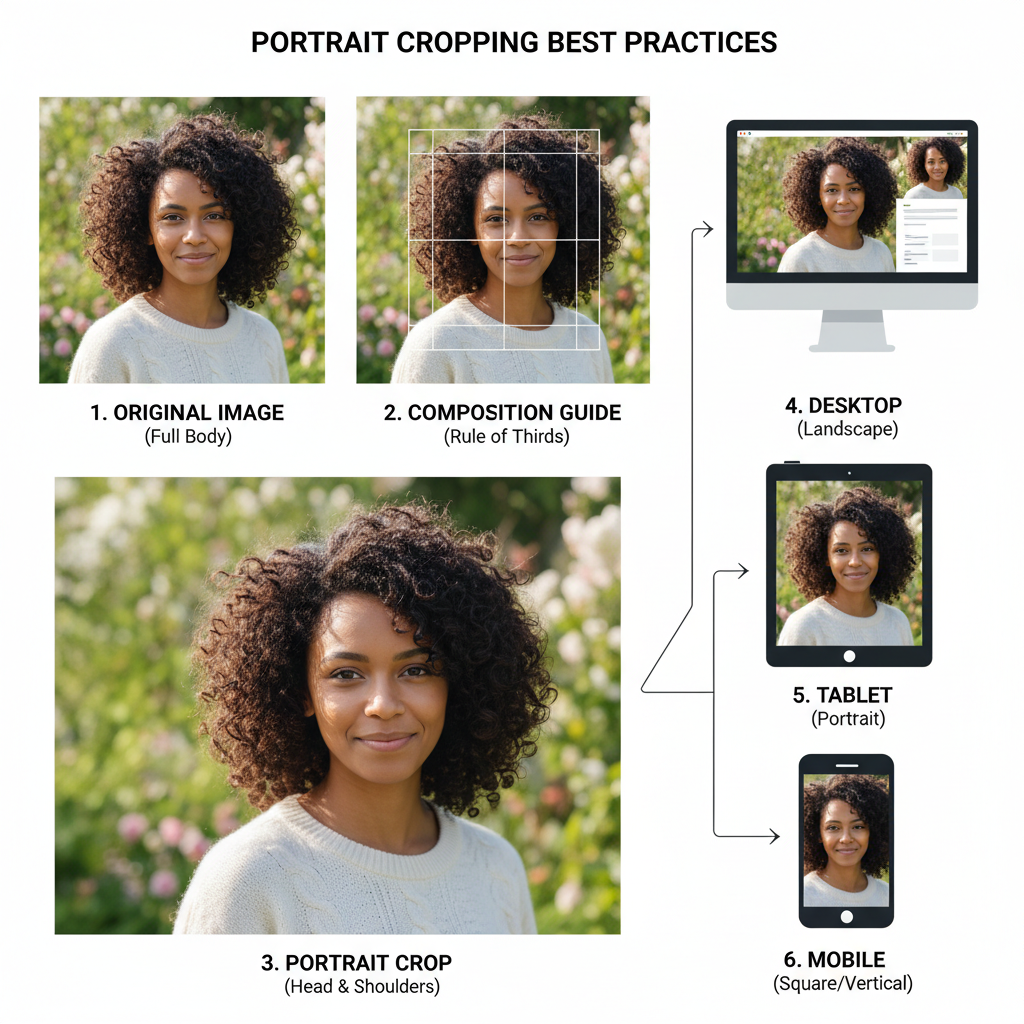
Best Practices for Cropping Portraits
Cropping affects the aesthetics and emotional impact of a portrait. Tips:
- Avoid cutting at joints – cropping at knees or elbows can look awkward.
- Leave headroom – some space above the head prevents cramped framing.
- Follow the rule of thirds – position eyes about one-third from the top of the frame.
- Retain aspect ratio — prevents distortion and ensures compatibility with frames/screens.
---
Adjusting Portrait Size Across Devices for Responsive Design
For web use, ensure portraits look good on mobile, tablet, and desktop.
Responsive techniques:
- Use CSS `max-width: 100%` to ensure images shrink for smaller screens.
- Provide multiple sizes with `srcset` for optimal loading.
- Keep file sizes small (<200 KB when possible) for faster mobile load times.
Example HTML snippet:
---
Tools and Apps for Resizing Portraits
You don’t need to be a Photoshop expert to resize quickly:
- Canva — quick crop and resize with preset social media dimensions.
- Adobe Express — web-based, easy aspect ratio adjustment.
- GIMP — free desktop app for precise DPI/PPI changes.
- Pixlr — online editor with fast, intuitive controls.
These tools often include options to lock aspect ratio, preventing accidental stretching.
---
Tips for Maintaining Aspect Ratio When Resizing
To maintain quality and shape:
- Use the “lock proportions” or “constrain aspect ratio” setting.
- Resize by percentage instead of freehand dragging.
- If you must change ratios, compose the image thoughtfully — don’t just chop randomly.
---
Mistakes to Avoid in Resizing Portraits
Common pitfalls when adjusting portrait photo size:
- Stretching — distorts facial features and makes lines look unnatural.
- Pixelation — caused by enlarging images beyond their resolution limits.
- Over-compression — reduces detail, introduces blocky artifacts.
- Ignoring platform specs — results in cropped heads or blank bars in online posts.
---
FAQ: Portrait vs Vertical Photo — Which Is Correct?
Many use “vertical photo” interchangeably with “portrait.” While both refer to a taller-than-wide image, portrait often implies a subject type (a person’s likeness) as well as orientation, whereas vertical just refers to the format.
In summary:
- Portrait — orientation + common subject type
- Vertical — orientation only
Knowing the difference ensures you use terms accurately in both conversation and technical documentation.
---
Conclusion
Mastering portrait photo size means understanding aspect ratios, print standards, digital resolution, and platform requirements. Whether you’re preparing headshots for LinkedIn or printing a framed 8×10, the right dimensions and resolution protect image clarity and presentation. By applying the guidelines above, you’ll avoid common resizing mistakes, produce clean responsive portraits, and maintain professional quality across all media.
Next step: Start resizing with one of the recommended tools today and test your portraits across print and online platforms to ensure flawless results.