Schedule Posts on Personal Facebook Page Step-by-Step Guide
Learn how to enable Professional Mode and use Meta Business Suite to schedule posts, optimize timing, and manage content on your Facebook profile.

Schedule Posts on Personal Facebook Page: Step-by-Step Guide
Scheduling posts on a personal Facebook page or profile is a smart way to maintain engagement without the daily grind of manual posting. This guide explains exactly how to schedule posts on a personal Facebook page, including enabling Professional Mode, using Meta Business Suite, optimizing posting times, and tracking performance — so you can build a consistent, effective social media presence.
---
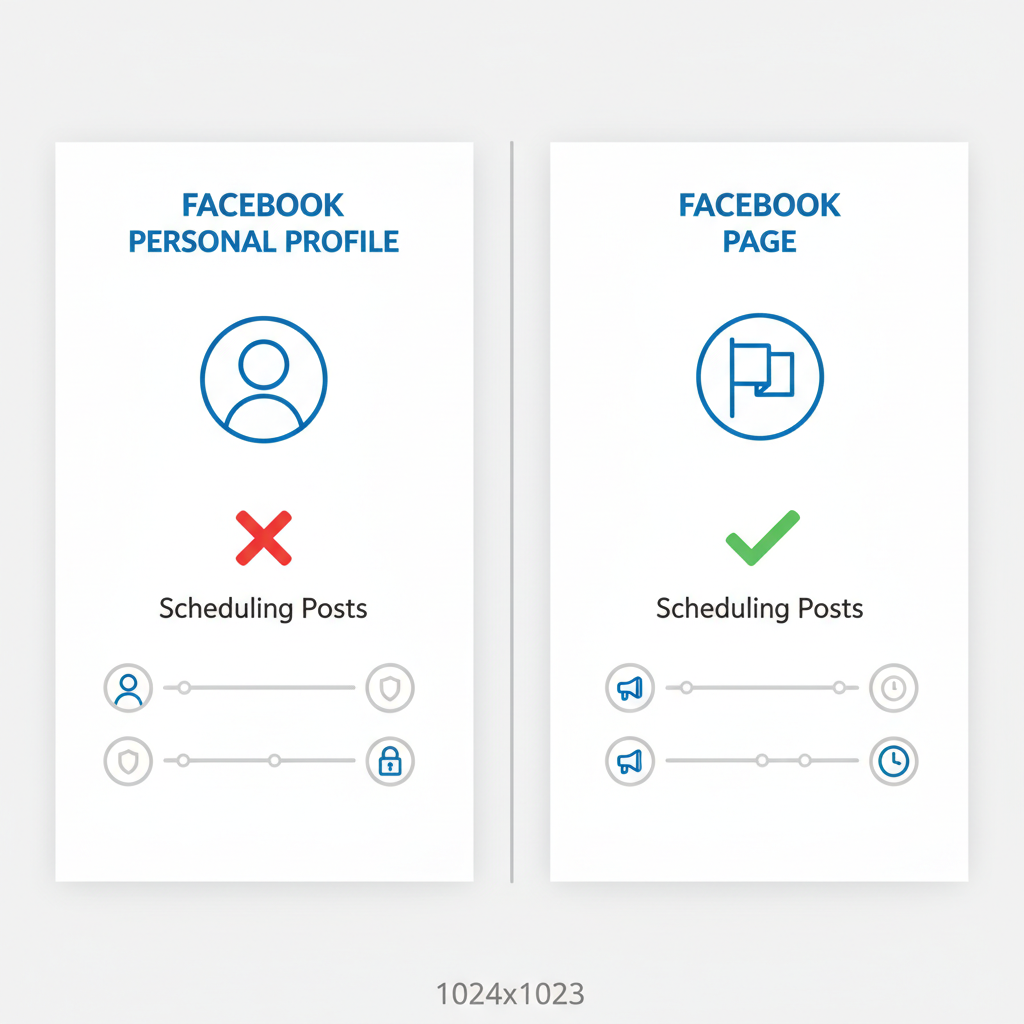
Understanding Facebook’s Scheduling Rules: Personal Profiles vs. Pages
Facebook handles scheduling differently depending on account type:
- Business Pages have built-in scheduling tools accessible when you create a post.
- Personal Profiles in standard mode do not allow scheduling.
- Professional Mode for personal profiles unlocks post scheduling and creator tools.
In short:
To schedule posts from your personal account, you must enable Professional Mode.
---
Switching to Professional Mode for Scheduling Access
Professional Mode transforms a personal profile into a creator-style profile. This provides:
- Access to Insights analytics
- Direct post scheduling capability
- Monetization options (if eligible)
Steps to switch:
- Open your personal Facebook profile.
- Click the three-dot menu below your cover photo.
- Choose Turn on Professional Mode.
- Follow on-screen prompts to confirm.
---
Accessing the Scheduling Tool (Desktop & Mobile)
After enabling Professional Mode, you can schedule posts on desktop or mobile.
On Desktop:
- Visit your profile.
- Click Create post.
- Select the calendar/clock icon for scheduling options.
On Mobile:
- Tap Create post on your profile.
- Open the ellipsis menu and choose “Schedule post.”
- Set date and time.
---
Step-by-Step Guide: Creating and Scheduling a Post
Follow these steps to schedule a post from your personal profile:
- Click “Create post.”
- Add your content — text, photos, videos, links.
- Open scheduling menu (calendar/clock icon).
- Set date/time.
- Click “Schedule”.
You can review upcoming posts in your Scheduled Posts section.

---
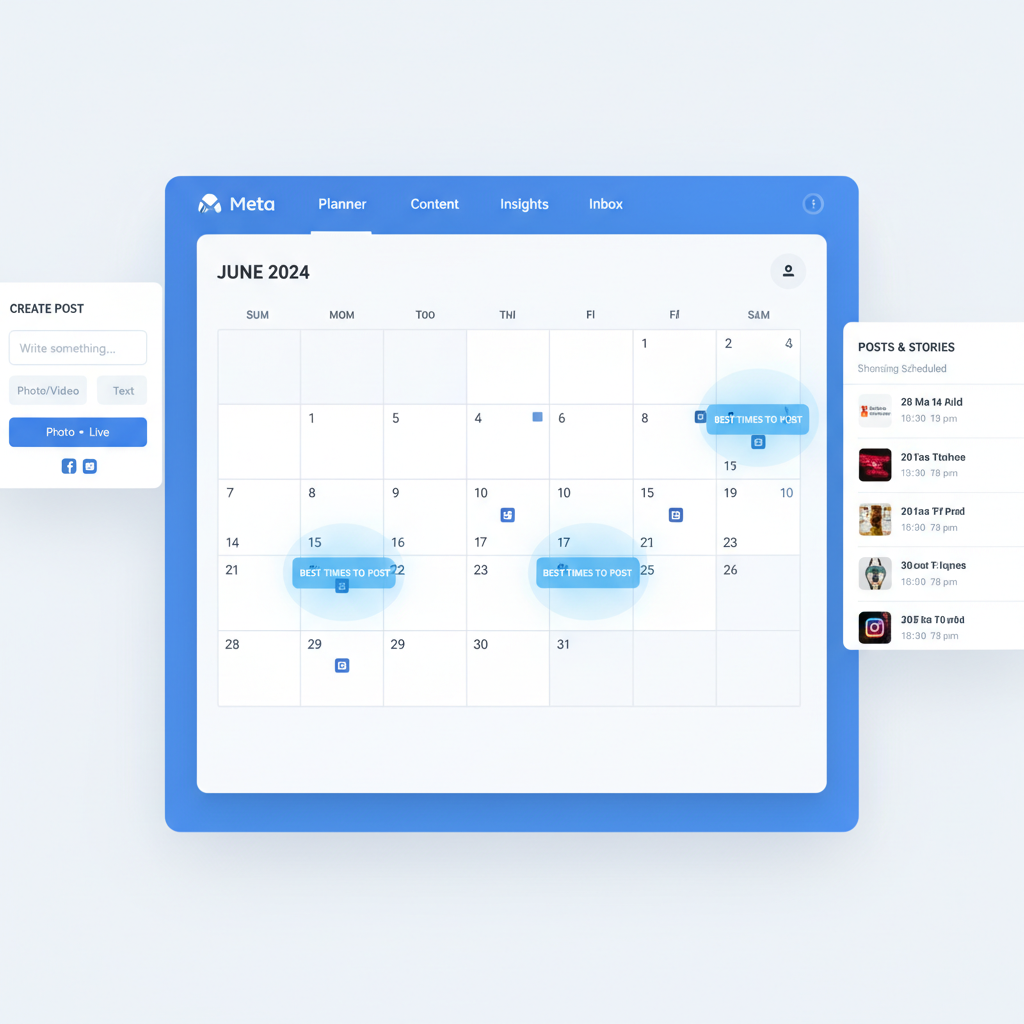
Using Meta Business Suite for Advanced Options
Meta Business Suite offers advanced scheduling features, even for profiles in Professional Mode. Access it via:
- business.facebook.com
- Meta Business Suite mobile app
Advantages:
- Schedule for Facebook and Instagram simultaneously
- Batch upload multiple posts
- View detailed engagement analytics
- Plan via the built-in calendar
---
Best Times to Schedule Posts for Higher Engagement
Timing affects engagement. General data suggests:
| Day | Best Time (Local) |
|---|---|
| Monday | 10 AM - 12 PM |
| Wednesday | 1 PM - 3 PM |
| Friday | 9 AM - 11 AM |
| Sunday | 7 PM - 9 PM |
Check your own Insights to tailor these times to your audience.
---
Batching Content & Scheduling Multiple Posts
Batching involves creating several posts in one session, then scheduling them over different days.
Benefits include:
- Improved efficiency
- Consistent posting schedule
- Reduced creative burnout
Pro Tip: Use Meta Business Suite’s calendar for a visual overview.
---
Editing, Rescheduling, or Deleting a Scheduled Post
To manage scheduled posts:
- Open Scheduled Posts.
- Edit: update text or media.
- Reschedule: adjust date/time.
- Delete: remove from schedule.
Note: Edits may not apply if the post is close to its scheduled time.
---
Integrating Third-Party Scheduling Tools
Tools like Buffer, Later, and Hootsuite work well with Pages. For personal profiles in Professional Mode:
- Link your profile as a Page where supported.
- Use Meta Business Suite for best reliability.
---
Tracking Post Performance & Adjusting Schedules
Tracking helps refine your schedule:
Watch metrics such as:
- Post reach
- Engagement rate
- Click-through rate
- Best-performing days/times
Optimize based on Insights or Business Suite analytics.
---
Common Mistakes to Avoid When Scheduling Posts
Avoid these pitfalls:
- Skipping analytics review
- Posting too often
- Ignoring visuals
- Forgetting calls-to-action
---
Privacy & Audience Settings for Scheduled Content
Always set the correct audience before scheduling:
- Public for maximum reach
- Friends for limited visibility
- Custom for targeted groups
---
Final Tips: Keep Your Profile Active Effortlessly
For a vibrant profile without daily effort:
- Schedule at least a week ahead
- Batch content creation
- Respond to comments after publishing
- Adjust based on audience data
By enabling Professional Mode and using Facebook’s scheduling tools — plus Meta Business Suite — you can maintain consistent, engaging updates while freeing time for creativity.
---
Summary:
Mastering how to schedule posts on a personal Facebook page saves time, boosts engagement, and lets you focus on creating better content. Enable Professional Mode, use Meta Business Suite for efficiency, and monitor Insights regularly to optimize results.
CTA: Try scheduling your next week of posts today to experience the benefits firsthand.


