How to Take Timer Pics on Instagram Step by Step
Learn how to take timer pics on Instagram with workarounds, setup tips, and burst shots for creative, hands-free selfies and group photos.

How to Take Timer Pics on Instagram Step by Step
Timer pics on Instagram are a popular way to capture creative selfies, group shots, and dynamic poses without needing someone else behind the camera. Whether you want to show off an outfit, document a fun moment with friends, or create an action shot, learning how to take a timer pic Instagram style will give you greater flexibility and control in your photography. This guide walks you through exactly how to do it, from setup to editing, while making sure your content looks professional and gets noticed.

---
Understanding Instagram Timer Pics
A timer pic is simply a photo taken using a timed shutter release. You prep your camera, set a countdown, and pose while the timer runs—allowing the camera to capture the shot without your hands on the device at the moment of exposure.
Why Timer Pics Are Useful
- Capture hands-free shots for Stories or Reels.
- Get group photos without leaving someone out.
- Nail action poses or mid-movement shots.
- Empower solo creators to produce content without help.
---
Does Instagram Have a Built-in Photo Timer?
Currently, Instagram does not offer a dedicated timer for still photos taken directly via its camera interface. The only built‑in timer is for Reels or video clips.
Workarounds
- Use your phone’s native camera app — Most smartphones (iOS and Android) have a timer option.
- Install third-party camera apps — Platforms like Camera+ or ProCamera offer timed shooting and advanced features.
- Record video in Reels with the timer, then extract stills — Lower quality than direct photos but useful if needed.
---
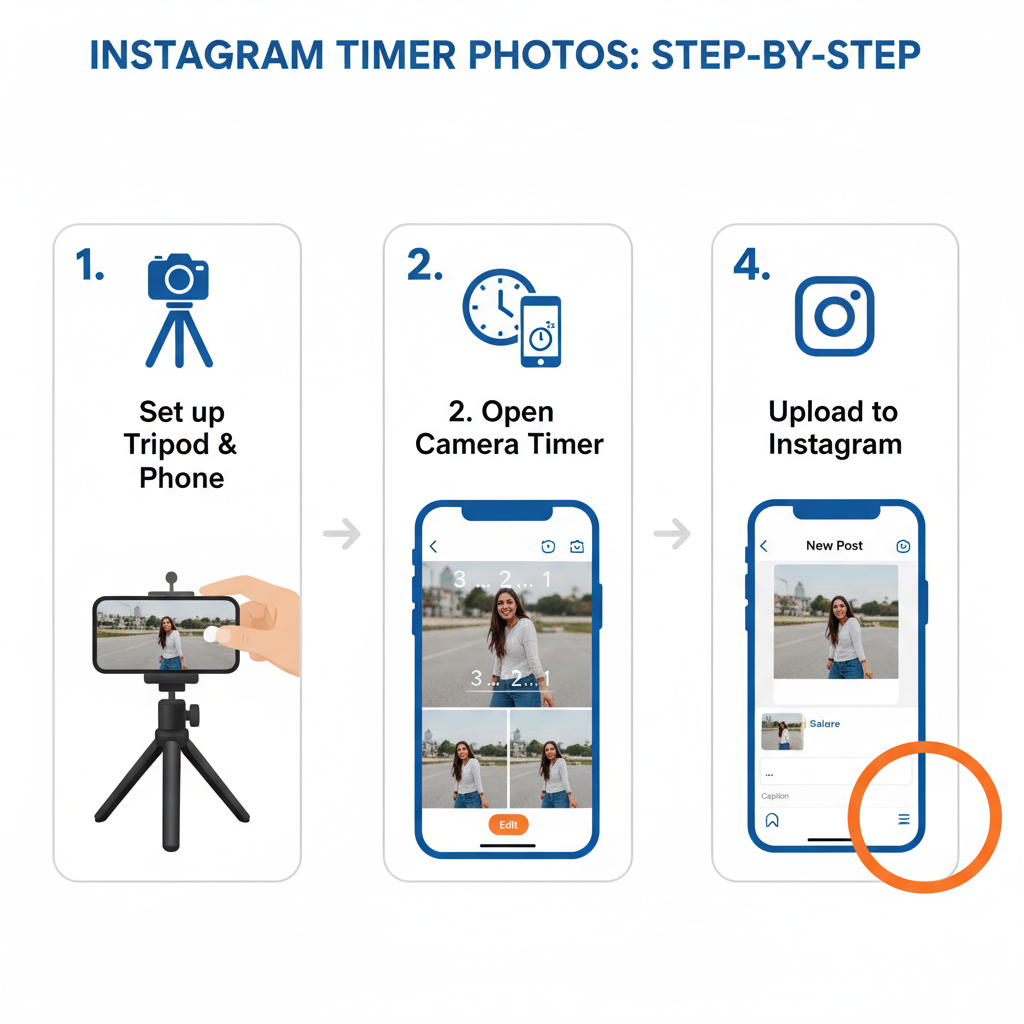
Setting Up Your Shot
Preparation is key to successful timer photography on Instagram.
Choose a Location
Select a background that complements your content theme—minimalist walls, vibrant urban scenes, green spaces, or a styled indoor area.
Get the Lighting Right
Natural light is ideal. Aim for early morning or golden hour for flattering tones without harsh shadows.
Style Your Background
Remove clutter, align main elements, and maintain symmetry for a polished composition.
---
Using a Tripod or Stable Surface
Shaky or tilted photos can spoil an otherwise great concept. Consider:
- A lightweight tripod for portability.
- A stable surface like a table or shelf.
- Phone grips or specialized mounts for better stability.
Experiment with angles by adjusting tripod height or slightly tilting your phone, and remember to lock screen orientation.
---
Framing Yourself in Advance
Before starting the timer, mark where you will stand or sit.
Pro Tip: Place a temporary object (like a book or cushion) in your spot, focus the camera there, then remove the object before shooting.
---
Selecting a Timer Duration
Choosing the right timer length ensures you have time to get into position.
| Timer Length | Best For | Pros | Cons |
|---|---|---|---|
| 3 Seconds | Quick poses | No long wait, less awkwardness | Little time to adjust |
| 5 Seconds | Simple set-ups | Balanced speed and readiness | Moderate waiting period |
| 10 Seconds | Complex poses or group shots | Plenty of time to prepare | May lose spontaneity |
---
Experimenting with Burst Mode
Burst mode captures multiple shots rapidly after the timer expires.
Benefits
- Capture motion—jumping, spinning, walking by.
- Get varying facial expressions quickly.
- Increase chances of the perfect shot.
How to Enable Burst Mode
- iPhone: Hold the shutter button in timer mode (varies by iOS version).
- Android: Activate “continuous shot” in camera settings.
---
Incorporating Props or Movement
Props and movement add interest to timer pics.
- Wearables like sunglasses, hats, or bags.
- Everyday items such as coffee cups, books, or skateboards.
- Dynamic actions such as a hair toss, walking, or adjusting clothing.
Stay mindful of motion blur—adjust shutter speed if your device permits.
---
Editing Timer Pics for Instagram
Editing can turn a basic shot into scroll‑stopping content.
- Instagram’s built‑in editor — Adjust brightness, contrast, and apply filters.
- External apps — Lightroom Mobile, VSCO, and Snapseed for finer control.
- Crop for Instagram ratios (1:1 square or 4:5 portrait).
- Enhance vibrance without compromising natural tones.

---
Adding Captions and Hashtags
Captions provide context; hashtags improve discoverability.
Example Hashtags:
- #timerpic
- #selfportrait
- #OOTD
- #handsfreephotos
- #creativepose
Use relevant tags and place them in your caption or first comment to maintain a clean look.
---
Sharing Strategically: Stories, Reels, and Feed
Different Instagram post formats reach different audiences:
- Feed posts — Permanent and ideal for high‑quality images.
- Stories — Temporary, perfect for casual or behind‑the‑scenes content.
- Reels — Dynamic sequences, useful for showing how the pose was set up.
Tip: Cross‑post to multiple formats to maximize reach.
---
Analyzing Engagement
After posting, monitor:
- Likes and comments
- Shares and saves
- Story views
Use Instagram Insights (available for professional accounts) to see:
- Which backgrounds or styling resonate.
- Best times of day for posting.
---
Improving Future Timer Pic Setups
Refine your approach with feedback:
- Try different timer lengths.
- Adjust lighting sources or conditions.
- Experiment with props and compositions.
- Develop a consistent editing style.
---
Final Thoughts
Mastering the timer pic Instagram method is about preparation, creativity, and smart sharing. Even without a native still‑photo timer, smartphones and third‑party apps make it easy to capture perfect shots hands‑free. By following these steps—planning your location, framing in advance, choosing the right timer length, and polishing your images—you can create engaging content that stands out.
Use this guide to elevate your Instagram photography today, and start creating timer pics that inspire and connect with your audience.