Photo Resolution Sizes Explained for Web and Print Use
Learn the differences between web and print photo resolutions, standard sizes, and best practices to keep your images sharp without slowing load times.

Understanding Photo Resolution Sizes for Web and Print
In the ever-evolving landscape of digital media, photo resolution sizes play a critical role in determining how your visuals appear across different platforms. Whether you’re designing for immersive web experiences or creating sharp, high-quality prints, selecting the right resolution affects image clarity, load speed, and overall impact. This comprehensive guide explains key terms, explores differences between web and print requirements, lists standard sizes, and shares best practices for resizing and exporting without compromising quality.
---
What is Photo Resolution?
Photo resolution refers to the amount of detail an image holds, typically expressed as pixel dimensions — the number of pixels in width and height (e.g., 1920×1080 pixels).
Higher pixel counts generally mean:
- More detail, which is crucial for zooming in or printing.
- Larger file sizes that consume more storage and bandwidth.
- Greater flexibility when cropping or resizing.
---
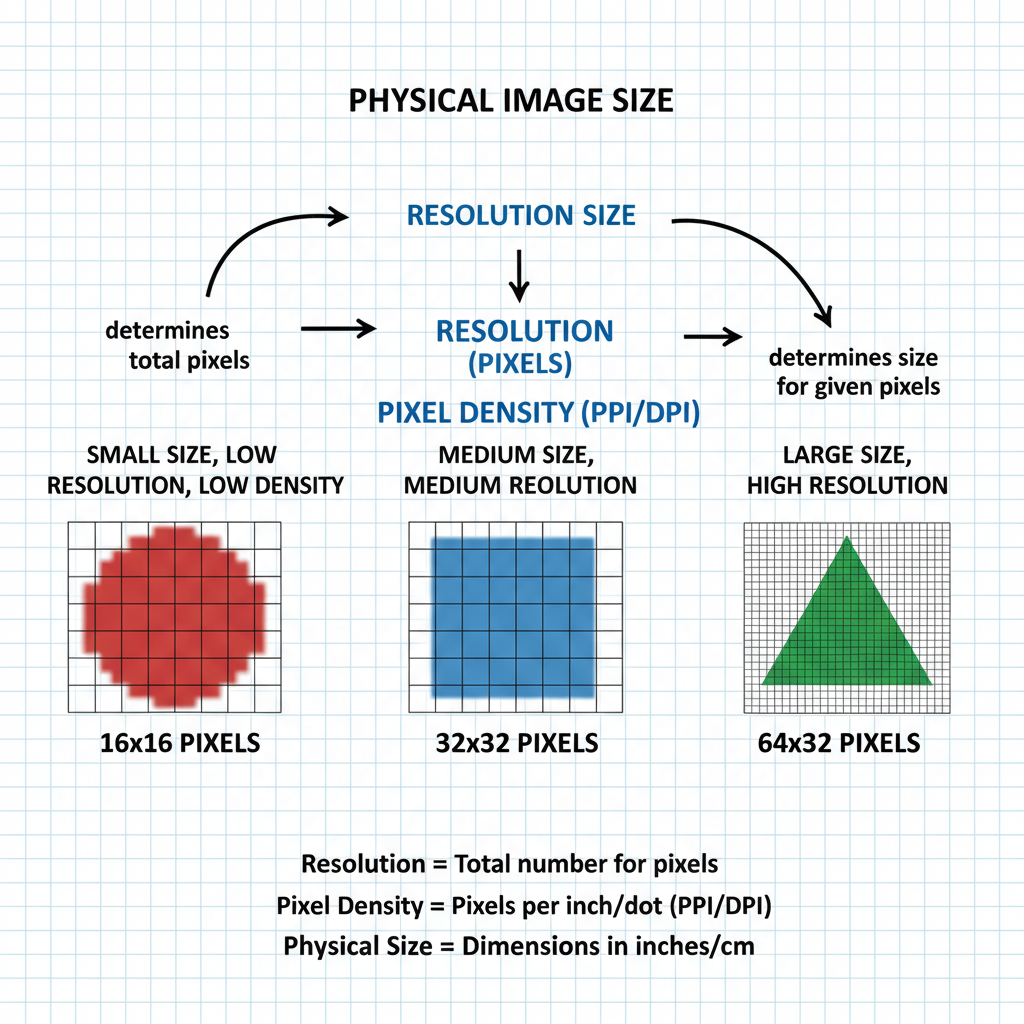
Resolution vs. Pixel Density vs. Image Size
Although these terms are often confused, they are distinct:
- Resolution: Pixel dimensions (width × height in pixels).
- Pixel Density (PPI/DPI): Pixels per inch — PPI for screens and DPI for print — measures how tightly pixels are packed in a physical space.
- Image Size: The physical dimensions at which an image will be displayed or printed.
For example, a 3000×2000px image can print at:
- 10×6.7 inches at 300 DPI (high-quality print)
- 41.7×27.8 inches at 72 DPI (low-quality large format signage)
---
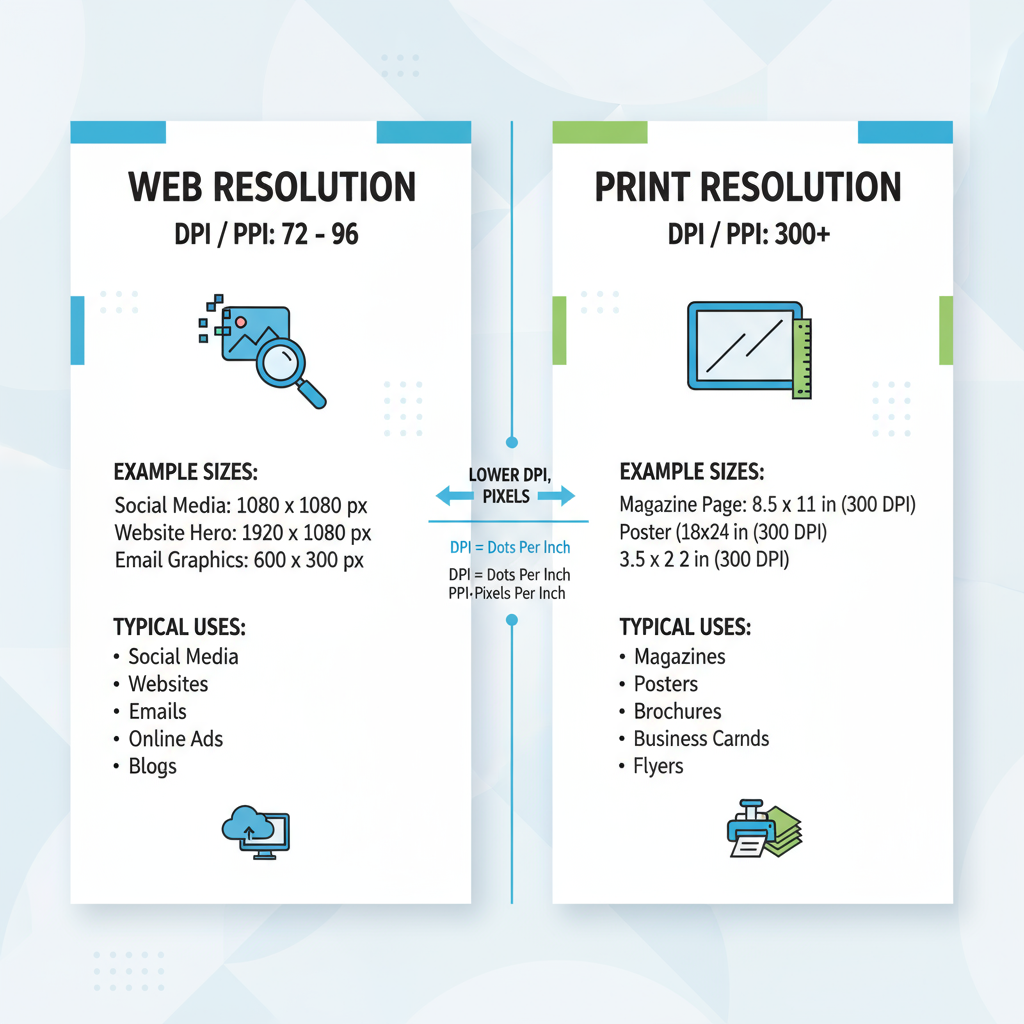
Web vs. Print Resolution Standards
Web and digital displays require different standards than print because screens use fixed pixel grids.
- Web / Digital: Traditionally, 72 PPI was the baseline. Today’s high-density screens (Retina, 4K, 8K) contain more pixels in the same physical space, but you still export to match the display area’s pixel dimensions.
- Print: For professional-quality printing, 300 DPI (or higher) is the standard to ensure sharpness and detail.
---
Standard Photo Resolution Sizes and Common Use Cases
Below is a reference chart of typical photo resolution sizes, their aspect ratios, and the applications in which they’re most often used:
| Resolution Name | Pixel Dimensions | Aspect Ratio | Common Use |
|---|---|---|---|
| Square HD | 1080 × 1080 | 1:1 | Instagram posts, profile pictures |
| Full HD | 1920 × 1080 | 16:9 | Web banners, YouTube videos |
| 2K | 2048 × 1080 | 1.90:1 | Digital cinema, wide-screen video |
| 4K UHD | 3840 × 2160 | 16:9 | High-end displays, videos |
| Print 8×10" | 2400 × 3000 | 4:5 | High-quality photo prints |
| Poster A3 | 4960 × 3508 | 1.41:1 | Print posters |
---
How Resolution Affects Image Quality & File Size
High-resolution images:
- Preserve fine detail, critical for large prints.
- Result in bigger file sizes, affecting web page load time.
- Require more memory and processing power during editing.
Low-resolution images:
- Load faster online, ideal for mobile and slower networks.
- May appear pixelated or blurry if enlarged too much.
- Consume less storage space, facilitating faster uploads.
---
Choosing the Right Resolution for Social Media
Social platforms compress and resize uploads, but starting with optimal dimensions helps maintain quality.
Examples:
- Instagram Feed: 1080×1080px (1:1 square) or 1080×1350px (4:5 portrait).
- Facebook Cover Photo: 820×312px.
- Twitter/X Post Image: 1200×675px.
- LinkedIn Banner: 1584×396px.
Tip: Review platform-specific guidelines regularly — these change as devices and layouts evolve.
---
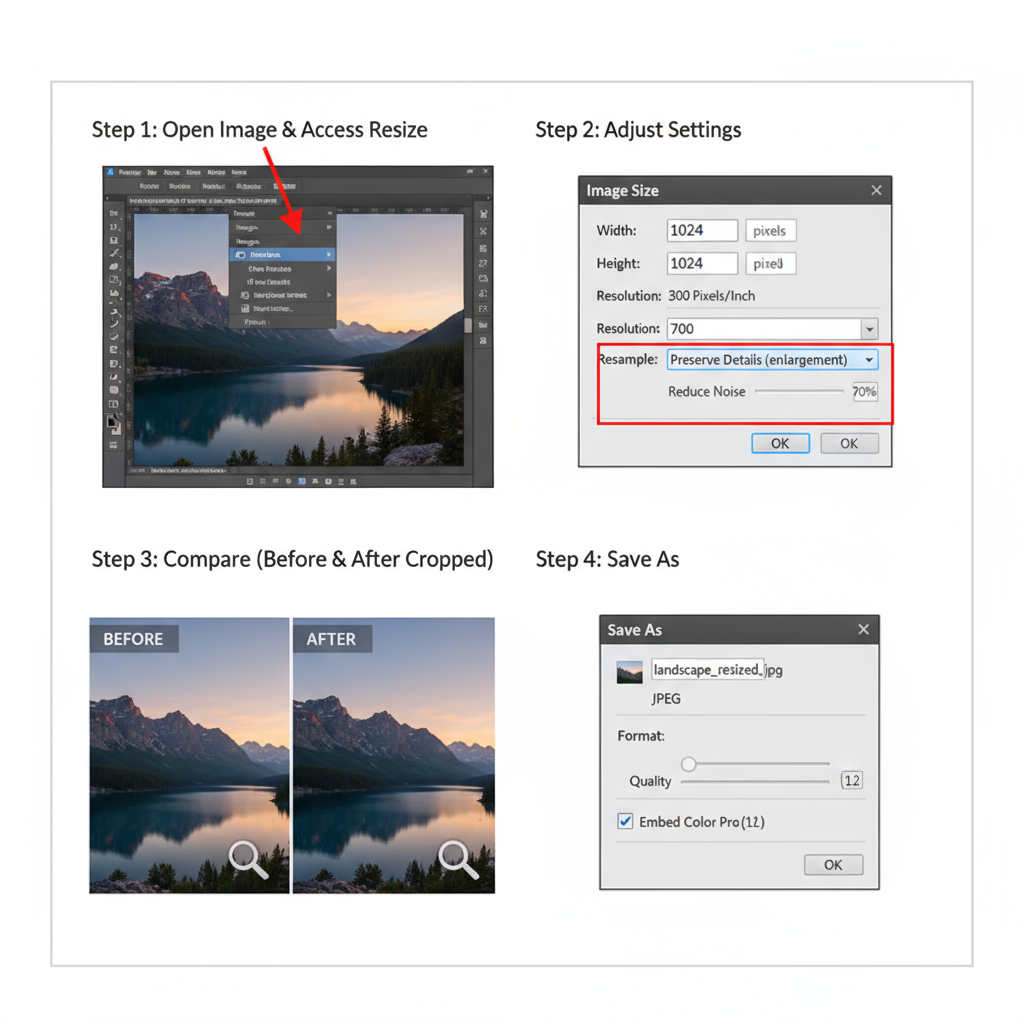
How to Resize Photos Without Losing Quality
To ensure crisp results when resizing:
- Start With High-Resolution Originals — Always edit from the largest available image.
- Maintain Aspect Ratios — Prevent distortion and stretching.
- Use Professional Editing Tools — Photoshop, GIMP, and Affinity Photo are reliable.
- Online alternatives like Photopea also work well.
- Leverage High-Quality Resampling — Use bicubic smoother or AI upscaling for enlargements.
Example:
## Using ImageMagick to resize while maintaining quality

convert input.jpg -resize 1080x1080 -quality 90 output.jpg
---
Understanding Aspect Ratios & Cropping Impact
Aspect ratio is the relationship between an image’s width and height. Common ratios include:
- 1:1 — Square
- 4:3 — Traditional photography
- 3:2 — DSLR standard
- 16:9 — Widescreen video and modern monitors
Cropping affects both composition and pixel count, altering resolution. Plan your final display or print size before cropping to avoid cutting essential content or degrading quality.
---
Common Pitfalls With Photo Resolution
Avoid these mistakes for optimal results:
- Stretching Images: Distorts shapes when aspect ratios don’t match.
- Overcompression: Leads to visible JPEG artifacts and quality loss.
- Inappropriate File Formats: Choose PNG for graphics with transparency, JPEG for photos, and WebP for modern web optimization.
- Ignoring PPI/DPI for Print: Large pixel dimensions do not guarantee sharp prints without the proper DPI setting.
---
Quick Checklist for Exporting Images
Before exporting, confirm:
- Correct pixel dimensions for the intended platform.
- Proper PPI/DPI for print (usually 300 DPI).
- Best-fit file format (JPEG, PNG, WebP).
- Balanced file size for quality and performance.
- Maintained aspect ratio to prevent distortion.
- Visual appearance tested on multiple devices/screens.
---
Summary & Next Steps
Mastering photo resolution sizes ensures that your images look sharp and professional across all media formats — from high-definition web displays to tactile, fine-art prints. By understanding resolution, pixel density, and aspect ratios, you can tailor each image to its platform, avoid common mistakes, and strike the perfect balance between detail and performance.
Take action: Review your current image library, adjust resolutions to match your intended use, and apply these best practices before your next upload or print run. Your visuals — and your audience — will thank you.