What Is the Standard Size of a Photo? A Practical Guide to Print, Digital, and Aspect Ratios
Learn the real standards for photo sizes across print and digital. Get aspect ratio mapping, US/metric dimensions, pixel guidelines, and cropping/file prep tips

Choosing the right photo size depends on where the image will live—on a wall, in a frame, or on a screen—and on the aspect ratio your camera captured. Print labs, frame availability, and platform guidelines all shape what feels “standard,” even though there’s no single universal size. This guide clarifies common print dimensions, international variants, aspect ratios, pixel requirements, and file prep so your photos look their best everywhere.
What Is the Standard Size of a Photo? A Practical Guide to Print, Digital, and Aspect Ratios
If you’ve ever asked “what is the standard size of photo,” the short answer is: there isn’t just one. The “right” size depends on how the image was captured, where it will be displayed (screen vs. print), and what frames or labs you plan to use. This guide demystifies common print sizes, international variants, aspect ratios, pixel requirements, and file prep so your photos look great everywhere.
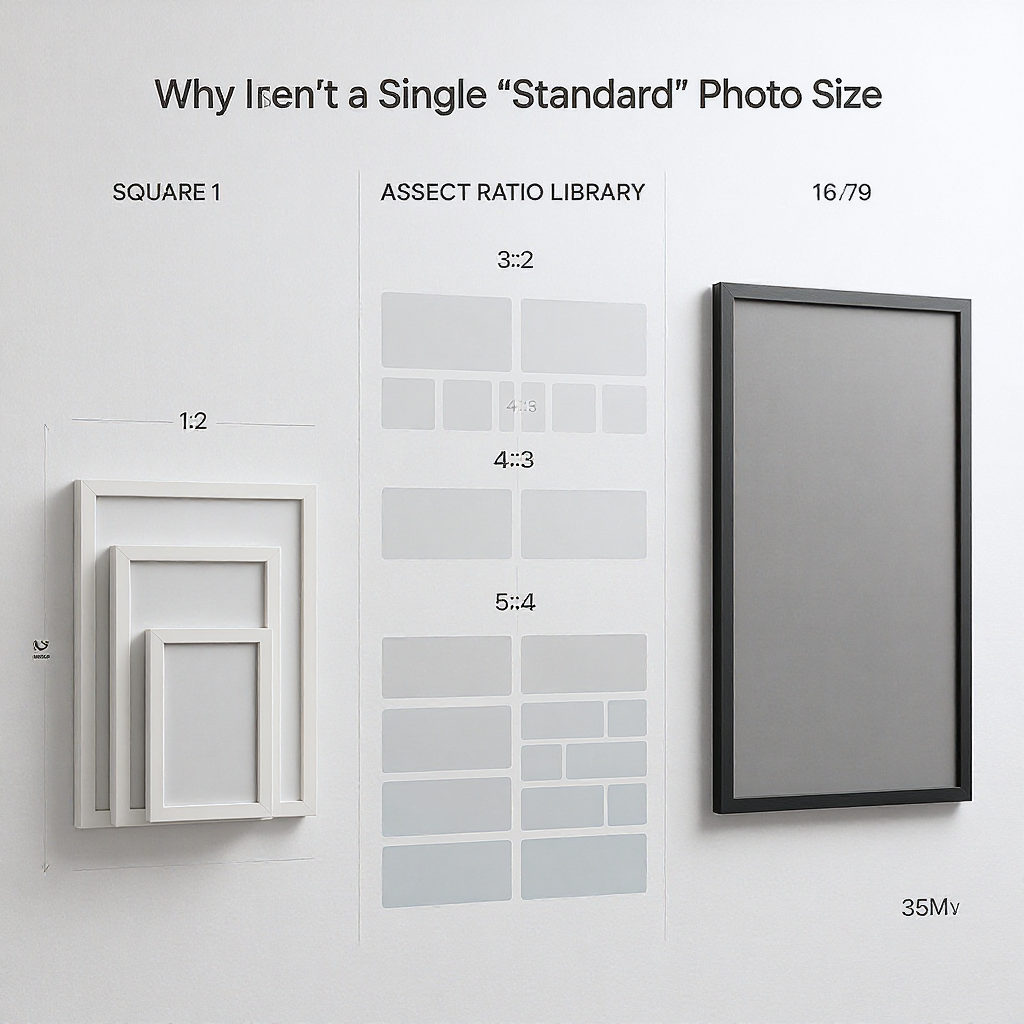
Why there isn’t just one “standard” photo size
Several forces shape “standard” sizes:
- Print labs and frames: Labs stock common dimensions, and frame makers build to those, creating de facto standards like 4×6, 5×7, and 8×10 inches in the U.S.
- Camera sensors: Different devices capture different aspect ratios (e.g., 3:2 on many DSLRs, 4:3 on phones), which map cleanly to some print sizes but not others.
- Display formats: Social media and screens favor widescreen or vertical ratios that don’t match traditional print sizes.
- Composition: Cropping to fit a size can trim edges of your photo, affecting the story you framed.
Most common print sizes (US) and when to use them
- 4×6 in (10×15 cm): The quintessential snapshot. Great for albums, casual framing, and handouts. Matches 3:2 perfectly (no crop from most DSLR/mirrorless cameras).
- 5×7 in: A classic desk or bedside frame size; slightly more “portrait-friendly” than 4×6, but requires a small crop from 3:2 images.
- 8×10 in: Popular for portraits and gift prints. Its 4:5 ratio means a noticeable crop from 3:2 and 4:3 originals—compose with breathing room.
- 11×14 in: Excellent for small wall art; similar cropping considerations as 8×10 (not a native match for 3:2 or 4:3).
On a desk, 4×6 and 5×7 feel intimate; on a wall, 8×10 and 11×14 start to read as art. For gallery-style grids, consider consistent ratios (all 4×6, or all 8×12) to keep spacing visually tidy.
Metric and international options
Common metric photo sizes include:
- 10×15 cm (close to 4×6 in): A lab staple worldwide.
- 13×18 cm: Similar to 5×7 in; excellent for modest frames.
- 20×30 cm (about 8×12 in): A clean match to 3:2 cameras, ideal for larger wall prints.
These differ from ISO A-series document paper (A4, A3, etc.). ISO paper uses a constant √2 aspect ratio (about 1.414:1), designed for efficient scaling and photocopying—not for typical camera sensor ratios. Printing photos on A4 (210×297 mm) often requires cropping or adding borders.
Aspect ratios explained—and how they map to sizes
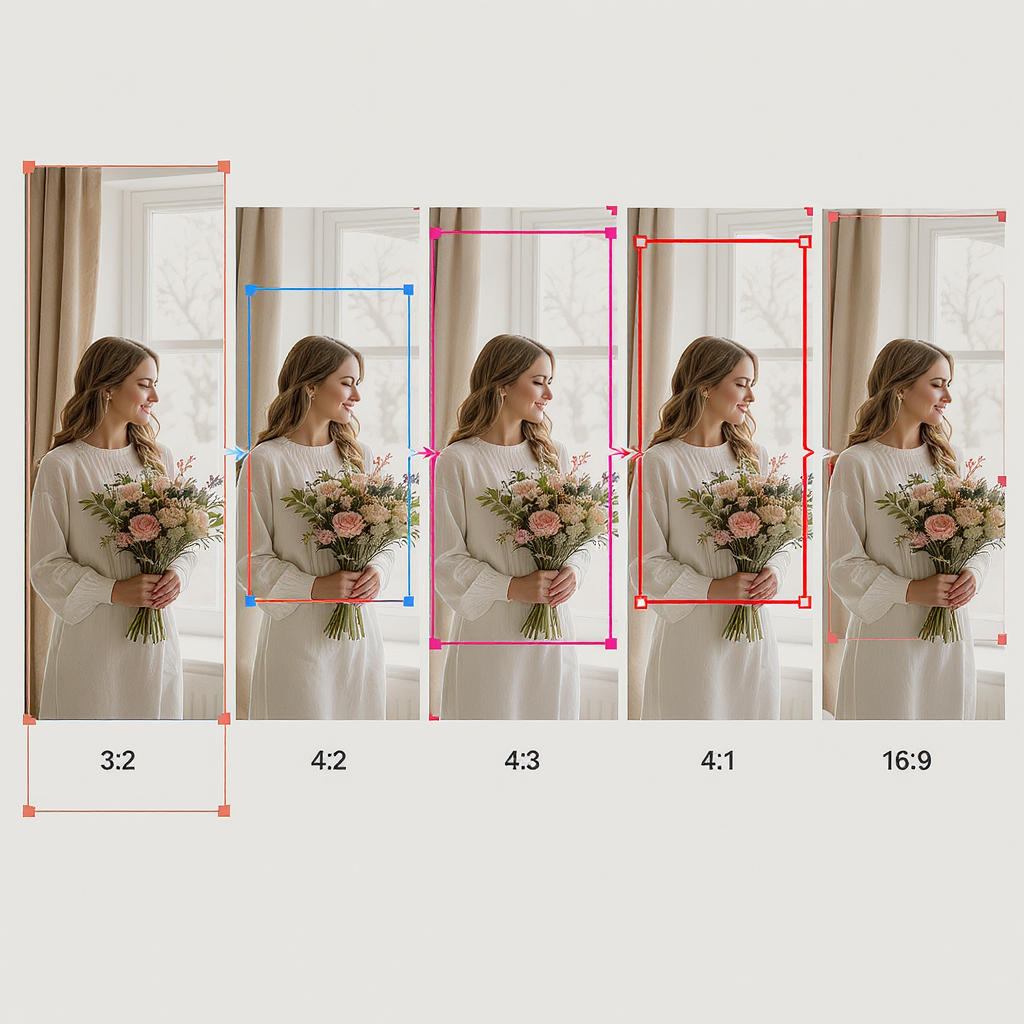
Common aspect ratios:
- 3:2: Most DSLRs/mirrorless cameras; some phone “full” modes. Exact print matches: 4×6, 8×12, 12×18, 20×30 cm.
- 4:3: Many smartphones and Micro Four Thirds cameras. Near matches: 6×8, 9×12 inches; may crop slightly for 4×6 or 8×10.
- 1:1: Square (popular on Instagram). Exact prints: 5×5, 8×8, 12×12.
- 16:9: Widescreen video, modern displays. Best for slides, banners, and landscape web use; awkward for traditional frames.
Mapping examples:
- 4×6 in = 3:2 (no crop for 3:2 originals)
- 8×12 in = 3:2 (no crop for 3:2 originals)
- 5×7 in ≈ 7:5 (needs a small crop from 3:2 or 4:3)
- 8×10 in = 4:5 (noticeable crop from 3:2; mild crop from 4:3)
Cropping and composition: keep what you intended
To avoid unintended cuts when printing:
- Match ratios: Choose a print size that matches your capture ratio (e.g., 8×12 for a 3:2 camera).
- Compose with margin: Leave a little space around important edges when shooting, anticipating crops to 5×7 or 8×10.
- Use lab tools: Most labs show a cropping preview; adjust the crop box to protect key subjects.
- Consider borders: Printing “fit” with white borders preserves the full image at the cost of a non-bleed look.
Pro tip: When in doubt, export multiple crops for different sizes and label files accordingly (e.g., “Sunset_8x10.jpg”, “Sunset_8x12.jpg”).
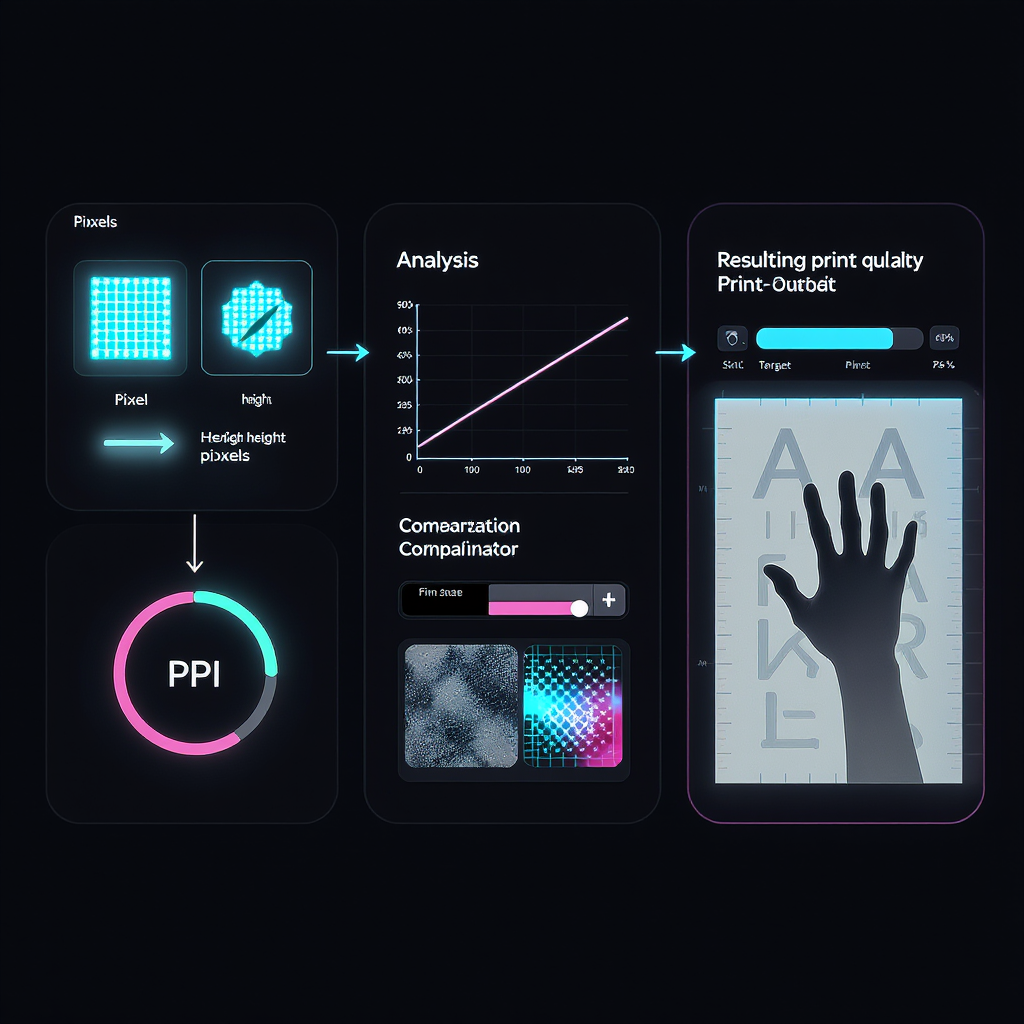
Pixels and resolution for sharp results
Print sharpness depends on pixels per inch (PPI):
- 300 PPI: Gold standard for close-viewed prints and photobooks.
- 240 PPI: Very good quality; often indistinguishable at normal viewing distance.
- 150–200 PPI: Acceptable for large wall art viewed from farther away.
Use this simple formula:
- width_pixels = width_inches × PPI
- height_pixels = height_inches × PPI
Example sizes at 300 PPI and 240 PPI:
| Print Size | Aspect Ratio | Pixels @ 300 PPI | Pixels @ 240 PPI |
|---|---|---|---|
| 4×6 in | 3:2 | 1200×1800 | 960×1440 |
| 5×7 in | 7:5 | 1500×2100 | 1200×1680 |
| 8×10 in | 4:5 | 2400×3000 | 1920×2400 |
| 8×12 in | 3:2 | 2400×3600 | 1920×2880 |
Quick estimation example (24 MP camera, 6000×4000 px):
- At 300 PPI, a 3:2 print can be up to 6000/300 × 4000/300 = 20×13.3 in (so 12×18 in is well within).
- At 240 PPI, up to 25×16.7 in with strong quality.
You can even compute this on the fly:
## Given width_px, height_px, and desired PPI:

max_width_in  = width_px  / PPI
max_height_in = height_px / PPI
Web and social media “standard sizes”
Screen standards prioritize aspect ratios and recommended pixel dimensions over inches.
| Platform | Use | Aspect Ratio | Recommended Pixels | Notes |
|---|---|---|---|---|
| Square post | 1:1 | 1080×1080 | Most reliable for grid aesthetics | |
| Portrait post | 4:5 | 1080×1350 | Tallest allowed in feed | |
| Landscape post | 1.91:1 | 1080×566 | Widescreen look; avoid tiny text | |
| Reels/Stories | 9:16 | 1080×1920 | Keep vital content within “safe” center | |
| Cover photo | ~2.63:1 | 820×312 | Design for center-safe crops on mobile | |
| Feed image | 1.91:1 or 1:1 | 1200×630 (landscape) or 1200×1200 | Square performs consistently | |
| Profile background | ~4:1 | 1584×396 | Crop varies across devices; keep text centered | |
| Feed image | 1:1 or 4:5 | 1200×1200 or 1080×1350 | Portrait gets more vertical real estate |
Note: Platforms change specs periodically; check each site’s current guidelines if the stakes are high.
Frames, mats, and lab availability
- Choose common sizes: Standard frames and mats are easiest and cheapest to find in 4×6, 5×7, 8×10, 11×14, 16×20, and 20×30 (cm equivalents in many regions).
- Mat openings: A mat labeled for 8×10 often has an opening slightly smaller (e.g., ~7.5×9.5) to overlap and hold the print. Expect a small edge hide.
- Borderless vs. borders: “Full-bleed” printing trims slightly beyond the edge; keep critical details 3–5 mm (or ~1/8–1/4 in) inside the edge (“safe area”).
- Lab availability: Not all labs stock every ratio (e.g., 8×12). If you want to avoid cropping a 3:2 photo, pick a lab that offers 8×12 or 12×18.
File prep checklist for reliable prints
- Color space:
- sRGB: Safest choice for most minilabs and online print services.
- Adobe RGB / ProPhoto: Use for wide-gamut workflows; convert to the lab’s required space before exporting if they don’t accept wide-gamut.
- File format:
- JPEG (quality 90–100): Sufficient for most prints; small size, wide compatibility.
- TIFF (16-bit, no compression or LZW): Best for maximum quality, large edits, and fine-art labs.
- Resolution: Export at the print size with 300 PPI (or 240 PPI for larger prints). Avoid upscaling unless necessary; if you must, use high-quality algorithms (e.g., “Preserve Details 2.0” or dedicated upscalers).
- Sharpening:
- Apply output sharpening for paper type—matte vs. glossy need different amounts.
- Preview at 100% and also stand back to simulate viewing distance.
- Soft proofing:
- If your lab provides ICC profiles, soft-proof in your editor to preview gamut clipping and adjust.
- Check for out-of-gamut warnings, especially in saturated colors.
- Bleed and safe margins:
- Ask your lab about bleed requirements. Keep key content inside a safe area to avoid edge loss.
- Naming and crops:
- Export variants per size (e.g., filename_8x10.jpg) to avoid accidental misprints.
- Test prints:
- For critical jobs, order a small proof first (4×6 or 5×7) to verify color and contrast.
Quick answers to “what is the standard size of photo?”
- There’s no single standard. For prints, 4×6 (10×15 cm) is the most universal small size; 5×7, 8×10, and 11×14 are common next steps.
- For 3:2 camera images, sizes like 4×6 and 8×12 avoid cropping; 5×7 and 8×10 will crop.
- For the web, follow platform-specific pixel dimensions and aspect ratios rather than inches.
Summary
By matching your photo’s aspect ratio to the intended output and prepping files with the right pixels, color space, and sharpening, you’ll get consistent, beautiful results—on walls, desks, and screens alike. Think in ratios first, then choose sizes and platforms that honor your composition. When in doubt, export purpose-built crops and order a small proof before committing to a large print.